
How to Reduce Noise from Your Roof Rack and Roofing Materials While Driving
Does your roof rack sound like a freight train every time you hit 50 miles per hour? I’ve ridden with that maddening whistle more times than I can count, and it always starts the same way-right after loading up for a job.
That howl or hum is usually a fixable problem with your setup, not a permanent flaw. Let’s get into the simple adjustments that can bring the quiet back to your cab.
From my toolbox to yours, here are the core fixes we’ll cover: diagnosing where the noise is really coming from, tightening and adjusting your rack’s installation, and securing and streamlining your cargo.
Key Takeaways: Silence on the Road
- Start with a simple hardware check; most rack noise comes from loose bolts and clamps.
- Shape matters; use aero-style crossbars and a wind fairing to cut down on whistling wind.
- Secure your cargo tightly; a shifting load will rattle and hum loudly.
- Check your sunroof seal, as an open or leaky one acts like a noise amplifier.
- You can fix this without buying a new rack; adjustments and smart loading often solve it.
Diagnosing the Din: Where’s That Noise Coming From?
The first step to a quiet ride is playing detective. You need to figure out what’s making the sound. Is it a whistle, a rumble, or a sharp rattle? The type of noise gives you a big clue.
Start with a parked car inspection. Grab each crossbar and give it a firm shake side-to-side and up-and-down. You should feel no movement or hear any clunking. If you do, the mounting points or hardware are loose. Next, run your fingers along the length of each crossbar and fairing. Feel for any plastic trim pieces or end caps that are not snapped in place. A small gap there can whistle like a tea kettle.
Now, take a drive. Have a passenger listen or use your phone to record audio. Pay close attention to when the noise starts. A low hum or whistle that begins around 35-45 mph is almost always wind turbulence. A persistent rattle at any speed is usually loose hardware or unsecured cargo. Try driving with the windows up and down. If the noise gets much louder with a window cracked open, it confirms it’s pressure-related wind noise.
How does the type of cargo affect noise? Think of it like this: a solid roof box is noisy but consistent. A ladder or pipe creates chaotic wind buffeting. A bike or kayak can cause a low-frequency rumble. The shape, not just the weight, is what makes the sound.
Is It the Rack, the Load, or Your Roof?
To isolate the culprit, test drive under two conditions. First, drive with the empty rack installed. If you hear noise now, the problem is the rack itself. If it’s quiet, the problem is your cargo.
For roofing materials, how you tie them down is key. Bundles of shingles should be strapped tight as a drum. Any slack strap will flap violently. I always cross my straps in an “X” pattern over the load. This prevents any side-to-side shift. Place a moving blanket or rubber mat under the materials. This stops direct contact rattles and protects your rack’s finish. It’s similar to how you would secure kayaks on roof racks, ensuring both grip and protection.
A loose load sounds different than a bad rack. A rack whistle is high-pitched. A rattling bundle of pipe or conduit sounds like coins in a washing machine. Tighten everything down, then slap the cargo with your hand. If it moves, it’s too loose.
The Sunroof Surprise
Here’s a trick many drivers miss. Your sunroof or moonroof is a major noise gateway. Even if it’s closed, a worn or dirty seal can let in a high-speed whistle that the rack creates.
If you have the tilt-open function, try driving with the sunroof fully closed versus just tilted up. The tiny gap from a tilted sunroof can turn a minor roof rack hum into a deafening roar. Many vehicles come with a small deflector that pops up when the sunroof opens. This device is designed to break up wind and reduce buffeting. Make sure it’s not broken or stuck.
For a quick seal check, visually inspect the rubber gasket around the glass. Look for cracks, gaps, or dirt buildup. A clean seal is a quiet seal. Wipe it down with a damp cloth and a bit of rubber protectant. This simple act can sometimes cut the cabin noise in half.
The RoofMason Material Verdict: Noise Levels of Common Roofing Loads

Not everything you put on your rack makes the same racket. I have hauled just about every material up there over the years. The noise comes from two things, wind resistance and vibration.
Let us compare a few common loads.
| Material | Weight | Wind Catch | Typical Noise Level |
|---|---|---|---|
| Metal Panels/Sheets | Medium | Very High | The Loudest |
| Asphalt Shingle Bundles | Heavy | Low (if flat) | Low (rattles if loose) |
| PVC or Metal Piping | Light-Medium | High | High (whistles) |
| Rolled Underlayment | Medium | Medium (if round) | Medium Hum |
So, are metal roofs loud when you are transporting them? Absolutely. A stack of long metal panels acts like a giant sail and a loudspeaker. They are thin, rigid, and catch every bit of wind, which makes them hum and vibrate loudly. Are metal roofs louder than shingles? For transportation, yes, without a doubt. A pallet of shingles, when strapped down flat, is heavy and dense. It creates much less wind turbulence than a bundle of lightweight, resonant metal.
The best bang for your buck tip is to break the wind’s grip on your load. For metal panels, strap a spare blanket or a sheet of thin plywood over the top edge facing the wind. It disrupts the clean airflow that causes howling. For PVC pipes, bundle them tightly and fill any hollow ends with rags to stop the whistle. For shingles, the goal is simple, keep them perfectly flat and tight.
Securing Your Load: The Ultimate Noise Prevention
Noise is often just your load telling you it is moving. A silent load is a secure load. Here is how my crew does it every time.
- Prepare the rack. Lay old moving blankets or rubber matting across the crossbars. This gives a soft, grippy base that prevents sliding and dampens vibrations.
- Load for flatness. Place your materials so the flattest, smoothest side faces the front. For shingle bundles, that means the flat side up. Stack everything as neatly and evenly as possible.
- Use the right straps. Use ratchet straps, not bungee cords. Bungees stretch and allow movement. You need solid, non stretch tension. Run straps through the vehicle’s door frames or dedicated tie down points, not just over the roof.
- Tie down every bundle. Do not just strap the whole stack. If you have multiple bundles or panels, use separate straps for each one or at minimum for every other one. This prevents them from rubbing and clattering against each other.
- The final check. After tightening all straps, give the load a firm shove from the side and front. If anything shifts, flexes, or makes a sound, tighten it more. An overloaded rack is a dangerous rack, and it will always be noisy because you cannot secure it properly. Check your vehicle and rack manufacturer’s weight limits first.
Aerodynamics 101: How Rack Shape and Design Cut the Noise
Think of your roof rack cutting through the air like a boat moving through water. A square, blunt edge creates choppy, turbulent water (noisy air). A smooth, rounded edge creates a cleaner wake (quieter air). That is the basic physics of your crossbar shape.
Square crossbars are common and strong, but they are noise champions. The flat front face slams into the air, creating a buffeting pressure wave and vortexes that howl. Oval or airfoil shaped bars are designed to slice through the air, guiding it smoothly over and around the bar with far less disturbance.
What are the best aerodynamic roof rack designs to minimize noise? Look for bars marketed as “aero,” “airfoil,” or “oval.” Can a different crossbar shape reduce noise? Swapping square bars for oval ones is one of the most effective single changes you can make. The difference on the highway is like closing a window that was barely open.
The Wind Fairing Fix
A wind fairing is a curved piece of plastic or composite that mounts on the front crossbar. It acts like a ramp for the wind, redirecting the air that would hit the blunt front of your load or rack up and over it. Think of it as a smooth stone helping water skip over a log in a stream.
Can I add a wind fairing to my existing roof rack, and will it help? In most cases, yes. Many universal fairings use adjustable straps or brackets. A fairing is most effective when you have a bulky load or a front bar placed far forward on the roof, as it manages the initial wind impact. It will not fix noise from loose loads or poorly shaped bars, but it can cut down a major source of roar and buffeting.
How do you properly install a wind fairing for maximum noise reduction? Position it as close to the roof as possible without touching. There should be just a small gap. Angle is key, it should be parallel to your windshield’s angle. On most sedans and SUVs, the bottom of the fairing should be nearly vertical. Drive at highway speed and have a passenger gently press on the top of the fairing. If the noise changes, adjust the angle until you find the quietest spot.
Rack Positioning and Spacing
Where you place your crossbars changes the music your roof makes. Placing the front bar too far forward puts it right in the high speed wind coming off your windshield. This often causes the loudest buffeting. Placing bars too close together can let them vibrate in harmony, creating a resonant hum.
How does roof rack positioning influence wind noise? For the quietest setup, start by following your vehicle manual’s recommended placement. Then, experiment. Try moving the front crossbar back 6 to 12 inches from the very front of the roof’s usable area. This simple shift can get it out of the worst turbulence. Ensure your bars are spaced wide enough to properly support your load, but not so wide they are at the very edges of the roof, where wind can whip underneath.
Installation and Maintenance: Tighten Up to Quiet Down

Think of your roof rack like a shingle. If the nails aren’t driven right, it flaps in the wind. The most powerful noise fighter is a perfect, tight installation. I’ve seen racks installed by the owner that looked fine in the driveway but howled at 50 mph because one bolt was a quarter-turn loose.
A secure installation is your first and strongest defense against rack noise.
Follow this checklist before you ever load a single item. Use it for new installations or to troubleshoot a noisy existing rack.
- Confirm Fit: Verify your rack system is the exact model for your vehicle’s make, year, and roof type (naked roof, fixed rails, flush rails).
- Tighten to Torque: Use a torque wrench and follow the manufacturer’s specs exactly. Over-tightening can strip threads or damage your roof, under-tightening guarantees rattles.
- Check Contact Points: Every foot, clamp, or tower should sit flush and solid on the roof or rail. There should be no gaps, wobble, or visible flex.
- Inspect Rubber Pads and Seals: These are your vibration isolators. Ensure they are clean, pliable, and not cracked or permanently flattened.
- Do the “Wiggle Test”: After full installation, try to shake the crossbars and towers with firm hands. Any significant movement means you need to go back to step one.
The Pre-Drive Rattle Check
A little routine care stops big noise problems. Think of this as checking your roof’s gutters. You do it a few times a year to prevent a clog. This five-minute check does the same for noise.
How can I reduce noise from loose or rattling components? Start with this quick five-point maintenance routine.
- Bolt Check: Go around and re-tighten all visible bolts and knobs on the rack system, especially after the first few drives post-installation and after a long trip.
- Pad Inspection: Look at the rubber pads where the rack touches your car. If they are worn thin, cracked, or missing, order replacements immediately. They are cheap and crucial.
- Lubricate Locks: Apply a small amount of silicone-based lubricant to locking mechanisms and moving parts on removable components. This keeps them operating smoothly and quietly.
- Examine Crossbar Ends: Many racks have end caps that can work loose. Press them firmly back into place or secure them with a dab of clear silicone sealant if they are a chronic issue.
- Secure All Cargo: Before you drive, give every strap, rope, and item on the rack a firm tug. A loose load is the most common source of sudden, alarming roof noise.
What maintenance can I do to keep my roof rack as quiet as possible? Stick to this simple checklist before and after big trips. Consistency is key. A rack that sits through summer sun and winter salt needs this attention to stay quiet.
Permanent vs. Removable: A Noise Trade-Off?
This choice is about balancing convenience and cabin comfort. A permanent rack is like a standing seam metal roof. It’s always there, doing its job, but it changes the aerodynamics of your vehicle forever. A removable system is more like a temporary tarp. You put it up when you need it, store it when you don’t.
Permanent racks (fixed side rails or towers) are always creating some wind drag and noise, even when empty. The benefit is that they are always ready. The downside is a constant 2-4 decibel increase in wind noise, which feels like a persistent background whistle or roar on the highway.
Removable systems let you return your vehicle to its original, quieter shape. What is the difference in noise between permanent and removable roof racks? With a removable rack taken off, you get back to factory quiet. The trade-off is storage space for the rack and the few minutes it takes to install it correctly each time you need it. If you only use a rack a few times a year, removable is the clear winner for noise control.
Inside Job: Soundproofing Your Vehicle’s Cabin
Sometimes, you can’t eliminate all the noise at the source. Your rack is tight and aerodynamic, but you still hear a hum. That’s when you shift tactics. Don’t just stop the noise, stop it from getting to your ears.
This approach targets the vehicle’s cabin, adding mass and sealing gaps to block sound transmission. It’s like adding extra insulation to your attic. You’re not stopping the rain, you’re making the house quieter.
Aftermarket sound deadening is a popular upgrade. Products like closed-cell foam insulation rolls or butyl rubber mats stick directly to the interior metal of your roof and doors. They add mass that dampens vibrations. For a soundproof metal roof, focusing on the roof’s interior skin yields the best quiet. How can I soundproof or add insulation to my vehicle’s roof from the inside? Adhesive damping mats applied to the roof’s interior metal skin are the most effective method. This is a more involved DIY job, often requiring headliner removal.
For a simpler project, upgrade the weatherstripping around your doors and windows. New, pliable seals can cut down on wind whistle that amplifies roof rack noise. As climate change drives more extreme weather, roof durability becomes a practical concern. Tight seals help protect the roof from moisture and wind-induced stress.
Budget-friendly DIY hacks exist. Some people have had mild success adding a layer of mass-loaded vinyl (a dense, flexible sheet) under the floor carpets or in the trunk. Even a thick, premium carpet pad can absorb some high-frequency noise. Manage your expectations with these. They help more with road and tire noise than a direct roof rack whistle.
When to Consider Professional Help
Most rack noise is a you-and-a-wrench problem. Sometimes, it’s a sign of something else. If you’ve done every check, tightened every bolt, and the rack still groans or the roof itself seems to vibrate, step back.
Persistent, severe noise can indicate a deeper issue, like a compromised roof seam or a rack system fundamentally incompatible with your vehicle. I once helped a customer who had a dealer-installed rack that was just the wrong shape for their SUV’s roof curve. It was “on,” but it was always fighting the vehicle’s design.
Consider consulting a specialist if the noise started after a minor incident or if you see new gaps between the roof and its trim. A good auto upholstery shop can handle complex sound deadening installations. A reputable rack retailer or installer can do a full diagnostic. For custom modifications or if you suspect the rack has stressed the roof itself, their expertise is worth the investment for your safety and sanity. Be aware of common roof repair myths that can mislead you about noises and repairs. The roof repair myths debunked guide will separate fact from fiction and point you to the right next steps.
The Attic Connection: What Roof Noise Teaches Us About Home Roofs
That howling around your roof rack on the interstate? It’s a perfect lesson for your house. The wind hits a bare surface and creates noise. It’s the same with a home metal roof. I’ve had many clients ask me, “Are metal roofs loud in rain?” or “Are metal roofs noisy during the rain?” It’s a fair question. The sound of rain on bare metal can be intense.
The real issue isn’t the metal itself, but what’s installed beneath it. A car’s interior has headliners and carpet to soak up sound. Your home’s roof needs the same kind of buffer. That’s where underlayment and insulation come in.
High-quality synthetic underlayment is the first critical layer. It sits right under the metal panels or shingles. Think of it like a thick, padded jacket under a rain shell. It absorbs the initial impact and deadens the sound. Without it, every raindrop telegraphs right into your attic. Not all synthetic underlayments are created equal; in fact, synthetic vs traditional roof underlayment offers different benefits and performance levels.
Next is the attic insulation. This is where you manage temperature, moisture, and sound all at once. Proper attic ventilation keeps air moving to prevent rot and ice dams. Insulation, with a sufficient R-value for your climate, traps heat. Together, a vented and insulated attic acts like a sound barrier, stopping noise from traveling down into your living space. I remember a job where we upgraded to a higher R-value insulation, and the homeowner said the next storm sounded like a gentle patter instead of a drum solo.
This is just like soundproofing a vehicle. You seal the gaps and add mass to block noise. For your roof, that means ensuring all penetrations for vents, pipes, and chimneys are tightly sealed with durable, code-approved flashing. Proper roof ventilation helps remove heat and moisture from the attic, supporting the effectiveness of insulation. A well-ventilated roof works with sealing to keep the space cooler and drier. A roof system that is well-sealed and well-insulated is always quieter and far more energy-efficient, saving you money year-round.
Lessons from the Road for Your House
Fixing noise always comes down to three actions: managing airflow, sealing gaps, and using the right materials. This is true for a whistling roof rack and a noisy home roof.
You can use the same diagnostic approach for both. When you hear a new whistle on your car, you look for a loose piece or a gap. Apply that logic to your home. Listen during the next rain. If it’s louder than it should be, your first suspicion should be in the attic.
Look for daylight sneaking through roof boards, which points to gaps. Feel for drafts around fixtures. Check if insulation is thin, matted, or missing. My crew and I start every inspection this way. It’s a simple, effective mindset that helps you catch small issues before they become big, expensive headaches. Understanding these principles helps you maintain a safer, quieter, and more sustainable roof.
Quick Answers
How often should I check and maintain my roof rack?
Perform a quick five-point check before and after any major trip. For a rack that lives on your vehicle, do a full inspection and re-tightening at least twice a year, just like checking your home’s roof in spring and fall.
Does the material of the roof rack itself (steel vs. aluminum) affect noise?
Material matters less than design. Both can be quiet if they use an aerodynamic shape. However, poorly designed racks in any material will whistle; focus on aero bars and a tight fit, not the metal type.
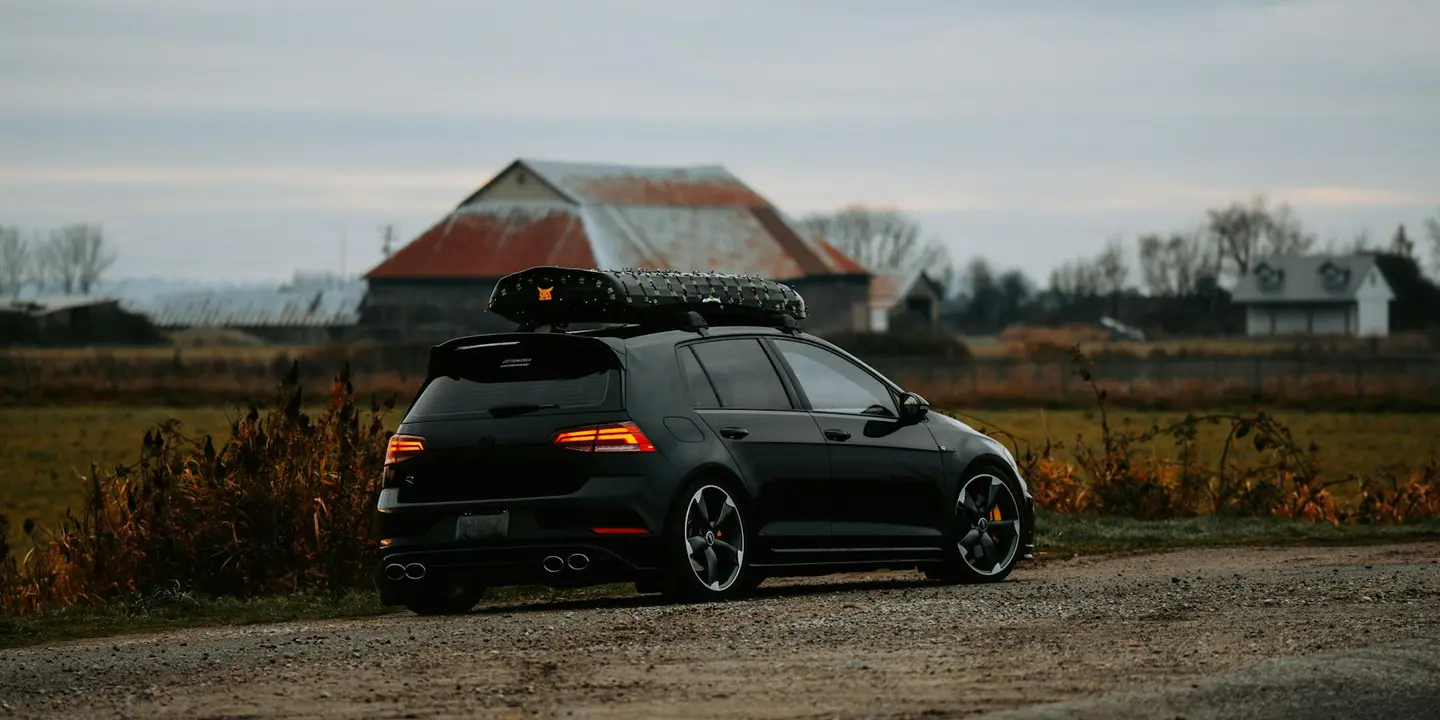
How do roof-mounted cargo boxes affect noise, and how can I minimize it?
Boxes create a constant wind hum. To minimize it, ensure the box is mounted perfectly level and as close to the roof as the instructions allow. A slightly tilted box acts like a wing, generating much more noise and drag.
Securing a Silent Ride from Your Roof Up
From my years on the crew, I’ve found that stopping roof rack noise starts with a simple, tight installation and mindful loading. Prevent most problems by thoroughly checking every clamp and strap before you drive; a secure load is a quiet load.
Treating your roof with care is a direct investment in your safety and your vehicle’s longevity. Stay informed on responsible roof care practices, from routine checks to understanding the needs of all types of roofing materials. For repairs, always prioritize roof repair safety practices to protect yourself and your property. This safety-minded approach helps prevent injuries and ensures lasting performance of your roof.
Ray Huffington
Ray is an experienced roofer. He has worked as a general contractor in the roofing industry for over 15 years now. He has installed and repaired all kinds of roofs, from small houses to large mansion, and from basic shingles to cement and metal roofs and even solar roof panels. He has seen homeowners struggle with roofing questions and always has experience based proven advice to help those in need. If you need roof pros, Ray's your guide.