
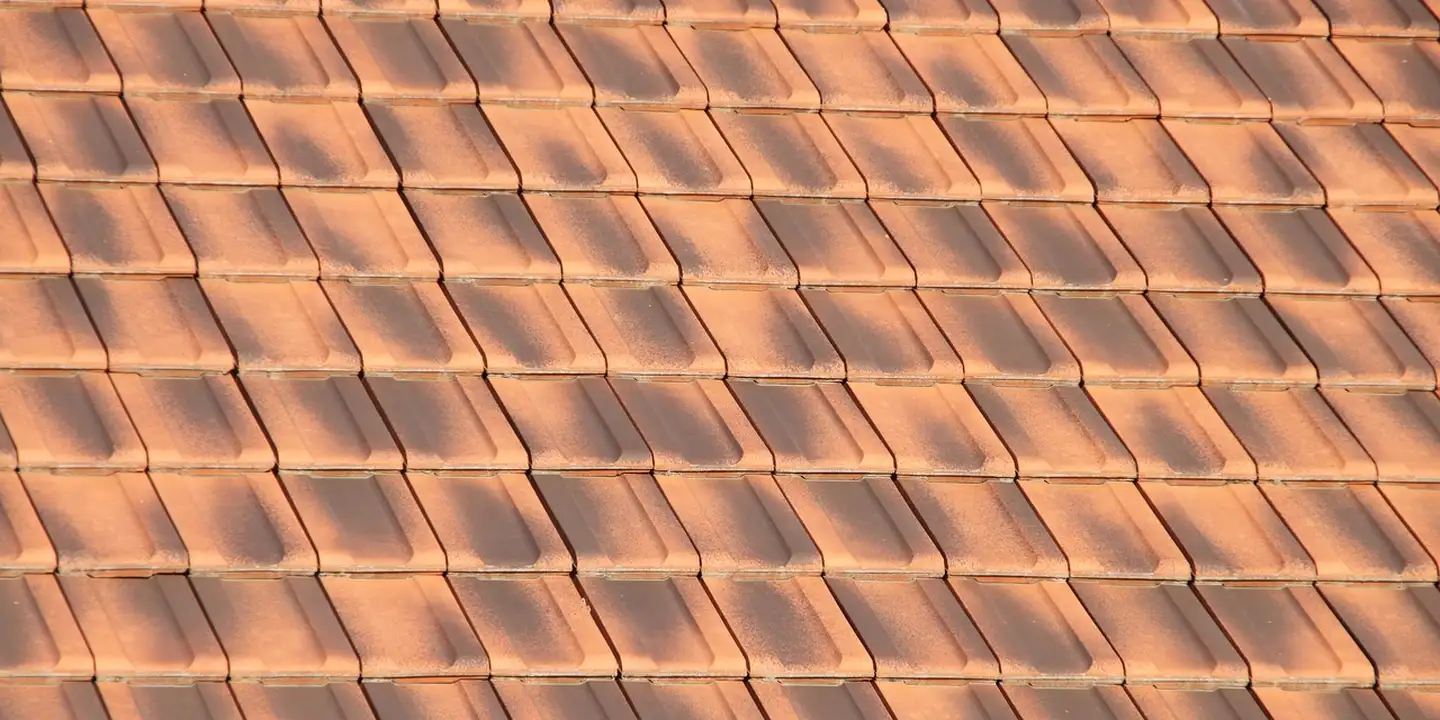
What Are the Proper Temperature Guidelines and Installation Steps for Roof Heat Cables to Prevent Ice Dams?
Ever see a ridge of ice form along your gutter line after a snowstorm? That ice dam can force water back under your shingles and into your home. Using roof heat cables correctly solves this, but only if you know when to turn them on and how to put them up right.
I will start with the precise temperature that signals it’s time to activate your heat cables. Then, I will detail the installation sequence, showing you how to run cables safely on gutters and roof valleys. You will also get my on-the-job advice for avoiding common errors that lead to poor performance or roof damage.
Key Takeaways: What Every Homeowner Needs to Know First
Think of heat cables like a good bandage. They cover the immediate problem, but they don’t heal the wound underneath.
The right thermostat setting saves you money and protects the cables from burning themselves out prematurely.
You cannot install these safely by just tossing a wire onto the roof. You must map your roof’s trouble spots and confirm your outdoor outlet can handle the load.
In most homes I’ve worked on, the real fix is inside the attic, not on the roof surface.
What Are Roof Heat Cables? Understanding Your Ice Dam Defense
Roof heat cables are simple electric wires you clip to your roof’s edge. When you plug them in, they get warm enough to melt snow and ice directly around them.
Their only job is to create narrow melt channels so water can drain off your roof instead of pooling behind an ice dam. They manage the symptom. They do not fix the cause, which is usually a warm attic.
I explain it to homeowners like this: it’s like installing a heated mat on a small section of your driveway. It clears a path, but it doesn’t stop snow from falling.
You’ll mainly find two types:
- Self-regulating cables: These are smarter. They adjust their heat output based on the surrounding air temperature. They use less energy when it’s warmer and are harder to overheat.
- Constant-wattage cables: These put out the same heat all the time. They’re simpler but can waste energy and may have a shorter lifespan if not controlled by a good thermostat.
How Ice Dams Form and Where Cables Help
Picture this cycle. Heat from your poorly insulated attic warms the roof deck. Snow on the upper, warmer part of the roof melts. That water runs down toward the cold eaves, which are beyond the attic’s warmth. There, it refreezes. Over time, this builds a ridge of ice-the dam-that traps more meltwater behind it.
This trapped water is what does the damage, forcing its way up under your shingles and into your home. It ruins roof decks, soaks insulation, and causes ceiling stains.
That’s where cables work. You place them in specific zones to keep just those areas open:
- Along the eaves (roof edge): This is the most critical line of defense to prevent the initial dam from forming.
- Inside roof valleys: These are natural channels for snow and water. If they block with ice, water backs up fast.
- Down gutter runs and downspouts: This prevents heavy icicles and keeps the entire drainage path clear.
On a job last winter, I saw cables installed only on the gutters. The dam formed just above on the roof, and the house leaked. You have to treat the entire problem area.
Setting the Thermostat: Proper Temperature Guidelines for Activation
You want to know the right temperature to turn on roof heat cables. Here’s the rule I give every homeowner.
Activate your heat cables when the outdoor temperature is between 20°F and 40°F and snow or freezing rain is in the forecast.
Think of it like this. Below 20°F, the cables are often just fighting a losing battle against extreme cold. They’ll keep a tiny channel open, but they can’t melt back a thick ice dam fast enough. Above 40°F, you’re usually wasting electricity. The sun and ambient air are doing the work for you.
The sweet spot is when it’s cold enough for snow to stick and meltwater to refreeze at the eaves, but not so cold that the cables can’t keep up. An automatic, outdoor-rated thermostat handles this decision perfectly.
Manual vs. Automatic Control: What I Recommend
You could plug the cables in and out manually. I don’t recommend it.
One season, a customer insisted on manual control. He went on a weekend trip during a surprise winter storm. He forgot to plug the cables in. We came out to find a new ice dam had already pushed water under his shingles. The repair bill was far more than a good thermostat.
An automatic controller is the only safe, efficient choice.
- Safety: It only runs the cables when needed, preventing overheating and fire risk from constant use.
- Energy Savings: It stops you from paying to melt snow on a sunny 45°F day.
- Convenience: It works whether you’re home, at work, or on vacation.
Step-by-Step: How to Install Roof Heat Cables to Prevent Ice Dams
Installing heat cables is a serious project. It involves electricity, heights, and your home’s roof. If any of that makes you pause, hire a licensed electrician or roofing pro.
Here are the key installation steps, done the right way.
Your first step is always safety: turn off power at the breaker to any outdoor outlet you’ll use, and only use a GFCI-protected circuit.
Pre-Installation: Planning, Measuring, and Gathering Tools
Good planning prevents a messy, unsafe install. Get everything ready on the ground first.
You will need:
- Roof heat cable kit(s)
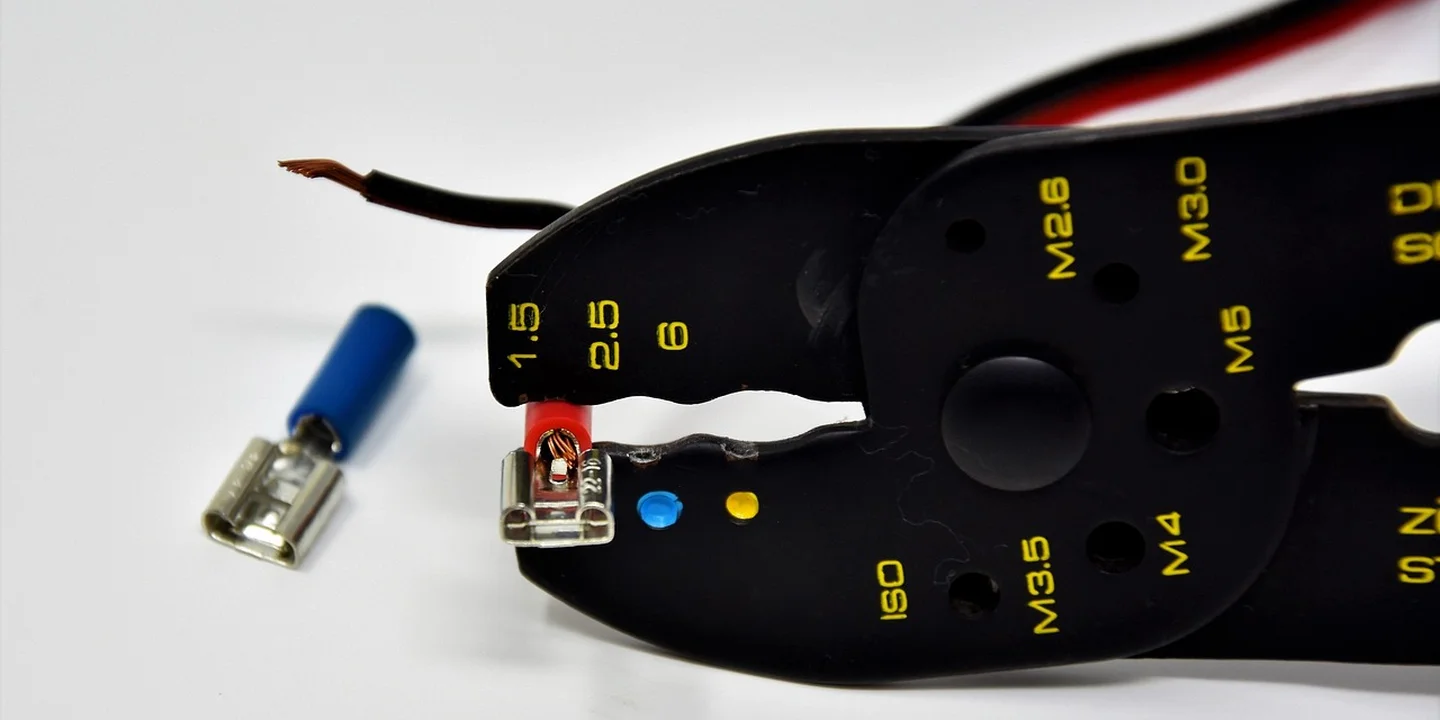
- Manufacturer-approved roofing clips (not included in most kits)
- Drill with appropriate bits for your roof material
- Non-contact voltage tester
- Heavy-duty, outdoor-rated extension cord (only if absolutely necessary)
- Ladder and proper fall protection
Measure the total length of your roof’s eave (the edge) where ice forms. Also measure your gutter runs and downspouts. Add these together to calculate total cable needed. Buy a kit that exceeds this length.
Check your local electrical code before you buy anything. Many areas require heat cables to be on a dedicated circuit. This isn’t a suggestion.
Laying and Securing the Cable: The Roofer’s Method
Never just toss cables onto the roof. You must follow a pattern and secure them properly.
The goal is to create a path for water to escape. Lay the cable in a zig-zag pattern along the first 3-6 feet of the roof edge. Then, run the cable down into the gutter, along its length, and down the inside of the downspout.
Use the plastic clips made for your cable brand. Drill a pilot hole and snap the clip in.
Never use nails, staples, or duct tape. They will damage the cable’s insulation and create a shock or fire hazard.
For metal roofs, you can use heat cables. You must use clips designed for metal to avoid puncturing the panels. The attachment method is similar, but precision is critical to avoid leaks, especially on residential metal roofs.
Here is the most important command for this entire project: Plug the cables in on the ground and confirm they heat up before you carry them onto the roof. You don’t want to install a dud.
Making the Electrical Connection Safely
Run the plug end of the cable to your outdoor outlet. Keep it clear of walking paths and pinching points.
If you need an extension cord, it must be outdoor-rated, as short as possible, and rated for a higher wattage than your cables. Do not daisy-chain cords or run them through windows or doors.
Plug the system into an automatic, outdoor thermostat, then plug the thermostat into the outlet. This gives you the control and safety we talked about earlier. Never let the cables plug directly into an outlet without a controller.
The Critical Attic Connection: Ventilation, Insulation, and Energy Impact
Installing roof heat cables is like taking aspirin for a fever. It can help the symptom, but it doesn’t cure the illness. For ice dams, the real problem is often a warm attic. Improving attic insulation and choosing roofing materials with better thermal performance can address the root cause of heat loss. That in turn helps keep temperatures stable and can lower energy bills.
Here’s how it works. Heat from your living space escapes into the attic. This warmth travels through the roof deck and melts the snow from underneath. The meltwater runs down to your cold eaves and gutters, where it refreezes into a dam. Every time you run those heat cables, you’re paying to fight heat that’s already costing you money on your heating bill.
Your goal is to keep your roof deck the same temperature as the outdoors. You do this with two key systems:
- Ventilation: This is your attic’s breathing system. Cool air should enter through soffit vents under the eaves, flow up the roof deck, and exit at ridge vents or gable vents at the peak. This airflow whisks away any stray warmth.
- Insulation: This is your attic’s winter hat. A thick layer on the attic floor (with an R-value of R-38 or higher in most cold climates) traps heat in your home so it never reaches the roof deck in the first place.
Think of it this way. Sealing your attic floor and installing proper vents is a permanent, energy-saving fix. Heat cables are a temporary, energy-using bandage. Improving your attic’s performance is almost always more effective and cheaper in the long run than adding more electricity to your roof.
Safety Check: Are Roof Heating Cables Dangerous and Worth It?
People ask me all the time: are roof heating cables dangerous? Are they safe? Let’s be straight about the risks.
Roof heat cables are electrical devices installed in a harsh, wet environment. If installed poorly, they can be a real hazard. The main dangers are:
- Fire: Wires can overheat if covered by leaves or snow, or if they’re damaged. Frayed cables or faulty connections are a serious risk.
- Electrical Shock: Any crack in the cable’s sheathing exposes live wires. If you’re cleaning gutters or a ladder touches a damaged section, you could be shocked.
- Roof Damage: Cheap plastic clips can break in the cold. Metal clips installed wrong can puncture the roofing material. I’ve seen cables tear free and take shingle granules with them.
Now, for the other side. When installed correctly on a suitable roof, they do work. A high-quality system with a built-in thermostat turns on only when needed, melting channels to prevent ice buildup. The benefit is real: you can prevent thousands of dollars in water damage to your eaves, walls, and insulation.
So, are they worth it? Here’s my verdict. If you have addressed your attic insulation and ventilation and you still get problematic ice dams on a simple roof layout, then a professional installation of a good system can be a worthwhile last line of defense. If your attic is warm and leaky, or your roof is very complex, cables are an expensive way to ignore the root cause.
Annual Inspection and Maintenance Routine
Heat cables need a checkup every fall, before the first freeze. Never assume last year’s setup is still good. Grab your ladder and follow this list.
First, do a visual inspection of every foot of cable you can see:
- Look for cracks, brittleness, or exposed wire in the cable sheathing.
- Check that every mounting clip is secure. No cable should be loose or sagging.
- Ensure cables lie flat and are not pinched or kinked anywhere.
Next, prepare the area. Clear all leaves, pine needles, and debris from your gutters and the roof valleys near the cables. Debris can insulate the cables, causing them to overheat, and it blocks meltwater flow.
Finally, check the electrical side. Plug the system in briefly (on a dry day) to confirm it heats up. Verify the automatic thermostat turns the cables on and off. Make sure the system is plugged into a Ground Fault Circuit Interrupter (GFCI) outlet. That GFCI is a critical safety device that will shut off power if it detects a problem.
When NOT to Install Heat Cables: Limitations and Better Solutions
Heat cables are a powerful tool. But they aren’t a cure-all. Throwing a cable at every roof problem can be a waste of money, or worse, create a new hazard. I’ve seen jobs where cables were the wrong fix from the start.
You should avoid installing heat cables if your roof shingles are already badly cracked, curled, or missing. The cables need a sound surface to attach to. On a failing roof, the adhesive won’t hold well, and you risk damaging the shingles further during installation. Fix the roof first.
Never install cables if your home’s electrical system is outdated or cannot handle the added load. These cables pull significant power. Plugging a high-wattage system into an old outlet or overloaded circuit is a fire risk. Have an electrician check your system first.
Very steep roofs are another red flag. Safety is non-negotiable. If you can’t safely walk on your roof slope, you shouldn’t be up there trying to snake a cable into perfect zig-zags. The risk of a fall is too high. Roof walking safety should come first. If you’re unsure, consider hiring a professional to handle the job safely.
Look at the Source: Better Long-Term Solutions
Heat cables treat the symptom (the ice dam) but not the cause (a warm roof). Often, a better solution targets the root problem.
Improving your attic insulation and ventilation is almost always the best permanent fix for ice dams. It stops the heat from your house from melting the snow in the first place, which is a crucial step in preventing ice dams. This is the equivalent of fixing a leaky faucet instead of just mopping the floor every day.
For immediate danger, hire a professional ice dam removal service. They use steam, which removes ice without damaging your shingles. It’s a one-time cost for an urgent problem, especially compared to the potential costly damage caused by ice dams if left untreated.
Snow guards are a smart option for homes with heavy snow loads that slide off in sheets. They hold the snow on the roof, letting it melt evenly or be removed safely. This prevents the sudden avalanches that can gut your gutters.
De-icing Cables for Metal Roofs: A Special Case
Metal roofs change the game. Many are designed to be “shedders,” letting snow slide off easily. On a properly installed metal roof with adequate clearance below, ice dams are less common.
Heat cables can work on metal roofs, but installation is trickier and the risk of damage is higher. You must use clips designed for metal, never just adhesive. The cables must be kept away from seams and fastener lines to avoid interference.
Often, the real solution for a metal roof with ice problems is to look at its design. Does it have a snow retention system? Is the roof-to-ground clearance sufficient for sliding snow? Addressing these design factors is usually more effective than adding cables as an afterthought.
When to Call a Professional Roofing Contractor
If your roof has complex lines with many valleys, dormers, or skylights, designing an effective cable layout is difficult. A pro understands heat flow and can map a pattern that actually works.
Consult a roofing contractor if you have persistent attic moisture, mold, or condensation stains on your ceilings. These are big red flags pointing to insulation and ventilation issues that cables won’t solve. A good roofer will diagnose the whole system, not just sell you a band-aid. Their advice can save you from recurring problems and protect your home’s structure.
Quick Answers
How do I know my heat cables are working correctly?
First, feel the cable (on a dry day) for warmth shortly after plugging it in during freezing weather. You should also see defined melt channels in the snow along the roof edge within a day of activation.
What’s the most critical safety step before installing cables?
Have a licensed electrician verify your outdoor circuit can handle the load and is GFCI-protected. Never overload an old outlet; this is a top cause of electrical fires with these systems.
If I need heat cables, does that mean my attic is the real problem?
Almost always, yes. Cables manage the symptom, but a warm attic is the cause. Your next step should be a professional attic inspection to assess insulation and ventilation.
Ensuring a Safe, Ice-Free Roof
Install your heat cables when daytime temperatures are above freezing and follow each step meticulously to create a reliable melt path. This approach helps prevent ice dams and the formation of dangerous icicles on your roof. This correct setup is your best defense against ice dams and the expensive repairs they cause.
Your roof’s longevity depends on a safety-first approach to all maintenance, from installations to seasonal inspections. Beyond routine upkeep, factors like roofing material, climate, attic ventilation, insulation, and maintenance frequency shape a residential roof’s life expectancy. These life expectancy factors will guide the next steps. I encourage you to keep learning about roof care for all types of roofs, as that knowledge is the foundation of a durable, well-protected home.
Ray Huffington
Ray is an experienced roofer. He has worked as a general contractor in the roofing industry for over 15 years now. He has installed and repaired all kinds of roofs, from small houses to large mansion, and from basic shingles to cement and metal roofs and even solar roof panels. He has seen homeowners struggle with roofing questions and always has experience based proven advice to help those in need. If you need roof pros, Ray's your guide.