
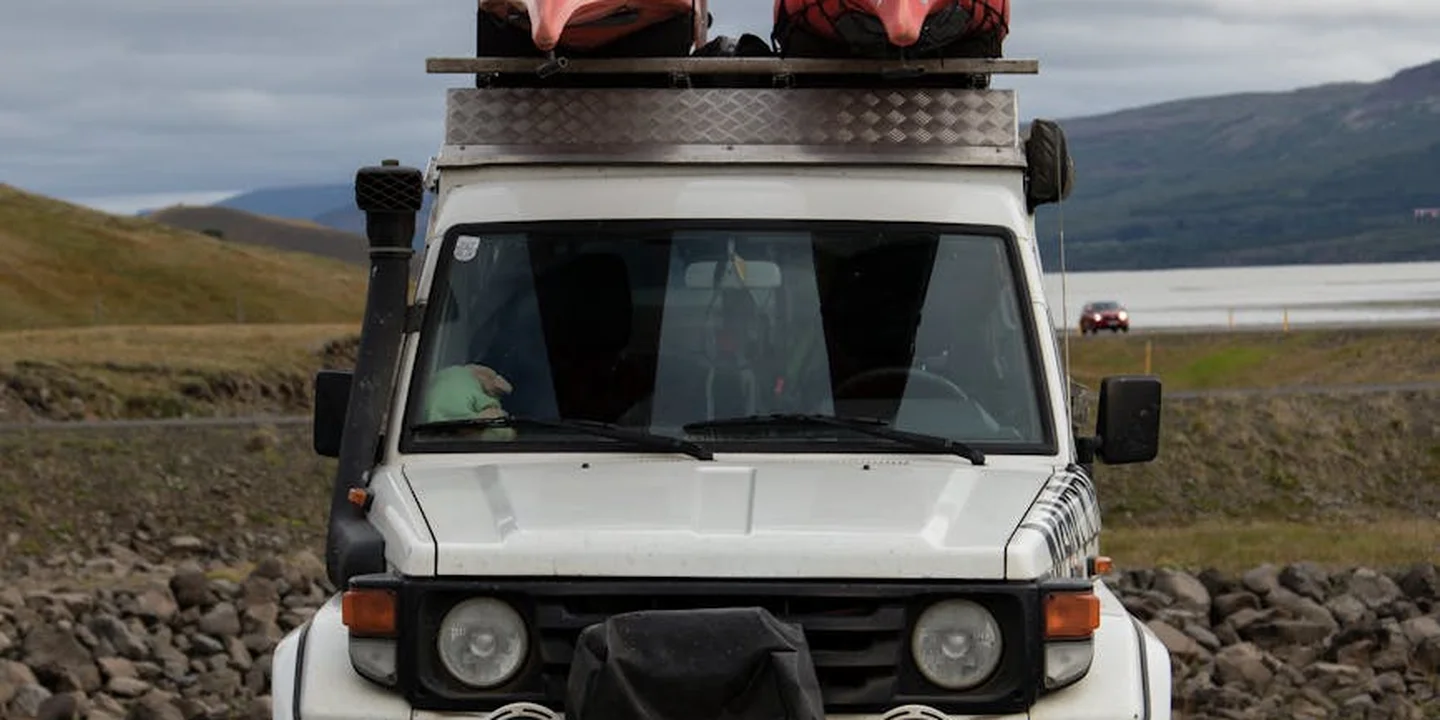
How Do You Secure a Kayak on a Roof Rack Without Damage?
Have you ever tightened down a kayak, only to hear it shift minutes later on the road? I’ve fixed more than a few poorly secured loads over the years. Proper technique prevents damage to your kayak and keeps everyone safe.
Here’s exactly what we’ll walk through:
- Picking the right roof rack and kayak carriers.
- Lifting and positioning your kayak without strain.
- Strapping it down so it can’t move or vibrate.
- Double-checking everything before you drive away.
Key Takeaways for Safe Kayak Transport
Think of this as your pre-trip mental checklist. Get these five things right, and you are setting yourself up for a safe, stress-free drive.
- Always use bow and stern lines. These are your emergency backup, stopping the kayak from shifting or lifting if a main strap fails.
- Never tie straps directly to your vehicle’s roof rails or door frames. You will damage them.
- Pull over and check all your straps every two hours of driving. Straps can loosen as the kayak settles.
- Balance the kayak’s weight evenly over the crossbars. An unbalanced load strains your rack and hurts handling.
- Protect both your kayak’s hull and your car’s roof finish. Direct contact damages both.
What You Need: Gear and Roof Rack Basics
Having the right gear is not about buying the most expensive brand. It is about choosing tools that are safe and easy to use correctly every single time.
For strapping the kayak to the crossbars, you have two main choices.
- Cam straps are the go-to for most paddlers. They are simple, fast, and very hard to over-tighten, which protects your kayak. I use these on every trip.
- Ratchet straps can generate immense force. They are great for lumber but can easily crack or deform a plastic kayak hull if you are not extremely careful.
You also need bow and stern lines, which are thin ropes or straps that tie the front and back of the kayak to your car’s bumper or tow hooks. Soft roof rack pads or kayak cradles sit on your crossbars to provide a protective, non-slip bed. Foam blocks are a last-resort option we will discuss below.
How do you choose the right roof rack for your kayak?
Start with the weight. Add the weight of your heaviest kayak to the weight of the rack’s cradle or padding. That total must be under your crossbars’ dynamic weight limit (the limit when the car is moving). You can find this limit in your vehicle’s manual or the rack manufacturer’s guide.
Factory side rails with removable crossbars are common and often perfectly adequate for one or two kayaks. Aftermarket systems that clamp to your door frames are also strong and reliable if installed perfectly. The weak point is rarely the rack itself, but how it is attached to the vehicle.
Can you put a kayak directly on roof rack?
No, you should never place a kayak directly on bare metal or plastic crossbars. The hard surfaces will scratch the kayak, and the kayak can slide easily. Crossbars also concentrate the kayak’s weight onto two narrow points, which can create pressure dents in the hull over time. A $30 set of padded cradles or even pool noodle slices slit open and wrapped around the bars prevents this damage completely.
Can I Transport a Kayak Without a Roof Rack?
I get asked this a lot, especially by folks new to the sport. The short answer is you can try, but you absolutely should not make a habit of it.
Tying a kayak directly to a naked roof is asking for trouble. The straps will wear through your car’s paint in minutes. They can also bend or crush the roof’s gutters and edges. At highway speeds, the kayak acts like a wing, creating lift. Without a solid rack to hold it down, that force goes straight into your delicate roof sheet metal, potentially causing expensive dents or a catastrophic failure where the whole thing tears free.
Foam block kits sold at big-box stores are a temporary workaround. You set the blocks on your roof, rest the kayak on them, and run straps through your car’s open doors. I have used these in a pinch for a slow, short drive home from a purchase, but I would never trust them on the highway or in strong wind. The connection is not solid, and the blocks can shift.
If you plan to move a kayak more than once, a proper roof rack system is the only safe, responsible choice. It protects your investment in your car and your boat.
The Right Way to Lift and Position Your Kayak
I get this question all the time from folks who are new to hauling their gear. “What is the proper way to lift a kayak onto a roof rack to avoid injury?” Throwing your back out is a miserable way to start a trip, but with the right technique, you can load up safely every time. I’ve helped more than a few friends and clients avoid a weekend of pain by showing them how we do it on the job.
Here is the step by step method my crew uses. It’s all about using your body wisely.
- Stand close to the kayak, feet shoulder width apart. Bend at your knees, not your waist, and get a solid grip.
- Use the power in your legs to lift, keeping your back straight. Let your thighs do the work, not your spine.
- For a longer or heavier kayak, always get a helper. One person on each end makes the lift smooth and controlled.
- If you’re loading solo, a simple roller that hooks onto the rear crossbar is a game changer. You lift one end onto the roller, then slide the rest up. It saves your back and your car’s finish.
Once the kayak is up there, the next big question pops up. “How should you position a kayak on crossbars for optimal balance?” Where you set it down is just as critical as how you lifted it up for a stable, safe ride.
First, center the kayak from side to side on your crossbars. An off center load will pull to one side while you drive. Use the seams of your roof or the vehicle’s edges as a guide to get it perfectly centered.
Next, look at the cockpit. You want to position the kayak so the cockpit opening sits between the two crossbars. This places the strongest, most rigid section of the hull directly over the supports. Think of it like carrying a long board with two people; you naturally want to hold it at the sturdiest points to prevent sagging or bouncing.
What about a canoe? Can you put a canoe on a roof rack? You sure can. The principle is the same. Center it carefully, and because a canoe is wider, ensure its widest point is supported by the crossbars to prevent rocking. Just like with a kayak, secure the cockpit or center area between the bars for the best balance.
Strapping It Down: The Art of Secure Tie-Downs
Folks often ask me, “What are the best types of tie-down straps and knots for securing a kayak?” After years on the road, I only trust cam straps with buckles for kayaks because they lock in place without excessive force. Ratchet straps are a common mistake. I’ve seen too many hulls with permanent dents from overzealous tightening. Cam straps are simpler and safer for your boat.
Looping the strap correctly is just as critical. Always run the strap around the crossbar itself, then over the kayak, and back under the crossbar. Don’t just lay it over the kayak. This wrap-around method uses friction to lock everything down, much like a seatbelt holds you in place.
How Many Tie-Down Points Do You Really Need?
This question comes up on every job. You need a minimum of four points: two sturdy straps over the kayak securing it to the crossbars, plus two separate lines for the bow and stern. That’s the standard my crew and I follow for every transport. It handles wind and road vibrations without fail.
Let me settle this once and for all. You should never tie a kayak directly to the roof rails on your vehicle. Roof rails aren’t built for that direct pressure. They can bend or even pull away, risking serious damage to your car’s roof. Always use a proper roof rack with crossbars as your foundation.
The Critical Role of Bow and Stern Lines
What is the purpose of bow and stern lines, and how do you attach them correctly? Bow and stern lines prevent the kayak from launching forward in a hard brake or sliding backward during acceleration. They are your insurance against lengthwise movement. I’ve retrieved kayaks from ditches where this step was skipped.
Attachment is straightforward. Find solid anchor points on your vehicle’s frame, like front tow hooks or rear bumper mounts. Use a trucker’s hitch knot to attach the lines; it’s a reliable knot that lets you cinch tension easily and release it fast. I teach this to everyone. Tie one end to the kayak’s secure handle, run it to the vehicle anchor, and use the trucker’s hitch to pull it taut.
How Tight is “Tight Enough”?
How tight should the straps be to avoid damaging the kayak or the roof rack? Use the hand-pressure test: press on the strap with your thumb; if you can easily twist it, it needs more tension. Aim for snug, not vice-tight.
Over-tightening is a real danger. It can cause “oil-canning,” where the kayak’s hull flexes and dents. Give the kayak a firm shove side-to-side; it should not slide on the crossbars. If it moves, tighten a bit more. If the hull starts to deform, you’ve gone too far. That’s the balance you’re looking for.
Final Safety Check and Pre-Drive Routine
I’ve learned the hard way that a good tie-down job can feel secure in your driveway but fail on the highway. A final walk-around is non-negotiable. Think of it like the last tool check before you climb the ladder. It’s quick, but it saves you from a major headache.
You asked: how can you check if your kayak is secure before driving? You perform a physical test, not just a visual one.
Give the entire setup a firm shake. Put your hands on the kayak near the racks and push down and sideways with some force. The kayak should not slide, shift, or lift. The entire assembly-kayak, cradles, and racks-should move as one solid unit with your vehicle. If anything rattles or moves independently, something is too loose.
Your 5-Minute Pre-Trip Checklist
Run through this list every single time you load up. It takes less time than filling a water bottle.
- The Shake Test: Do this first, as described above. It’s your primary security check.
- Visual Strap Inspection: Look at every strap from hook to buckle. Ensure they are flat, not twisted. A twisted strap loses over half its holding power and can wear through quickly. Check that buckles are fully engaged and locked.
- Bow and Stern Line Tension: Pluck the bow and stern lines like a guitar string. They should be tight and have a firm, high-pitched sound. These lines are there to prevent lift at highway speeds, not just to keep the nose from swinging. They must be taut.
- Clearance Check: This is a roof-saver. Know the total height of your vehicle with the kayak loaded. If you’re pulling into a garage, hold a long paddle or stick at that height and walk toward the door. An avoidable impact with a garage door or low clearance is the most common cause of damage to both your roof rack and your kayak.
Here’s a pro tip from my crew: after you drive the first 3 to 5 miles, find a safe place to pull over and re-check every single strap and line. The kayak will settle into the cradles, and straps can relax a bit. This quick re-tightening ensures everything stays drum-tight for the rest of the journey. It’s the difference between a one-time check and a secure transport.
Protecting Your Roof and Your Kayak
A secure kayak is worthless if it arrives at the lake scuffed or your car’s roof is scratched up. Good loading is a two-way street.
What should you do to protect the kayak’s hull from scratches during transport?
The crossbars on your rack are not friendly to a plastic hull. Without a barrier, they will grind and scratch it over every bump.
I learned this the hard way on a job where we used a client’s truck to haul materials. A single trip left permanent marks on their kayak. The fix is simple.
You need a soft layer between the hard bar and the kayak. This is not a place to cut corners.
- Use foam pipe insulation or pool noodles. Slit them lengthwise and clamp them over your crossbars. They’re cheap and effective.
- Invest in purpose-made crossbar pads. They have a tougher outer shell and often include straps to hold them in place.
- For kayak saddles or J-cradles, ensure the padding is intact and not worn down to the plastic.
The right padding turns a damaging pressure point into a cushioned cradle.
The Grit That Grinds: A Clean Start
Padding alone isn’t enough. Imagine strapping sandpaper to your bars. That’s what happens if you ignore grit.
Sand, dirt, and small rocks get stuck to your kayak’s hull and the padding. When you cinch the straps down, this grit gets pressed between the two surfaces. As you drive, it vibrates and acts like a tiny file.
Make this a two-minute habit before every load-up:
- Wipe down the hull where it will contact the pads with a damp towel.
- Run your hand over the padding on your crossbars or cradles. Brush off any debris.
Cleaning the contact points prevents micro-scratches you only see in the sunlight.
Flipping the Perspective: Protecting Your Vehicle
We talk a lot about the kayak, but your car’s roof is just as vulnerable. The rack itself can damage the finish.
The feet of most roof racks rest directly on the painted roof. Dirt trapped under them will scratch the paint in a perfect rectangle. I’ve seen it countless times on cars at the boat launch. If you’re concerned about maintaining paint protection for your roof, consider using protective pads under the racks.
Protect your investment:
- Before installing the rack feet, clean the roof contact points with rubbing alcohol.
- Consider clear protective vinyl strips under the feet. It’s a permanent, invisible shield.
- When loading, be mindful. Don’t drag the kayak’s coarse hull across your roof’s paint. Lift it clear and set it down gently on the padded bars.
Your roof rack is also a wear item. Rinse salt and road grime off it periodically to prevent corrosion on bolts and moving parts.
Can I Put an Inflatable SUP on a Roof Rack?
Yes, you absolutely can, but you must adjust your technique. A rigid kayak sits on the rack. A soft inflatable board can sag around it.
The goal is to support the board’s full width to prevent creasing or permanent deformation. Think of it like a hammock; you don’t want a single point cutting into it.
Here’s how to do it right:
- Inflate the board to its maximum recommended PSI before loading. A firmer board is more stable and less likely to fold.
- Use wider, flat cradles or create a “bed” across your crossbars. You can lay a thick foam pad or even a folded moving blanket across both bars before placing the board on top.
- Use more straps. Instead of just two cam straps, use one in front of the crossbars and one behind on each side. This prevents the board from shifting forward or back.
- Do not overtighten. You want it snug so it can’t lift, but cranking down on an inflatable can damage the seams. You should not be able to easily twist the board, but you shouldn’t be deforming its shape either.
Treat an inflatable like a rigid board with a softer shell, using wider support and mindful strapping.
Driving in Wind and Rain
I hear this question all the time. Weather doesn’t just make the drive unpleasant, it actively works against your setup. Wind tries to lift and twist your kayak, while rain can sabotage your straps.
Think of your kayak on the roof like a wing. As you drive, wind flowing over it creates lift, the same force that keeps an airplane in the air. This lifting force is why bow and stern lines are absolutely non-negotiable in bad weather. They anchor the kayak to the solid frame of your vehicle, fighting that upward pull. Without them, you’re relying solely on the roof rack’s grip, and that’s a scary gamble.
Your driving habits need to change with the weather. First, slow down. High speed dramatically increases wind force. Second, be extra cautious of crosswinds when passing over bridges or through open areas. A sudden gust can shove your entire load sideways. Give large trucks a wide berth, as the blast of air they push out can hit your kayak like a solid wave. I’ve had my own truck rocked by that vortex, and it’s a stark reminder to keep my distance.
Here’s a pro tip many learn the hard way. Nylon straps absorb water and can stretch slightly as they dry. Plan to pull over safely after about 20 miles of rain to re-tighten all your straps and lines. A quick check takes two minutes and prevents the slow, dangerous loosening that can happen on a long, wet drive.
Loading Two or More Boats: Doubling the Caution
When you double the cargo, you need to double your attention to detail. Every part of the process becomes more critical, from setup to the final strap check.
Are There Different Considerations for Multiple Kayaks?
Yes, absolutely. Loading one kayak is straightforward. Loading two or more is a careful puzzle. The main concerns shift from just holding a boat down to managing how the boats interact with each other, your rack, and the wind.
You must prevent the kayaks from rubbing together during transit, which can scratch and gouge hulls. You also have to account for the combined wind force trying to lift and twist a much larger, flatter surface area.
Stacking vs. Side-by-Side J-Cradles
Your rack setup dictates your loading method. This isn’t a matter of preference, it’s about using your equipment correctly.
Side-by-side with J-cradles is the standard, safer method for most drivers. Each kayak sits in its own cradle, secured independently. The weight sits lower and is spread evenly across the crossbars. I recommend this for everyday use.
Stacking kayaks directly on top of each other on a flat bar rack is a space-saver, but it adds complexity. You must use thick foam blocks or specialized stackers between the boats to prevent hull-to-hull contact. The top kayak catches much more wind, creating a significant lifting force and potential for sway.
Think of it like stacking plates versus setting them on a shelf. The shelf (J-cradles) is more stable.
Individual Tie-Downs Are Non-Negotiable
This is the mistake I see most often. Someone will put two kayaks on J-cradles and run one long strap over both of them, cinching them down as a bundle.
This is a major safety risk. If that single strap fails or loosens, you lose both boats at once. It also doesn’t allow you to properly secure each kayak’s position, letting them shift and collide.
Here is the right way. Treat each kayak as if it were the only one on the roof.
- Secure Kayak #1 with its own bow/stern lines and its own cam straps over the hull.
- Secure Kayak #2 with its own completely separate set of bow/stern lines and cam straps.
No straps should be touching both kayaks. This gives you redundancy. If one strap fails, the other kayak is still secured, and the remaining straps on the loose kayak might just keep it from flying free.
Weight Distribution and Roof Rack Limits
You must know your numbers before you load. First, check your vehicle’s roof load limit in the manual. Then, check the dynamic weight limit of your specific roof rack system, and compare it with the residential roof load limits to ensure safety.
Exceeding these limits doesn’t just risk dropping a kayak, it can permanently damage your car’s roof rails or gutters.
For loading, balance the weight evenly between the two crossbars. On J-cradles, try to position the boats so their heaviest points (usually the cockpit) are centered between the bars. If stacking, place the heavier, wider boat on the bottom. Always load and unload from the side of the vehicle, not the rear, to avoid twisting the rack.
Finally, do a final systems check. Tug every strap. Look for any point where the boats could touch. Give the assembly a firm shake from the side. Nothing should slide, shift, or feel loose.
When You Should Not Try This Yourself
Let’s be honest. I’ve seen too many weekend warriors get in over their heads. A good roofer knows when a job is beyond their skill or their ladder, and you should apply the same logic to your roof rack.
Loading a kayak isn’t just about the technique. It’s about whether your vehicle and your body are up for the task.
If any of these situations apply to you, stop and find another solution. Your safety and your vehicle’s roof are not worth the risk. Walking on roofs can be dangerous and should be avoided whenever possible.
Your Vehicle Isn’t Built for It
Not all roofs are created equal. I treat them differently based on what they’re made of.
- Vehicles with panoramic sunroofs or large glass panels: The factory rack or crossbars might be rated for weight, but the structure underneath is fragile glass. A shifting kayak or a overtightened strap puts massive point pressure on that glass. I wouldn’t trust it.
- Cars with “soft” or fabric convertible tops: This should be obvious, but I’ve seen it. There is no safe mounting point. The rack will fail.
- Older vehicles with questionable roof integrity: If you see rust bubbles or dents around the gutters or rack points, the metal may be compromised. It might not hold the dynamic weight of a kayak in motion.
Your Kayak is Too Much to Handle
There’s a big difference between a 40-pound recreational boat and an 80-pound sea kayak packed for a week.
- Extremely heavy touring or fishing kayaks: If you can’t easily lift one end of the kayak above your head with control, you shouldn’t be trying to get it onto a roof. The risk of dropping it on your car, yourself, or a bystander is too high.
- Extra-long kayaks (over 14 feet): These become unwieldy in the wind. If you’re not confident you can manage the sail effect alone, you need a partner or a different method.
You’re Missing the Right Equipment
You can’t secure something to nothing. This is a basic principle in roofing and in racking.
- Lack of solid factory or aftermarket tie-down points: If your car has no secure points in the front or rear to run your bow and stern lines, you cannot safely secure the kayak. Bungee cords hooked to a plastic bumper won’t cut it at highway speeds.
- Using a makeshift or damaged rack system: A rusty clamp, a cracked crossbar, or a strap that’s frayed is a failure waiting to happen. Inspect your gear like I inspect my safety harness.
Your Body is Telling You No
This is not a test of pride. It’s a practical assessment.
- Physical inability or injury: If you have a bad back, shoulder, or limited mobility, the twisting and lifting is a great way to end your trip before it starts. Listen to your body.
- Working completely alone in an unstable situation: No spotter, high winds, an uneven dirt parking lot. Any one of these factors can turn a simple load into an accident.
Safer Alternatives to Consider
When my crew runs into a roof that’s too steep or damaged for us to work on safely, we don’t force it. We get a different piece of equipment or call in a specialist. You should do the same.
Visit a local kayak outfitter or outdoor store. Many will load and secure your kayak for a small fee. It’s worth every penny for the peace of mind and to see a pro do it once.
For heavy or multiple boats, a small trailer is often the best choice. It keeps the weight off your vehicle’s roof entirely and is much easier to load at waist level. It’s the ultimate solution for frequent trips with big gear.
Knowing when a job is wrong for you is a sign of experience, not weakness. Choose the safe path to the water.
Keeping Your Rack System Reliable
You get the rack installed and the kayaks loaded. It’s easy to think the job is done. From my time on roofs, I can tell you that’s when the real work starts. A rack is a mechanical system bolted to your car, and it needs care just like anything else. Understanding the right roof installation methods helps ensure a secure, long-lasting setup. After all, even small mistakes at installation can create big headaches later.
People often ask me, “What regular maintenance and checks should be performed on roof racks and straps?” My answer is simple: treat them like part of your vehicle. You check your tire pressure and oil. Your roof rack needs the same kind of routine attention—just like your roof should be inspected regularly. A quick five-minute check before a trip can save you from a costly disaster on the highway.
Inspect Straps Before Every Single Trip
Straps are the weakest link. Sunlight is their worst enemy. Before you even touch your kayak, run every strap through your hands.
- Look for severe fading or a chalky, brittle feel. This is UV damage, and it means the nylon fibers are breaking down.
- Check for any fraying, cuts, or worn spots, especially near the buckles and hooks.
- Test the buckles. They should engage and release smoothly. If they’re sticky or won’t lock securely, replace the entire strap.
A worn strap will often give way when you need it most, like during sudden braking or a crosswind. I keep a brand-new set of straps in my truck as spares. They’re cheap insurance.
Check Every Bolt and Fitting
Vibration from driving will loosen anything that isn’t permanently welded. Every few months, or before a big road trip, you need to get hands-on with your rack.
Use the correct tool, usually a hex key or a screwdriver, that came with your rack. Don’t just guess.
- Tighten the bolts or clamps where the towers attach to your vehicle’s roof or door frame.
- Check the fittings that secure the crossbars to the towers.
- Ensure any adjustment mechanisms on the crossbars themselves are locked down tight.
A loose tower can grind against your car’s paint, creating a rust spot that’s expensive to fix. A quick check takes two minutes and protects your roof’s finish.
Clean the Pads and Feet
This is the most overlooked step, but it’s pure roof care. The rubber pads and feet on your rack trap dirt, sand, and road grit. There are many roof care myths that mislead homeowners. Roof care myths debunked clarifies what actually works.
When you tighten the rack, that grit gets pressed against your paint. It acts like sandpaper, slowly scuffing the clear coat. A few times a year, pop the rack off completely.
- Wash the rubber pads with soapy water and a soft brush.
- Wipe down the area of your roof or door frame where the rack sits.
- Let everything dry completely before reinstalling the rack.
This simple cleaning habit prevents permanent cosmetic damage to your vehicle and ensures a solid, slip-free connection for your rack. On my own truck, I do this with every seasonal oil change so I never forget.
Quick Answers
How does weather affect my straps while I’m driving?
Rain can cause nylon straps to stretch as they absorb moisture, and sunlight degrades them over time. Pull over safely to re-tighten straps after the first 20 minutes of wet driving, and replace any straps that feel brittle or show heavy UV fading.
What’s the best way to protect hulls when stacking two kayaks?
You must create a soft, wide barrier between the boats to prevent grinding. Use thick foam blocks or commercial stackers; never let hulls touch directly. Secure each kayak independently with its own straps to the crossbars to stop shifting.
What noises should I listen for while driving that signal a problem?
A persistent loud humming or whistling means a strap is loose and flapping, creating dangerous drag. Any rhythmic thumping or shifting sound means the load is moving-find a safe place to stop immediately and re-secure everything from scratch.
Final Thoughts on Loading Kayaks Safely
Your roof’s job is to keep water out, not to hold heavy gear. A secure rack system and a healthy roof deck are the non-negotiable foundation for any safe trip.
Think of your roof care as an ongoing partnership. Regular inspections for wear, and proactive maintenance, protect your biggest investment from the ground up. That often means deciding between DIY roof checks and a professional inspection. Knowing where to draw the line helps you plan ahead.
Ray Huffington
Ray is an experienced roofer. He has worked as a general contractor in the roofing industry for over 15 years now. He has installed and repaired all kinds of roofs, from small houses to large mansion, and from basic shingles to cement and metal roofs and even solar roof panels. He has seen homeowners struggle with roofing questions and always has experience based proven advice to help those in need. If you need roof pros, Ray's your guide.