
How Do You Properly Prepare, Paint, and Repaint a Metal Roof for Long-Lasting Protection?
Is your metal roof showing its age with faded color or early rust? I’ve been on hundreds of roofs where a quick paint job peeled in a year because the crew skipped the vital first step. Getting a finish that lasts a decade or more isn’t about magic paint, it’s about a methodical process. I’ll show you the system I use to turn a weathered metal roof into a durable, protected surface that stands up to the elements.
Here is exactly what we’ll cover: the non-negotiable cleaning and prep work, how to pick the right primer and paint for your metal, and the application techniques that prevent drips and ensure adhesion.
Key Takeaways Before You Grab a Brush
Let’s talk for 60 seconds before you start. This is the briefing I give my crew on every repaint job.
Ninety percent of a paint job that lasts two decades happens before the first drop of paint comes out of the can. The painting is the easy part. The hard, critical work is all in the preparation.
This is high-elevation work. It requires a specific mindset for safety that you don’t need for painting a wall. I won’t let anyone on my crew touch a roof without going over the plan twice.
You can paint and repaint a metal roof. I’ve successfully repainted galvanized roofs that were 30 years old. The answer is always yes, if you use the right products and methods.
Done correctly, a thorough prep and repaint can add a solid 15 to 20 years of life and protection to your metal roof. I base that on tracking my own jobs over the years. It’s a renewal, not just a cover-up—especially when compared to a completely new residential metal roof installation.
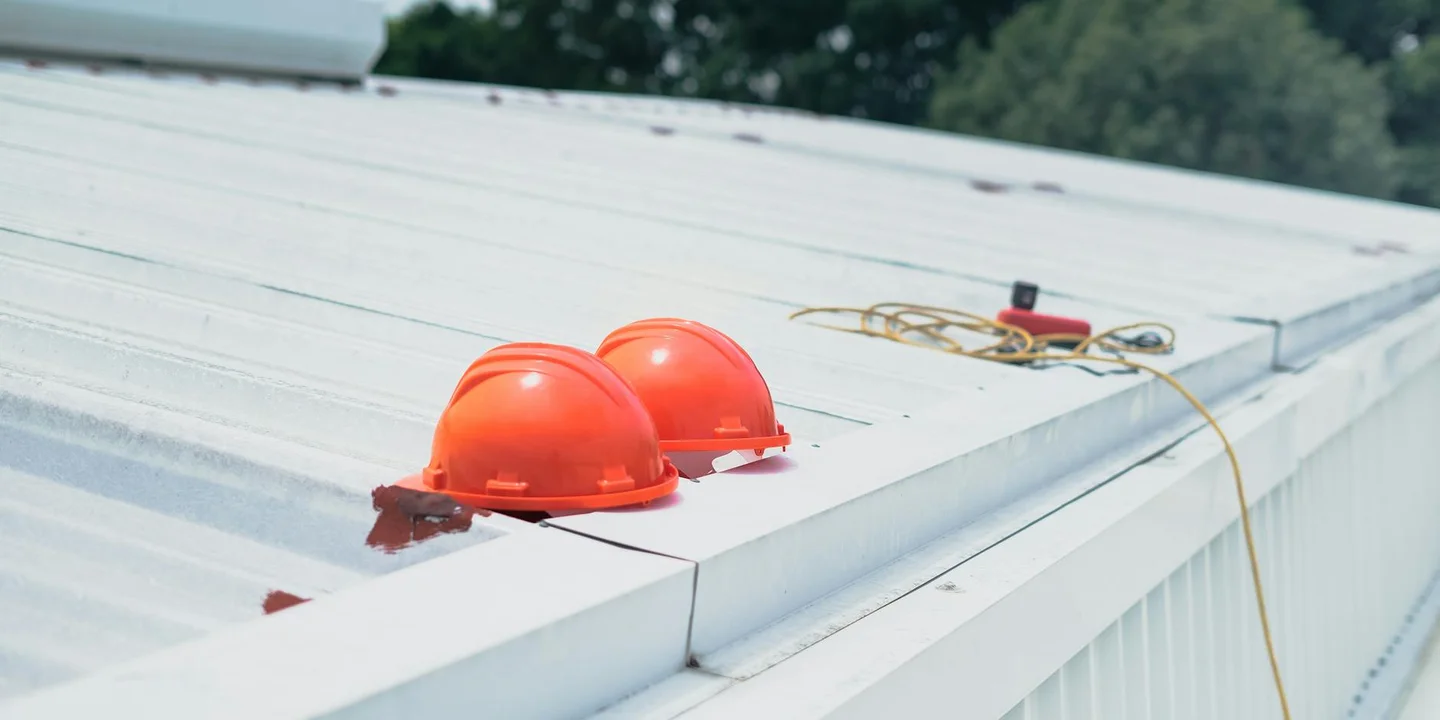
Safety First: Why This Job is Often a Pro-Only Affair
I take this personally. I’ve seen close calls. Here is the non-negotiable gear you must have, not just own, but use.
- An OSHA-approved fall arrest harness, connected to a rated roof anchor.
- Sturdy roof shoes with soft, rubber soles designed for metal.
- Safety glasses. Metal shavings and dust are no joke.
- Grippy work gloves. Sweaty palms and a metal panel are a bad mix.
The risks are specific and serious. A metal roof is slicker than ice when wet or dusty. The pitch changes everything. You are working near power lines. The sun can bake you and the metal, leading to heat exhaustion fast. Just getting your ladder secure and angled right is its own safety test.
Use this simple rule: if your roof pitch is steeper than a 6/12, call a professional. A 6/12 pitch means the roof rises 6 inches for every 12 inches horizontally. It’s the point where walking stops and climbing begins.
If you get hurt in a fall doing this yourself, your homeowner’s insurance may deny the claim. They call it “assumption of risk.” Professional roofing companies carry massive liability insurance for this exact reason.
Using a harness correctly means installing temporary roof anchors. This is a skill. I’ve had to fix roofs where a DIY anchor was screwed right through a seam, inviting leaks. You’re not just attaching a hook, you’re finding the structural member beneath the metal.
Can You Even Paint Your Metal Roof? The First Assessment
Let’s start with the simple answers.
Yes, you can paint a metal roof. You can paint a tin roof. You can paint galvanized metal roofing. I’ve done all three on jobs over the years. But “can you” is different from “should you right now.” The answer depends entirely on your roof’s condition.
Your roof must pass two basic checks before you even think about paint.
- It must be structurally sound. Walk around and look for any sagging, major dents, or loose panels. Paint is not a bandage for a failing roof. If the structure isn’t solid, painting is a waste of money and a safety risk.
- It must have minimal rust. I’m talking about light surface rust, what we call “flash rust.” If you have large, flaky patches where the metal is pitted and crumbling, paint won’t fix it. You need to repair or replace those panels first.
Painting over existing paint is a different job than painting bare, weathered metal. You need to know what you’re starting with.
If your roof already has a factory paint or coating that’s just faded, your job is about adhesion. You need to thoroughly clean and lightly scuff that old layer so the new paint has something to grip. Think of it like trying to glue two smooth pieces of plastic together. It won’t stick unless you rough up the surface first.
If you have bare galvanized steel or an old roof where all the paint has worn off, your job is about creating a new foundation. That metal needs a specially formulated primer first. This primer chemically bonds to the galvanized coating or bare metal, creating the perfect base for your topcoat. Skipping this step is the fastest way to see your new paint peel off in sheets.
I need to clear up a common hope I hear from homeowners. Bleach will not restore color to a metal roof. A diluted bleach solution is a great cleaner for killing mold, mildew, and algae. It makes the roof look brighter by removing the organic gunk. But it does nothing for paint that has faded from UV exposure. The color is gone. You need paint.
One last word of caution. You might wonder, “Can I mix the colors of our metal roof?” Maybe you want to touch up a spot or think you can blend a new batch. Don’t. Mixing paints from different cans, even with the same color name, is a gamble with bad chemistry. Formulas can vary slightly by batch. If the chemistries are incompatible, the mixed paint might not cure properly, leading to a sticky mess or premature failure. Always use paint from a single, large batch for the entire job.
Gathering Your Arsenal: Tools, Primer, and Paint
Think of this like a surgical procedure. You need the right instruments for each step. Using the wrong brush or skipping a chemical can waste a whole weekend of work. Here is the toolkit I’ve refined over dozens of metal roof jobs.
The Non-Negotiable Tool List
Get these items ready before you even set up a ladder.
- For Cleaning: A pressure washer (a gas model is best for consistent power), a stiff-bristle scrub brush on a long pole, and a garden hose.
- For Surface Prep: A paint scraper for peeling areas, a wire brush or wheel for rust spots, and a supply of rust converter liquid.
- For Painting: A high-quality paint sprayer (an airless model saves time), a 4-inch angled brush for cutting in edges, rollers with extendable poles, painters tape, and plastic sheeting.
- For Safety: A proper roof harness, secure anchors, non-slip shoes, gloves, and eye protection. Do not skip this.
Having every tool within reach on the roof prevents you from making risky trips up and down the ladder.
Choosing the Right Primer
Primer is not just paint. It’s the glue that bonds your finish coat to the metal. Using the wrong type is the fastest way to see your new paint peel in a year.
The rule is simple: match the primer to the surface you’re covering.
| Surface Condition | Primer Type to Use | Why It Works |
|---|---|---|
| Existing paint that’s firmly attached | Acrylic Bonding Primer | It grips onto old paint and creates a uniform surface for the new topcoat. It’s like applying a double-sided tape between layers. |
| Bare metal or areas with active rust | Rust-Inhibitive Primer (often oil-based or epoxy) | This primer contains chemicals that neutralize rust and seal the metal. It stops the corrosion you see and prevents new rust from starting underneath your paint. |
On most older roofs, you’ll use both: rust-inhibitive primer on scraped spots and bonding primer over the sound old paint for a unified base.
Picking Your Topcoat Paint
Your roof’s finish coat fights the sun, expands in heat, and contracts in cold. Standard house paint will crack and fail. You need a coating designed for the job.
- 100% Acrylic Latex Roof Coatings: This is my go-to for most residential jobs. It’s highly flexible, reflects UV rays well, and is easy to clean up with water. It breathes, which helps prevent moisture from getting trapped.
- Oil-Modified Alkyl Coatings: These are tougher and have superior moisture resistance. They’re a good choice for roofs in very wet climates or with persistent condensation issues. The trade-off is they are less flexible and require stronger solvents for cleanup.
- Silicone Hybrid Coatings: These offer incredible water resistance and durability. They are often used on commercial buildings. For a homeowner, they can be overkill and are significantly more expensive. They also attract dust until fully cured.
Look for paint labeled specifically for “metal roofs” or “roof coatings” and check the can for “UV resistant” and “high elasticity.”
How Much Paint and Primer Will You Need?
Running out of paint halfway across a roof panel is a nightmare. Here’s how to estimate.
First, calculate your roof’s square footage (length x width of each plane, then add them up). A standard 5-gallon pail of roof coating covers between 300 to 400 square feet per coat, but the can will state the exact coverage.
For a simple example: a single-story ranch home with a 1,500 sq ft roof needs about 4-5 gallons for one coat. You will apply one coat of primer and two finish coats.
Always buy 10-15% more than your calculation to account for wastage in the sprayer, overlap, and the extra paint needed for thick seams and edges.
The Crucial Prep Work: How to Clean and Repair Your Roof

The Cleaning Sequence: Start Fresh
Before you open a paint can, your roof must be spotless. I’ve repainted dozens of metal roofs, and every successful job started here. Cleaning removes the invisible barrier of dirt, mildew, and chalk that causes new paint to peel right off. A clean surface also helps prevent rust and extends the roof’s life. In the next steps, you’ll find rust-prevention tips that work with cleaning. Follow these steps in order.
- Pick a roof-safe cleaner. Use a biodegradable roof cleaner or a trisodium phosphate (TSP) substitute. Harsh chemicals can etch the metal and harm your landscaping.
- Apply and scrub gently. Work on a cool, overcast day. Apply the cleaner with a garden sprayer or soft brush. Scrub in sections with a long-handled, soft-bristle brush to loosen grime without scratching.
- Rinse with low pressure. Use a garden hose with a spray nozzle, not a pressure washer. High-pressure water can bend seams and force moisture underneath the panels, creating new leaks. Rinse thoroughly until the water runs completely clear.
Fixing the Flaws: Repair Work Comes First
A clean roof lets you see every problem. Painting over damage is the most common mistake I see homeowners make. A roof damage inspection guide can help you spot issues early and plan proper repairs. Address these repairs now, or your new paint job will fail in those exact spots within a year.
- Seal minor leaks. Inspect every fastener and seam. Tighten any loose screws. For small gaps, use a high-quality, urethane-based sealant designed for metal. My crew always keeps a tube in the truck.
- Sand rough spots. Use 80-grit sandpaper to smooth any raised edges, light rust, or old paint drips. This isn’t about removing material, just creating a uniform surface.
- Treat active rust. For any orange-brown rust patches, brush on a rust converter. This product chemically changes rust into a stable, black primer layer that you can paint over. Let it dry completely as the label instructs.
Dealing with Old Paint and Stubborn Rust
If your roof has peeling paint or thick, scaly rust, you must remove it. New paint needs a solid foundation. You have two main choices.
Mechanical removal is my usual go-to. Use a wire brush, sandpaper, or a non-abrasive scrubbing pad. For big areas, a dual-action sander saves time. Always wear a dust mask and safety glasses. The goal is a smooth, bare metal surface.
Chemical removal works for intricate areas. Apply a paint stripper or heavy-duty rust remover gel. These products break down the old coating so you can scrape or rinse it away. Chemical methods require gloves, eye protection, and excellent ventilation, so read the directions twice.
The Golden Rule: Dry, Clean, and Dull
After cleaning and repairing, your roof must pass the final inspection. The surface must be completely dry, free of all dust and oil, and dull to the touch before you apply primer. Any shine means the paint won’t stick. I tell my clients to wait at least two full sunny days after the final rinse. Run your hand over the metal. If it feels smooth and matte, you’re ready. If it’s slick or gritty, wash it again.
The Painting Process: From Primer to Final Coat
This is where your prep work pays off. A careful, methodical approach here is what separates a five-year job from a fifteen-year job. I’ve seen too many rushed paint jobs fail early.
Step-by-Step Application Guide
Follow this sequence. Do not skip steps or rush the drying times in between.
- Check the weather forecast thoroughly. This is non-negotiable.
- Stir your primer and topcoat paint thoroughly according to the can’s instructions.
- Start with the primer, focusing on edges, trim, and any bare metal spots first.
- Apply the primer to the entire roof field.
- Allow the primer to dry completely, as specified by the manufacturer.
- Apply the first thin coat of your finish paint.
- Allow the first coat to dry completely.
- Apply the second thin coat of finish paint.
- Allow the roof to cure fully before any foot traffic or weather exposure.
Ideal Weather Conditions for Painting
Paint is a chemical process, and weather controls it. The perfect day is between 50°F and 90°F with low humidity. You also need a clear forecast for at least 48 hours after you finish. Painting in direct, scorching sun can cause the paint to dry too fast and blister. Cold, damp conditions prevent proper curing and adhesion. If the weather isn’t right, reschedule the job. It’s that simple.
Applying the Primer
Think of primer as the glue that holds your topcoat to the metal. Use a high-quality brush to “cut in” all the edges, trim, fasteners, and panel laps. This gives you control in the tricky spots. For the large, open field of the roof, use a roller with a long nap or an airless sprayer. The goal is a smooth, even film that completely hides the metal underneath. Any spot you miss with primer is a future spot for rust and paint failure.
Drying Time Between Coats
This is the most common mistake DIYers make. The paint can feel dry to the touch long before it’s ready for another coat. You must follow the recoat times listed on your specific paint can. These times change based on temperature and humidity. In perfect conditions, it might be 4-6 hours. On a cooler, humid day, it could be 24 hours or more. Putting a second coat on too soon can lift the first coat or trap solvents, ruining the finish. When in doubt, wait longer.
Applying Paint for Even Coverage
Work in manageable sections, about 4 feet by 4 feet. This keeps you organized and prevents the paint from setting up before you can blend it. Whether you’re rolling or spraying, always maintain a “wet edge.” This means you slightly overlap your next pass into the still-wet paint of your previous pass. This technique eliminates visible lines and streaks. My crew always works side-by-side across a roof for this reason.
Apply two thin coats instead of one thick, gloopy coat. A thick coat is more likely to sag, run, and dry unevenly. It can also take much longer to cure properly. Two thin coats build a more flexible, uniform, and durable barrier. The first coat seals the primer, and the second coat builds the final color and protection.
How Do You Know When Your Metal Roof Needs a New Coat?
Your roof will tell you when it’s thirsty for a new paint job. You just need to know what to look for. Get up there safely with a pair of binoculars or during your annual gutter cleaning to check for these clear signs.
The Visual Warnings
Look for a chalky, white powder on the surface. This is oxidation, and it means the paint’s top protective layer is gone. Think of it like sunscreen that has completely worn off. The metal is now exposed.
Fading color is another major clue. If that rich red barn color now looks like a pale pink, the pigments have broken down. This often happens first on the south and west-facing slopes that get the most sun.
Small rust spots are your final warning. They start as tiny specks, often around fasteners or seams. If you see them, the clock is ticking. Paint doesn’t just make your roof look good. It is the barrier that stops steel from turning into rust.
Peeling or flaking paint is a serious sign. It means the paint has lost its grip. Water can get underneath, trap itself against the metal, and accelerate corrosion. I once worked on a farm roof where the owner waited too long after seeing flakes. We had to cut out and replace several panels.
Maintenance, Not a Miracle Cure
It’s vital to get this right. Painting is a maintenance task to prevent problems, not a repair for a failing roof. You can’t paint over major rust or structural issues and expect a fix.
If your roof has widespread, scaled rust or areas where the metal is thin and corroded, painting is just a cosmetic cover-up. You must address the metal damage first, which often means panel replacement. A new coat of paint preserves a sound roof. It does not resurrect a dead one.
How Long Should a Paint Job Last?
A quality paint job on a properly prepared metal roof should last 15 to 20 years. That’s the standard we aim for on professional jobs. But many factors can cut that life short, even with the metal roof’s lifespan warranty.
Coastal salt air, industrial pollution, and heavy tree shade (which keeps the roof damp) are tough on paint. The original preparation matters most. A paint job is only as good as the surface underneath it. Skipping the cleaning and priming steps is the number one reason new paint fails early.
Using the wrong type of paint is another common mistake. You must use a paint formulated specifically for metal roofing. It flexes with the metal’s expansion and contraction. The cheap exterior house paint I saw one homeowner use started peeling in sheets after one winter.
What’s the Real Process for Repainting an Old Metal Roof?
Yes, you can repaint a metal roof. I’ve done it on countless barns, shops, and homes over the years. The real question isn’t about possibility, it’s about preparation. With a previously painted roof, your entire success hinges on one thing: getting the new paint to stick to the old paint.
The primary challenge with a repaint is adhesion, and overcoming it requires the old coating to be structurally sound and surgically clean. You’re not bonding to bare metal, you’re bonding to a surface that’s been weathered for years. If you skip the steps to ensure a perfect bond, the new paint will peel, sometimes in large sheets, within a year or two.
Step-by-Step: From Inspection to Fresh Coat
This isn’t a one-afternoon project. Rushing it guarantees a callback. Follow this process, and the roof will last for another decade or more.
- Thorough Inspection for Failure. Walk the entire roof. I’m looking for three things:
- Active rust (bubbling, flaking).
- Extensive chalkiness (a powdery residue that coats your hand).
- Areas where the old paint is peeling or has completely failed.
If more than 20-25% of the roof is actively rusting or peeling, a full strip-down to bare metal might be necessary. That’s a different, bigger job. Also, if the roof is from before 1978, test for lead paint and follow EPA guidelines for containment.
- Aggressive Cleaning to Remove Chalk and Grime. This is where most DIY jobs fail. You cannot just hose it off.
- Use a stiff-bristle brush (not wire, which can scratch) and a dedicated metal roof cleaner or a trisodium phosphate (TSP) solution.
- Scrub the entire surface to break the glaze of chalk and embedded dirt. Think of it like sanding, but with chemicals and elbow grease.
- Rinse thoroughly with clean water. Any cleaner left behind will ruin adhesion.
The surface should be dull, not glossy, and your hand should come away clean after wiping it.
- Spot-Prime Any Bare Metal. After cleaning, you’ll see every tiny scratch, chip, and rust spot. Each one is a failure point.
- Use a wire brush or sander to remove all loose rust down to solid metal.
- Immediately apply a rust-inhibitive primer designed for metal. This seals the spot and prevents the rust from “bleeding” through your new topcoat.
- Use a Compatible Primer (The Secret Sauce). You must prime the entire roof. This primer must be chemically compatible with both the old paint and the new paint you plan to use. This is non-negotiable. An acrylic primer may not stick to an old oil-based coat. Tell your paint supplier exactly what’s on the roof now. This primer is the “glue” for your entire system.
- Apply the Topcoat. Use a high-quality, 100% acrylic latex paint formulated for metal roofs. Apply it according to the manufacturer’s directions for temperature and humidity. Two thin coats are always better than one thick, gloopy coat that can sag or crack.
What About a Color Change?
Changing your metal roof’s color is absolutely possible, but it requires careful planning. The most critical rule is that you cannot successfully apply a light color over a dark one in a single coat. The old dark pigment will show through, giving you a muddy, off-tone result. When choosing a metal roof color, consider how it will harmonize with your home’s style and surroundings. In the next steps, we’ll show you how to choose a metal roof color to get the look you want.
On a crew, when we had to go from a dark brown to a light tan, we used a two-step process. First, we primed with a high-hide white or gray primer specifically made for this blocking purpose. Then, we applied the new light-colored topcoat. It adds a step and material cost, but it’s the only way to get a true, clean color. Going from a light color to a dark one is far more straightforward.
A Homeowner’s Maintenance Routine to Make the Paint Job Last
Think of your painted metal roof like a classic car. Regular washing and a watchful eye keep it shining for decades. A simple, consistent maintenance routine is the single best way to protect your investment and delay your next major repaint.
Your Simple Seasonal Log
You don’t need a complicated schedule. Tie these quick checks to other seasonal home tasks so you remember them.
Spring and Fall: Gutter Duty
Twice a year, clear your gutters and downspouts completely. This is non-negotiable. Clogged gutters cause water to back up and overflow onto your roof’s edge. That constant dampness is a direct attack on the paint and sealants. Keeping water flowing away prevents the slow creep of moisture-related failure at your roof’s most vulnerable perimeter.
Bi-Annual: The Ground-Level Inspection
When you’re doing your gutter work, take five extra minutes. Walk around your house with a pair of binoculars. Look for piles of leaves or pine needles. Scan for dark stain streaks, which are early signs of mildew or dirt buildup. Look for any shiny spots that might signal a scratch or a missing chip of paint. Catching a small problem from the ground is always cheaper than fixing a big one discovered from a ladder.
As Needed: Branch Management
Tree limbs hanging over the roof do two kinds of damage. They drop leaves and sap that stain the paint, and they trap shade and moisture against the surface. I’ve seen roofs where moss started under a constant branch shadow. Tree cover over a roof increases debris and moisture retention, which can accelerate staining and rot. Understanding these tree cover roof effects helps homeowners anticipate problems before they become costly. Trimming branches back by at least 6-10 feet allows sunlight and air to keep the roof dry and clean.
After Major Storms: The Post-Event Check
High winds and hail can cause issues that compromise the paint film. From a safe vantage point, look for any fasteners (screws or nails) that may have worked loose-their heads will look different. Check for small dents or dimples from hail. Even a tiny dent can fracture the paint, creating a starting point for rust you won’t see until it’s a bigger problem. A quick visual scan helps you address minor damage before it escalates.
This isn’t hard work. It’s about being observant. Sticking to this basic routine can easily add 5 to 10 years of life to your roof’s paint system, saving you thousands on a premature replacement. It’s the homeowner’s version of changing your car’s oil-minor, regular care prevents a major, costly failure.
Quick Answers
How do I know if my old roof is a candidate for repainting, or needs repair first?
Inspect for widespread, flaking rust or structural issues like dents and loose panels. If more than a quarter of the surface is actively failing, repair the metal first-paint is protection, not a structural fix.
What’s the one thing I absolutely cannot skip when repainting an already-painted roof?
You must thoroughly clean and dull the old surface to break the glaze of chalk and grime. If the existing paint is still glossy or powdery to the touch, your new coat will not properly adhere and will peel.
After a successful paint job, what’s the key to making the finish last as long as possible?
Implement a simple, observational maintenance routine. Clear debris from gutters and the roof surface seasonally, and trim back overhanging tree branches to keep the roof dry and allow for proper air circulation.
Securing Your Metal Roof’s Future
From my years on crews, the one lesson that sticks is this: your paint job is only as good as the surface underneath it. Invest your effort in thorough cleaning and priming, and you’ll be rewarded with a shield that lasts for years without fuss.
Your roof is a long-term guardian for your home, so treating it with care is a responsibility I take seriously. Make safety your top priority during any upkeep, and keep building your knowledge with the practical Roof Care and All Types of Roof guides right here. In the next steps, we’ll explore roof repair safety practices to help you work confidently and protect your home.
Ray Huffington
Ray is an experienced roofer. He has worked as a general contractor in the roofing industry for over 15 years now. He has installed and repaired all kinds of roofs, from small houses to large mansion, and from basic shingles to cement and metal roofs and even solar roof panels. He has seen homeowners struggle with roofing questions and always has experience based proven advice to help those in need. If you need roof pros, Ray's your guide.