
How Do You Design and Build a Strong, Modern A-Frame Roof?
Ever admired the simple, sturdy shape of an A-frame roof and wondered how to make one work for your home? I’ve worked on dozens of these projects, and while the design seems straightforward, getting it right requires specific know-how. You need to balance classic style with modern building science for a roof that’s safe, efficient, and long-lasting.
Here’s what I’ll break down for you based on hands-on experience. We’ll start with the non-negotiable design considerations like snow load and proper pitch. Next, I’ll compare traditional and modern material options for durability and energy efficiency. Finally, I’ll explain the current construction methods that make building an A-frame more precise and reliable than ever.
Key Takeaways: What Makes an A-Frame Roof Different
The core thing to grasp is simple. On an A-frame house, the roof is the wall. This isn’t just about looks. It changes how you build, heat, and fix everything.
Picture a standard house. The walls stand up straight, and the roof caps them. For an A-frame, those steep, sloping sides are doing both jobs. I’ve repaired many where this basic fact was ignored in the design.
This design has clear benefits. The steep angle sheds snow beautifully. You also get that timeless, iconic cabin look.
It has real drawbacks too. You lose usable space where the walls slope in. Fixing a leak or replacing a shingle is more complex and dangerous. The steep pitch can also lead to ice dams if the roof isn’t sealed and insulated perfectly.
Compare it to a common gable roof. A gable has two sloping sides, but full-height vertical walls underneath. This gives you consistent living space. An A-frame’s space shrinks as you move toward the peak.
Here’s how I explain it to homeowners. If a regular roof is a hat you put on your house, an A-frame roof is a full-body raincoat. It envelops the structure, which defines the entire living experience inside.
Thinking Like a Roofer: Key Design Considerations for Your A-Frame
People often ask me, “What are the key design considerations for an A-frame roof?” My answer always starts with planning like a roofer before the first board is cut. That planning should include roof structure and framing best practices to ensure a solid, safe frame. Only then do design choices translate into a buildable roof.
Start with the pitch, or slope. A 60-degree pitch sheds snow faster than a 45-degree one. But a steeper pitch eats up interior space and needs more material. Your local building code will dictate the minimum pitch for your snow load area. Get this number first.
The structural bones cannot be an afterthought. The ridge beam and rafters carry the entire load. For spans over 20 feet, modern engineered lumber like LVL or PSL is a smart choice. I specify it now to prevent sagging and ensure longevity.
Water management is critical. On a steep slope, rainwater hits the gutters with force. You need oversized gutters and more downspouts to handle the volume. Plan for ice dam prevention from the start with proper insulation at the eaves and adequate ventilation. When upgrading the roof, consider gutter replacement as part of a comprehensive water-management plan. This helps ensure the new installation works in harmony with the roof to move water away efficiently.
Now, the building envelope. How do you insulate a wall that’s also a roof? You have two main paths. A vented assembly has a rafter bay air channel to vent moisture. A “hot roof” or unvented assembly uses spray foam insulation directly on the sheathing. I lean toward vented designs for better long-term moisture control in most climates.
Never forget access. How will you or a future roofer safely get on that slope to clear a chimney or repair a panel? I advocate for installing permanent roof anchors during construction for fall protection. On one of my crew’s projects, we designed a slight reduction in pitch near the ridge to create a walkable area. It made all future maintenance safer and cheaper.
Choosing Your A-Frame Roof Skin: The RoofMason Material Verdict
Selecting the right a frame house roof materials is a balance of budget, climate, and durability. Here’s my honest comparison from the field.
| Material | Weight | Fire Rating | Hail/Wind Resistance | Lifespan | Best Bang for Buck |
|---|---|---|---|---|---|
| Asphalt Shingles | Heavy (250-400 lbs per square) | Class A (Good) | Moderate to Good (depends on grade) | 20-30 years | Budget-conscious builds in areas with mild weather. |
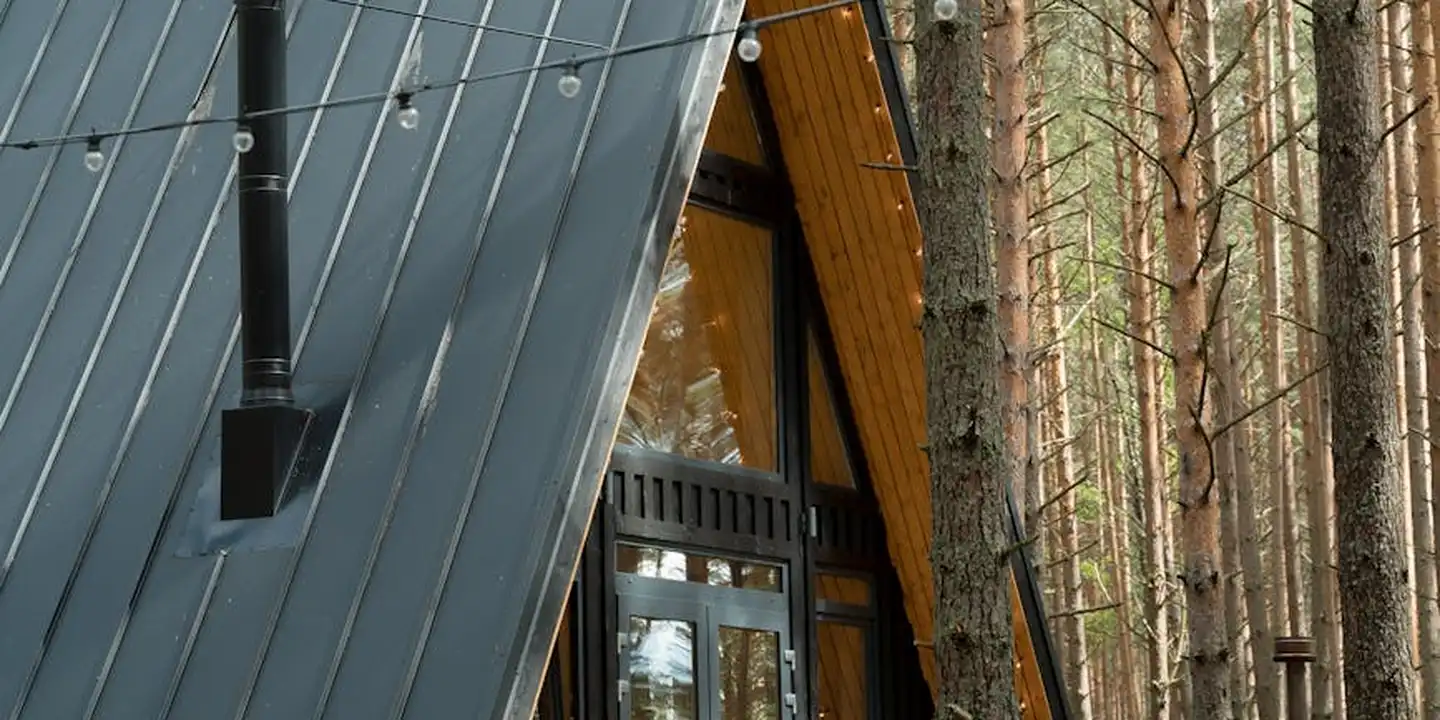
| Standing Seam Metal | Light (50-150 lbs per square) | Class A (Excellent) | Excellent | 40-70 years | Snow country, high-wind zones, and long-term value. The top choice for an a frame house metal roof. |
| Synthetic Slate/Rubber | Moderate (150-300 lbs per square) | Class A (Excellent) | Very Good | 30-50 years | Wanting a premium aesthetic without the extreme weight of real stone. |
Asphalt shingles are the familiar choice. On a steep A-frame, use only architectural shingles rated for the pitch, and ensure they are nailed correctly. I’ve re-secured too many that started to creep on slopes above 45 degrees.
For an a frame cabin metal roof, standing seam is in a class of its own. The light weight lessens structural stress, and the slick surface sheds snow and ice effectively. When planning installation, features like concealed fasteners and interlocking seams influence durability and ease of setup. Understanding these installation features helps ensure a long-lasting roof.
Synthetic slate gives you a high-end look with better impact resistance than real slate. It’s a solid middle-ground option for many.
There are specialty routes. An a frame green roof is possible but requires massive structural support and expert waterproofing. For any flat sections on an a frame house with flat roof additions, a fully adhered membrane system is the only way to go.
My verdict after decades? For durability and low maintenance, especially in tough climates, standing seam metal is the material I recommend most often for A-frames. It costs more upfront but saves money and worry over the life of the cabin.
Material Deep Dive: The Case for Metal on an A-Frame Cabin
Let’s focus on why metal, specifically standing seam, is a premier choice for an a frame cabin roof.
The seams are the key. The panels lock together with raised seams that water cannot penetrate. This is vital on a steep slope where water races downward. I trust it in mountain conditions where ice and wind test a roof daily.
Installation on such a steep surface has nuances. We order extra-long panels to minimize horizontal seams. Safety is non-negotiable. The crew must use harnesses tied to pre-installed anchors. The lock-strip seam must be perfectly crimped to handle the thermal expansion and contraction on that big, uninterrupted plane.
A major bonus is solar reflectivity. A light-colored metal roof reflects heat away, reducing cooling costs in summer. This works hand-in-hand with your a frame cabin roof insulation strategy. A well-insulated, reflective roof keeps the interior temperature stable and protects against ice dams.
Building It Smarter: Modern Construction Methods and Materials
Many homeowners ask me, “What are the modern construction methods for an A-frame roof?” The answer starts with prefabrication. Modern A-frame cabin kits have changed the game. Instead of cutting every rafter on-site, companies now use computer-controlled saws to precision-cut timber. This means less waste and a frame that fits together like a puzzle. I’ve worked with crews where this shaved weeks off the build time. The real star, though, is using Structural Insulated Panels, or SIPs.
For an A-frame roof, SIPs act as the structure, insulation, and sheathing all in one thick panel. You get a high R-value for insulation right from the start, which is a huge win for energy efficiency. The panels create an incredibly airtight seal when installed correctly. But I need to give you a hard-earned caution. Those panel joints are everything. On a steep A-frame, if the sealing tape or mastic fails at a joint, you’re inviting moisture right into your walls. I always tell my crews to treat every seam like it’s the most important nail in the roof.
Keeping water out doesn’t stop at the sheathing. We now use advanced water barriers that are miles ahead of old tar paper. Self-adhered membranes stick right to the roof deck, creating a second skin that seals around nails. For the edges, integrated drip systems are designed to handle heavy rain and ice dam pressure. These aren’t just upgrades; they’re your first line of defense in a storm.
Tech tools make these complex roofs more manageable. Builders use drones to survey the site and get exact measurements without climbing. Software for Building Information Modeling, or BIM, lets us visualize how every timber, panel, and flashing will intersect long before we order materials. It catches problems on a screen instead of on your roof, saving time and money.
The Attic Connection: Ventilation, Insulation, and Energy Smarts
This part is critical for an A-frame. Your living space is directly under the roof. There is no dusty attic to act as a buffer. I call this the “Attic Connection.” Your roof assembly is your ceiling, your walls, and your thermal blanket all at once. Get it wrong, and you’ll feel every degree of temperature change.
You have two main paths: a vented roof assembly or an unvented “hot” roof. A vented system aims to let air flow behind the insulation, from the eave up to the ridge vent. On a steep A-frame pitch, creating that continuous air channel is a careful dance. You need baffles installed at the eaves to keep the insulation from blocking the airflow, and you must ensure the pathway is clear all the way to the top. I’ve fixed jobs where this channel was pinched off, leading to trapped moisture and rotten sheathing.
Insulation here is about getting a high R-value in a thin profile. You don’t have space to waste. Spray foam is popular because it seals air leaks as it insulates. Rigid foam boards offer great R-value per inch and can be layered. Dense-pack cellulose blown into deep cavities is another solid choice for an A-frame cabin roof. Each has pros and cons on cost and installation, but the goal is the same: a complete thermal envelope.
Your energy bills and daily comfort are directly tied to this insulation and air sealing work. A poorly executed A-frame can be an energy nightmare, with heat racing out in winter and pouring in during summer. I’ve been in homes where the owners spent a fortune on heating simply because the ridge wasn’t sealed properly. Doing it right from the start is the only smart move.
Keeping It Solid: A-Frame Roof Care and Maintenance Guide
Building it right is only half the job. Keeping it solid for decades is where real roof care begins. An A-frame roof is a beautiful, simple structure, but its steep pitch demands a specific maintenance mindset.
Rule #1: Respect the Pitch (Safety First)
You cannot safely walk on a 60-degree roof. I’ve been on thousands of roofs, and I still treat a steep A-frame with extreme caution. The risk of a fatal fall is too high, so it’s essential to follow proper roof walking safety techniques.
For safe inspection, you have three good options: a high-quality pair of binoculars, a drone, or hiring a professional with proper steep-slope equipment like a ladder hook or scaffolding. A pro has the harnesses and walk boards needed to move on that slope without damaging the roof or themselves.
Your Bi-Annual Check-Up
Do this check in spring and fall. Your focus areas are different from a standard roof.
- The Ridge Cap: This is the roof’s spine and a high-stress point. Look for cracked sealant on metal roofs or loose, curling, or missing cap shingles. Wind loves to attack this peak first.
- Valleys (If Present): Not all A-frames have valleys, but if yours does, it’s a critical channel for water. Ensure no debris is piled up and that the metal valley liner or shingles are intact.
- The Eaves and Rake Edges: Check the very bottom edges for signs of ice dam damage from the previous winter-stained or warped wood, damaged shingles, or compromised metal drip edge.
- Attached Structures: If you have an A-frame deck roof or a horizontal roof carport attached, inspect the connection point to the main house. This seam is a classic leak starter.
Gutter Discipline is Non-Negotiable
On a standard roof, a clogged gutter is a problem. On an A-frame, it’s a disaster waiting to happen. The entire wall is directly below the roof edge.
Clogged gutters cause water to overflow and cascade directly down your siding, leading to massive water backup, rotten walls, and foundation issues. Clean them meticulously at least twice a year. I strongly recommend installing quality gutter guards; they drastically reduce how often you need to clean out leaves and pine needles.
Spotting and Fixing Common Leaks
Leaks on a steep roof often show up lower down than the actual breach. Water runs down the sheathing before it drips.
- On a Metal Roof: Look for loose, missing, or damaged screws with worn-out rubber washers. Check for open seams or laps in the panels. A small tube of color-matched sealant can often fix a minor screw hole issue.
- On a Shingle Roof: Look for shingles that are cracked, curled, or completely missing. On such a steep slope, a missing shingle is an open door for driven rain.
The most common leak location on any A-frame is where the roof meets a side wall or an intersecting structure, like on an A-frame house with metal siding. The flashing in that joint expands and contracts differently than the roof or wall. Over time, the sealant fails. Re-caulking this joint with a high-grade, flexible sealant is a common repair.
Planning for the Long Haul
No roof lasts forever. For traditional asphalt shingles on an A-frame, expect a 15 to 25-year lifespan. The steep pitch actually helps shingles last longer by shedding water and sun exposure quickly. Roof shingles lifespan can vary depending on material and climate.
You’ll know it’s replacement time when you see widespread granule loss in gutters, multiple cracked or cupped shingles, or frequent leaks that aren’t isolated to one spot.
Modern metal roofs change the game. A standing seam metal roof can last 40+ years with minimal upkeep. Your maintenance cycle shifts from replacing materials to simply ensuring fasteners and sealants remain tight. The initial investment is higher, but the long-term care is significantly less demanding. A metal roof lifespan warranty can help safeguard that long-term performance. Understanding warranty terms early helps you make better choices when comparing options.
Quick Answers
My old A-frame cabin is drafty. What’s the best way to add insulation?
For an existing structure, spray foam applied directly to the roof sheathing is often the most effective solution, as it insulates and air seals in one step. Otherwise, adding rigid foam boards over the existing interior is a solid option, but a pro must assess your structure to prevent moisture issues.
Are metal roofs on A-frames noisy during rain or hail?
Properly installed with solid sheathing and attic insulation, a standing seam metal roof is no louder than any other roof. The real concern is maintenance: check screw tightness and sealant at laps annually, as thermal movement on that big slope can loosen them.
Can I inspect my steep A-frame roof myself?
Never walk on it. Use high-quality binoculars or a drone for a visual inspection of the ridge, eaves, and surface. For any hands-on repair or a closer look, hire a professional roofer equipped with the proper steep-slope safety gear and anchors.
Your A-Frame Roof: Built Right, Cared For
The most critical step is marrying a weather-tight design with proven construction methods from day one. Do this, and your roof won’t just look striking-it will perform flawlessly season after season.
I always tell property owners that their roof’s longevity depends on a partnership: you provide vigilant, safe upkeep, and it provides reliable shelter. Make a habit of learning about materials and maintenance; it’s the best defense against the elements. Different roofing materials have different lifespans depending on climate and location. Being mindful of where you are helps you choose wisely and plan for future replacements.
Ray Huffington
Ray is an experienced roofer. He has worked as a general contractor in the roofing industry for over 15 years now. He has installed and repaired all kinds of roofs, from small houses to large mansion, and from basic shingles to cement and metal roofs and even solar roof panels. He has seen homeowners struggle with roofing questions and always has experience based proven advice to help those in need. If you need roof pros, Ray's your guide.