
Natural Roof Moss Removal: Safe Techniques That Protect Your Home
Is that green fuzz on your roof more than just an eyesore? In my years on the job, I’ve seen moss quietly damage more roofs than most storms.
Moss holds moisture against your shingles, which can lead to rot and leaks over time. You don’t need harsh chemicals to fix it; effective, natural solutions are within reach.
I’ll walk you through the best tools for gentle removal, my trusted homemade cleaner recipe, and simple steps to stop moss from returning.
Key Takeaways: Your Quick Action Plan
Before you grab a ladder, understand this simple plan. It comes from fixing dozens of mossy roofs over the years.
Your first job is to stay safe, not to kill every bit of moss. A stable ladder and proper shoes are more important than any cleaner.
Moss is not just dirt you can rinse off. Think of roof moss as a symptom, like a fever. It tells you your roof is staying damp and shaded. Killing it without fixing the cause is a temporary fix.
You cannot just spray and walk away. Even the best natural solution only turns the moss brown and loose. You will almost always need to follow up with careful, gentle manual removal to get the debris off your shingles.
Focus your effort on stopping it from coming back. Installing zinc or copper strips is a one-time task that prevents years of future cleaning. Trimming tree branches is free and hugely effective.
The single fastest way to ruin your asphalt shingles is with a pressure washer. The force blasts away the protective granules and forces water up under the shingles. On an asphalt roof, a pressure washer does more damage in an hour than moss does in five years.
Why Does Moss Grow on My Roof and Why Should I Care?
Moss doesn’t grow on every roof. It looks for a specific set of conditions, and your roof might be providing them. The main culprits are shade and constant moisture.
- Overhanging tree branches block sun and drop debris that holds moisture against the shingles.
- North-facing roof slopes get less direct, drying sunlight.
- Clogged gutters cause water to back up and sit along the roof edge, a perfect moss nursery.
- Valleys and low spots where water and debris collect are common starting points.
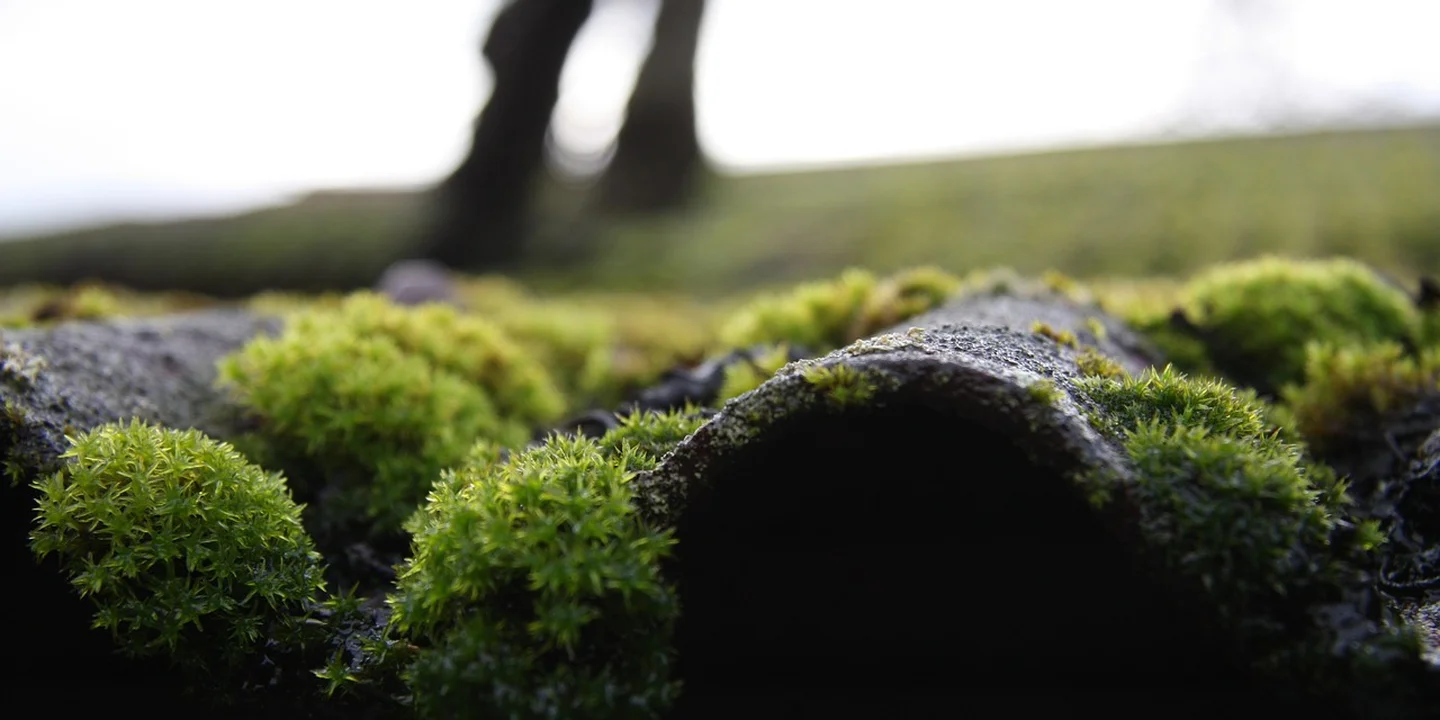
This isn’t just about looks. Moss actively shortens your roof’s life. It grows in shingle overlaps and under the edges, making it important to clean it properly.
Picture a wet sponge shoved under your wood floorboard. That’s what moss under a shingle is like. It holds moisture against the roof deck 24/7, leading to rot. As the moss mat thickens, it gently pries the shingle up, breaking the seal and making it vulnerable to wind.
The gritty moss also grinds against the shingle surface as it expands and contracts. I’ve seen roofs where heavy moss wore the granules right off, leaving the asphalt mat exposed to the sun’s UV rays. That causes brittleness and cracking years ahead of schedule.
Ignore it, and you risk two big problems. First, that trapped moisture will eventually find a nail or a crack and cause a leak in your ceiling. Second, most shingle manufacturers require you to maintain your roof to keep the warranty valid. A roof covered in moss often voids that protection, leaving you to pay for a premature replacement.
You care because moss is a slow-moving repair bill. Removing moss from your roof early is simple roof care. Letting it go is an expensive gamble.
Natural Moss Killers: Safe DIY Solutions from Your Pantry
Think of these solutions as a way to soften up the moss before you clean it off. They do not remove it instantly. Instead, they kill the moss so it comes off much easier with gentle scraping. I have found that common household items can work well if used correctly. They are safer for your roof and nearby plants than harsh chemicals. Next, we’ll look at practical roof moss removal methods that pair with these prep steps. These methods include safe cleaners and gentle mechanical options that fit this approach.
Let us compare a few options. White vinegar is acidic. Baking soda is alkaline. Oxygen bleach breaks down moss cells with bubbles. Each has its place depending on your roof’s condition and what is growing below.
Killing the moss first makes the physical removal job smoother and prevents you from tearing up your shingles.
White Vinegar Solution
Mix equal parts white vinegar and water in a pump sprayer. I use a 50/50 ratio on most jobs. Spray it directly onto the moss, soaking it well. The acidity in vinegar breaks down the moss structure. For best results, apply it on a sunny day. The sun helps dry and kill the moss. You might need to do this two or three times over a week for thick moss.
Vinegar works best with sunlight and multiple applications, especially on stubborn patches.
Baking Soda Paste or Sprinkle
Dampen the moss first with a light spray of water. Then, sprinkle baking soda generously over it. You can also make a paste with water and apply it. Baking soda works by drying out the moss. It also changes the pH on the surface, making it hard for moss to thrive. Be careful with runoff. If it washes into your garden, it can affect soil pH and harm plants.
Baking soda is a good option for spot treatments, but keep it away from your flower beds.
Oxygen-Based Bleach (Safer Alternative)
Do not use chlorine bleach. It can damage shingles, corrode metal flashings, and kill plants. Oxygen bleach, like powdered brands or hydrogen peroxide, is a gentler choice. Mix it with water as directed on the package, usually a scoop per gallon. Spray it on the moss and let it sit. It releases oxygen bubbles that break apart the moss. Hydrogen peroxide is similar. A 3% solution from the pharmacy can be used directly.
Oxygen bleach is my go-to for larger areas because it is effective and will not harm your landscaping.
Now, what is the safest natural method? For most roofs, oxygen bleach is the safest for both the roof and the environment. Vinegar and baking soda are good for smaller jobs.
Here is a quick comparison to help you choose.
| Solution | How It Works | Best For | Precautions |
|---|---|---|---|
| White Vinegar | Acidity breaks down moss | Small patches, sunny areas | May harm plants, needs sun |
| Baking Soda | Dries moss and alters pH | Spot treatments, damp moss | Avoid garden runoff |
| Oxygen Bleach | Oxygen bubbles lift moss | Large areas, all roof types | Follow mixing instructions |
Avoid straight chlorine bleach or rock salt. They can ruin your roof’s materials and create dead spots in your yard. I have seen roofs where salt runoff killed grass for seasons.
Step-by-Step: How to Remove Moss Without Damaging Your Shingles
Once the moss is dead and brown, it is time for cleanup. This part is all about being gentle. Work from the top of the roof down. This way, debris falls clear and does not clog your gutters. While you’re at it, check the chimney and gutters for any buildup or damage. This small check helps keep residential roofs and their flashing in good shape, and regular cleaning residential roofs, chimneys, and gutters can prevent future issues.
Gather your tools. You will need a soft bristle brush or broom, a plastic putty knife, and a garden hose with a spray nozzle. I always keep a plastic knife in my kit for this. Metal can scratch shingles.
Here is the process I follow with my crew.
- Apply your chosen natural solution. Let it work for a day or two until the moss turns brown and brittle.
- Start at the ridge. Gently scrape the moss with the plastic putty knife. Move in the same direction as the shingle grains. Do not pry or dig.
- Use the soft bristle brush to sweep away loose debris. For stuck bits, a light touch with the knife is enough.
- Rinse the area with a gentle stream from the hose. Low pressure is key. High pressure can force water under shingles.
Always scrape with the grain of the shingles to avoid lifting the edges and causing leaks.
For light moss, you might get away with using a stiff bristle broom from a ladder. But it is risky. You could lose balance or push moss into gaps. On a steep roof, always use a safety harness and non slip shoes. Never stand directly on mossy areas. They are slippery.
If you are doing it yourself, take your time. Focus on gentle movements. Rushing can lead to damaged shingles or accidents.
Stopping Moss for Good: Prevention and Long-Term Care
Cleaning off moss is just the first step. To keep your roof clear for years, you need to change the conditions moss loves. For residential roofs, moss prevention hinges on reducing moisture and shade while keeping gutters clear.
Think of it like this. You wouldn’t mop a floor and then leave a hose running on it. You fix the leak. These strategies fix the “leaks” on your roof that let moss thrive.
Installing Zinc or Copper Strips
This is my favorite long-term solution. I’ve installed them on dozens of homes, including my own.
A strip of zinc or copper is nailed under the top course of shingles, near the ridge. When it rains, a tiny amount of metal ions washes down over the roof.
This creates an environment moss and algae can’t grow in.
The metal acts like a slow-release, self-applying treatment every time it rains.
You install it once, and it works for 20 years or more. Copper is more effective but also more expensive than zinc. For most residential asphalt roofs, zinc strips do a fantastic job.
A common question is if these strips harm your plants or gutters. The amount of metal released is minuscule. I have never seen it damage landscaping. In fact, it’s far gentler than repeated chemical sprays.
Homeowner’s Annual Roof Maintenance Routine
Your roof needs a checkup, just like your car. A simple seasonal habit catches small problems before they become big, expensive ones.
Here is the routine I follow for my own house:
- Spring: Inspect for winter damage. Look for loose or missing shingles and check valleys for debris. This is also the perfect time to see if any moss survived the winter and needs a touch-up treatment.
- Summer: Trim back any tree branches that are touching or heavily shading the roof. This improves airflow and sunlight.
- Fall: Clean gutters thoroughly. Clogged gutters hold water against the roof edge, creating a perfect moss nursery.
- Winter: After major storms, check from the ground for displaced debris like branches.
Aim to do a visual inspection from the ground at least twice a year, in spring and fall.
Cleaning gutters is the most critical task you can do to prevent moisture buildup at your roof’s edge. For heavily wooded lots, you may need to clean them three or four times a year, even if you have gutter guards installed.
Improving Sunlight and Airflow
Moss loves shade, moisture, and still air. Your goal is to give it the opposite.
Trimming tree branches is the most effective way to do this. You don’t need to clear-cut your yard. Just focus on opening up the canopy over the roof to allow in more sun and let breezes dry the shingles faster after rain.
This isn’t a weekend project, but a long-term landscape strategy that pays off with a cleaner, drier roof.
I worked on a historic home completely shrouded by oaks. We cleaned the roof, installed zinc, and the owner had an arborist thin the canopy. Five years later, that roof is still spotless. The environment changed.
Smart Roof Care: When to DIY and When to Call for Help
Knowing your limits keeps you safe and protects your investment. Not every job is a DIY job.
The Real Danger of Pressure Washers
I need to be very clear on this. Never use a high-pressure washer on an asphalt or wood shingle roof.
The pressure is far too strong. It does two destructive things. First, it blasts off the protective ceramic granules on asphalt shingles. This exposes the asphalt mat to sun, causing rapid aging.
Second, it forces water up and under the shingles.
You are guaranteed to create leaks that didn’t exist before.
If you see a company offering to “power wash” your shingle roof, walk away. Proper roof cleaning uses low-pressure water, like a garden hose, only to rinse off cleaning solutions.
When to Call a Professional Roofer
Calling a pro isn’t a failure. It’s smart. Here are the signs it’s time to make the call:
- Your roof is steep. If you’re not 100% confident on a ladder or a steep pitch, don’t risk it.
- The moss infestation is severe and widespread, especially on a fragile roof like clay tile, slate, or old wood shakes.
- You see signs of deeper problems: sagging, rotten decking, or many curled/brittle shingles.
- You simply aren’t comfortable with the height or the work.
A professional service brings safe access equipment, the right cleaning agents for your roof type, and usually a warranty on their work. Their job is to clean without causing damage.
A good roofer will also point out any unrelated issues they spot, like cracked flashing or worn vent seals, during their inspection.
Best Time of Year for Moss Removal
Timing matters. The best windows are during dry, mild weather in late spring or early fall.
In late spring, the moss is actively growing and easier to kill, but the harsh summer sun hasn’t arrived yet. Early fall offers similar mild conditions, cleaning the roof before the wet, dark winter sets in.
Avoid the peak heat of summer, as cleaning solutions can dry too fast, and the dead of winter, for obvious safety reasons.
You want a few dry days forecast after your treatment to let the roof dry out completely.
When NOT to Try This Yourself
Let’s summarize the hard stops. Do not attempt DIY moss removal if:
- Your roof pitch is steep.
- The shingles are old, brittle, or already damaged.
- You lack proper safety gear, including a sturdy, secured ladder and stable shoes.
- The root cause, like total, permanent shade from a structure, cannot be fixed.
Your safety and the integrity of your roof are not worth the risk. In these cases, a professional assessment is the only responsible choice. For roof walking safety, always evaluate the surface and use proper fall protection before stepping onto any roof. When in doubt, consult guidelines and a qualified professional before attempting roof access.
Quick Answers
What should I do immediately after cleaning moss off my roof?
Inspect the area for any shingle edges you may have accidentally lifted during cleaning and gently press them back down. Then, ensure your gutters are completely clear of all the moss debris to prevent immediate moisture re-accumulation.
Will zinc strips work on any roof type?
They are highly effective on standard asphalt shingles, but I do not recommend them for metal, slate, or tile roofs without consulting the manufacturer. The runoff can stain or corrode certain materials, so always check compatibility first.
My roof moss is very stubborn. Can I mix natural solutions?
Do not mix different chemicals like vinegar and bleach, as this can create dangerous fumes. Instead, apply a stronger concentration of a single solution, like a 70/30 vinegar mix, and give it more time to work before gently scraping.
Taking Charge of Your Roof’s Health
The single best move you can make is to adopt a routine of gentle, natural cleaning instead of waiting for moss to become a problem. From my years on crews, I’ve seen that this consistent care is what truly preserves your shingles and saves your wallet.
Treat your roof as the critical shield it is by always putting safety first during any upkeep you do. I recommend making a habit of learning about roof care, from material guides to maintenance tips, so you can confidently protect your home for the long run.
Ray Huffington
Ray is an experienced roofer. He has worked as a general contractor in the roofing industry for over 15 years now. He has installed and repaired all kinds of roofs, from small houses to large mansion, and from basic shingles to cement and metal roofs and even solar roof panels. He has seen homeowners struggle with roofing questions and always has experience based proven advice to help those in need. If you need roof pros, Ray's your guide.