
How Do You Build a Pergola with a Slanted Roof? Your Step-by-Step Guide
Want a pergola that actually sheds rain and snow instead of just looking pretty? A slanted roof is the answer, but tackling the build yourself can feel overwhelming. I’ve installed these on countless homes, and I’m here to walk you through it from plan to finish. This guide will show you how to build a sturdy, code-compliant pergola that adds real value to your property.
- Planning your slanted roof design for proper drainage and looks
- Choosing durable, sustainable materials that will last
- The step-by-step build process, focusing on safety and solid construction
Can a Pergola Have a Solid Roof? Your Top Questions Answered
Yes, you can put a roof on a pergola. I’ve built both types for over twenty years. A traditional pergola has an open lattice roof. Think of it like a sieve for sunlight. A solid roof is a full cover, more like your house’s roof. It turns an airy structure into a sheltered patio.
The big difference is in function: lattice offers partial shade, while a solid roof provides full protection. This choice changes everything about how you use the space.
Adding a solid, slanted roof comes with clear upsides and downsides. Let’s break them down.
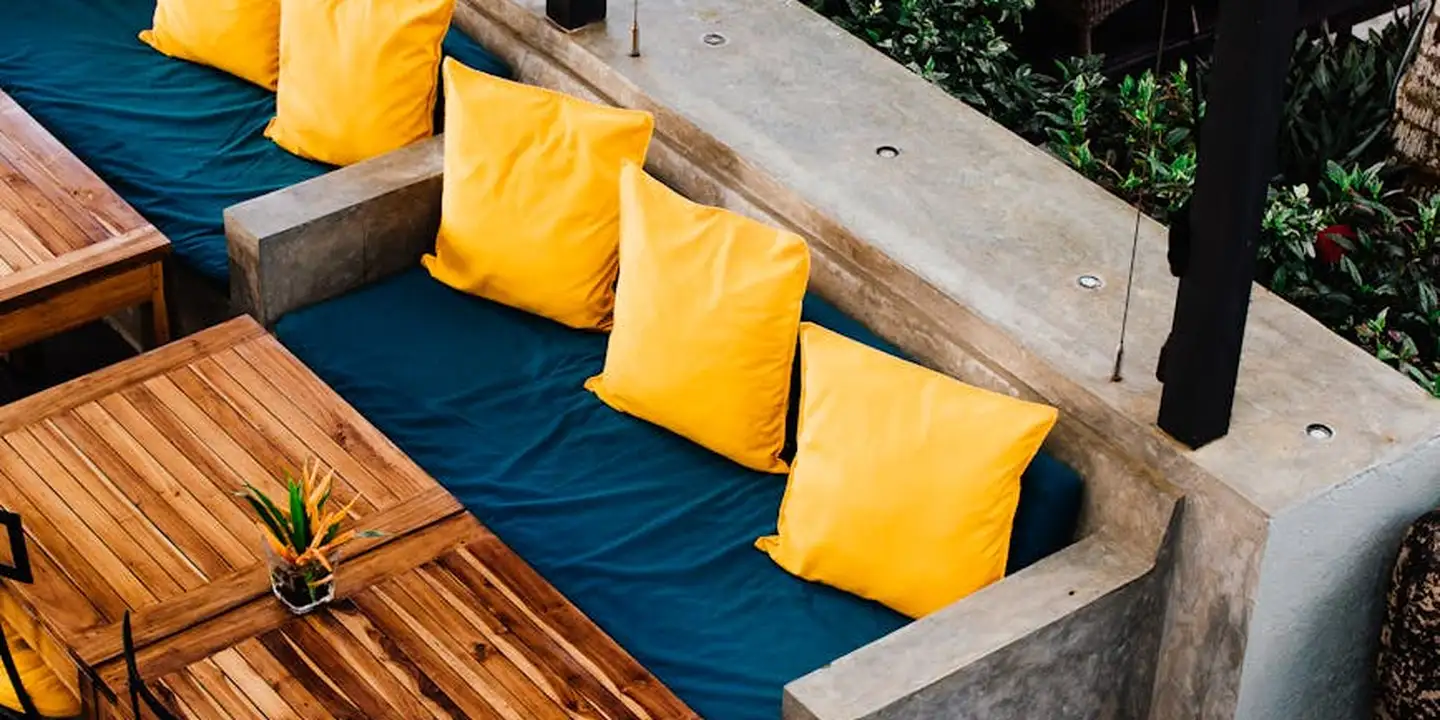
- You get more usable shade and real weather protection. A solid roof lets you enjoy the area in rain or harsh sun. It extends your living space.
- The added weight is a major factor. A solid roof needs stronger posts and beams. I always upsize the lumber compared to an open pergola.
- Proper drainage becomes your number one job. Water has to shed off cleanly. That’s why the slant, or pitch, is non-negotiable.
You can put a metal roof on a pergola, and I often recommend it. Metal panels are a durable, lightweight choice that handles a slope perfectly. On a job last spring, we used corrugated steel. It was easier to install than shingles and will outlast the wood frame.
People ask if a courtyard can have a roof. Absolutely. It’s the same principle. An attached structure leans on your house for support. A freestanding one in a courtyard needs its own solid footing. The planning just starts from a different point.
Planning Your Slanted Pergola: Design and Practicality
Start by asking yourself one question. What is this for? Is it for deep shade over a dining set? Is it to keep a grill area dry? Or is the look the main goal? On my crew, we settle this before any sketches are drawn.
Knowing your primary need guides every design choice you make next. A roof for aesthetics can be lighter. A roof for rain shelter must be tighter and steeper. Exploring the pros and cons of roofing materials and styles helps you balance aesthetics, cost, and performance. This sets the stage for comparing options in the next steps.
Next, focus on three critical planning factors.
First, roof pitch is all about water movement. You need enough slope to shed rain and snow. For a metal roof, I rarely go below a 3:12 pitch. That means for every 12 inches horizontally, the roof rises 3 inches. A lower pitch can let water sneak back under the panels. It’s especially important over patios.
Second, get the overall size right for your house. A huge pergola can dwarf a small home. A tiny one gets lost in a big yard. Use your home’s eaves and doors as a scale reference. It should look like it belongs.
Now, for the step you cannot skip. Checking local building codes and pulling permits is not optional for a permanent, roofed structure. This is about safety and legality. Codes dictate how deep your footings must be, how to handle wind uplift, and property line setbacks.
I had a client who learned this the hard way. They built a beautiful slanted pergola without a permit. The inspector made them tear it down because the posts weren’t buried deep enough for our frost line. It was an expensive lesson. Always make that call to your building department first.
Safety First: Is This a Pro-Only Project?

Let’s be completely clear. Building the slanted roof framework and installing panels at height is dangerous. This is not like building a garden planter box on the ground. For a safer, step-by-step approach, consult our slanted roof build maintain guide. It offers practical precautions and best practices to keep you on track.
I have seen too many projects where a homeowner got in over their head on a ladder. This phase of the work deserves your full respect.
Your Non-Negotiable Safety Gear
Do not start this project without the right equipment. A simple ladder is not enough.
- Fall Arrest System: You need a proper roof safety harness anchored to a secure point. A belt is not a harness.
- Stable Platform: Roof jacks with planks or a full scaffold system are required. Working off ladders alone is a recipe for a fall.
- Eye Protection: Drilling metal and cutting materials creates flying debris. Safety glasses are cheap insurance.
- Work Gloves: Protect your hands from sharp metal edges, splinters, and pinch points.
If you don’t own this gear or aren’t trained to use it safely, that’s your first sign this might be a pro job.
Specific Risks on a Sloped Roof
A slanted surface changes everything. Gravity is working against you.
Handling long, heavy rafters or big sheets of polycarbonate while balanced on a slope is a major challenge. One slip with a 16-foot beam can cause serious injury.
Always look up before you lift. Are there overhead power lines or tree branches near your work area? Contact with power lines can be fatal. Clear the space before you begin.
I tell my crew to treat every sloped surface like a ladder. You need three points of contact at all times, which is nearly impossible when you’re trying to fasten a panel.
Honest Self-Assessment is Key
Take a hard look at your skills. Have you ever framed a structure or worked safely at height before?
Building the pergola posts on level ground is one thing. Installing the slanted roof is another. If you have any doubt about your ability to work safely on that slope, stop.
My strong advice is to build the pergola structure yourself and hire a licensed professional to install the roof frame and panels. This splits the cost and ensures the most dangerous work is done right. Your safety is worth the investment.
Choosing Materials: From Beams to Roof Panels
Building a pergola with a roof means thinking in two distinct layers. The frame is the skeleton that holds everything up, and the roof panels are the skin that keeps you dry underneath. Choosing the right material for each job is the difference between a structure that lasts a season and one that lasts for decades.
The Structural Frame: Posts, Beams, and Rafters
This is the strong, silent part of your pergola. It has to carry the weight of the roof and resist wind without rotting or warping. Think of it like the bones in your body.
- Pressure-Treated Lumber: This is the workhorse. It’s affordable and infused with chemicals to fight rot and insects. I’ve used it for countless backyard projects where posts go into the ground. The main thing to know is it can be wet when you buy it, so it may twist or check as it dries. Let it acclimate on-site for a week or two before cutting and installing.
- Cedar or Redwood: These are the premium, natural choices. They contain natural oils that make them incredibly rot-resistant without chemical treatment. They’re more expensive, but they look beautiful and weather to a lovely silver-gray. If you want a pergola that ages gracefully with minimal upkeep, cedar is a top-tier pick.
- Composite or PVC Lumber: This is the modern, low-maintenance option. It’s made from wood fibers and plastic or is entirely synthetic. It won’t rot, splinter, or need staining. I recommend composites for the visible beams and rafters if you want a perfectly uniform look that never needs paint. Just know it can be heavier and more expensive than wood.
The Roof Covering: Panels That Shed Water
Here’s where my roofing experience really comes into play. A slanted pergola roof needs to move water away quickly. You’re not building a sealed attic, but you still need control over where the rain goes.
- Corrugated Metal Panels: This is my go-to for durability. They’re lightweight, install quickly, and shed water like a pro. The “corrugated” ridges give them strength. For a typical backyard pergola, 29-gauge steel or aluminum panels are more than strong enough. Always look for panels with a high “wind uplift” rating, which tells you how well the fasteners can resist the wind trying to peel the roof off.
- Polycarbonate Panels: These are the clear or tinted plastic panels. They let diffused light through, giving you shade without darkness. They’re perfect if you want a bright, airy space protected from rain. Like metal, they come in corrugated or multi-wall designs for strength. Make sure you get UV-coated panels so they don’t turn yellow and brittle in a few years.
- Solid Wood or Lattice: Using wood slats or a lattice for the “roof” creates classic dappled shade. This isn’t a waterproof roof, it’s a sunlight filter. If you go this route, space the slats to control how much sun gets through. Use cedar or pressure-treated wood, and understand that you’ll get wet if it rains.
Your final choice often comes down to a simple question. Do you want full shelter from rain, or just filtered shade from the sun? For full shelter, metal or polycarbonate panels are your answer. For pure shade with an open-air feel, a wood lattice is beautiful. Just build your frame with the correct slope to match your choice.
The Essential Tool Kit for Building a Roofed Pergola
Building a slanted roof pergola is a hands-on project. I have framed many of them. Whether you’re aiming for a pergola or a shed-style shelter with a slanted roof, the fundamentals stay the same. If you’re considering a slanted shed roof specifically, the next steps will walk you through planning and framing. Having the right tools on hand turns a frustrating job into a smooth, professional-looking installation. Let’s break down what you actually need, category by category.
Measuring and Layout Tools
Getting your lines straight and your angles correct is the first real test. If your measurements are off by even half an inch at the base, that error multiplies at the roofline. I learned this the hard way on an early job where we had to reposition two posts after the concrete had already set.
- 25-foot Tape Measure: You will use this constantly for checking post spacing and beam lengths.
- 4-foot Carpenter’s Level: This is your go-to for checking that each post is perfectly vertical, or “plumb.”
- Laser Level: Think of this as your project’s referee. It shoots a perfectly level line across all your posts to mark where your slanted roof beams will attach, ensuring a consistent slope.
Excavation Tools
Your pergola is only as strong as the posts holding it up. Digging proper, deep holes for your post bases is non-negotiable for long-term stability. Using a shovel alone is exhausting and often results in uneven, bell-shaped holes.
- Clamshell Post Hole Digger: This tool gives you the leverage to dig deep, straight-sided holes efficiently.
- Round-Point Shovel: You will need this for moving loose dirt and for mixing concrete if you go that route.
Cutting Tools
Clean cuts mean tight, secure joints. For the compound angles of a slanted roof, a miter saw is not just helpful, it’s mandatory for accuracy. Trying to cut rafters for a slope with just a circular saw is a recipe for gaps and weak connections.
- Circular Saw: Use this with a sharp framing blade to make the long, straight cuts on your main beams and joists.
- Power Miter Saw: A 10-inch or 12-inch model lets you make precise angled cuts for the rafters where they meet the sloped header beam.
Fastening Tools
This is where your structure gets its strength. An impact driver provides the consistent torque needed to sink thick lag bolts without stripping the heads. On my crew, we switched to impacts years ago and never looked back at struggling with a standard drill.
- Cordless Impact Driver: Paired with a set of hex-drive sockets for driving structural screws and lag bolts.
- Framing Hammer (20-oz or heavier): Essential for installing metal joist hangers and making small adjustments during assembly.
Safety Gear
This category is never optional. Treat your safety gear like your most important tool, because it protects all the others, namely you. I have seen more close calls with flying wood chips and stumbled ladders than I care to remember.
- Safety Glasses: Wear them anytime a saw is running or you are drilling overhead.
- Heavy-Duty Work Gloves: They protect your hands from splinters and improve your grip on lumber.
- Hearing Protection: Earmuffs or earplugs are a must for prolonged use of power saws.
- Sturdy, Closed-Toe Boots: Provide ankle support and traction on uneven ground.
Here is a final tip from my experience. For setting posts in concrete, renting a small portable concrete mixer for a day is worth every penny. It gives you a uniform mix that is stronger than hand-mixed concrete, and it saves an incredible amount of time and effort.
Step-by-Step: Building the Structure and Roof Frame
This is where your pergola takes shape. I’ve built dozens of these, and getting this frame right is what separates a wobbly eyesore from a structure that lasts for decades. Follow these steps in order.
Step 1: Site Layout and Post Installation
Think of this as laying the foundation. A mistake here throws everything else off. First, pick your spot. You want to consider where the sun travels so you get the shade you want in the afternoon. Check the view from your patio or kitchen window. Always call 811 or your local utility locating service before you dig even one hole; hitting a gas or power line is a life-changing mistake. Finally, know your property lines to avoid disputes with neighbors and stay within local setback codes.
Once the spot is chosen, mark your pergola’s corners with stakes and connect them with string. Use a builder’s square to ensure your layout is perfectly rectangular. Now, dig your post holes. They must go deeper than your area’s frost line. If frost gets under your posts, it will push them up over winter and ruin your level frame.
Set your posts in concrete. I mix the concrete in a wheelbarrow to a thick, oatmeal-like consistency. Have a helper hold each post perfectly vertical-what we call plumb-while you pour and tamp the concrete around it. Use a long level to check each post in two directions, and measure diagonally across the tops to ensure all posts are level with each other. On a crew last year, we spent an extra hour on this step, and it saved us a full day of headaches later. Let the concrete cure for at least 24 hours before you put any weight on the posts.
Step 2: Building the Beam and Rafter Framework
This step creates the slanted roof’s skeleton. You’ll install two sets of horizontal beams. The double beams on the high side and the low side carry the load of the rafters. Secure them to the posts with through-bolts or heavy-duty structural screws, not just nails. I prefer bolts for their sheer strength.
Now, the rafters. These are the angled pieces that give your roof its pitch. The slope, or pitch, is usually a gentle 1:12 or 2:12 ratio for a pergola. To cut your rafters, you’ll need to calculate the length and the angles at each end. If one side attaches to your house, you’ll need a birdsmouth cut. A birdsmouth is a small notch in the rafter that lets it sit flat and secure on the top of the beam, like a bird’s beak hooking onto a branch. It prevents rocking and distributes weight evenly. Cut all your rafters at once to ensure consistency; even a small error multiplies across the roof.
Secure each rafter to the beams. I space them 24 inches apart, center to center, for a standard look and strong support. Use galvanized hurricane ties at each connection point. This metal bracket might seem like overkill, but it’s code in many areas and it keeps the roof on during a storm.
Step 3: Installing the Roof Sheathing or Battens
You’re now ready for the “skin” of your roof. Your choice here depends on whether you want a solid cover or an open, airy lattice.
For a solid roof, like one for metal panels or polycarbonate sheets, you need a solid deck. This usually means attaching sheets of exterior-rated plywood directly to the rafters. Stagger the seams between plywood sheets so they don’t all line up, creating a much stronger deck, just like brickwork. For some materials, like standing seam metal, you might install strapping, which are thin wood battens that run perpendicular to the rafters. These battens give you a surface to screw the panels into and allow for expansion and contraction.
For a classic open lattice roof, you won’t use sheathing. Instead, you’ll install cross slats. These are smaller pieces of wood that run perpendicular to your rafters. Space them according to your design-6 to 12 inches apart is common. You can use pre-assembled lattice panels for speed, but I find building them from individual slats lets me control the spacing and quality better. Use stainless steel or coated screws for all this work, especially if you’re using a durable wood like cedar. They resist rust and won’t stain the wood over time.
Step-by-Step: Installing the Slanted Roof Panels

This is where the project transforms from a wood frame to a real roof. Your work here determines if your pergola is weatherproof or a leaky mess. I treat this phase like any roofing job, because it is one.
How to Install Metal or Polycarbonate Roof Panels
Think of laying panels like shingling a roof. You always work from the bottom up and from one side to the other. This controls water flow.
First, snap a chalk line along the lower edge of your rafters. This is your starting line. Every panel must align with this line, or your whole roof will look crooked and won’t shed water properly.
Place your first panel so it overhangs the front eave rafter by about an inch. This overhang is your drip edge, guiding water away from the structure’s face. Now, lay the second panel beside it, following the manufacturer’s specified side-lap. For most corrugated panels, this means one full corrugation over.
Here’s the critical part I learned on a windy jobsite: fasteners. Never use ordinary screws.
- Use only the manufacturer-recommended fasteners with integral rubber sealing washers.
- Drive them through the top of the corrugation, not the flat valley.
- Do not overtighten. You want to compress the washer to form a seal, not crush it.
Move up to the next row. Overlap the upper panel over the lower panel by the required amount, usually 6 to 12 inches. This top-to-bottom overlap is your insurance against driven rain. Secure it, and continue across and up.
At the gable ends, you’ll need to cut panels to fit. Use a fine-tooth blade and wear eye protection. Seal the exposed cut edges with a color-matched end cap or a bead of high-quality exterior sealant made for your panel material.
Finishing and Sealing the Roof
A roof isn’t done when the last panel is screwed down. The finishing details manage water, and water is your enemy.
Install a metal drip edge along the entire bottom eave, underneath the panel overhang. This small piece of bent metal directs water cleanly off the roof and prevents it from wicking back up into the wood rafters. It’s a simple step that prevents rot.
At the sides (the rake edges), you have options. You can install rake trim over the panel ends for a clean look, or use a closure strip to block bugs and debris from getting under the panels. For a pergola, I often use a simple J-channel trim. It’s easy and effective.
Now, grab your caulk gun. Walk the entire perimeter and seal any gap where trim meets the panel or where an end cap is installed. Pay special attention to the peak, or ridge, if your design has one. A bead of clear roofing sealant here stops wind-blown rain.
Finally, do the “wiggle test.” Go back and gently try to move each panel. If one flexes or rattles, you need another fastener. A tight, drum-like roof won’t leak and won’t tear off in a storm. That’s the goal.
Finishing Touches and Long-Term Protection
I have seen brand new pergolas start to turn gray and warp after just one harsh season. The work isn’t done when the last screw is in. Protecting your investment is the most critical step.
Sealing the Wood from the Elements
Think of a protective stain or sealant as a raincoat for your pergola. Without it, water soaks in, the wood swells, then shrinks, and eventually cracks and rots. Sunlight also breaks down the wood fibers, turning it gray and brittle.
You have two main choices. A clear or tinted water-repellent sealant soaks deep into the wood to block moisture while letting the natural grain show. A solid-body stain sits on the surface like a thin coat of paint, offering superior UV protection and hiding more imperfections.
Apply the protection after the wood has fully dried from any rain, but before you add any permanent furniture or shades. Follow these steps for a lasting finish:
- Sand any rough spots or saw marks with 120-grit sandpaper.
- Blow off all dust with a leaf blower or brush it away thoroughly.
- Apply the sealant or stain with a sprayer for speed, then immediately back-brush it into the wood with a paintbrush to ensure even coverage and no drips.
- Pay special attention to end grains, notches, and joints where water loves to wick in.
- Most products need a second coat after 2-4 hours. Do not skip it.
Plan to reapply this protection every 2-3 years. I mark my calendar. It is the single best way to avoid costly repairs later.
Adding Functional and Decorative Elements
Now for the fun part. These add-ons make the structure yours and can solve small problems. Post caps are my favorite upgrade. A simple copper or architectural cap does more than look good.
A quality post cap seals the exposed end grain of your vertical posts, which is the most vulnerable spot for water infiltration and rot. It is both decoration and a smart layer of defense.
Lighting transforms the space. For my own backyard project, I ran outdoor-rated conduit inside one post during framing to power a ceiling fan. For a simpler fix, solar-powered string lights or LED strip lights mounted to the underside of the rafters work beautifully. Just ensure any electrical work follows local code.
Integrating Furniture and Shades
Your slanted roof creates fantastic opportunities for shade solutions. A retractable canvas shade mounted to the high side beam can be angled to block the afternoon sun. For a permanent look, some homeowners install fixed polycarbonate panels.
If you plan to attach a swinging bench or a heavy daybed to the structure, think about anchor points during the framing stage. Bolting through a reinforced beam is always stronger than trying to add hardware to finished wood. Keep the focus on how additions connect to the sturdy frame you just built.
Pergola Roof and Structure Maintenance
Your new pergola’s slanted roof needs regular care, just like your main house roof. I tell homeowners to think of it as a yearly tune-up. A small amount of maintenance now saves you from big, expensive fixes later.
Plan to inspect all roof panels once a year, ideally in the spring after winter storms. Get up on a ladder and look closely at every fastener. I’ve had to re-tighten more screws than I can count after a season of wind. Check the seals between panels for cracks or peeling. Run your fingers along them; if the sealant feels brittle or crumbly, it’s failing. Clear off any piled-up leaves or twigs, as they trap moisture and add weight.
Cleaning the roof surface is key for appearance and longevity. Be extra gentle with polycarbonate panels, which I install often for light diffusion. Never use a pressure washer or scouring pads. Mix a mild dish soap with water in a bucket. Use a soft sponge or cloth to wipe the surface. Rinse it all off with a garden hose. This gentle wash prevents stubborn mildew stains and keeps the material from degrading, unlike some techniques used for roof shingles that can cause damage.
The wood frame is the backbone of your structure. Your most critical check points are all the joints and where the posts touch the ground. Look for dark, soft wood or a musty smell-that’s rot. Tiny holes or piles of sawdust mean insects are at work. Small hairline cracks are normal, but large splits can weaken the frame. If the wood looks dry or faded, it needs fresh protection. On my own projects, I re-apply a clear, water-repellent sealant every two years.
Water drainage is non-negotiable. Even a slanted roof can cause problems if water has nowhere to go. If your design has gutters, make sure they are free of debris. For simpler drip edges, ensure the ground beneath is sloped away. I once repaired a pergola where water pooled at a post base for months, rotting it from the inside out. Clear pathways for water protect your investment from the ground up, especially when combined with proper roof drip edge installation.
Common Questions
How do I maintain my new slanted pergola roof to prevent leaks?
Inspect all roof fasteners and perimeter seals once a year, tightening or reapplying sealant as needed. Always keep the surface clear of debris to ensure proper water drainage and prevent material degradation. On flat roofs, a proactive repair maintenance routine helps prevent leaks. Regularly scheduled inspections and timely sealant touch-ups keep flat roofs watertight.
What’s the most durable roof panel material for a four-season climate?
Corrugated metal panels are the toughest choice for handling snow, rain, and sun. Ensure you use the correct fasteners with sealing washers and follow the manufacturer’s overlap requirements for a watertight install.
Should I add gutters to my slanted pergola?
It’s a smart upgrade for long-term health. Gutters channel water away from the post bases and footings, which is the best defense against soil erosion and hidden wood rot. You can also consider installing gutter guards to reduce maintenance.
Building a Pergola Roof That Lasts
From my time on the crew, the best roof-care advice I can give is this: a slanted pergola built with the correct pitch and firmly anchored posts will handle weather for decades. Get those two things right during installation, and you’ve built a structure that protects itself.
Owning this pergola means committing to a quick visual check of the roof surface and connections at least twice a year. For me, staying curious about materials and methods in our Roof Care, All Types of Roof Guide, Care, Maintenance resources is how you build not just a project, but long-term peace of mind.
Ray Huffington
Ray is an experienced roofer. He has worked as a general contractor in the roofing industry for over 15 years now. He has installed and repaired all kinds of roofs, from small houses to large mansion, and from basic shingles to cement and metal roofs and even solar roof panels. He has seen homeowners struggle with roofing questions and always has experience based proven advice to help those in need. If you need roof pros, Ray's your guide.