
Gutter Guards: Do They Really Work and Are They Worth Installing?
How many times have you climbed a ladder, dreading the messy job of cleaning out your gutters? If you’re looking at gutter guards, you’re smart to ask if they live up to the promises. You want to know if they’ll truly stop clogs and if the upfront cost pays off over time. Based on my years on the roof, I’ll give you the straightforward answers you need.
- How effective different gutter guard types are in real-world conditions.
- The true value and long-term savings of a quality installation.
- The correct way to install them for lasting, trouble-free performance.
Key Takeaways: What You Need to Know First
Before you spend a dime, get your expectations straight.
- Gutter guards reduce how often you clean, but they don’t eliminate the chore forever.
- Their real value isn’t in your yard’s beauty, but in protecting your home’s structure from water.
- If you have few trees, they might be overkill. If you’re buried in leaves, they’re a game-changer.
- A bad installation can cause more leaks and damage than having no guards at all.
No gutter guard is a 100% perfect shield; think of them as a sophisticated filter, not a magic force field. Fine debris like pine needles, shingle grit, and “helicopter” seeds will always find a way in over time.
The true value of a gutter guard isn’t just about avoiding ladder work, it’s about stopping thousands of dollars in water damage to your roof deck, fascia, siding, and home’s foundation.
What Gutter Guards Actually Do (And What They Don’t)
Let’s get simple. Gutter guards are screens, covers, or inserts that sit on top of or inside your gutters.
Their main job is straightforward: let water in, keep big junk out. They’re designed to block leaves, twigs, and large debris while allowing rainwater to flow through into the gutter channel and away from your house.
Think of them like a colander for your roof’s water system. You pour pasta (rainwater) through it, and it catches the noodles (leaves) while letting the water pass through.
But they have limits. I’ve seen homeowners get frustrated because they expected a miracle.
Gutter guards do not stop all fine debris. Pine needles, ash seeds, and the sandy grit from your asphalt shingles can slip through many designs. These materials can still build up inside the gutter.
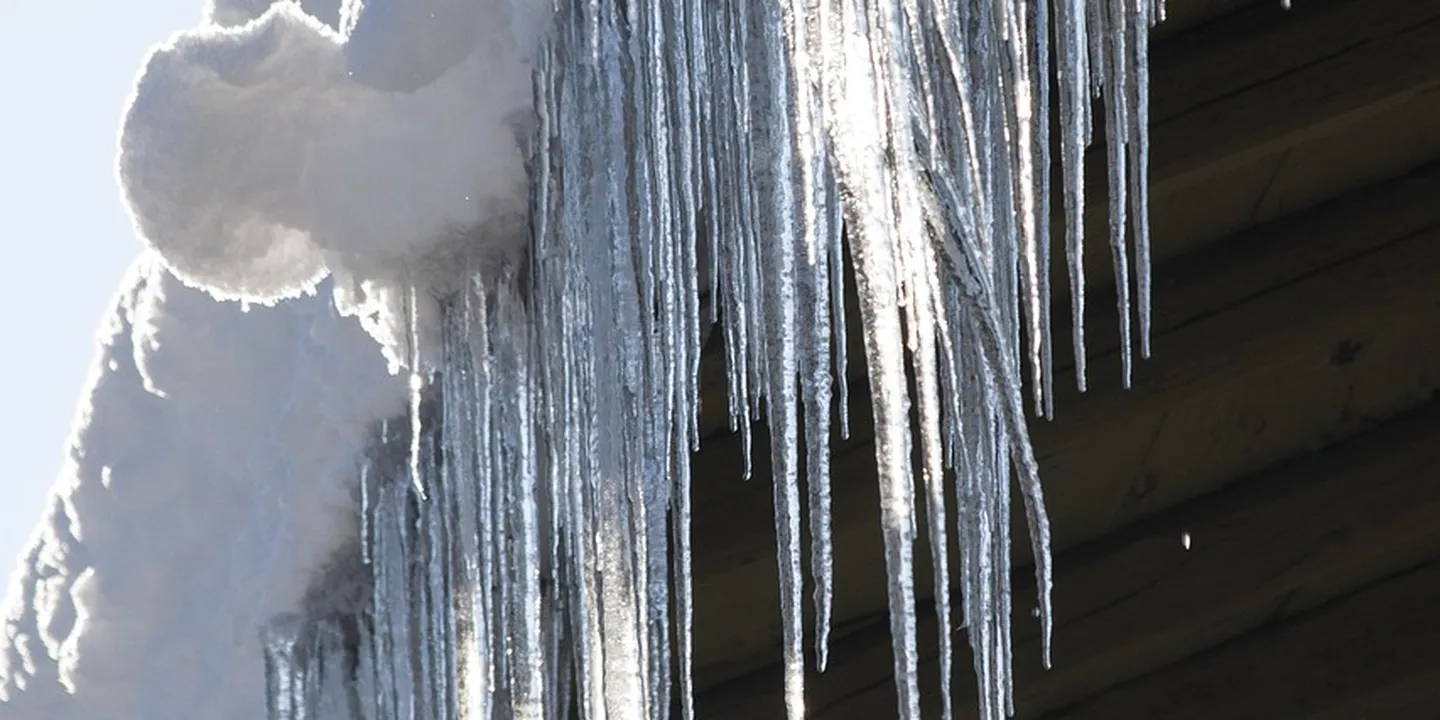
They also do not prevent ice dams by themselves. Ice dams are caused by heat loss from your attic melting snow unevenly. While clear gutters help water drain, a guard won’t stop the core problem. You still need proper attic insulation and ventilation. Ice dam prevention roofs address roofline heat loss directly, reducing dam formation. When paired with proper insulation and ventilation, they offer a more complete solution.
A guard’s job is singular: keep the water path open. Everything else is a bonus.
How Effective Are Gutter Guards Really? The Unvarnished Truth
Are gutter guards effective? The simple answer is yes, but it’s a qualified yes. From my jobs over the years, I’ve seen a real-world effectiveness range of about 70% to 95%. The best systems stop most debris while letting water flow through.
The wide gap in that range comes down to two things: the type of guard you choose and the specific environment around your home. A cheap, basic screen might work fine for a house with one maple tree. That same screen will fail completely under a canopy of pine trees.
Several factors can kill a gutter guard’s effectiveness. The biggest one is the type of debris. Fine materials like pine needles, helicopter seeds, or shingle grit can slip right through the gaps of many mesh guards. Roof debris is another killer. If you don’t clean your roof surface before or after installation, all that loose grit and moss washes right into your gutters, clogging them from underneath the guard. This is especially problematic in certain climates where such debris is more prevalent, making it important to choose gutter guards suited for your specific environment.
Are gutter guards any good? They can be a fantastic tool. But are gutter guards a scam? They can feel like one if you buy the wrong type for your situation or have unrealistic expectations. No guard is 100% maintenance-free. The marketing hype often promises you’ll never clean again, but the reality is you’ll just clean less often.
You also need to think about winter. Many homeowners ask, are gutter guards bad in winter? They can create problems if you choose the wrong kind. Solid gutter covers can encourage ice dams because melting snow can’t drain into the gutters easily and instead refreezes at the edge. In heavy snow country, some guards can also act as a shelf, allowing snow and ice to build up and potentially damage the gutter itself. To reduce that risk, focus on preventing ice dams with proper gutter winterization. These preventive steps help keep gutters clear and protect your home during winter.
The Effectiveness Test: For Your Specific Roof
Before you spend a dollar, take five minutes to look at your house. Ask yourself these questions to see if guards are a smart buy for you.
- What trees are within 30 feet of your roof? (Pine, spruce, oak, maple?)
- How often are you cleaning your gutters now? (Twice a year? Four times?)
- What is your roof pitch? (Steep roofs shed debris better than low slopes.)
- Is your roof in good shape, or is it shedding a lot of granules?
Gutter guards are most effective for homes with large-leaf deciduous trees (like oaks and maples) and a roof pitch that helps debris slide off. A micro-mesh style usually works best here.
Guards are least effective, and sometimes a total waste, for homes surrounded by coniferous trees (pines, spruces) or trees with tiny seeds. They are also a poor choice if your gutters don’t already have the correct slope for drainage. I’ve seen more clogged gutters with cheap guards on them than without, because people install them and forget about maintenance completely. In fact, there are many myths about gutter guards that often lead to disappointment.
The True Value: Weighing Cost Against Long-Term Protection
Looking at a price tag per foot is only half the story. The real value comes from what you gain in time, safety, and prevention.
Think about cleaning your gutters. It’s a chore, but it’s also a risk. Every time you climb that ladder, you’re taking a chance. Gutter guards change that math. You trade a recurring, risky task for a one-time setup. The value here is in keeping your feet safely on the ground, not just keeping leaves out of your gutters.
Beyond the Dollar Sign: Time, Safety, and Structure
- Time Saved: Instead of cleaning two to four times a year, you might do a quick visual check or a light brushing. That’s hours back in your life, every year.
- Safety First: Fewer ladder climbs mean dramatically less risk of a dangerous fall. I’ve seen too many DIY gutter-cleaning trips to the ER.
- Protection for Your Roof: Clogged gutters cause water to spill over. That constant overflow rots your roof’s wooden eaves and fascia boards silently from behind. Good guards keep water flowing where it should, protecting your roof’s edge structure.
DIY Cost vs. Professional Installation
You have two main paths. Doing it yourself costs less upfront but demands your time and skill.
- DIY Materials: Basic guards cost between $1 and $7 per linear foot at a home center. For a standard 200-foot home, you’re looking at $200 to $1,400 just for materials.
- Professional Installation: A pro will charge $7 to $12 per linear foot on average. For that same 200-foot home, expect a quote from $1,400 to $2,400.
The professional price includes labor, expertise in fitting and fastening, and usually a warranty on the work. I’ve fixed many DIY jobs where guards were installed poorly, creating gaps or damaging shingles. A pro should get it right the first time.
Contrasting Costs: Guard vs. Major Repair
Let’s compare the investment to potential disasters. A $2,500 professional guard installation seems like a big check to write.
Now, price out repairing water damage. Rotted soffit, fascia, and roof decking on one eave can easily hit $1,500 to $3,000. A basement flood from overflowing gutters can cause $5,000 to $10,000 in damage or more. Gutter guards are a preventive measure, like a helmet for your home’s foundation. The math starts to make sense when you see the alternative.
Are Gutter Guards Necessary? It Depends.
They aren’t a universal must-have, but they are a very wise investment in specific situations.
You should seriously consider guards if:
- Your property has overhanging trees (especially pines, maples, or oaks).
- You have a multi-story home where cleaning is difficult and dangerous.
- You’re away from home for long periods, like seasonal travel.
- Your goal is low-maintenance living as you age in your home.
You might skip them if:
- Your home is in an open area with few to no trees.
- You have single-story, easily accessible gutters and don’t mind cleaning them.
- Your budget is extremely tight, and you can commit to regular, safe cleanings.
On a job last fall, a client with massive pine trees installed guards. He told me it was the first year he didn’t dread November. That peace of mind is part of the value, too.
Gutter Guard Types Compared: Which One Suits Your Roof?
Picking a gutter guard is like picking a tool. You need the right one for the job. On my crew, we’ve installed them all. Each type has a place, but they handle debris and water very differently. It’s always best to compare the best systems before deciding.
Mesh Screens
Think of these as a screen door for your gutter. They are metal or plastic grids that sit on top. They’re a popular choice.
Their main job is to stop large leaves and sticks while letting water flow through the holes.
They work well for classic big-leaf trees like maples and oaks. But tiny debris like pine needles or “helicopter” seeds from sycamores can slip right through or sit on top, blocking water.
Reverse Curve (Surface Tension)
These are the premium option, usually made from coated steel or aluminum. They have a curved front edge.
The design uses physics. Water sticks to the curve and flows over into the gutter, while leaves and debris fall off the edge. They offer a very clean look.
Reverse curve guards are excellent for heavy rain and large-leaf debris, but their complex shape means installation must be perfect. A bad fit creates gaps that let everything in.
Bottle Brush
These look like big pipe cleaners. You drop a spine with bristles into your gutter. The idea is that debris sits on top of the bristles while water runs down the channel underneath.
In my experience, they are a mixed bag. They can handle pine needles decently. The big issue is that they become a platform for moss and mold to grow, and cleaning them out is a messy chore.
Foam Inserts: The Budget DIY Choice
Foam guards are porous blocks you stuff into the gutter. Homeowners often ask, “Are foam gutter guards any good?” The answer isn’t simple.
Let’s be blunt about their pros and cons.
The big appeal is price and ease. You can buy them at any hardware store and cut them to length with a bread knife. For a single-story home with easy access, it’s a one-afternoon project.
Now, the downsides. Foam holds moisture against your gutter, which can speed up rust on metal gutters. It degrades in sunlight over a few years, crumbling into pieces you’ll later have to dig out. They also get overwhelmed easily, becoming a soaked sponge that blocks water flow during a downpour.
| Type | Material | Cost | Handles These Best | Install Ease |
|---|---|---|---|---|
| Mesh Screen | Metal, Plastic | Mid-Range | Large Leaves, Sticks | Moderate (Clips On) |
| Reverse Curve | Coated Metal | High | Heavy Rain, Leaves | Difficult (Precise Fit) |
| Bottle Brush | Plastic/Poly Bristles | Low | Pine Needles | Very Easy (Drop-In) |
| Foam Insert | Porous Foam | Very Low | Light Debris | Very Easy (Drop-In) |
Matching Guard to Roof and Trees
Your roof type and local trees matter. A metal roof sheds water faster, so you need a guard that can handle a high-volume flow without backing water up under your shingles. A robust reverse curve or heavy-duty mesh is often best.
For standard asphalt shingle roofs with pine trees, a fine metal mesh is my go-to because pine needles behave like tiny spears. They’ll find any gap. If you have mostly large leaves, a standard mesh or reverse curve works well. If your roof is steep or complex, remember that easier-to-install guards might save on labor costs.
Foam, Mesh, or Metal? A Roofer’s Quick Guide
Here’s my plain advice from years on the ladder.
Pick foam inserts if you’re on a very tight budget, have easy ground-level gutters, and don’t mind replacing them every few years. Treat them as a short-term solution.
Choose a stainless steel micro-mesh if you have pines, spruces, or messy seed pods and want a “set it and forget it” option that will last 20 years. It’s the best defense against the smallest debris.
Invest in a reverse curve system if you have a high-value home, heavy rainfall, and large-leaf trees, and you can hire a precise installer. Don’t try this as a DIY project.
Skip the bottle brush style unless you enjoy pulling slimy, matted vegetation out of your gutters by hand every spring. There are better options.
Installing Gutter Guards: Tools, Steps, and Safety
Putting in gutter guards is a project many homeowners can handle. But working on a ladder at your roofline demands respect. I’ve seen too many close calls over the years.
Your safety is the first thing to set up, before you even touch a gutter guard. This isn’t a suggestion, it’s the rule my crew lives by on every job.
- A Sturdy Extension Ladder: Make sure it extends at least 3 feet above your gutter line for safe stepping.
- Ladder Stabilizer or Standoff: This keeps the ladder from resting directly on the gutters, which can damage them, and provides a much safer, more stable base.
- Heavy-Duty Work Gloves: Gutter edges can be sharp, and you’ll be handling debris.
- Safety Glasses: Protect your eyes from falling grit, metal shavings, or splash back.
Step 1: The Critical Gutter Clean-Out
Listen closely. Installing a gutter guard on top of a clog is like putting a screen door on a house filled with trash. It does nothing.
You must start with a perfectly clean gutter, or the entire project is a waste of time and money.
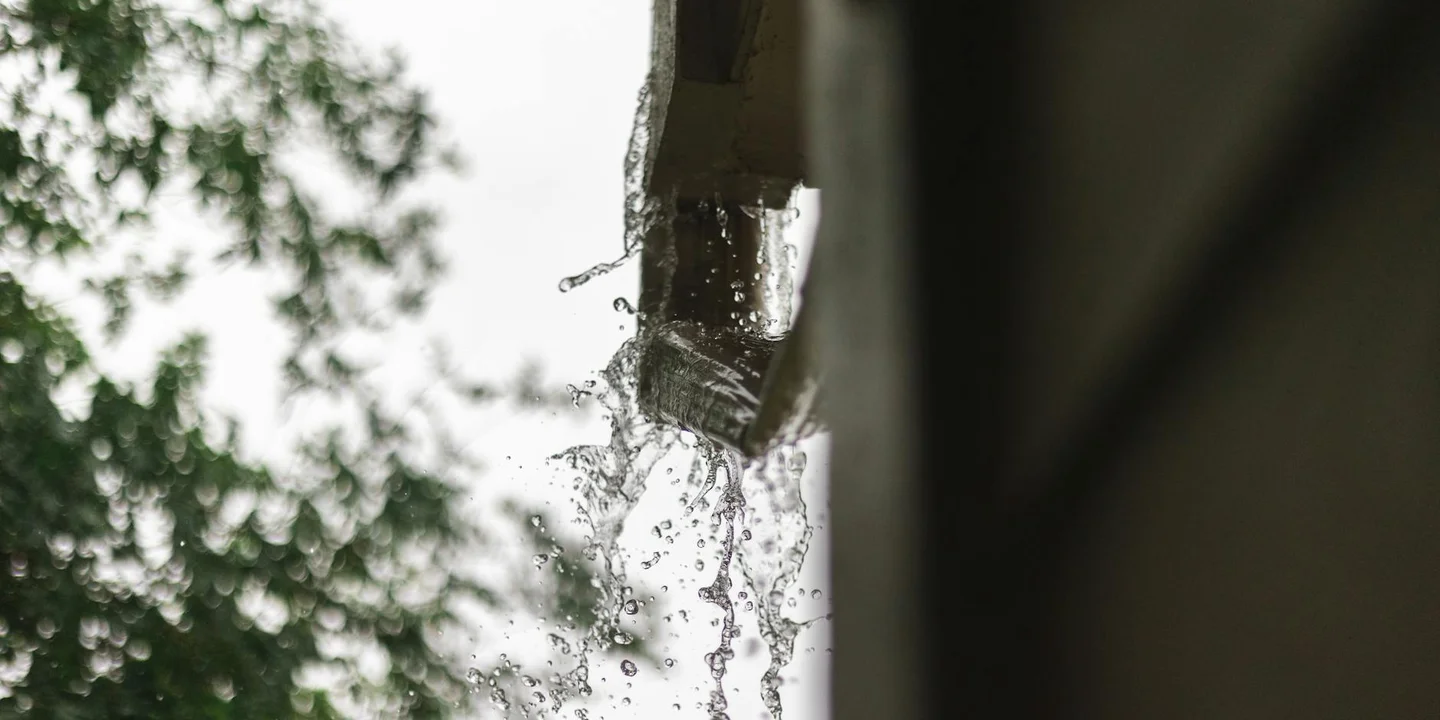
Use a small plastic scoop or your gloved hands to pull out all leaves, twigs, and sludge. Start from the end opposite your downspout and work toward it. Once the big stuff is out, take your garden hose with a spray nozzle and flush the entire run. Watch the water flow freely out the downspout. If it backs up, you still have a clog in the downspout pipe that needs rooding out.
Step 2: Measuring, Cutting, and Dry-Fitting
Now, measure each straight section of gutter from end to end. Do not guess. Write each measurement down. For guards that come in sections, you’ll cut them to length.
Cutting is different based on material. Use tin snips for aluminum mesh guards. Use a fine-tooth hacksaw or heavy-duty utility knife for rigid plastic ones. Always cut on a stable surface. Dry-fit each piece before you secure it to make sure it sits flush and covers the gutter width properly. An uneven fit is where debris sneaks in.
Step 3: Securing the Guards – The Right Way
How you attach the guard depends on its type. Some snap on with built-in clips. Others use small stainless steel screws. Some heavy-duty micro-mesh systems friction-fit under the first row of shingles.
Follow the manufacturer’s instructions exactly. If using screws, drive them only into the front lip of the gutter, not through the gutter bottom. Never screw anything into your roof deck or shingles unless the system is specifically designed for it. The goal is to keep water flowing over the guard and into the gutter, so pay attention to any directional arrows on the product. Installing it backwards can cause immediate overflow.
Step 4: The Final Check: Water Flow and Debris Test
Your job isn’t done when the last screw is tight. You need to test your work. Grab your hose again and run water onto the roof section above your newly guarded gutter. Simulate a rain shower.
Watch the water. It should flow smoothly over the guard and into the gutter. Check for any overflow at the ends or middle, which signals an incorrect pitch or a blockage. Also, toss a few leaves or pine needles onto the guard. They should wash off or sit on top. If they catch easily, you’ll know what to expect after the next windstorm. No system is perfect, but a good installation should handle this basic test with ease.
Homeowner’s Maintenance Routine for Gutters and Guards

Gutter guards are a tool, not a set-it-and-forget-it solution. A simple, twice-a-year check can save you thousands in repair bills and easily extend your roof’s life. I have seen well-maintained roofs last 5 to 10 years longer than neglected ones, and the gutters are a big part of that.
Your Seasonal Checklist
Do these quick checks in the spring after the last frost and in the fall after the leaves have dropped.
- Visual Inspection from the Ground: Grab a pair of binoculars. You are looking for three things. First, check that all gutter guards are still securely attached and none are sagging or missing. Second, look for visible piles of debris like leaves or pine needles sitting on top of the guards. Third, scan for any signs of the gutter itself pulling away from the fascia board.
- Check Downspout Flow: This is your gutters’ report card. Wait for a steady rain or run a garden hose into the gutter near a downspout. The water should flow freely and pour out the bottom with strong force. If it’s a trickle or backs up, you have a clog in the downspout or at the guard entry point.
- Clear the Guard Surface: For micro-mesh or screen guards, use a leaf blower or a soft broom to sweep off accumulated debris. For solid-surface or reverse-curve guards, you may need to gently hose them off. Never use a pressure washer, as it can damage the guards or force water under your shingles.
How Often to Clean Your Gutters
The schedule completely depends on your tree cover and your guard type.
With No Guards: You are cleaning the actual gutter channel 2 to 4 times per year. Heavy tree cover means spring pollen, summer seed pods, and a major fall leaf cleanout, plus a winter check.
With Quality Guards: Your maintenance shifts to the surface of the guard. You will likely need to clear surface debris 1 to 2 times per year. The gutter channel underneath should stay much cleaner.
Even with the best guards, I recommend a professional gutter cleaning every 2 to 3 years. A pro will remove the guards, clear any fine sediment (grit) that has washed through, and inspect for hidden issues like seam separation, minor rust, or improper slope that you cannot see from the ground. It is a small investment for peace of mind, especially when compared to costs associated with roof and gutter damage.
When to Skip Gutter Guards: Limitations and Pitfalls
Gutter guards aren’t a magic fix for every home. I’ve been called to houses where a new guard system made problems worse, not better, especially when they didn’t address the underlying issues like leaks or sagging.
The right time to install a guard is after you’ve confirmed your gutters are in perfect working order. Putting them over a failing system just hides the problem until it causes serious damage. So make sure to choose the right method for installation once your gutters are ready.
Scenarios Where Guards Are a Bad Idea
Think of your gutter like a foundation. If the foundation is cracked, you don’t just paint over it. Here are times to avoid guards entirely:
- Existing Gutter Damage: If your gutters are sagging, have separated seams, or show rust holes, guards add weight and trap moisture against the damage. Fix the gutter first.
- Incorrect Slope (Pitch): Gutters need a slight slope toward the downspout to drain. If they’re level or pitched wrong, water will pool. A guard on top won’t fix this; it will just let the pooled water fester with debris.
- Excessive Roof Debris: Roofs shedding lots of moss, granular shingle grit, or wood chips from cedar shakes can overwhelm most guards. The fine particles slip through mesh or stick to foam, creating a sludge that’s harder to clean than plain leaves.
Are Gutter Guards Bad? How Quality Matters
Gutter guards themselves aren’t inherently bad, but a poor choice or bad installation can be.
Cheap, flimsy guards or the wrong style for your tree types are a primary cause of overflow that damages fascia boards and roof edges. A solid “helmet” style guard in a pine needle area, for example, will let needles slide off, but a sudden downpour has nowhere to go but over the sides because the water can’t enter the gutter fast enough.
I once replaced a rotted fascia board where the homeowner had installed a cheap plastic mesh. It clogged completely with maple seeds, forcing all rainwater behind the gutter and into the wood for an entire season.
When to Call a Professional Roofer
Installing guards on a simple, single-story ranch is one thing. Tackling a complex roof is another. Hire a pro if:
- Your home has multiple stories. Working at height is dangerous without proper fall protection.
- The roof line is steep, has many valleys, or features intricate architectural details around the eaves.
- You are unsure about the health or slope of your current gutters. A pro can assess them first.
- The installation requires modifying or trimming the existing shingles for a proper fit. Doing this wrong leads to leaks.
The Roof Warranty Warning
This is a critical detail most homeowners never consider. Many roof shingle warranties require a specific gap between the shingle edge and the gutter.
If a gutter guard is installed by lifting the shingles and tucking it underneath, or by fastening it through the shingles, you may void the manufacturer’s warranty on your roof. The fastener penetrations or altered shingle alignment can be cited as improper modification. Always check your roof warranty terms or consult your roofing contractor before proceeding.
Quick Answers
My gutters need work. Should I fix them or install guards first?
Fix the gutters first, every time. Installing guards on damaged, sagging, or poorly sloped gutters just hides the problem and can make it worse. If overflow is occurring, address drainage and slope first before adding guards. Ensure your gutters are sound and draining correctly before adding any protection on top.
What’s the best guard for a roof surrounded by pine trees?
Choose a stainless steel micro-mesh system. Pine needles act like tiny spears and will plug most other guards. A quality micro-mesh has holes small enough to stop them while still letting water through effectively.
When is installing gutter guards a DIY job, and when should I call a pro?
DIY is feasible for single-story homes with simple, accessible rooflines. Hire a professional installer if your home is multi-story, has a steep/complex roof, or if the system requires fitting under shingles to avoid voiding your roof’s warranty.
Getting the Most from Your Gutter Guard System
Pick a guard designed for your specific debris and climate, and insist on a precise, by-the-book installation. I’ve watched this two-step process turn problematic gutters into a set-it-and-forget-it part of the roof for over a decade.
Your roof’s health depends on your consistent, safe inspection of all its components, gutters included. For deeper knowledge on maintaining everything from metal to tile, I recommend exploring our ongoing articles on roof care and maintenance for all common home styles.
Ray Huffington
Ray is an experienced roofer. He has worked as a general contractor in the roofing industry for over 15 years now. He has installed and repaired all kinds of roofs, from small houses to large mansion, and from basic shingles to cement and metal roofs and even solar roof panels. He has seen homeowners struggle with roofing questions and always has experience based proven advice to help those in need. If you need roof pros, Ray's your guide.