
How to Install and Replace Metal Roof Screws Correctly
Have you ever seen a rusty streak under a screw head on your metal roof and wondered what went wrong? I’ve repaired countless roofs where the problem started with just one improper screw. Getting this detail right stops leaks and protects your investment.
You’ll learn how to select the right screws and tools for the job.
I’ll show you the exact installation technique my crew uses.
You’ll get my method for finding and replacing bad screws safely.
Safety First: Is Screwing Down a Metal Roof a Job for You?
Let me be direct. Screwing down a metal roof is one of the riskiest home maintenance tasks you can do. I learned this on a steep 10/12 pitch ranch job years ago. My boot slipped on morning dew as I was walking on the roof, and I slid four feet before my harness caught me. That heartbeat of freefall is all the convincing I ever needed.
If you decide to proceed, your gear is non-negotiable. You need a full-body harness tied to a certified anchor, not a tree or chimney. You need roof jacks and planks for stable footing. You need gloves, safety glasses, and boots with aggressive tread. The roof itself is a hazard-it’s sharp, slippery, and gets scalding hot.
The specific dangers are a steep slope fall, contact with overhead power lines, deep cuts from panel edges, and heat exhaustion from working in the sun. Metal conducts heat, turning your workspace into an oven by midday.
Use this simple checklist. Do not try this if any item is true:
- Your roof is more than one story high.
- The design has valleys, dormers, or complex angles.
- You do not own or will not use proper fall arrest gear.
- Your roof’s warranty requires certified installer work.
Your Lifeline: Fall Protection Gear You Can’t Skip
Think of a roof harness like a seatbelt for your house. It only works if it’s connected properly. You need a secure anchor point, often a rated bracket screwed into a roof truss. Your harness lanyard clips to this anchor, giving you just enough rope to work but not enough to hit the ground.
A ladder is for access, not for safety while you work on the roof surface. For secure footing, roof jacks are metal brackets you attach under the panels. You then lay sturdy planks across them, creating a stable platform. This is how crews work safely on steep pitches.
Knowing Your Limits: When to Call a Professional Roofer
Some problems are bigger than a few loose screws. On metal roofs, seal repair around screw holes is essential to prevent leaks. Proper sealing around fasteners also helps prevent corrosion and water intrusion. Call a professional roofer immediately if you see widespread rust that has eaten through the metal, if the roof deck feels soft or spongy underfoot, or if you simply don’t know your local building code for fastener spacing.
Installing screws incorrectly can create leaks and immediately void the manufacturer’s warranty on expensive metal panels. Your home insurance may also deny a future claim if they find the damage stemmed from unqualified DIY work.
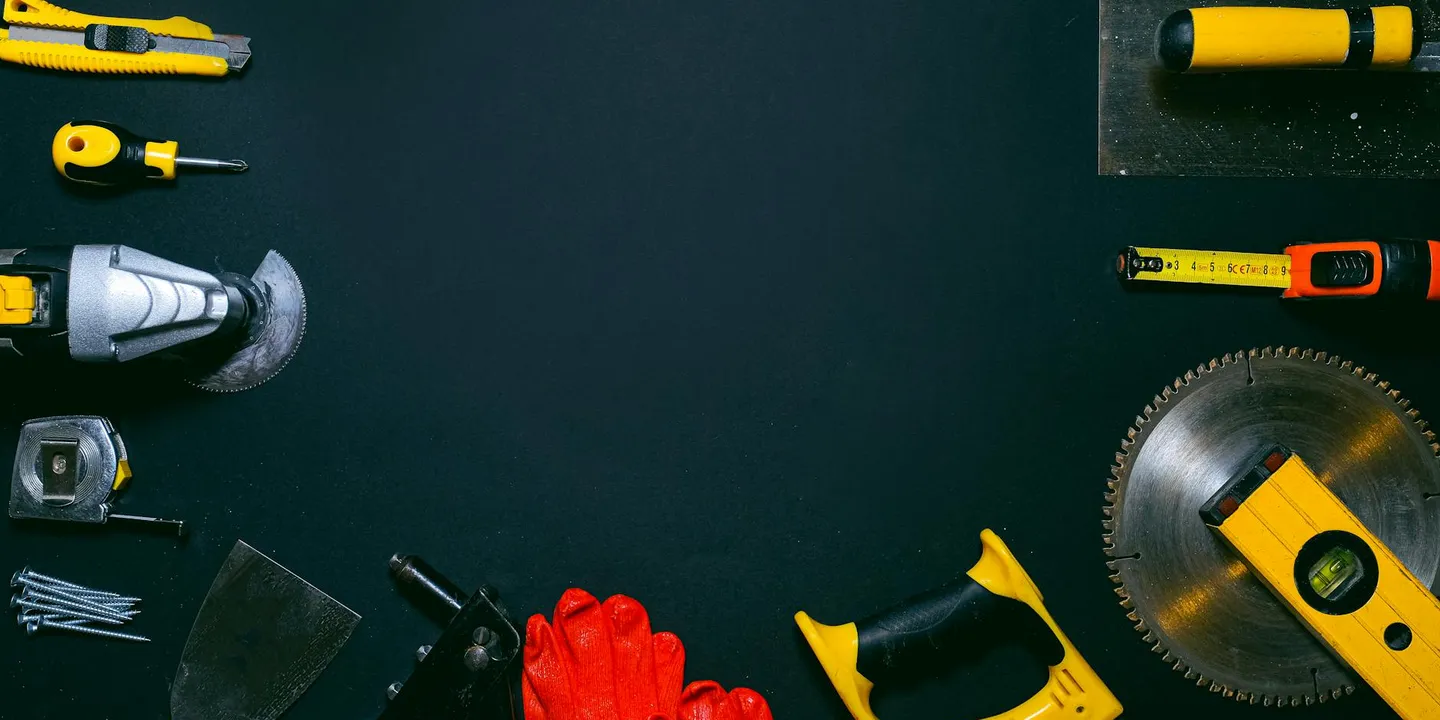
Gearing Up: Choosing the Right Tools and Screws
Here is the most important rule for metal roofing: the right screw in the right place. Using a wood screw or the wrong length is the number one cause of leaks I see on DIY jobs. The fastener is the seal, so it’s crucial to check and replace screws on your metal roof regularly.
Your tool list is short and specific. You need a cordless impact driver, not a standard drill. You need a magnetic screw guide to hold screws in place. A tape measure and a sharp, dedicated metal drill bit complete the kit.
For screws, you will hear about “Class” ratings like 4 or 5; a higher class generally means a thicker, stronger screw that resists snapping under wind uplift. Length is critical. The screw must be long enough to go through the metal panel, any underlayment, and penetrate at least 1 inch into the solid wood roof deck beneath.
Choosing screws is like choosing shoes for a job site. You need the right fit (length), the right build (class rating) for the load, and the right features (coating) for your climate.
The Screw Dictionary: Self-Tapping, Washers, and Coatings
Most metal roof screws are self-tapping. They have a drill bit tip that cuts threads into pre-drilled pilot holes. Self-piercing screws are less common; they can punch through thin metal without a pilot hole, but they require precise, powerful tools.
The washer is what seals out water. It’s made of neoprene or EPDM rubber. When you drive the screw correctly, the washer will compress to about half its original thickness, forming a tight gasket. It should not be bulging out the sides or appear completely flat.
A proper washer compression looks like a neat, round donut seated firmly against the metal. Screws come with coatings for corrosion resistance. Galvanized is standard, but for harsh coastal or industrial areas, a color-matched, thicker polymer coating provides a much longer life.
Impact Driver vs. Drill: Why the Right Tool Matters
A standard drill spins. An impact driver combines spin with rapid, hammer-like blows. This impact action provides consistent torque. It drives the screw to the perfect depth every time, preventing you from stripping the screw head or leaving it too high.
My crew learned this the hard way. Using a drill on a hot day, we over-torqued and ruined a whole box of screws by stripping the heads. Always start with a fresh, sharp drill bit designed for metal to create a clean pilot hole; a dull bit will overheat, harden the metal, and make driving the screw nearly impossible.
Planning Your Attack: Spacing, Codes, and Manufacturer Rules

Figuring out how many screws you need for a metal roof is not a guessing game. I have patched leaks on roofs where the previous crew just estimated the spacing, and it never holds up in a storm. That’s why it’s important to both calculate the correct quantity and use the right length screws.
The distance between screws depends on three things. It changes based on your specific panel type, your local wind speeds, and your area’s building codes. In windy regions, screws must be placed closer together to meet higher “wind uplift” ratings and keep the roof secured. Understanding roof installation methods helps apply these patterns in practice. Different methods change where fasteners go and how they’re spaced.
The golden rule is this: always follow the metal roof panel manufacturer’s installation guide exactly. Their instructions are based on tested engineering, not guesswork. I keep a copy of the guide on my clipboard for every job, especially when working on residential metal roofs.
Before you start, check with your local building department. Many areas require a permit for re-roofing, and an inspector will verify your screw pattern meets code. A DIY roof installation repair guide can provide a quick, step-by-step overview. It also includes essential safety tips to keep you prepared before you begin.
Mapping the Fasteners: Where Every Screw Should Go
Placement is key for strength and weatherproofing. Screws must go in the flat part of the metal panel, never on the high rib. Driving into the rib can crack the coating and create a weak spot.
For spacing, think in terms of the roof’s zones. At the eaves and ridges, you typically need screws every 12 inches or less for extra hold. In the main field of the roof, a common pattern is one screw per square foot, but your manufacturer’s guide has the final say. Also consider how roof crossbars, studs, and trusses influence spacing and fastener placement. Following the framing plan for these members helps ensure secure, consistent spacing across the roof.
Metal panels expand and contract with temperature swings, so screws must be driven straight and allow for this movement without binding. If they’re too tight, the metal can buckle or tear around the fastener.
At the Edges and Overlaps
The edges and side laps are where most leaks start if screws are wrong. For the ends of each panel, place screws within an inch of the edge. Where panels overlap on the sides, you must screw through both layers of metal to create a sealed joint. On a job last spring, I found every leak traced back to a side lap where the screws were too far apart.
The Perfect Drive: How to Install Metal Roofing Screws Correctly
This is where the real work happens. How do you screw down metal roofing properly? It comes down to a consistent technique that avoids two big mistakes: driving the screw too loose or cranking it down too tight.
The visual cue is a fully compressed washer that sits flush with the metal panel, not sunk into it. Get this right, and you have a watertight seal. Get it wrong, and you’re inviting leaks.
I recommend finding a rhythm. Install screws in a straight line, then pause every few rows to look back and check your work. A consistent pattern is easier to inspect and looks professional.
Step-by-Step: Driving a Screw from Start to Finish
- Position the screw perfectly perpendicular to the roof surface. Angled screws don’t seal well.
- Start your drill at a slow speed to let the screw thread engage the metal cleanly without “walking.”
- Drive the screw until the rubber washer is fully compressed and sits flush. You should see a slight squeeze of the washer, but the metal around it should still be flat.
- Stop immediately when you feel solid resistance. Do not keep driving.
Avoid “dimpling” the metal by driving too hard. This creates a small crater that can pool rainwater and lead to rust. I’ve seen dozens of these on repair calls.
The Sound and Feel of a Properly Set Screw
You can hear and feel a good installation. As the washer compresses, the drill’s sound will change from a high whine to a deeper, solid thud. The handle will push back slightly in your hand when the seal is complete.
It feels similar to tightening a lug nut on a car tire, you know the exact moment it’s snug and secure.
For large roofs or crews, I use a drill with a torque-setting attachment. It takes the guesswork out and ensures every single screw has the same perfect compression. It saves time and prevents callbacks.
Sealing the Deal: How to Prevent Leaks at Every Screw
The rubber washer on your screw is your main line of defense. It’s designed to compress and form a watertight gasket. Think of the washer as your raincoat, and any extra sealant as the hood you pull up in a downpour. You want that extra layer of security in critical spots.
For backup sealant, you have two common choices. Polyurethane sealant (like common roof and flashing sealant) is very durable and bonds well to metal. Silicone sealant is flexible and adheres to almost anything. My go-to is a high-quality polyurethane for its longevity and paintability.
Apply sealant as a small dab on top of the screw head after it’s driven. You can also put a pea-sized drop on the washer before installation for tricky areas. The biggest mistake is using too much sealant. A giant blob will dry on the outside but stay soft inside. It will eventually crack from the sun’s heat, letting water in and trapping it against the metal.
I learned this lesson on a repair job for a persistent leak near a ridge. We found the screws were tight, but the washers were fine. The issue was on the high, curved part of the ridge cap. Wind-driven rain was finding its way under the screw heads. A tiny dab of sealant on each ridge screw fixed a leak the homeowner had fought for two seasons. It’s a five-minute fix that saves thousands in water damage.
Inspection and Maintenance: Checking Your Seals Over Time
Get in the habit of looking at your roof twice a year, in spring and fall. You don’t need to walk the whole thing. Use binoculars from the ground or a ladder safely placed at the gutter line. You’re looking for three things: cracked or missing washers, rust forming on the screw heads, and sealant that has shrunk back or cracked. These are common issues that can be found during a roof damage inspection.
A single failed seal is a simple fix. You clean the area, remove the old screw, and put in a new one with fresh sealant. If you ignore it, that tiny hole lets a steady drip reach your roof decking. Over months, that moisture rots the wood. What was a $5 repair becomes a $2,000 decking replacement.
Fixing Past Mistakes: How to Replace Damaged or Leaking Screws
Replacing a few bad screws is a common and manageable repair. The process is more about careful removal than installation, as rust and stripped heads are your main foes. You have to clean out the old hole perfectly for the new screw to seal.
Safely Removing the Old Screw
Always wear heavy gloves and safety glasses. Metal shavings are sharp. Follow these steps:
- Brush away any dirt, leaves, or old sealant from around the screw head.
- Spray a quality penetrating oil onto the screw threads. Let it soak for 10-15 minutes.
- Use a drill with a screwdriver bit that fits perfectly. Apply steady pressure and slow reverse speed.
- If the head strips, you must drill it out. Use a drill bit slightly smaller than the screw head to drill just the head off. Then you can often remove the shank with pliers.
The goal is to get the screw out without wobbling the drill and making the hole in the metal larger. A bigger hole means a poor seal for the new screw.
Prepping the Hole and Installing the Replacement
Once the old screw is out, you must prepare the hole. Use a small pick or compressed air to remove all rust flakes and debris from the hole in the metal and the wood below.
If the hole is now too big, you have two options. You can use a screw one size larger in diameter. Or, you can clean the area thoroughly and apply a small, flexible sealant patch (like flashing tape) over the hole before driving the new screw.
Apply a dab of sealant to the washer of your new screw. Drive it straight down until the washer is fully compressed and just starts to “dish” or dimple. Do not overdrive. This careful installation is what makes a repair last as long as the original.
When the Wood is Rotten: A Bigger Problem
If you remove the screw and the wood underneath feels soft or spongy, stop. This is no longer a screw problem, it’s a structural problem. The water has been leaking long enough to damage the roof deck. You need a professional to assess the rot, replace the decking in that area, and properly integrate the repair with the surrounding metal panels.
Common Screw Installation Mistakes to Avoid at All Costs
After decades on roofs, I’ve seen the same errors cause leaks time and again. Avoid these:
- Over-driving the screw: This crushes the washer, splits the rubber, and creates a recess that holds water.
- Using the wrong length: A screw that’s too short won’t bite into the wood. One that’s too long can poke through your ceiling.
- Ignoring spacing: Screws too far apart let the metal lift in wind. Screws too close together create unnecessary holes.
- Forgetting the sealant: Relying on the washer alone, especially on ridges, hips, and valleys, is a gamble.
- Working in the rain or on a wet roof: Water will get trapped in the hole, guaranteeing rot.
Go slow, check your work, and a metal roof will protect your home for decades.
Quick Answers
How do you properly seal around screws to prevent leaks?
Use a high-quality polyurethane sealant as a backup on ridge caps, hips, and side laps where wind-driven rain is a risk. Apply only a pea-sized dab on top of the screw head after it’s driven-too much will crack and trap moisture.
What are the steps for safely removing old or damaged screws?
First, soak the screw with penetrating oil and use a perfectly fitting bit in your impact driver. If the head strips, drill it off carefully to avoid wobbling and enlarging the hole in the metal panel.
What common mistakes should be avoided when installing screws?
Never over-drive the screw, which crushes the sealing washer. Always use the correct length to get a solid bite into the wood deck, and follow the manufacturer’s spacing guide to the letter.
Securing Your Roof’s Future
Your roof’s success comes down to using the right screw in the right way every single time. A proper installation locks out water and locks in decades of durable performance.
A safe roof starts with you; never compromise your safety for a quick fix. For more detailed guidance on upkeep, explore our resources on Roof Care and All Types of Roof Guide to keep your entire roofing system in top shape. Prioritize Roof Repair Safety Practices to prevent slips and falls and for comprehensive safety guidance.
Ray Huffington
Ray is an experienced roofer. He has worked as a general contractor in the roofing industry for over 15 years now. He has installed and repaired all kinds of roofs, from small houses to large mansion, and from basic shingles to cement and metal roofs and even solar roof panels. He has seen homeowners struggle with roofing questions and always has experience based proven advice to help those in need. If you need roof pros, Ray's your guide.