
What Are the Best Waterproofing Methods for Flat Roofs and Sheds?
Does a small puddle on your flat roof after a storm make you nervous? I’ve spent years on crews where that was the first sign of a big, expensive problem. Flat surfaces trap water, so your waterproofing choice directly decides if your roof lasts or leaks.
I will explain the three most effective waterproofing systems I trust from hands-on experience. You will see how liquid coatings create a custom, watertight shell. We will compare the pros and cons of rubber membranes and built-up roofs. I will give you my straightforward advice on which method to pick for your project.
Key Takeaways: Your Waterproofing Cheat Sheet
Based on my years of patching, coating, and replacing flat roofs, success starts with these five rules. Ignore them, and you’re just painting over a problem.
- Surface prep is 80% of the waterproofing job. Any coating or membrane will fail if it’s applied over dirt, moisture, or old, flaking material.
- For a DIY shed roof, a liquid-applied membrane is your best and safest bet. It’s like using a thick, rubbery paint that bridges small gaps and seams easily.
- Elastomeric coatings are powerful, but they demand a perfectly sound and clean base. Think of it like applying a new skin; it needs a healthy body to stick to.
- Always find and fix the actual leak source first. Water travels. Sealing the spot where you see it inside often misses the real entry point upstairs.
- Cost and expected lifespan vary wildly by material. A roll of roofing felt might buy you a year, while a professionally installed EPDM membrane can last 30.
Choosing Your Shield: Waterproofing Materials Compared
Picking a waterproofing method isn’t about finding the “best” one. It’s about finding the right tool for your specific job. I’ve used them all, from quick shed fixes to major commercial recoveries. Here’s how they stack up.
The most effective materials for flat roofs balance seamless coverage with long-term durability. For DIYers, that’s liquid coatings. For permanent solutions, it’s sheet membranes.
The Flexible Sealants: Liquid and Spray Options
These products go on wet and cure into a flexible, monolithic blanket. There’s no seaming, which is a huge advantage on a flat surface where water pools.
Liquid Applied Membranes are the go-to for homeowners. You buy them in buckets and apply them with a thick-nap roller or a brush. They’re excellent for coating a shed roof, sealing around protrusions like vents, or refreshing an old surface. The consistency is like very thick, sticky paint.
Spray-Applied Elastomeric Coatings are the professional-grade version. A contractor uses a spray rig to apply a uniform layer that cures into a tough, rubber-like skin. It’s fantastic for large, complex areas but overkill for a simple garden shed.
Can you use elastomeric coating on a flat roof? Yes, absolutely. I’ve specified it for countless low-slope roofs. The critical step is surface preparation: the roof deck must be completely clean, dry, and free of any loose material or major cracks. Any weakness underneath will telegraph through and cause the coating to fail, especially over built-up roof layers.
How long does this type of waterproofing last? With proper prep and application, a quality liquid or spray coating can easily last 10 to 15 years. I recoated my own garage roof with a liquid membrane seven years ago, and it’s still holding strong without a single drip.
The Sheet Goods: Membranes and Felts
These are rolls of material that you physically attach to the roof deck. They offer superior puncture resistance and longevity but require more skill to install correctly, especially at the seams.
Modified Bitumen (Torch-Down) is a heavy-duty felt infused with rubber or plastic. We heat the underside with a torch to melt the asphalt and adhere it to the roof. It’s incredibly durable but not a DIY project due to the open flame and skill required.
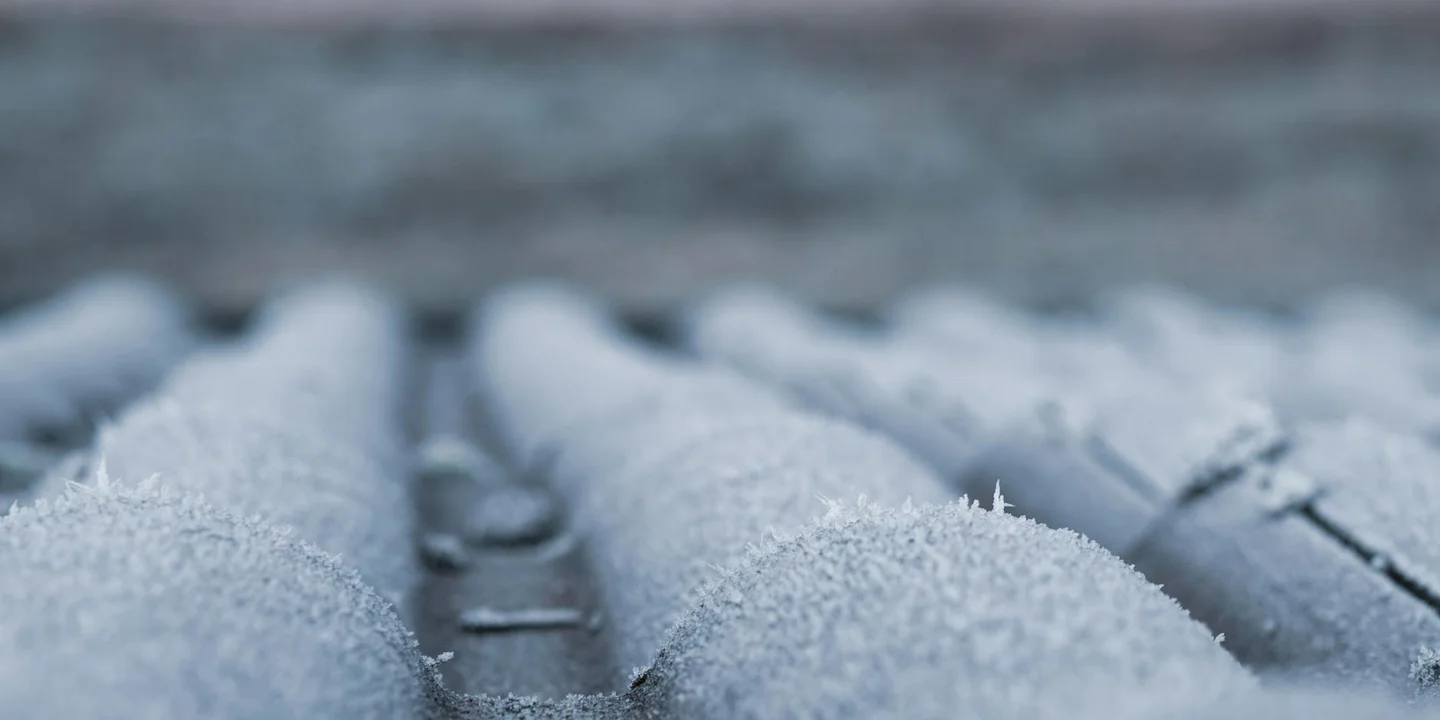
EPDM (Ethylene Propylene Diene Monomer) is a synthetic rubber sheet. It’s very flexible, handles temperature swings well, and is glued or mechanically fastened. I’ve installed miles of this stuff on residential flat roof sections. It’s like giving your roof a giant, durable rubber raft skin.
PVC & TPO are single-ply synthetic membranes. The seams are heat-welded together with a special tool, creating a bond that’s often stronger than the material itself. These are top choices for commercial buildings and also reflect sunlight, which can lower cooling costs.
Traditional Asphalt Roofing Felt (tar paper) is included here for context. It’s a temporary moisture barrier installed under shingles. On its own, it is not a standalone waterproofing layer for a shed roof.
Is a waterproofing membrane better than roofing felt for sheds? For any long-term solution, yes, without question. Roofing felt is absorbent and will degrade when exposed to constant weather, while a proper membrane like EPDM or a PVC is designed to be the permanent, watertight outer layer. Using just felt on a shed is asking for leaks within a season or two.
Prep Work: The Foundation of a Dry Roof
Think of waterproofing like painting a wall. If you paint over dust, cracks, or damp spots, the new paint will fail. Roofing is the same. Skipping prep is the fastest way to waste your money and time.
This is how you prepare a flat roof for waterproofing. It is not glamorous, but it is the most important part of the job.
Leak Hunt and Repair: Stopping the Problem at the Source
You must fix every leak before applying new waterproofing. Water trapped under a membrane will cause rot and bubbles, destroying your work from below.
Here is how do you repair leaks in a flat roof before waterproofing.
- Wait for a dry spell. The roof deck must be completely dry.
- Clean the entire surface. Sweep away all dirt, gravel, and debris. A shop vacuum works well.
- Perform a hose test. With a helper inside, run water over suspected areas. Start low and work up. Mark every spot where water appears inside. This method finds leaks that are invisible from a simple visual check.
- Cut out any soft, rotten wood or damaged substrate. Replace it with new, exterior-grade plywood or oriented strand board (OSB), securely fastened.
- For cracks in concrete, chisel out a “V” shape to create a wider base, clean it, and fill it with a flexible polyurethane or silicone-based sealant.
The Critical Leak Point Analysis: Seams, Flashing, and Edges
Flat roofs do not shed water like sloped roofs. Water sits and finds the weakest spot. Those weak spots are almost always at the junctions.
This is how to cover roof from rain at its most vulnerable points. Pay special attention to where the roof meets a wall (parapet), around vent pipes, and at the roof’s edge.
These areas move differently than the main roof. Heat makes them expand and contract. This constant flexing cracks old sealant. To waterproof these junctions correctly, you need to reinforce them properly to prevent leaks.
Use a flexible, roof-grade sealant and a reinforcing fabric mesh. First, apply a generous bead of sealant over the seam or joint. Then, immediately press the fabric mesh into it. Finally, apply another full coat of sealant over the mesh, completely saturating it. This creates a flexible, reinforced bandage that can handle movement without splitting.
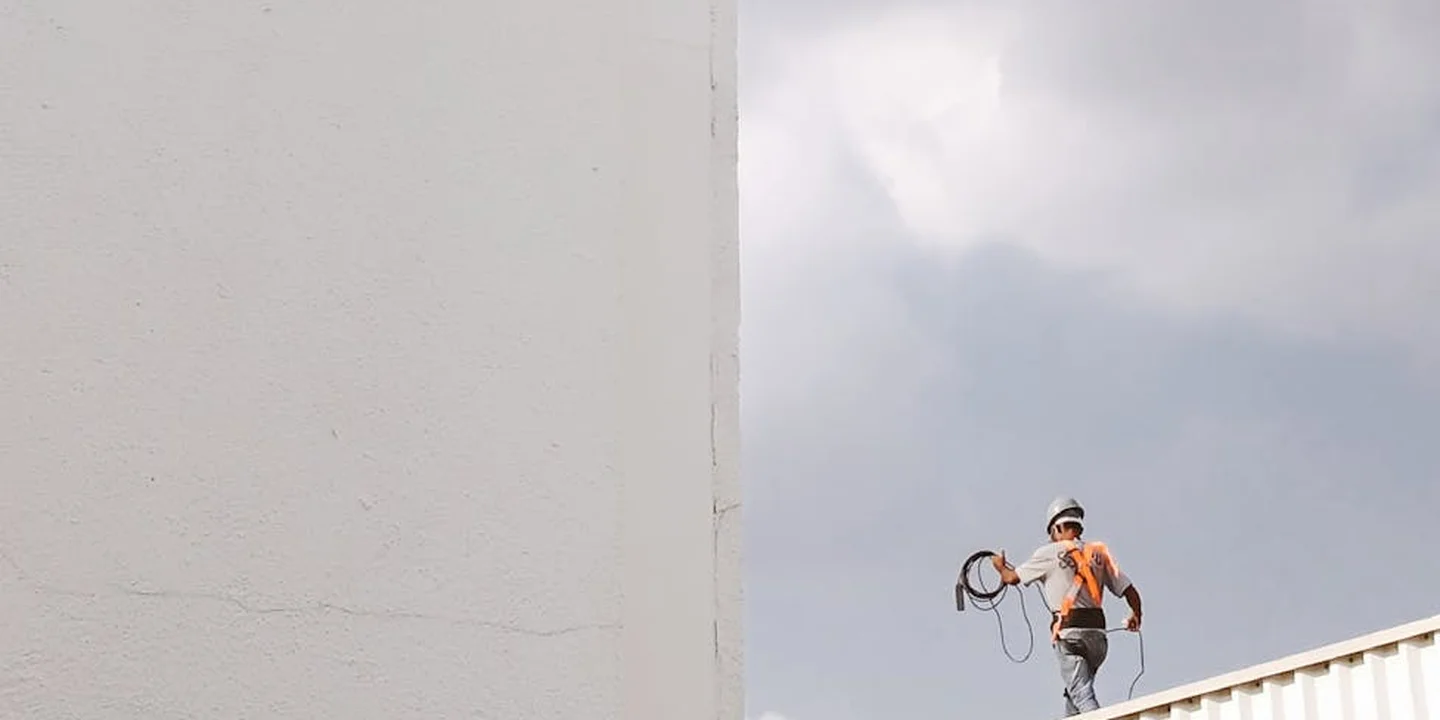
Safety First: Setting Up Your Work Area
Flat roofs feel safe until they are not. A slip on wet sealant or a misstep near the edge can be serious.
For DIYers, understanding how to install fall protection on a roof is non-negotiable. If your roof has a parapet wall, it may have anchor points. Use them with a proper harness and lanyard. If there is no permanent anchor, you must install temporary roof anchors that screw into the roof structure. Do not rely on makeshift tie-offs.
Keep your work area clean. Store materials away from the edge. Be aware of electrical lines. When using products like cold-applied adhesive or torch-down materials (if a pro is doing it), have a fire extinguisher rated for Class B fires (flammable liquids) readily accessible. This simple precaution ties directly into how to fireproof your roof during the work process.
How to Waterproof a Flat Roof, Step-by-Step
With the roof prepped, dry, and reinforced at the seams, you are ready for the main event. For most DIY and professional repairs, a liquid-applied membrane is the best choice. It forms a seamless, rubber-like blanket.
Applying a Liquid Waterproofing Membrane
This is a straightforward but detail-oriented process. Here are the steps to apply liquid waterproofing membrane.
Tools & Materials You’ll Need: Long-nap roller and frame, stiff brush, squeegee, measuring cup, reinforcement fabric, and your chosen liquid membrane (usually a rubberized asphalt or acrylic coating).
- Prime the surface if required. Some membranes need a primer for best adhesion. Check your product’s instructions.
- Start at the farthest point from your exit. Pour a manageable amount of coating onto the roof.
- Use the squeegee to spread the material into a thin, even layer. Follow with the roller to ensure complete, uniform coverage and to push coating into the texture of the roof. A consistent thickness is more important than a heavy, sloppy application.
- Immediately lay your reinforcement fabric into the wet coating on all critical seams, corners, and details. Press it down with the roller until it is fully transparent and saturated.
- Apply a second coat over the entire roof, rolling perpendicular to your first coat direction. This cross-hatching ensures no thin spots.
- Observe temperature limits. Most coatings need to be applied above 50°F (10°C) and not in direct, hot sun on a black roof. Curing time can be 24-48 hours. Check the forecast for rain.
Budgeting the Job: Cost vs. Longevity
What is the cost of waterproofing a flat roof? It depends entirely on who does the work and the material’s quality.
For a DIY project, you are paying for materials. Liquid membrane kits and materials typically cost between $0.50 to $1.50 per square foot. A 200-square-foot shed roof might cost $100 to $300 in materials. A larger 1,000-square-foot garage roof could run $500 to $1,500. Torch-down roofing is another common DIY option. Its cost per square (100 sq ft) is typically higher, about $200 to $600 per square, depending on materials and prep.
Hiring a professional includes labor, warranty, and expertise. Professional installation ranges from $3 to $7 per square foot on average. That same 1,000-square-foot roof could cost $3,000 to $7,000 installed, which is in line with typical roof replacement costs per square foot.
The real value is seen in lifespan. A proper DIY job with quality materials can last 10+ years. A professional-grade application with thicker mils and full system warranties can last 15-20 years or more. Compare that to the cost of interior water damage repair, and a good waterproofing job is always a smart investment.
Shed Roof Waterproofing: A Smaller, Smarter Project
The best way to waterproof a shed roof is with a liquid-applied membrane. It’s the most forgiving and effective DIY method. You can apply the roof coating from the ground with a long-handled roller, avoiding risky climbs. This setup makes it easier to reach all areas and keeps the job safer.
Think of your shed as a training ground. The principles are the same as a big flat roof, but the scale is manageable. A liquid membrane, like a high-quality acrylic or polyurethane coating, brushes or rolls on. It creates a seamless, rubber-like skin over your roof deck. Because there are no seams, there are no weak points for water to find its way in. This beats trying to seam together sheets of material, which is where most DIY shed projects fail.
Start with a sound structure. Replace any soft, rotted wood. Clean the surface until it’s free of dirt, moss, and loose material. Then apply the coating according to the manufacturer’s directions, which usually means a primer followed by two coats. Pay extra attention to the edges and any penetrations, like a vent pipe.
Common Shed Waterproofing Mistakes to Avoid
I’ve repaired dozens of sheds where a weekend project turned into a leaky mess. Avoid these common pitfalls.
- Painting Over Rot: Waterproofing is not paint. It will not stabilize rotten wood. You must cut out and replace all damaged plywood or boards first. Coating over rot seals in moisture and guarantees failure.
- Forgetting the Drip Edge: Water runs off the field of the roof but then wicks back underneath along the raw edge of the wood. Always install metal drip edge flashing on all sides before you apply any coating. Seal the top of the flashing to the roof with your membrane.
- Using the Wrong Product: Standard house paint or driveway sealant cracks and peels within a season. You must use a product specifically designed for roof waterproofing. Read the label.
- Ignoring the Slope: Even a shed roof needs a slight pitch to shed water. If your roof is truly dead flat, ponding water will eventually break down any coating. Consider adding tapered foam strips to create drainage paths before you waterproof.
The Homeowner’s Flat Roof Maintenance Log
A flat roof waterproofing system lasts decades with basic care. This simple, seasonal routine adds years to its life. Regular checks for seams, flashing, and surface wear support proper flat roof maintenance and help prevent leaks. Addressing issues promptly protects interior spaces from water damage.
Every Spring (After the last frost):
- Inspect the entire membrane for cracks, blisters, or punctures from winter debris.
- Clear all leaves, twigs, and dirt from the surface and scuppers.
- Check all metal flashings around walls and pipes for lifted seams or rust.
Every Fall (Before the first snow):
- Remove all leaf accumulation. Wet leaves hold moisture against the membrane and clog drains.
- Inspect and reseal any perimeter sealant that looks dried out, shrunken, or cracked.
- Ensure all roof drains and gutters are completely clear.
Be mindful of anything you place on the roof. A forgotten patio chair or a flagpole can chafe the membrane in the wind. If you have a flag, secure its pole with a proper weighted base, not by strapping it to a vent pipe, which can wear a hole in both the pipe boot and the roof. This routine is not optional. It’s how you catch a $200 repair before it becomes a $5,000 replacement.
Common Questions
What’s better for my project: a single-ply membrane or a liquid coating?
For a permanent, set-it-and-forget-it solution on a large area, hire a pro to install a single-ply membrane like EPDM or TPO. For a DIY-friendly job, especially on a shed or to seal complex details, a liquid-applied membrane is the more practical choice.
How can I make my new waterproofing last as long as possible?
Commit to semi-annual inspections and immediate repairs of any puncture or crack. The number one thing you can do is keep the surface and all drains completely clear of debris and standing water.
When should I choose TPO over EPDM rubber?
Choose TPO if energy efficiency and reflected sunlight are a priority, as it’s typically white and can reduce cooling costs. EPDM is my go-to for its proven long-term flexibility and weather resistance, especially in colder climates.
Making Your Waterproofing Investment Last
The most reliable waterproofing starts with a hands-on inspection to understand your roof’s unique needs. From there, pairing a robust, appropriate material with meticulous installation is what truly seals the deal.
Your job is to maintain that protection with consistent, safe inspections and a willingness to learn. Staying up-to-date on roof care best practices is how you ensure your flat roof or shed remains secure and functional for the long run.
Ray Huffington
Ray is an experienced roofer. He has worked as a general contractor in the roofing industry for over 15 years now. He has installed and repaired all kinds of roofs, from small houses to large mansion, and from basic shingles to cement and metal roofs and even solar roof panels. He has seen homeowners struggle with roofing questions and always has experience based proven advice to help those in need. If you need roof pros, Ray's your guide.