
How Much Does Professional Roof Moss Removal Cost, and Can You DIY It Safely?
You’ve seen it happen slowly. A few green flecks last year have become a fuzzy, green carpet on your north-facing shingles this spring. The big question isn’t just how to get rid of it, but what’s the smartest way for your wallet and your roof?
Homeowners often worry about the price tag for a professional cleaning and wonder if a roof rake from the hardware store is a safe, effective substitute. The cost varies widely based on your home and location, but trying to save money with the wrong tool can lead to much costlier repairs.
In this guide, I’ll cover the real price range for professional moss removal, the pros and cons of using a roof rake yourself, and safer DIY alternatives we recommend to our crew’s clients.
What You Need to Know First: Key Takeaways
- Professional cleaning typically runs between $400 and $800 for a standard home, but steep roofs or heavy growth can push the final bill over $1,000.
- A roof rake can scrape off the green you see, but it also scrapes away the protective granules on your shingles, creating sandpaper-like damage that shortens your roof’s life.
- The best move is to combine cleaning with prevention. Installing zinc or copper strips at the roof’s peak is the most reliable way to stop moss from coming back.
- Always verify a pro uses a gentle, low-pressure method. Harsh power washing can blast shingles apart and void your warranty.
Breaking Down the Cost: What Professionals Really Charge
Homeowners always ask me, “How much does it cost to remove moss from a roof?” I tell them to think of the quote like a recipe. You have several ingredients that change the final price.
For a typical 2,000 square foot house with a moderate pitch, you’re generally looking at that $400 to $800 range. Many companies estimate by the square foot, which often falls between $0.20 and $0.50. That square-foot price is a useful starting point for budgeting, but it’s just the base before other factors get added.
I’ve done jobs where the quote doubled because of conditions the homeowner didn’t even consider. Your final cost depends entirely on your roof’s specific story.
The 5 Biggest Factors That Change Your Moss Removal Quote
Here are the details from the crew’s perspective that really shape your estimate.
1. Roof Size & Pitch
More square footage means more time and material. The pitch, or steepness, is a huge labor multiplier. A steep roof isn’t just harder to walk on; it requires safety harnesses, roof jacks, and much slower, deliberate work, which all increase the labor cost significantly. A low, walkable roof might take a few hours. A steep one can take all day with a smaller crew for safety.
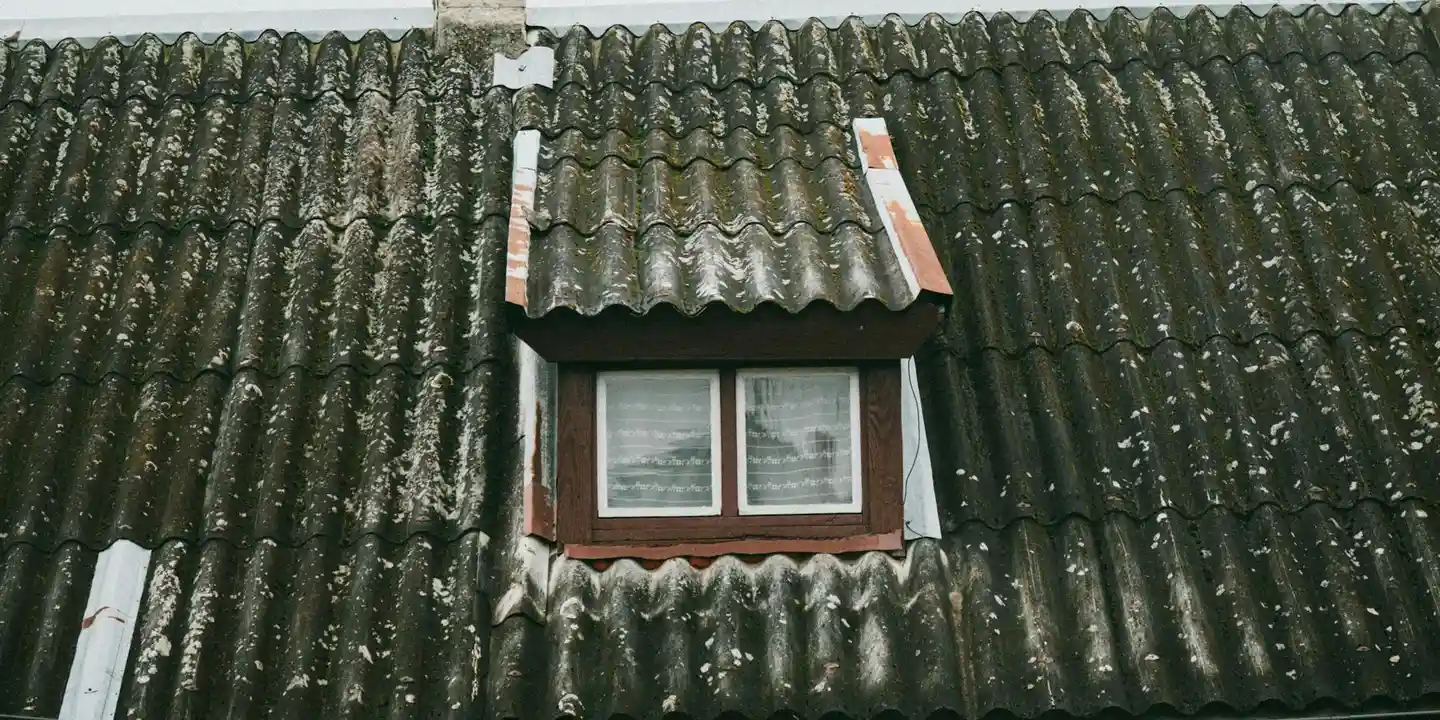
2. Moss Severity
Light, spotty moss is a quick job. Thick, matted moss that’s been growing for years is a different beast. It acts like a sponge, holding moisture against the shingles. Removing heavy mats often requires a gentler, multi-step approach to avoid pulling up entire shingles with the moss, which adds time and cost. Think of it like removing old tape from a wall; you go slow to avoid peeling the paint.
3. Your Roofing Material
Not all roofs are cleaned the same. Standard asphalt shingles need a soft touch to preserve their granules. Safely cleaning mold from asphalt shingles requires gentle, low-pressure methods to avoid granule loss. Using appropriate cleaners designed for asphalt roofs helps prevent staining and damage while removing mold. Wood shake is fragile and can split if brushed too hard. Tile and metal are durable but require specific cleaners to avoid staining. The method must match the material, and specialized care for wood, tile, or historic roofs always comes at a premium.
4. Location & Accessibility
Labor rates vary by city and region. The physical access to your roof matters just as much. If your house is surrounded by dense gardens, decks, or has a very high second story, it takes extra time and equipment to set up ladders safely without damaging your property, and that time is billed. A simple, open ranch-style home is always the most straightforward and affordable job.
5. The Cleaning Method
There are two main ways pros do this: soft wash (using a moss-killing chemical solution) and manual brushing (often after a treatment). A pure soft wash might cost less upfront but could require a follow-up visit. Manual brushing is more labor-intensive but gives an immediate, clean result. I prefer a combined method—applying a biodegradable moss killer, letting it work, then gently brushing the dead moss away without damaging the shingles. Avoid any company that mentions high-pressure water; that’s a red flag for roof damage. When choosing a method, it’s crucial to understand the pros and cons of each.
The Roof Rake Question: A DIY Solution or a Hidden Hazard?

Are roof rakes an effective DIY tool? I hear this a lot. A roof rake is like a long-handed garden hoe or a snow shovel designed for your roof. It has a wide, flat head that you use to scrape material off the surface. Some have a telescoping pole. A roof scoop is a similar tool, often with higher sides, better for snow but also used for debris.
Here is my clear answer from twenty years on roofs. A roof rake can remove the bulk of dry moss. It feels productive. But that feeling comes with real and expensive risks to your roof’s health and your safety. You must ask, can a roof rake damage your roof? Absolutely. Do roof rakes damage shingles? Every single time you drag one across an asphalt roof, you are causing some level of wear.
How a Roof Rake Can Damage Your Shingles (And Your Wallet)
The damage happens in the mechanics. The edge of the rake, even a plastic one, catches on the tiny, gritty granules on your asphalt shingles. As you pull, it doesn’t just lift moss. It plucks those granules loose like sandpaper on a painted car hood.
Those granules are not just for color. They are a shield against the sun’s ultraviolet rays. Scrape them away, and you expose the asphalt underneath to faster breakdown. This accelerated UV degradation can cut years off your roof’s lifespan and is a common reason manufacturers void warranty claims. They see the unnatural wear pattern and deny coverage.
I’ve been called to repair roofs where someone aggressively “cleaned” with a rake. The repair often involves replacing whole sections of prematurely aged shingles. That bill can easily surpass the cost of a professional soft wash cleaning.
If You Must Use a Roof Rake: A Safer, Limited Approach
If you have a very low-pitch roof with a dusting of dry, loose moss, you can use a rake with extreme caution. This is not for thick, wet mats or steep roofs. Follow these steps to minimize harm.
Step 1: Use an extendable pole to stay firmly on the ground. Your feet belong on the earth, not the ladder or roof for this task. A good telescoping pole gives you reach and keeps you safe.
Step 2: Always pull the rake DOWN the roof slope (with the shingles), never up or sideways. Pulling down follows the shingle’s overlapping pattern. Pulling up can catch edges and tear them.
Step 3: Use minimal pressure. Let the tool’s weight do the work. You are guiding, not forcing. If you’re straining, the moss is too rooted for this method.
Step 4: Never use a metal-edged rake. Only use tools with a plastic or poly blade. Metal is far too aggressive and will guarantee damage.
A decent telescoping roof rake costs between $50 and $150. A roof scoop works on a similar principle but is designed more for pushing snow or loose debris. For moss, the flat rake head gives you better control for the delicate pulling motion you need.
Hazard Assessment: When This Job is “Pro-Only”
Some conditions make DIY moss removal a hard no. Your safety and your roof’s integrity are not worth the risk.
Roof Pitch: If your roof is steeper than a 6/12 slope (that means it rises 6 inches for every 12 inches horizontal), it is a major fall risk. Walking on it requires training and gear.
Power Lines: Any overhanging utility lines near your work area create a lethal electrocution hazard. Pros know how to assess and manage this distance.
Roof Condition: Old, brittle, or cracked shingles can break underfoot. You might go up to clean moss and come down with a leak caused by your own footsteps.
Multi-Story Homes: The danger multiplies with height. A fall from a second-story roof is often severe or fatal. The complexity of moving equipment and managing ropes at height is for professionals.
A professional crew doesn’t just bring a ladder. They use fall arrest systems, roof jacks to create safe platforms, and special rubber-soled footwear for grip. This equipment, and the training to use it, is what you are really paying for with a pro the peace of mind that the job gets done without injury or catastrophic damage.
Choosing a Professional Service: What to Ask (Beyond the Price)
This is the key step. A low price won’t mean much if the cleaning method damages your shingles. Your first question, and the one that separates the hacks from the pros, is about their method.
Ask if they use a high-pressure washer or a soft wash system. A professional will never blast your roof with high pressure. It is possible to safely clean roof shingles and remove stains without damage with the right method. A low-pressure soft wash targets stains while protecting the shingle surface. I’ve seen crews do it, and it’s heartbreaking. That force drives water under the shingles, strips away the protective granules, and can cause leaks you won’t see for months. The right way is a low-pressure soft wash that applies a moss-killing solution and gently rinses it away.
Next, ask about the chemicals in that solution. You want a company that can tell you exactly what they’re using.
The best mossicides are sodium hypochlorite-based (like a very specific, roof-safe bleach mixture) or made from potassium salts of fatty acids, and they should be biodegradable. Avoid anyone who is vague or says they use “just soap and water.” That won’t kill the roots. A responsible company considers your landscaping and local waterways in their chemical choice.
Never let a worker on your roof without verifying their insurance. This is non-negotiable.
Ask for a Certificate of Insurance (COI) that shows both general liability and workers’ compensation coverage. If a worker gets hurt on your property and the company isn’t insured, you could be held liable. A reputable company will email you the COI without hesitation. My crew always carries a copy in the truck for the homeowner to review.
Finally, get every detail of the job in writing. A quote should be a scope of work.
Your written estimate should clearly state if it includes a preventative treatment, like a zinc sulfate spray, to slow moss from coming back. Cleaning without prevention is a temporary fix. If it’s not included, ask for the cost to add it. This is how you choose a roof moss removal service: by vetting their method, their materials, their insurance, and their plan for long-term results. Make sure they’re committed to safely remove moss from your shingles.
The Homeowner’s Moss Prevention & Maintenance Routine
Think of your roof like a car. A little regular maintenance prevents big, expensive repairs. This simple routine tackles the three things moss loves: shade, moisture, and a place to grab onto. When moss starts to creep in, removing it from the roof safely is essential. We’ll cover safe moss removal techniques in the next steps.
Your gutters are your roof’s drainage system. When they’re clogged, water backs up and sits against the roof edge, creating a perfect damp sponge for moss.
Make it a habit to clean your gutters and downspouts in the spring after the seeds fall and again in the late fall after the leaves drop. This simple task prevents moisture dams that rot your roof deck and feed moss growth.
Look at the trees around your house. Branches that hang over the roof cast shade and drop debris that holds moisture.
Once a year, in late fall, trim back any overhanging branches to let more sunlight and air reach your roof surface. Sunlight is a natural moss killer. Increasing airflow helps the roof dry faster after rain or dew.
For a more hands-off solution, consider installing metal strips. These are a classic, effective tool.
You can install zinc or copper strips along the ridge of your roof. When it rains, a tiny amount of metal ions washes down the roof, creating an environment where moss can’t easily grow. They last for years and are a great investment for homes in shaded, damp climates. This can be more effective than natural moss removal methods.
After any cleaning, whether you do it or a pro does, take the extra step to protect your work. This final touch makes all the difference.
After the roof is clean and dry, apply or request a moss-inhibiting sealant treatment to help keep it clear for seasons to come. This is especially important for moss prevention on residential roofs. For moss prevention on residential roofs, regular maintenance and the right sealants help keep shingles healthy. It’s the best way to extend the life of your roof and protect your investment.
Common Questions
What should I do right after my roof is cleaned to protect it?
The first step is to install zinc or copper strips along the ridge. This provides long-term protection by preventing moss from easily growing back.
How can I tell if moss has caused hidden damage to my roof?
Severe, matted moss traps moisture against the deck, which can lead to rot. If the growth was heavy, schedule a professional inspection to check for soft spots or compromised shingles underneath.
Do different roofing materials need specific care after moss removal?
Yes. While asphalt shingles benefit greatly from metal strip prevention, always consult your contractor. Treatments or sealants should be compatible with your specific material, whether it’s wood, tile, or metal.
Your Blueprint for Long-Term Roof Health
From my years on the job, I tell homeowners that consistent, gentle cleaning beats any drastic reaction to moss. Match your response to the severity of the growth—professional removal for thick mats, cautious raking for light film—to protect your shingles.
Think of your roof as a living part of your home’s shell that needs your informed attention. Building your knowledge on care and materials makes you a partner in your roof’s durability, not just a customer when it fails. Understanding residential roof life expectancy factors helps you plan maintenance and replacement timelines. From climate and insulation to shingles and installation quality, these factors shape how long your roof will perform.
Ray Huffington
Ray is an experienced roofer. He has worked as a general contractor in the roofing industry for over 15 years now. He has installed and repaired all kinds of roofs, from small houses to large mansion, and from basic shingles to cement and metal roofs and even solar roof panels. He has seen homeowners struggle with roofing questions and always has experience based proven advice to help those in need. If you need roof pros, Ray's your guide.