
How to Read Roof Blueprints and Sketch Accurate Roof Designs
Have you ever stared at a roof blueprint, unsure what all those lines and symbols mean? I remember my first major repair job where a misread detail nearly led to a structural issue. Reading blueprints and creating your own design sketches is a fundamental skill that prevents costly errors and ensures a safe, code-compliant roof. This guide breaks down the process into clear, manageable steps I use on every project.
I will show you how to decode common blueprint symbols, take accurate physical measurements, and translate them into a practical sketch for planning or repairs.
Key Takeaways: Your Quick-Start Guide
Here is what you must remember before you pick up a pencil or a hammer.
- Blueprints are the legal map for your roof. Misreading them voids manufacturer warranties and guarantees your project will fail inspection.
- An accurate sketch prevents material waste and costly field fixes. It turns the plan into actionable steps that save time and money.
- You must understand local building codes and wind uplift ratings from the blueprint. This is non-negotiable for a safe, compliant roof that protects the home.
- Some tasks require a professional. Complex hip roof geometry or intricate valleys often need an expert to translate from paper to shingles correctly.
Why Bother with Blueprints and Sketches? The Roofer’s Reality Check
I’ve watched good roofers get into trouble by treating the blueprint as a simple drawing. It is not. A roof blueprint is the architect’s instruction manual, specifying every layer and fastener for a durable roof. Your job is to follow those instructions to the letter.
Your sketch is how you communicate those instructions to your crew on a noisy job site. A good sketch acts like a reliable chalk line on the deck, guiding every cut and placement with confidence. Without it, you are guessing, and guessing leads to leaks.
This accuracy ties directly to your budget and reputation. Precise plans let you create exact material estimates, which is the foundation of any good quote and prevents wasted bundles. I learned this the hard way early in my career by underestimating a valley and having to pay for extra material out of pocket.
Do not skip the details in the notes and sections. Blueprints specify critical elements for long-term roof care, like underlayment type, flashing integration, and ventilation pathways. Ignoring these is how you get a callback for a leak in two years.
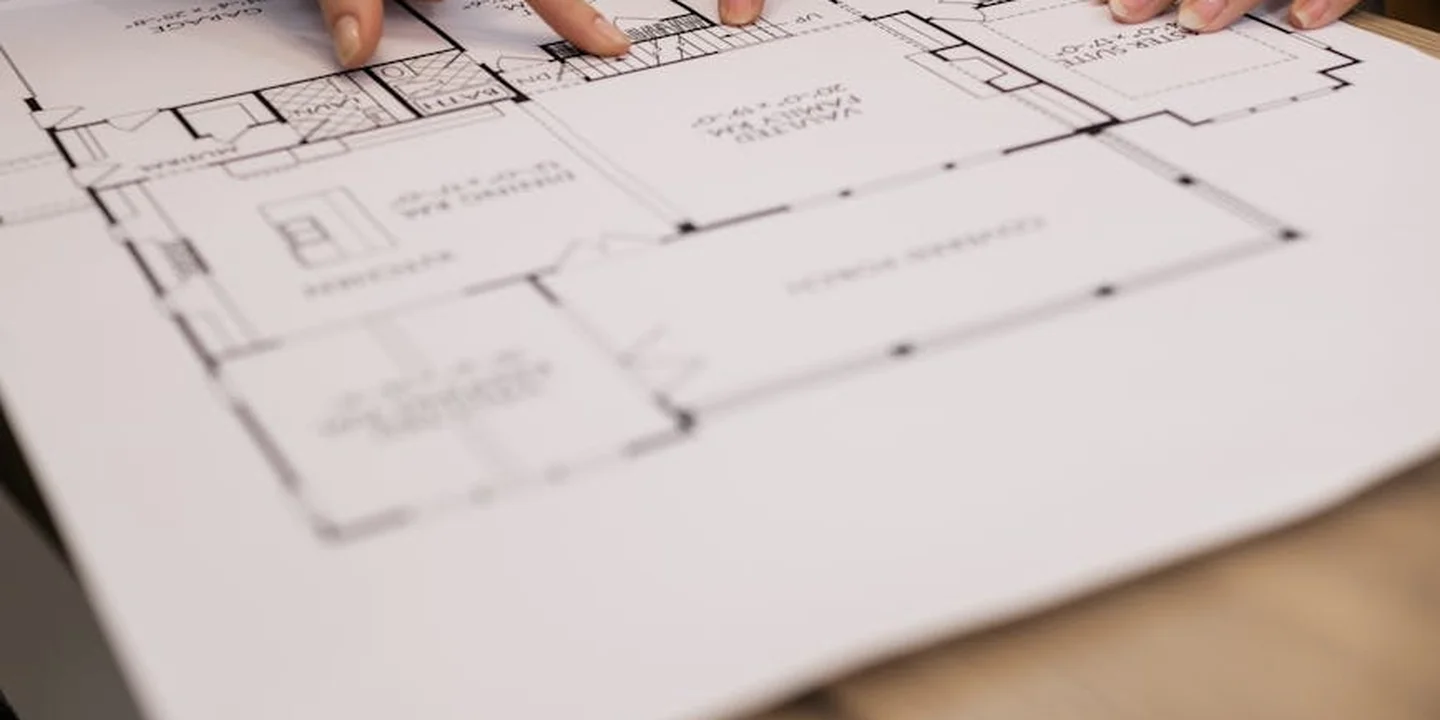
The Two Documents: Blueprint vs. Sketch
Let’s define these tools clearly. A roof blueprint is the official, scaled construction document, complete with engineer stamps and legal weight. It is the authority you answer to for code compliance.
A roof design sketch is the practical, on-site translation a roofer makes for the crew. In my experience, it is like a detailed cartoon about roof tiling that shows exactly where everything goes in a way everyone understands instantly. It complements knowledge about roof construction types, materials, and systems.
Think of it this way. The blueprint is the detailed recipe from a professional kitchen. It lists every ingredient and step. Your sketch is your prep list and cooking notes for your own grill. It organizes the work so you can execute the recipe perfectly under real conditions.
Cracking the Code: How to Read Roof Blueprint Symbols and Notations

When you first look at a roof blueprint, all the lines and marks can be confusing. The key symbols and notations are a universal language for roofers, showing where every rafter, valley, and drain goes. Think of it like reading a map before a road trip.
Your first step is always to find the legend on the drawing sheet. Blueprints from different architects use different symbols, so the legend is your essential cheat sheet. I once started a job assuming a symbol meant a standard vent, but the legend showed it was for a specialized exhaust fan.
Here are some of the most common symbols you will encounter.
| Symbol on the Print | What It Stands For |
|---|---|
| A solid line with small tick marks or arrows | Rafter or roof joist, indicating direction and length |
| A thick, peaked line at the top of angles | Ridge board, the backbone of your roof |
| Lines meeting in a sharp “V” shape | Valley, the channel where two roof sections meet |
| A small circle, sometimes with a cross or label | Drain, vent pipe, or other roof penetration |
| Dashed or dotted lines | Hidden structural elements, like framing behind sheathing |
You also need to understand the abbreviations. Abbreviations like TYP for ‘typical’ tell you when a detail is repeated, which directly affects how much material you order. If the print says “Rafter @ 24″ O.C. TYP,” it means that spacing is used throughout the area. You must count all the rafters to get your total lumber.
Other common abbreviations are CL for centerline and SYM for symmetrical. Missing a TYP note can mean you’re short dozens of pieces when the delivery truck arrives. I’ve had to make extra runs to the lumberyard because of that.
Understanding Roof Pitch and Slope Notation
Roof pitch and slope tell you how steep the roof is. On a blueprint, this is almost always written as a ratio, such as 6:12. This means for every 12 inches the roof goes out horizontally, it goes up 6 inches vertically.
People use pitch and slope to mean the same thing, but there is a small difference. Pitch is the ratio of the rise to the full span of the roof, while slope is the ratio of rise to run. For your work on the roof, the 6:12 notation gives you what you need. You can also learn more about roof pitch calculations.
This number is not just for looks. The pitch dictates what roofing materials you can use and what safety gear you need. Standard asphalt shingles often need a minimum slope of 2:12 or 4:12 to shed water properly. Steeper roofs, like 9:12, might require metal panels or special underlayment. On low-slope roofs, the material choice becomes even more important. In the next steps, you’ll see recommended options aligned with your roof’s pitch.
For safety, I always note the pitch before my crew steps on the roof. Any roof with a pitch over 6:12 requires fall protection like harnesses or roof jacks. I treat steeper pitches with extra respect because a slip can happen fast.
The Roofer’s Toolkit: What You Need to Read and Sketch
Reading a blueprint is one skill. Sketching your own accurate design is another. You need a mix of physical drawing tools and the right mindset to do it well. Let’s break down what goes in your toolkit.
First, the physical tools for putting pencil to paper.
- Architect’s scale ruler: This multi-sided ruler lets you measure directly from scaled drawings. My favorite is a triangular scale with 1/4″ and 1/8″ scales.
- Drafting triangles: A 45-degree and a 30-60-90 triangle help you draw perfect angles for roof pitches and hips.
- Quality pencils and erasers: A mechanical pencil with 0.5mm HB lead makes consistent lines. A good white eraser fixes mistakes without smudging.
- Graph paper: Paper with a grid keeps your sketch proportional. I start with 1/4″ grid paper for most roof sketches.
- Tape measure: Never trust the blueprint alone. Use a 25-foot tape to verify critical dimensions on the actual house.
The mental tools are just as critical. Patience is your best friend when untangling a complex roof plan or starting a sketch from scratch. Rushing leads to errors that cost time and money.
Keep a trusted reference book nearby, like “A Roof Cutter’s Secrets” for complex cuts. Knowing how to snap a chalk line on the roof deck helps you visualize and draw the layout correctly. If you can see the lines in your head, you can put them on paper.
You can use digital tablet apps for sketching. But I always recommend learning with paper and pencil first to build a real feel for scale. My early sketches were all by hand, and that foundation made me confident on any roof.
Step-by-Step: How to Read a Roof Blueprint Like a Pro

Treat this like a linear process. You start with the big picture and work your way down to the tiny details. I always walk my crew through it this way to prevent confusion on the job site.
Step 1: Gather and Orient Yourself
First, get organized. On a renovation last spring, we wasted half a day because the detail sheet was in a different folder.
- Collect all relevant sheets. You typically need three sets: structural for the frame, architectural for the shape, and detail sheets for the flashings and edges.
- Check the title block first. Look for the scale, date, and revision number. I always use the latest version; a revised rafter spacing once saved us from ordering the wrong lumber.
- Locate the north arrow on the site plan. Knowing the roof’s orientation helps you plan for sun exposure and wind-driven rain, which affect material durability.
Step 2: Identify the Roof Style and Critical Measurements
This step answers your core questions. Spotting the style early tells you how complex the job will be.
How do you account for different roof styles like gable or hip in a sketch? Look at the roof plan view. A simple rectangle with a line down the middle is often a gable. Lines coming from all corners to a central point usually mean a hip roof. The elevation drawings confirm the slopes.
What measurements are critical to take from a roof blueprint? Write these down every time. Missing one can throw off your entire material order.
- Overall building dimensions (length and width).
- Eave lengths (the horizontal overhang).
- Ridge length (the peak running along the top).
- Rafter spacing (commonly 16″ or 24″ on center).
- Overhangs at the eaves and rakes.
Never guess a missing dimension. Use the scale to calculate it. If the scale is 1/4″ = 1′ and a wall is 1.5 inches on paper, it’s 6 feet long. Guessing leads to costly cuts that don’t fit.
Step 3: Decode the Details and Specifications
This is where the real roof-care knowledge lives. I learned to scrutinize this section after a leaky valley taught me a painful lesson—especially after debunking some roof-care myths.
- Focus on the sections and detail callouts. These blown-up drawings show exactly how to install flashing at a chimney or how edge metal should drip. Think of them as the instruction manual for keeping water out.
- Check for notes on ice and water shield zones, attic ventilation, and warranty steps. For example, manufacturer warranties often require specific underlayment in valleys. Skipping this voids your coverage.
- This is where code compliance is spelled out. You’ll find nailing patterns, fastener types, and safety specs here. Following these isn’t just about passing inspection; it’s about building a roof that lasts and protects the people inside.
From Plan to Paper: Creating Your Accurate Roof Design Sketch
Translating the blueprint to your own sketch is where the project becomes real. This is your chance to find errors before they are built into the roof.
How to Scale Dimensions and Start Your Drawing
How do you translate blueprint dimensions into a scaled sketch? Use graph paper and an architect’s scale ruler. If the blueprint scale is 1/8″ = 1′, then 1 inch on your graph paper equals 8 feet in reality.
Start by drawing the building’s footprint. Then, add the ridges, hips, and valleys based on the style you identified. For tricky angles on custom homes, the methods in A Roof Cutter’s Secrets to Framing the Custom Home are invaluable. They break complex geometry into simple steps.
Common Sketching Mistakes and How to Avoid Them
What are the common mistakes to avoid when reading roof blueprints? I’ve seen all of these cause problems.
- Ignoring the scale and drawing freehand. Your sketch must be proportional.
- Missing detail callouts for flashing or penetrations. Every pipe and vent needs a home in your sketch.
- Not accounting for roof thickness. Remember, decking, underlayment, and shingles add height that affects clearances.
- Forgetting to include chimney or vent openings. Draw them in early so you know where to frame the openings.
A mistake on paper becomes a very expensive mistake on the roof. A wrong angle in a sketch once led to a valley that didn’t shed water, requiring a full tear-off to fix.
Final Checks for a Foolproof Sketch
What steps ensure a roof design sketch is accurate and to scale? For residential roof designs SketchUp helps you visualize slopes and details in 3D. Run through this checklist before you order any materials.
- Verify all measurements twice. Go back to the blueprint and confirm each number.
- Cross-reference with elevation views. Make sure the slopes in your sketch match the side views on the plans.
- Calculate the total roof area from your sketch. This ensures you order the right amount of shingles and underlayment.
- Have another experienced person review it. I always ask a crew member to look over my shoulder; a fresh pair of eyes catches what you might miss.
A precise sketch is the foundation for proper water shedding. When every angle and intersection is correct, water flows off the roof without ponding, which is the ultimate goal of good roof maintenance.
When This Isn’t a DIY Job: Recognizing Your Limits
Looking at a blueprint can feel like learning a new language. It’s tempting to think you can puzzle it all out. For basic sketching on an existing roof, you often can. But there is a firm line where amateur sketching must stop and professional plans begin.
I need to be blunt here. Blueprints for new construction or a major addition are not DIY territory. If your project involves building a new structure or significantly altering your home’s footprint, licensed contractors and design pros must handle the plans. The stakes are too high. On a crew, we’d use homeowner sketches for planning material estimates, but we’d never frame a roof from them. Roof repairs, though tempting to DIY, carry risks of leaks and falls. In most cases, hiring a professional roofer is the safer choice to protect your home.
Three major red flags mean you should put the pencil down and pick up the phone. The first is engineered trusses. These are like a custom engine block for your roof. If the blueprint shows prefabricated trusses, you are looking at a system where every piece relies on precise engineering for strength; you cannot sketch or modify these yourself.
The second red flag is a complex roof shape. Multi-plane roofs with valleys, hips, and dormers are a 3D puzzle. The third is any uncertainty about local building codes. If you don’t know the required rafter spacing or insulation R-value for your area, you’re already in over your head.
There is also a practical legal hurdle. Your city or county building department will almost always require sealed plans from a licensed architect or structural engineer before issuing a permit for major work. They need the official stamp. A hand-drawn sketch, no matter how neat, won’t pass muster. I’ve seen entire projects delayed because homeowners didn’t know this step was required.
Finally, and most critically, is the issue of structural safety. Blueprints note design loads for wind and snow. Misreading these numbers or sketching a design that can’t hold them is a catastrophic risk. An error in interpreting load ratings doesn’t just cause a leak; it can compromise the safety of the entire structure. This isn’t about pride. It’s about knowing that some jobs require the expertise and liability insurance of a professional. Your goal should be a safe, sound roof, not just a piece of paper that looks right.
Common Questions
What’s the one tool I need that isn’t in my toolbox?
Patience. Rushing leads to misreading symbols or skipping details, which guarantees errors on the roof. Slow down, verify every notation against the legend, and double-check your measurements before you sketch.
What’s the most common mistake that ruins a sketch?
Ignoring the scale and drawing freehand. This throws off every dimension, causing material shortages and framing that doesn’t fit. Always use graph paper and an architect’s scale ruler to keep everything proportional from the start.
What’s the biggest challenge when sketching different roof styles?
Visualizing the 3D angles from a 2D plan. For hips and valleys, you must accurately translate where planes intersect on your sketch. Use drafting triangles for the angles shown and cross-reference your sketch with the blueprint’s elevation views to confirm.
Your Blueprint for a Roof That Lasts
From my experience, the single most important step is creating a clear, accurate sketch that any roofer can use to build safely and correctly. Get this foundation right, and you avoid the vast majority of future problems before the first shingle is even laid — especially when it comes to building and framing the roof structure.
A well-planned roof is a direct result of responsible ownership and a commitment to ongoing learning. I encourage you to keep exploring resources on roof care, all types of roofs, and maintenance guides to make informed, safety-first decisions for your property.
Ray Huffington
Ray is an experienced roofer. He has worked as a general contractor in the roofing industry for over 15 years now. He has installed and repaired all kinds of roofs, from small houses to large mansion, and from basic shingles to cement and metal roofs and even solar roof panels. He has seen homeowners struggle with roofing questions and always has experience based proven advice to help those in need. If you need roof pros, Ray's your guide.