
How Do You Remove a Chimney? A Roofer’s Guide to Methods, Process & Feasibility
Is your old chimney collecting more leaks than it does smoke? You’re not alone. Many homeowners face this dilemma when a chimney becomes obsolete or problematic. Removing a chimney is a significant structural change that demands a clear plan and expert handling to protect your home’s integrity.
I’ll explain how to assess if removal is right for your house, outline the common demolition methods we use on my crew, and detail the full process from inspection to final repair.
Can a Chimney Be Removed From a House? The Straight Answer
Yes, you can remove a chimney from your house. But let me be clear, this is a major structural project, not a simple weekend fix. I’ve worked on dozens of these jobs, and each one requires careful planning and skilled execution.
Homeowners usually decide to remove a chimney for a few practical reasons.
- Structural issues: The chimney is crumbling, leaning, or has severe mortar decay that’s too costly to fix.
- Freeing up space: That chimney breast in your living room or bedroom takes up valuable square footage.
- Stopping leaks: If your chimney is the main source of chronic roof leaks, removal is a permanent solution. I’ve seen many roofs dry out for good after we took a problematic chimney out.
- Upgrading appliances: Modern furnaces and water heaters often use direct-vent systems that don’t need a traditional chimney.
There are good reasons to keep one, though. If you use your fireplace, love the classic look, or own a historic home, repairing and maintaining the chimney is often the better path. A well-built chimney adds character and can be a functional asset.
This is absolutely not a do-it-yourself project. You are dealing with immense weight, significant height, and critical connections to your home’s frame and roof. Tearing it down wrong can cause damage to your roof, walls, and even the foundation. Always hire a professional crew.
What to Consider Before You Decide to Remove a Chimney
The first and most important step is a professional assessment. You need a qualified roofer and likely a structural engineer to look at your specific situation before any decisions are made. They will determine how the chimney is tied into your home.
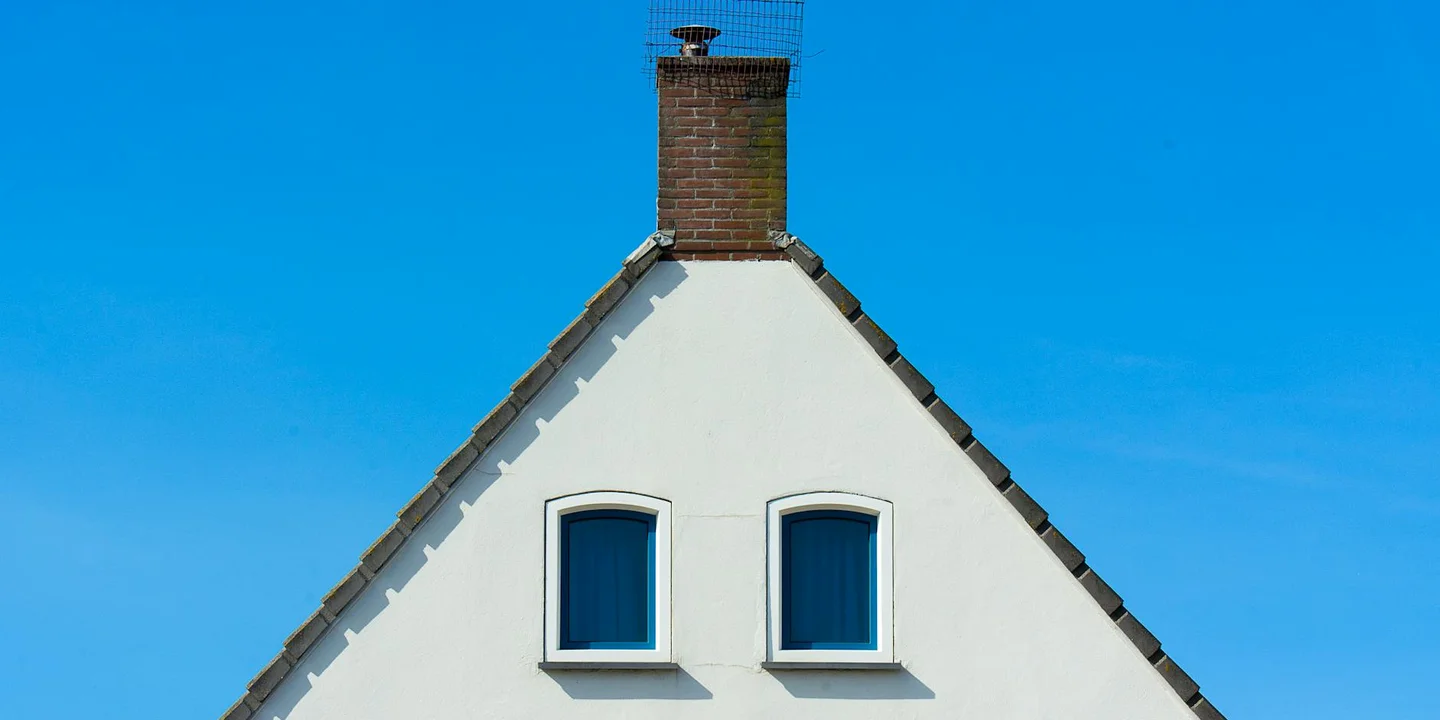
A chimney isn’t just sitting on your roof. It’s integrated. The roof framing is built around it, and the metal flashing is woven into the roofing layers to create a watertight seal. Think of the flashing like a custom-fitted boot where the chimney meets the roof. Removing the chimney means you have to rebuild that section of roof framing and install new, continuous roofing over the gap.
Several hidden factors will affect the job.
- Local building codes and permits: This work almost always requires a permit. Your contractor should handle this.
- Asbestos or creosote: Old flue liners may contain asbestos, which requires special abatement procedures.
- Roof warranty: If your roof is under warranty, the removal and repair must be done to the manufacturer’s specifications to keep that warranty valid.
Think about cost over time. Compare the recurring expense of chimney repointing, cap replacement, and leak repairs every few years to the one-time investment of proper removal and a fully restored roof. For a chronically faulty chimney, removal often makes long-term financial sense.
Safety First: Why This is a Job for Professionals
Chimney removal is not a do-it-yourself weekend project. It is one of the most hazardous tasks you can undertake on a roof. Regular chimney components maintenance, including flues, crowns, and caps, helps prevent issues that would make removal even more dangerous. Staying on top of maintenance also keeps future repairs safer and more manageable.
The specific dangers involved make hiring a professional crew the only sensible choice.
The Hazards Are Real and Severe
You are working at height on a roof section that becomes unstable as you dismantle it. The footing changes by the minute.
Falling bricks and mortar are lethal. I have seen a single brick punch straight through a porch roof and decking from two stories up. The force is incredible. Controlling this debris over the side of a house is a major operation.
The dust is another silent threat. Old mortar and soot create a fine, hazardous silica dust. Inhaling it can cause serious, long-term lung damage.
If the chimney is not properly supported during demolition, you risk a partial structural collapse that can damage the roof and the interior of your home. Such problems can affect home safety.
How a Professional Crew Manages the Risk
A qualified team comes prepared with specialized equipment to control every hazard. This is what you are paying for.
- Fall Arrest Systems: Every worker is tied off with a harness and lifeline anchored to a secure point. This is non-negotiable.
- Roof Jacks or Staging: They install temporary platforms or jacks to create a stable, safe work area around the chimney.
- Debris Chutes: Heavy-duty chutes are set up to funnel bricks and rubble directly into a dumpster or designated area on the ground. Nothing gets thrown.
- Dust Suppression: They use water misting systems or enclosures to keep hazardous dust from becoming airborne.
- Full PPE: This includes hard hats, safety glasses, heavy gloves, and respirators rated for silica dust.
The Liability You Assume by Doing It Yourself
If you get hurt, your health insurance may not cover an injury sustained during unlicensed construction work. The medical bills would be yours alone.
If a brick falls and injures a family member, neighbor, or damages property, your homeowner’s insurance could deny the claim. They would call it negligence.
A licensed, insured contractor carries liability and workers’ compensation insurance to protect you, your property, and their crew. This transfers the massive financial risk of the project off your shoulders. That peace of mind is worth the cost of hiring a pro.
Chimney Removal Methods Explained
When you decide to remove a chimney, the method matters more than you might think. I’ve overseen dozens of these jobs, and choosing the right approach keeps your home safe and the project on track. Let’s break down the two main ways we do this.
The Top-Down Method
This is the standard for most chimney removals. My crew starts at the roof line and works down, taking apart the stack brick by brick or in small sections. We use tarps and chutes to direct debris straight into a dumpster on the ground.
Working from the top gives us complete control over the demolition, which is why it’s my preferred method for most homes. It’s like carefully disassembling a tall tower of blocks from the top so nothing crashes down unexpectedly. We patch the roof as we go, which minimizes weather exposure.
The Interior-First Method
Sometimes, you have to start inside. This method involves removing the hearth, fireplace, and the chimney flue from the living areas before we even touch the roof stack.
We use the interior-first approach when a homeowner is already renovating the room and wants the indoor space cleared first. I once worked on a century home where the owners were converting their fireplace nook into a bookshelf. Taking the interior chimney out first made their interior remodel much easier.
Comparing the Two Approaches
Your home’s layout and goals determine the best method. Here’s a quick comparison from my experience.
For debris management, top-down is cleaner. All the broken brick and mortar goes directly outside. With interior-first, you’re hauling debris through your home, so it’s messier.
Interior disruption is higher with the interior-first method. You’ll have dust and workers inside your living space. The top-down method mostly keeps the mess on the roof and outside.
Choose top-down for a straightforward exterior removal on a standard home. Opt for interior-first if you’re already gutting the room or have a complex interior layout that needs attention.
Why a “Full Tear-Down” Isn’t an Option
You might wonder why we don’t just knock the whole chimney over. I need to be very clear about this.
Pushing over a full chimney stack is extremely dangerous and is never the correct way to do it. The weight and force could collapse part of your roof or wall. I’ve seen bids from less experienced crews suggesting this, and it’s a major red flag. Proper removal is always a controlled, piece-by-piece process.
The Step-by-Step Process for Chimney Demolition
Planning a chimney removal is like mapping a route through a construction zone. You need a clear, safe sequence. As a roofer, I follow this exact process on every job. It keeps the crew safe and protects your home.
Step 1: Site Prep & Protection
We never start swinging hammers first. We start by shielding everything around the work area. Heavy tarps go over your shrubs and flower beds. We set up ground safety zones with bright tape so no one walks under the work. Inside your attic and living spaces, we hang plastic dust barriers over openings. This prep work prevents thousands in damage to your property and stops a dusty mess from spreading through your house. On one of my first jobs, we skipped interior barriers, and the homeowner was cleaning fine brick dust for a week.
Step 2: Utility Disconnection
This is the silent, critical step. Before anything comes down, we must deal with the flue. A licensed professional seals and caps the flue liner at the roofline. This stops drafts, moisture, and animals. We then double-check that no gas lines, furnaces, or water heaters are still venting into the chimney. I once helped on a demo where an old furnace vent was still active. Finding and capping it correctly avoided a dangerous situation. Never let a crew skip this verification.
Step 3: The Dismantle
Now we carefully take the chimney apart. We work from the top down, just like undressing a layer. The chimney crown comes off first. Then, we remove bricks and mortar course by course using hand tools. We use a sturdy debris chute to funnel all the old masonry directly into a waiting dumpster or container on the ground. This controls the fall and protects your roof deck from impact damage. I’ve seen videos of people trying to push a chimney over. That method risks cracking rafters and is never worth the shortcut.
Step 4: The Critical Roof Repair
Removing the chimney leaves a hole in your roof. This step seals it forever. We start by inspecting and replacing any soft or damaged roof decking. Next, we install a layer of ice and water shield over the entire exposed area. This sticky membrane seals around nails. Then, we weave new shingles into the existing roof field. The masterpiece of this repair is the flashing: we install new, continuous metal flashing that tucks under the uphill shingles and lays over the downhill ones, creating a seamless water barrier. On a repair years ago, a crew used a simple patch of sealant instead of proper flashing. It leaked before the next rainstorm. A woven, flashed repair is the only way to do it right. Proper chimney flashing is essential for any reliable roof repair.
Step 5: Cleanup & Final Inspection
A clean site is a sign of a professional job. We remove every piece of debris, brick, and old mortar. We sweep the roof and clean your gutters. The final walk-through is key. We inspect the repair from the ground and on the roof. We check for proper water flow off the new shingles and press on them to ensure they are sealed down tight for wind resistance. We look for any stray nails and make sure the flashing is smooth. This last look catches small issues before they become your problems.
Feasibility and Hidden Challenges
Homeowners usually ask this question in one of two ways. The answer to each is very different.
Can I remove a chimney stack from my roof?
Yes, this is often the most feasible part of the project. We call this a “roof-down” removal. You seal off the flue at the top, cap it, and remove the brickwork from the roofline up. The chimney breast and flue inside the house stay put. This method particularly helps when dealing with abandoned chimneys in walls to mitigate any risks.
This approach solves a leak problem and removes a maintenance headache without tearing apart your living room.
Can I remove a chimney from an interior wall?
This is a much bigger deal. You are talking about demolition from the attic down through the house. The complexity skyrockets.
An interior chimney is like a spine running through your home’s structure; removing it requires careful surgery and major reconstruction at every floor.
Location Changes Everything
Where your chimney sits dictates the job’s difficulty and cost.
- Exterior Wall Chimney: This is simpler. The chimney is outside the home’s living envelope. Removal mostly involves exterior masonry and roof work. Interior disruption is minimal, often just patching a wall where the fireplace was.
- Interior Wall Chimney: This is the complex one. The chimney runs through your attic, between floors, and down a wall. Demolishing it leaves a vertical chase that must be filled and reframed at every level.
- Multi-Story Homes: Add more floors, and you add more work. A chimney on a two-story house means demolition, framing, and repair work on the roof, the second-floor ceiling/wall, the first-floor ceiling/wall, and the foundation. Each level is a separate project.
The Hidden Costs You Must Budget For
The brickwork is just the start. On a full removal, the real expense is in putting your house back together. I’ve seen budgets blown by these common surprises:
- Matching Vintage Roof Materials: Your 50-year-old slate or clay tiles? You can’t buy them at the hardware store. Sourcing a match for a small patch can be costly and time-consuming.
- Repairing Interior Walls and Ceilings: That chimney breast was likely plastered over. Removing it leaves a huge hole. You’ll need drywall, taping, texturing, and painting to blend the new wall with the old room.
- Upgrading Attic Insulation & Air Sealing: Where the chimney passed through your attic floor, there’s a giant uninsulated hole. You must seal it and bring the insulation up to modern code, which is an added material and labor cost.
- HVAC or Plumbing Re-routing: It’s common for ducts or pipes to be tucked around an old chimney. Removing it can mean rerouting these systems, which requires a different licensed tradesperson.
How a Pro Checks Feasibility: The Load-Bearing Question
Before any hammer swings, a good contractor will head to your attic with a flashlight. We are looking for one critical thing: is the chimney holding up your house?
We examine the roof framing around the chimney to see if any structural members, like rafters or joists, are resting on it. In older homes, builders sometimes used the chimney as a handy support column. If it’s bearing weight, removal requires installing a new beam or support wall first. That’s a major structural change needing engineering plans.
If the framing is built *around* the chimney with clear space, it’s likely non-load-bearing. That’s the green light for a more straightforward demolition. Never assume; always check from the attic down.
Cost, Timeline, and Finding the Right Crew
Let’s talk numbers and logistics. This isn’t a weekend DIY project, so planning and hiring the right team are everything.
What You Can Expect to Pay
For a full chimney removal from the roofline up, a realistic total cost typically falls between $4,000 and $10,000. The final number swings wildly based on your home’s height, chimney construction, and your location. Additionally, the chimney sweep cost is a key factor when budgeting for upkeep. Regular maintenance can affect long-term expenses and safety.
Here’s how that cost usually breaks down:
- Labor (The Biggest Chunk): This covers the skilled work of demolition, structural modification, and the critical roof repair. A complex, two-story brick chimney costs more than a simple one-story flue.
- Disposal Fees: Brick, mortar, and flue tiles are extremely heavy. My crew has filled an entire 30-yard dumpster with chimney debris. Hauling that weight away isn’t cheap.
- Roof Repair Materials: This includes decking, underlayment, and a complete “patch” of matching shingles integrated into your existing roof. This is where the long-term integrity of the job is decided.
- Interior Finish Work: Don’t forget the inside! You’ll need to patch the ceiling and wall where the chimney breast was, which may involve drywall, plaster, paint, and trim.
A Realistic Project Timeline
For a standard removal, plan for a professional crew to be on-site for 2 to 4 full days.
Day one is for demolition: removing the chimney stack, capping the flue below the roof, and cleaning up. Day two focuses on the roof: building the new decking, installing ice and water shield, and weaving in new shingles. If interior finishing is part of their scope, days three and four handle that. Weather is the wild card that can stretch this timeline.
Vetting Your Contractor: This is Non-Negotiable
You’re not just hiring a roofer. You’re hiring a specialist in structural modification. Your vetting checklist must be strict, including checks for proper licensing and contracts.
- They must be licensed as a general contractor or roofing contractor in your state. A handyman’s license isn’t enough.
- They must carry high-limit general liability insurance (at least $1 million). Ask for the certificate and call the insurer to verify it’s current.
- They must show specific, recent examples of chimney removals they’ve completed. Ask for addresses and photos.
- They must provide a detailed, written scope of work. This document should explicitly state how they will seal the flue, frame the roof, and install new flashing. It must specify the warranty period for the roof repair, separate from any shingle manufacturer’s warranty.
The Peril of the Low Bid
The cheapest estimate is almost always the most expensive choice in the long run. I’ve been called to fix too many of these “budget” jobs.
To cut costs, less reputable crews skip vital steps. They might nail a piece of metal over the hole instead of properly framing in new rafters. They often reuse old flashing or use cheap caulk instead of installing new, integrated step flashing and ice guard. This guarantees a leak, possibly within the first year.
Pay for the crew that details their process and stands behind their structural work with a strong warranty. Your roof’s integrity depends on it. Also, beware of the lifetime warranty myth—real roofing warranties have limits and conditions you should understand.
What Happens After the Chimney is Gone?
The real test of a chimney removal isn’t just getting it down. It’s how the roof heals. Think of it like surgery on your home’s skin. The scar needs to be watertight and strong. Even if you’ve successfully diagnosed and fixed a leaky chimney before, the repaired area after removal needs extra attention.
A perfect repair blends in completely and performs better than the old, leak-prone chimney penetration ever could. I judge my own work by whether you can’t tell where the chimney was from the street. That means matching the existing shingles in color and pattern, and weaving new underlayment seamlessly into the old. On a project a few years back, we spent an extra half-day just cutting and fitting the decking to avoid any weak seams. That attention to detail is what lasts.
Your job starts once the crew leaves. The first few rainstorms are your free inspection.
Go into the attic with a good flashlight after it rains. Look for any dark stains, drips, or damp wood near the repair area. Do this two or three times. Monitoring the attic after the first few rains is the best way to catch a small leak before it becomes a big problem.
Also, shine your light along the eaves. Make sure the work didn’t accidentally cover or block any soffit vents. Your attic needs that airflow to stay dry and prevent rot. If the air feels stuffy or you see new condensation, call your roofer back.
People often ask if removing a chimney hurts their home’s value. In my experience, it’s usually the opposite. Removing a chimney correctly eliminates a major maintenance liability, which most buyers and appraisers see as a positive. You’re getting rid of a structure that demands constant flashing checks, repointing, and is a classic leak source. A clean, professional removal shows the home has been thoughtfully updated.
So, what’s the final result? A successful removal should leave you with one less thing to worry about. A precise chimney removal leaves your roof stronger and more watertight, but that strength depends entirely on the craftsmanship of the final repair. It’s not just about filling a hole. It’s about restoring the roof’s integrity as if the chimney was never there.
Common Questions
What roof maintenance is needed after a chimney is removed?
The critical maintenance is a visual inspection. Check your attic for any moisture stains after the first few rains and ensure your new roof patch is shedding water cleanly into the gutters.
How do you match my old roofing materials for the repair?
We source matching materials from salvage yards or specialty suppliers, or use a custom blend of new shingles. For unique roofs like slate or tile, we’ll discuss all matching options and their costs upfront before any work begins. We’ll also point you to reputable sources for buying shingles and other roofing materials, and explain typical price ranges to help you compare options before you commit.
When is the best time of year to schedule a chimney removal?
Schedule during dry, mild weather-late spring through early fall is ideal. This gives us a stable window to complete the roof repair properly and ensures the sealing materials can set correctly.
Securing Your Roof After the Chimney is Gone
Based on every job I’ve overseen, the single most important takeaway is this: a successful chimney removal is defined by a flawless roof seal. Invest the time and resources into a meticulous, code-compliant closure, and your roof will protect your home without a hitch for decades.
Your role now is to be a proactive steward of your roof’s condition. Make a habit of visual checks from the ground each season and commit to learning more about your specific roof type through reliable care guides.
Ray Huffington
Ray is an experienced roofer. He has worked as a general contractor in the roofing industry for over 15 years now. He has installed and repaired all kinds of roofs, from small houses to large mansion, and from basic shingles to cement and metal roofs and even solar roof panels. He has seen homeowners struggle with roofing questions and always has experience based proven advice to help those in need. If you need roof pros, Ray's your guide.