
How Much Does Installing a Roof Window Cost? A Practical Analysis
Considering a roof window for more natural light but unsure about the expenses? From my years on the job, I know that understanding the full cost picture is key to a smart project.
I will cover the real price of materials, accurate labor estimates, and the critical construction steps that affect your budget.
Key Takeaways: Your Cost Cheat Sheet
Plan for these numbers. A roof window project is more than just the glass you buy.
- Total installed cost per window typically ranges from $1,500 to $5,000+.
- DIY can save you $800 to $2,000 in labor per window. But one mistake with the flashing can lead to a leak that costs ten times that to repair.
- The most common hidden cost is structural work. Opening your roof might require new framing lumber, which adds material and labor.
- A quality, well-sealed unit with good energy ratings can cut heating and cooling bills. Over 10-15 years, those savings can balance a higher upfront cost.
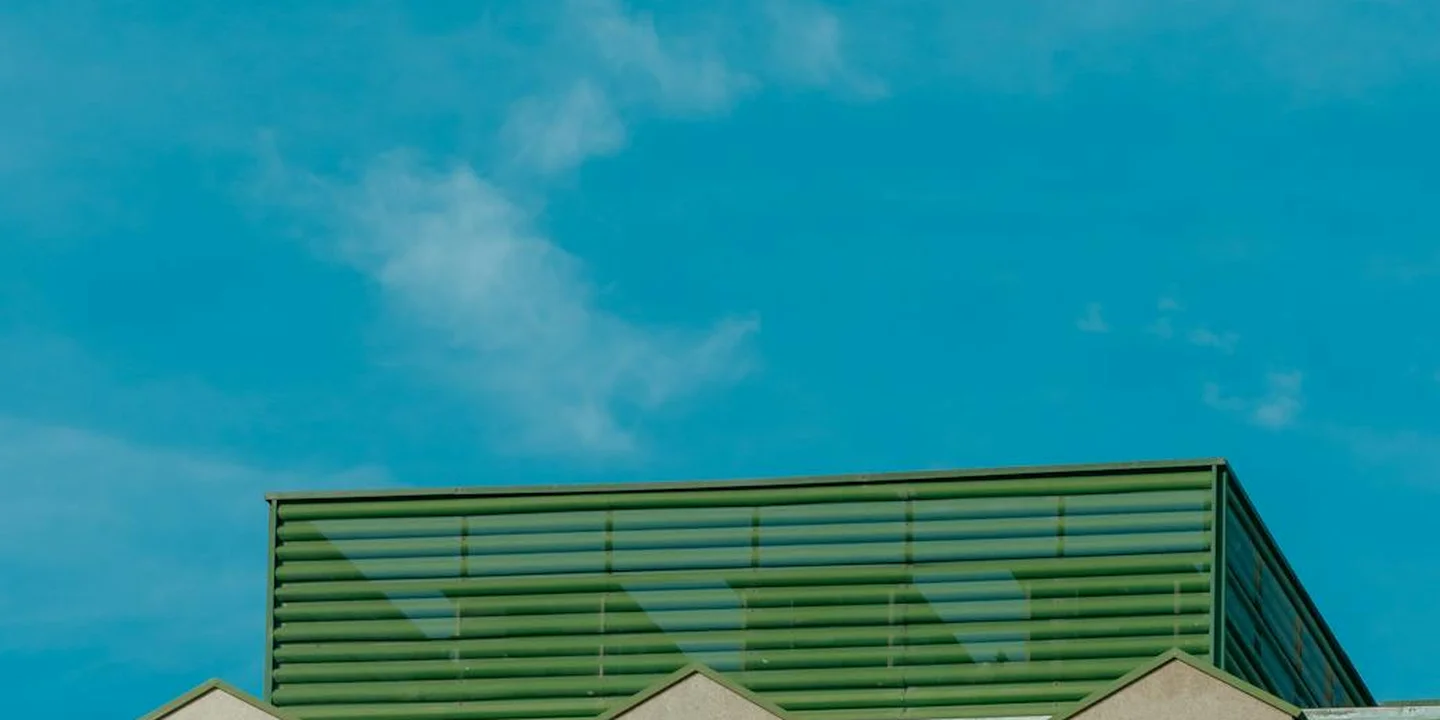
Roof Window Types and Their Price Points
First, let’s clear up the name. People use “skylight” for everything. In the trade, a skylight is often a fixed panel set into a curb. A roof window is an operable unit that hinges open, usually installed flush with the roof rafters. You get more function with a roof window.
When asking “how much are roof windows,” you’re really asking about three different animals.
- Fixed Windows: These don’t open. They are for light only. Budget models start around $200, but a quality, well-flashed unit installed will run $1,000 to $2,500.
- Venting Windows: The most popular choice. They open manually or with a pole for fresh air. This is where most homeowners look, with a typical installed cost of $1,800 to $3,500 each.
- Tubular Skylights: A tube channels light from the roof to a ceiling diffuser. They’re great for small, dark spaces. Installed costs are lower, from $500 to $1,500.
What is the cost of the roof window unit itself? The box you buy. For a standard venting window, expect to pay $400 to $1,200 at the supply house before any labor. This price swings wildly based on two things.
The frame material matters. Wood is classic but needs maintenance. Vinyl is affordable and stable. Composite frames (like fiberglass) are top-tier for durability and insulation but cost the most.
The glass type is the big ticket item. Basic double-pane is the minimum. Low-E coating reflects heat. Tempered glass is a safety requirement. Argon gas between panes boosts insulation. Each upgrade adds cost but also value.
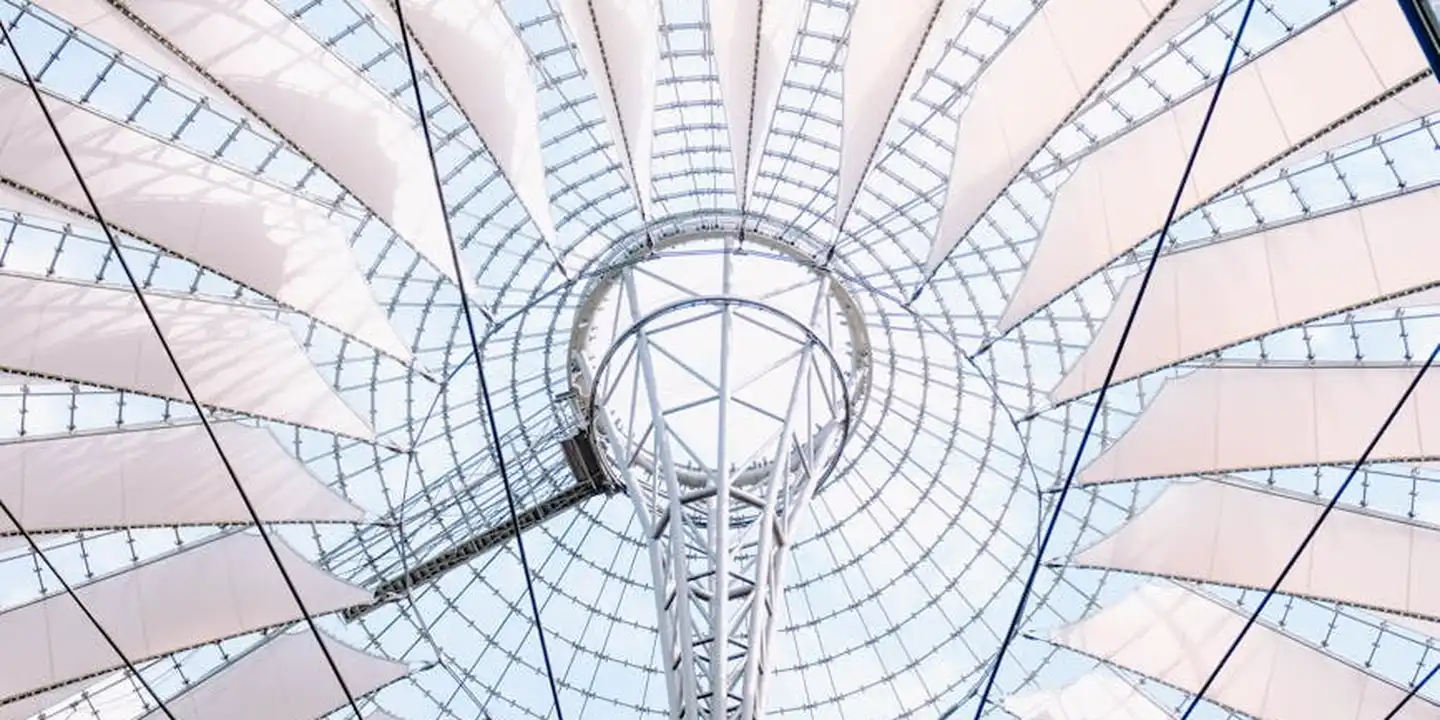
Are glass roofs expensive? A full glass roof structure is a major architectural project. But adding a few well-placed roof windows is a cost-effective way to borrow that feeling of light and space.
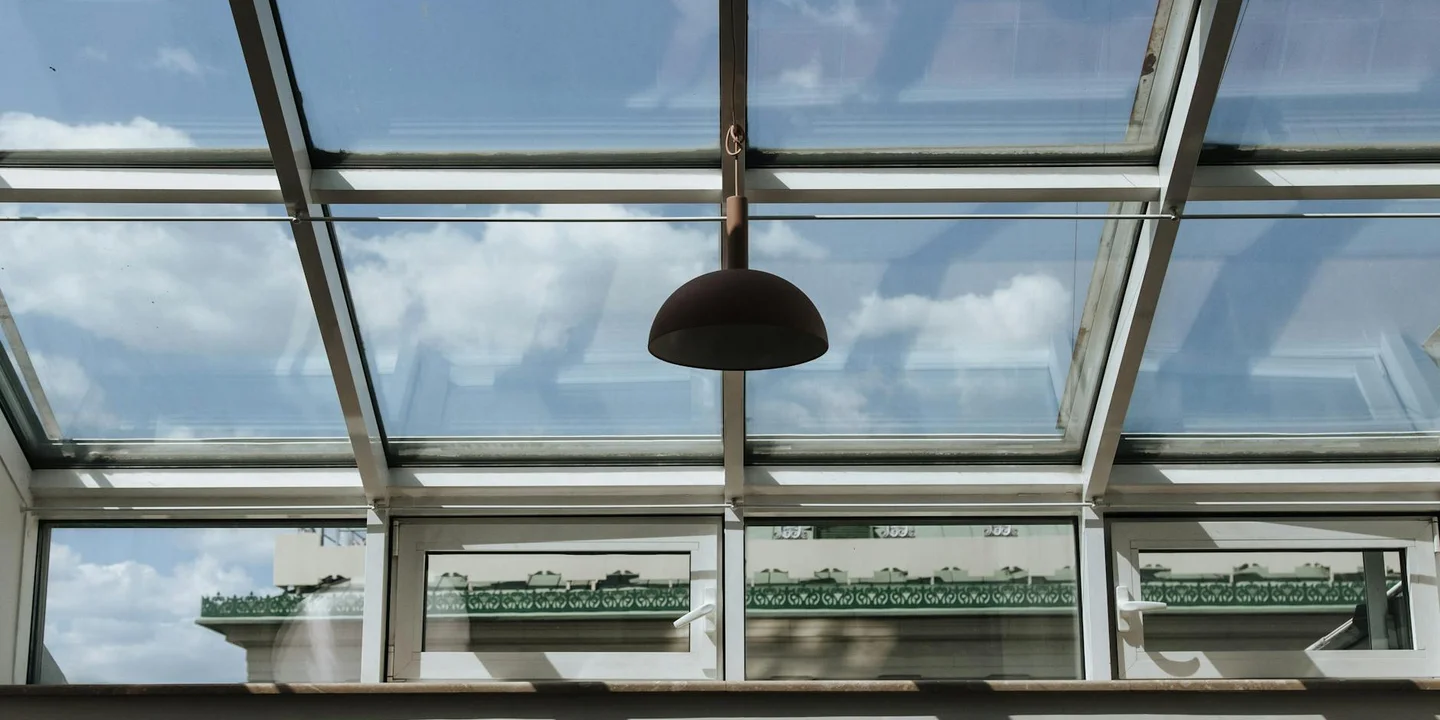
Standard Venting Windows: The Workhorse Choice
This is the type I’ve installed hundreds of times. It’s the practical pick for turning a stuffy attic into a usable room or bringing light into a loft.
You’ll find a huge range. A basic, manually operated 2′ x 3′ vinyl unit might cost $1,800 installed. A mid-size, top-hinged wood window with a gas spring for easy opening can hit $2,800. This mid-range is where you get the best balance of function, quality, and cost for most homes. It’s the default choice for a reason.
Premium and Custom Glass: When Costs Climb
This is where the numbers jump. You’re paying for convenience and performance.
Self-cleaning glass has a special coating. Rain sheets off, taking dirt with it. It’s a luxury that saves you from a scary ladder climb. Electronic openers with rain sensors let you control windows with a remote. Custom shapes (circles, triangles) or oversized panoramic units require special engineering.
For context, a single high-end electric roof window with a fancy finish can cost $5,000 to $8,000 installed. Compare that to a standard asphalt shingle roof, which might cost $8,000 to $15,000 for the entire house. One premium window can cost as much as half a new roof.
Energy Ratings Decoded: Is the Upgrade Worth It?
Think of your window like a winter coat. You want it to keep heat in (or out). Two numbers tell that story.
U-factor measures insulation. A lower number is better. It means less heat escapes through the glass on a cold day. SHGC (Solar Heat Gain Coefficient) measures how much sun heat gets through. A lower SHGC means less unwanted solar heating in summer.
Is the upgrade worth it? In a cool climate, a great U-factor is key. In a hot, sunny state, a low SHGC saves on AC bills. Paying 15-20% more for a high-performance glass package often pays for itself in energy savings within 5-10 years, especially if the window faces south or west. You also get less condensation and more comfort. That’s a win in my book.
Labor Costs: Professional Installation vs. DIY
What are the installation labor costs? Homeowners ask me this all the time. The short answer is, it depends entirely on who does the work.
Professional roofers typically charge by the project, not the hour, for a window install. You are looking at a range, but a common ballpark is $500 to $1,200 per window for labor alone, on top of the window cost. That fee buys you three critical things you cannot get from a video tutorial: proven skill, valid insurance, and a workmanship warranty. I have seen crews fix leaks from DIY attempts that cost the homeowner triple what professional installation would have. For a full roof project, you’ll also want to consider roof replacement cost per square foot to get a complete price picture. That metric helps you compare bids and plan your budget across the entire roof.
If you are considering the DIY route, you need to price out more than just the window. You need specialized tools. Roof jacks and staging planks can rent for $50 to $100 a day. A quality circular saw, roofing nailer, and metal cutting snips are a must. Then there is safety gear: a proper harness system, anchor points, and non-slip boots. This is not a one-afternoon project. For a first-timer, plan for two full weekends of work, minimum.
My firm verdict? DIY is a false economy for most people. If your roof is steep, your framing knowledge is basic, or you are uneasy on a ladder, hire a pro. It might be feasible for a very handy homeowner replacing a window on a low-pitch, single-story porch roof. For anything on your main house, the risk is too high.
Worker safety and building code compliance are non-negotiable. A pro knows how to size the new roof rafters, install proper ice and water shield, and integrate flashing with your existing shingles. A mistake in any of these steps invites water into your home’s structure.
What a Professional Crew Actually Does
When my crew installs a roof window, we follow a meticulous process. Each step relies on experience you cannot read in a manual.
- Layout and Inspection: We first locate the exact spot inside the attic, checking for wires, pipes, and structural members. We never cut blind.
- Opening the Roof: We carefully remove shingles and underlayment in a controlled area much larger than the window frame. This gives us room to work.
- Framing the Rough Opening: We double up the surrounding rafters with new “headers” and “sill” plates to carry the load. This is carpentry, not just roofing.
- Flashing Integration: We install the window’s proprietary flashing kit, weaving it step-by-step under the upper shingles and over the lower ones. This layered sealing is where most DIY attempts fail and cause leaks.
- Final Seal and Cleanup: We apply roofing cement only at specified points, install the interior trim, and ensure the window operates smoothly. We then clean all debris from your yard and gutters.
The DIY Cost-Benefit Analysis
Let us put the numbers side by side. This table compares a single, mid-range roof window installation.
Look at that last line. The real cost of DIY is not the upfront savings. The high cost comes from fixing a self-inflicted leak, which often requires tearing out your work and starting over with a pro. Water damage to drywall, insulation, and framing turns a simple window project into a major repair.
Essential Construction Materials and Their Costs
So you’re pricing out the roof window itself. Good start. But the real work, and the real cost, is in the installation kit that surrounds it. If you only budget for the glass, you’re in for a shock. Let me break down everything else you need to buy.
Think of it like this: the window is the jewel, but you need the entire waterproof, insulated, and finished setting for it. The list includes flashing, roofing underlayment, ice and water shield, sealant, insulation, interior trim lumber, and fasteners. Forgetting any one of these is an invitation for a leak or an energy drain.
When you ask how much are roofing materials for this job, you’re really asking for the price of a complete sealing system. The single biggest factor in your long-term cost isn’t the window price, it’s the quality of the materials you use to integrate it with your roof.
Flashing: Your First and Best Defense Against Leaks
This is the most important item on your list. Flashing is the metal (or sometimes rubber) barrier that seals the gap between the window frame and your roof shingles. Imagine it as a sophisticated, multi-layered waterproof collar that channels water away from the opening.
If the flashing fails, everything fails. I’ve been on too many repair calls where a beautiful roof window was installed with cheap, poorly fitted flashing. The result is always the same: water stains on the ceiling.
You’ll need a few types:
- Step Flashing: These are L-shaped metal pieces woven under each course of shingles up the sides of the window. They are the primary moisture barrier.
- Counter-Flashing or Head Flashing: This is the large, pre-formed piece that covers the top of the window (the “head”). It’s designed to sit over the step flashing and under the shingles above, creating a shingle-over-flashing waterfall effect.
- Ice and Water Shield: This is a self-adhering rubberized asphalt membrane. You install a layer of this directly onto the roof deck around the entire window opening before any other flashing goes on. It’s a secondary, sticky backup defense, especially critical in valleys or cold climates where ice dams form.
Now, for material costs and longevity. Most roofers use aluminum flashing. It’s cost-effective, corrosion-resistant, and easy to work with. A roll of 10″ aluminum step flashing might cost you $40-$60. For a step up, consider galvanized steel. It’s stronger and has a longer lifespan, but it’s heavier and can cost 20-30% more. When planning flashing installation for roofs, the material choice affects ease of installation and long-term sealing. That’s why pros weigh climate and roof design when selecting flashing.
The premium choice is copper. It lasts longer than the roof itself, developing a beautiful patina. It’s also the most expensive, often triple the price of aluminum. My advice? If your budget allows and you’re using other durable materials, invest in copper for the flashing. It’s a one-time cost for a lifetime of peace of mind.
The Supporting Cast: Insulation, Trim, and Sealants
Flashing keeps water out. This group of materials keeps your home comfortable, quiet, and finished on the inside. Don’t skip them.
- Roofing Underlayment: When you cut the hole for the window, you’ll disrupt the existing underlayment (the felt or synthetic sheet under your shingles). You need to patch and integrate new material around the opening. A roll of synthetic underlayment runs $80-$150. This is a core part of your roofing supplies cost.
- Sealants: You need a high-quality, exterior-grade roofing sealant compatible with your flashing material (e.g., polyurethane for aluminum). A couple of tubes at $10-$15 each will do. This is for sealing small joints, not for fixing bad flashing work.
- Insulation: The gap between the window’s rough opening and its frame must be filled. Use compressed, non-expanding foam designed for windows (around $10-$20 a can) or batt insulation. This stops heat loss and drafts completely.
- Interior Trim Lumber: To finish the inside, you’ll need wood to create a neat casing around the window. The cost varies by wood type, but budget $50-$150 for clear pine or a similar wood. This is where you make it look like part of your home, not just a hole in the roof.
- Fasteners: You need roofing nails for the flashing and shingles, and screws for securing the window frame to the roof rafters. Use corrosion-resistant galvanized or stainless-steel fasteners. A few dollars spent here prevents rust stains later.
A final word on cost. You can find cheaper versions of all these items. But a roof window is a permanent modification. Spending 10-20% more on proven, durable materials now saves you thousands in water damage repairs and premature replacements down the line. That’s the real cost analysis.
Structural Modifications: The Hidden Expense
Are there structural modifications required, and what is their cost? The answer is usually yes, and this is the most common budget surprise. Putting a hole in your roof is not like cutting a hole in a wall. The roof’s framing holds up everything above you, and you can’t compromise it. For residential solar, plan roof preparation structural requirements. This includes load capacity, rafter spacing, and sealing penetrations.
Every roof window installation requires some level of structural work. The cost depends entirely on what the saw blade hits when you open up the decking. This same planning applies to roof deck balcony structural requirements and installation. Addressing these early can save time and money.
When the Saw Comes Out: Cutting Roof Framing
Think of your roof rafters or trusses as the ribs of your house. If your new window fits perfectly between two existing ribs, you’re in luck. This is a “simple opening.” The crew just cuts the roof deck, slides the window in, and frames around it. The extra cost here is minimal, maybe a few hundred dollars for added labor and common lumber.
But if a rafter runs right through the middle of your planned window spot, that rafter must be cut. This is a major structural change that requires a building permit and often an engineer’s stamp. You’re not just buying a window; you’re buying a structural engineering consultation, which can cost $500 to $1,500. Then you must pay to rebuild the support system.
The process starts with temporary supports. We install sturdy boards called “strongbacks” on either side of the work area to hold the roof weight. Only then do we safely cut the existing rafter. The labor for this careful prep, cutting, and cleanup typically adds $1,000 to $2,500 to your job.
Reinforcement Costs: Headers and Supports
Once a rafter is cut, you must redirect the load. This is where headers and supports come in.
We build a strong frame for the window, just like the frame around a door. Two vertical “trimmer” rafters are installed from the cut ends down to a solid bearing point. A horizontal “header” beam is placed across the top to carry the load. All of this uses heavy, graded lumber like Douglas fir or LVL beams.
- Materials for this reinforcement (beams, connectors, fasteners): $300 – $800+
- Specialized carpentry labor to install it correctly: $800 – $2,000+
Here are the two main cost tiers you can expect.
- Simple Opening (No Rafters Cut): Added cost is mostly labor for framing, $500 – $1,200.
- Major Structural Reinforcement (Rafter Cut): Added cost for engineering, materials, and complex labor ranges from $2,500 to $5,000 or more.
Skipping proper structural work is the most expensive “savings” you can choose. It’s a waste of money on a band-aid fix. Without the right supports, the roof can sag over the window, leading to leaks, cracked drywork below, and in severe cases, a partial roof failure. Do the math once, and do it right.
Interior Finishing and Electrical Integration

Once the window is sealed and weather-tight from the outside, the work moves indoors. This phase turns a rough opening into a finished part of your home. It also decides how convenient and functional your new roof window will be.
The cost here splits into two parts: closing up the wall and ceiling, and adding any electrical features you want. You can keep it simple or build a custom surround with built-in lights. The choice directly impacts your final bill.
Making it Pretty Inside: Drywall, Paint, and Trim
Finishing the interior opening is a multi-step process. I’ve seen homeowners get surprised by this, thinking the roofer handles it all. Usually, the roofing crew creates the opening and installs the window curb. A carpenter or drywall crew finishes the inside.
The typical process looks like this:
- Framing the “Light Well”: If the window is on a sloped roof, you need to build a box (a shaft or light well) from the window down to the interior ceiling. This is basic lumber framing.
- Installing Drywall: The new framing gets covered with drywall. For attic spaces, I recommend moisture-resistant “green board” drywall. It costs a bit more but handles temperature swings better.
- Mudding, Taping, and Sanding: This is the messy part. Joints and screws are covered with compound, taped, sanded smooth, and repeated. A good finish here makes all the difference.
- Priming and Painting: New drywall must be primed before painting. You’ll need two coats of a quality paint for a uniform look.
- Installing Trim: The final touch. Trim (or casing) hides the gap between the drywall and the window frame. Simple pine is affordable, while custom millwork or PVC trim adds cost.
A basic finish with simple materials might cost a few hundred dollars if you do it yourself, or $800 to $1,500+ for a professional. This gets you a painted, trimmed opening that looks clean.
A high-end custom build-out is different. Think of building out a bookshelf nook around the window, using premium wood trim, or adding a custom plaster finish to match historic moldings. For a fully custom interior treatment, your costs can easily match or exceed the price of the roof window itself. I worked on one project where the reclaimed wood cladding for the light well cost more than the window installation.
Wiring for Light and Convenience
Roof windows bring in natural light, but you often need controlled light for evenings or privacy. This is where electrical planning comes in.
You will need a licensed electrician for any new wiring that connects to your home’s electrical system. This is not a DIY task for most people. Electrician rates vary, but budget for a minimum service call fee plus hourly labor, often totaling $300 to $600 for a straightforward job.
Common electrical additions include:
- Operated Blinds or Shades: Manual blinds work fine, but motorized ones are convenient, especially for hard-to-reach windows. True hardwired motors require an electrician to run a wire. A simpler, lower-cost option is a battery-operated motor. Many brands offer solar-powered remotes that recharge a small battery, eliminating wires entirely.
- Integrated Lighting: Adding recessed cans or LED strip lights inside the light well creates amazing ambiance. This always requires an electrician to run a new circuit or tap into an existing one.
- Ventilation Fans: Some roof windows open for air. To boost airflow, you might want a small exhaust fan installed in the light well. This also requires proper electrical wiring.
My advice is to plan the wiring during the framing stage. It’s much cheaper and cleaner to run wires inside an open wall than to try and fish them later. Always check if your local building code requires a permit for this electrical work; a good electrician will handle that. If you’re unsure about needing a feature now, at least consider having the electrician run a “future wire” or conduit while the walls are open. It saves a huge headache later.
Permits, Inspections, and Legal Costs
What are the potential costs for obtaining permits or inspections? You can expect to pay between $100 and $500, sometimes more in large cities. This is not a place to cut corners. That fee buys you a critical safety review.
A permit is required because you are making a structural change. You are cutting a large hole in the roof’s decking, which is part of your home’s skeleton. You are also breaking the sealed envelope that keeps weather out. The building department needs to ensure the new opening is properly framed and that the window itself meets codes for things like energy efficiency and emergency escape.
Think of the permit fee as an insurance policy against future leaks and structural issues. It ensures the work is done to a minimum safe standard. Skipping this step can lead to fines, problems selling your home, and an invalidated warranty from your installer.
The timeline matters too. A permit review can take a few days to several weeks. If the initial inspection fails, you face a re-inspection fee, often $50 to $150. More critically, your project stalls until the issue is fixed. I’ve seen jobs delayed a full week because of flashing the inspector didn’t like. That’s extra labor costs sitting idle.
Navigating the Permit Process
Don’t be intimidated by the paperwork. Start by calling your local city or county building department. Ask specifically, “What is required for a permit to install a roof window or skylight?” Get the answer in an email if you can.
Your contractor should usually handle this, but you need to verify. A reputable roofer will include the permit cost and pull it themselves. If they suggest skipping it, see it as a major red flag. When you hire a roofing contractor, make licensing and a clear contract part of the deal. A written agreement should specify who handles licenses and permits.
For a DIY project, you’ll need to apply. You typically provide:
- A site plan showing the window location.
- The manufacturer’s specification sheet for the window model.
- Details on how you’ll frame the opening.
Your best move is to have a clear conversation with your contractor about who is responsible for pulling the permit and scheduling inspections. Get it in writing.
Inspection Fees and What Inspectors Look For
Inspection fees are often part of the initial permit cost. The inspector’s job is to verify the work at specific stages. For a roof window, they will typically check two main things.
First is the rough framing inspection, after the hole is cut and the new header and jack studs are installed. The inspector is checking that the roof’s structure is still sound. They measure the lumber size and the fasteners used.
The final inspection happens after the window is fully installed and flashed. Here, they focus on three key areas:
- Flashing Integration: They will check how the window’s flashing layers tie into the existing roofing material. This is the number one source of leaks.
- Fire Egress: If the window is in a bedroom and serves as an emergency exit, they will verify it opens wide enough and is low enough to the floor.
- Interior Finishing: They will check that the drywall or plaster around the interior shaft is properly finished and that any insulation is correctly placed.
Being prepared for these inspections means your project moves smoothly. It means your new light source is also a secure, watertight part of your home.
Total Project Cost and Long-Term Value
So, what is the total estimated project cost range? Based on all the factors we’ve covered, for a single roof window, you can expect a total installed cost between $2,000 and $6,000. The final number lands where your choices about quality, roof complexity, and finishes intersect. Of course, it can vary even more if you’re talking about something like a conservatory roof.
Think of it as a spectrum. A standard installation uses a reliable, mid-grade window on a straightforward roof with basic interior trim. A premium installation involves a top-tier, high-efficiency unit, significant structural adaptation, and custom finished interiors like drywall and paint.
The real cost question homeowners have isn’t just the install price, but what they’ll pay or save over the next 20 years. A quality roof window is a one-time construction cost followed by decades of minimal care that prevents major repair bills.
Routine maintenance is simple and cheap. I tell my clients to do two things each spring and fall: clean the glass and exterior seals with mild soap and water, and visually check the interior perimeter for any signs of condensation or seal failure. This costs you maybe an hour of time and a few dollars for cleaner. Neglecting this can let small leaks start, which may rot roof decking or damage interior ceilings. That repair can easily cost thousands, wiping out any initial savings from a cheap install.
Energy-efficient windows work like a good jacket for your house. They keep wanted heat in during winter and reflect solar heat in summer. This directly reduces how hard your furnace and air conditioner work. For a typical home, a high-performance roof window can save $50 to $150 annually on energy bills. That means the extra investment for a premium, efficient window can pay for itself in utility savings alone in 10 to 15 years.
Look into federal or local energy tax credits for qualifying installations. Some manufacturers also offer seasonal rebates. Financing through a home equity loan is a common path, as it often offers lower rates than credit cards. These options improve the long-term value by spreading the cost or providing upfront discounts.
My verdict? View the upfront cost as buying 25+ years of light, ventilation, and connection to the sky. The long-term benefit in home enjoyment and energy savings almost always justifies the investment in proper materials and craftsmanship.
Calculating Your Final Budget: A Real-World Example
Let’s build a sample budget for one roof window. This table reflects real quotes I’ve seen and given, from a simple retrofit to a complex, high-end new construction scenario.
| Cost Category | Low-End | Mid-Range | High-End |
| Window Unit | $500 – $800 | $1,200 – $1,800 | $2,500+ |
| Labor | $800 – $1,200 | $1,500 – $2,000 | $2,500+ |
| Flashing/Materials | $150 – $300 | $300 – $500 | $600+ |
| Structural Work | $0 (none needed) | $300 – $800 | $1,500+ |
| Interior Finish | $100 (paint trim) | $400 (drywall, paint) | $1,000+ (custom shaft) |
| Permits & Fees | $50 – $150 | $150 – $300 | $300+ |
| Estimated Total | $1,600 – $2,550 | $3,850 – $5,900 | $8,400+ |
The Lifetime Cost: Maintenance vs. Savings
Forgetting the long-term picture is like buying a car and never budgeting for gas or oil changes. Let’s compare the yearly costs of owning a roof window.
Annual Maintenance Cost: This is minimal. A bottle of cleaner and your time. We can fairly estimate this at $20 per year if you do it yourself.
Estimated Annual Energy Savings: Using a good quality, double-pane, low-E coated window, a realistic savings is $75 to $100 per year on your combined heating and cooling bills in most climates.
Simple math shows the window pays for its own upkeep and puts $55 to $80 back in your pocket each year. Over 20 years, that’s $1,100 to $1,600 in net savings, not even counting the value of the natural light. This turns the window from a pure cost into a minor, ongoing asset.
Financing and Incentives: Making it Affordable
If the upfront cost is a hurdle, you have practical options. A home equity line of credit (HELOC) often has a lower interest rate than other loan types. Some window manufacturers run direct rebate programs, especially during slower seasons. Always check the Database of State Incentives for Renewables & Efficiency (DSIRE) for local utility rebates or tax credits related to energy-efficient upgrades. Using these tools effectively reduces your initial outlay and improves the project’s overall financial payback.
Common Questions
What’s the biggest sign my roof window needs repair, not just cleaning?
Look for persistent interior condensation or water stains on the drywall around the frame. That usually indicates a failed seal or flashing issue, which requires professional repair to prevent structural damage.
How do I choose between materials for the long haul?
Prioritize the flashing and glass. Spend on a quality, complete flashing kit and low-E, argon-filled glass. This upfront cost prevents massive water damage and energy waste, saving you far more over 20 years.
Can adding a roof window really lower my energy bills?
Yes, if you choose a high-performance unit. A good energy rating (low U-factor, appropriate SHGC) acts like insulation, directly reducing heating and cooling strain. The annual savings can offset a higher initial cost within a decade.
Securing Your Roof Window Investment
I tell every homeowner that the true expense of a roof window is in the craftsmanship of its installation, not the initial quote. Investing in proper flashing and a watertight seal from the start prevents costly leaks and energy waste for years to come.
Your job is to commit to regular, safety-first inspections and to keep learning about Roof Care and All Types of Roof Guides. This proactive habit protects your entire roofing system, ensuring your new window adds value without compromise. Consider when a DIY vs professional assessment is the wiser choice for your roof.
Ray Huffington
Ray is an experienced roofer. He has worked as a general contractor in the roofing industry for over 15 years now. He has installed and repaired all kinds of roofs, from small houses to large mansion, and from basic shingles to cement and metal roofs and even solar roof panels. He has seen homeowners struggle with roofing questions and always has experience based proven advice to help those in need. If you need roof pros, Ray's your guide.