
How Do I Secure a Tarp on My Roof for Emergency Leak Repair?
Hear that ominous drip during a downpour? I’ve been there, both as a homeowner and a roofer, and I know the panic it brings.
You need a reliable stopgap now to protect your home’s interior. This guide will show you how to do it safely and effectively.
We’ll start with the only safe way to get on your roof for this job.
You’ll learn how to choose and position the tarp to actually stop the water.
I’ll show you my crew’s method for anchoring that won’t fail in the wind.
Before You Climb: Your Safety and Situation Assessment
I tell every homeowner this. Assessing the risk from the ground is your first and most important job. Climbing onto a damaged roof in bad conditions is how accidents happen. To stay prepared, consult a roof damage inspection guide for a practical, ground-based checklist. It outlines what you can safely assess from below and when to call in a pro.
Look at your roof. If any of these apply, stop and call a professional roofer immediately.
- Steep pitch (6/12 or greater). If your roof looks like a steep hill, a slip can be fatal. I won’t work on one that steep without full rigging.
- Multi-story homes. The extra height turns a simple fall into a life-threatening event.
- Wet or slippery roofs. Moss, algae, or morning dew make shingles as slick as ice. I’ve waited out many rains before going up.
- Proximity to power lines. One misstep with a metal ladder or batten near a line is all it takes.
- Significant structural damage. If you see sagging, broken rafters, or large holes, the roof deck could collapse. This is beyond a tarp fix.
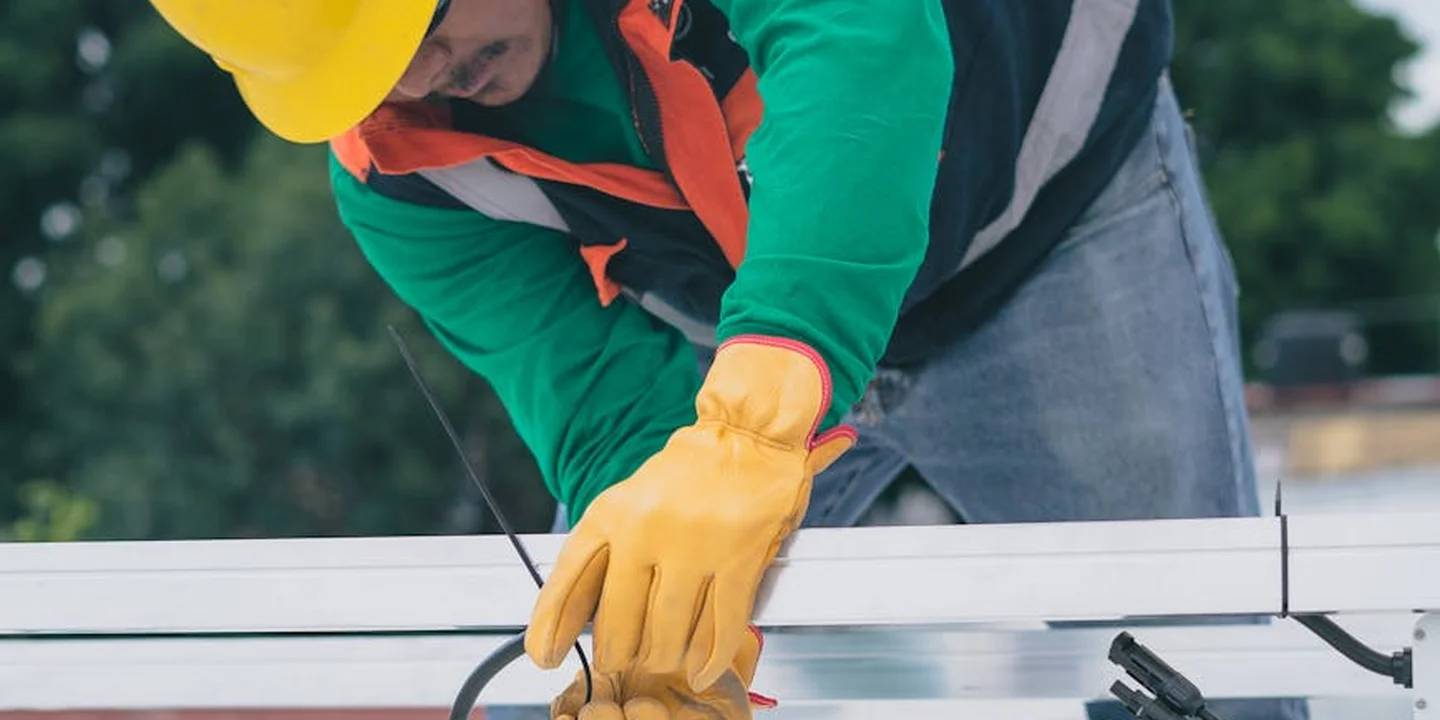
Your safety gear is not optional, it’s your lifeline. Do not skip any of these items.
- A fall-arrest harness with a rated roof anchor. This system catches you if you slip. My crew and I wear them on every job.
- A sturdy ladder with stabilizers. Stabilizers keep the ladder from sliding sideways on the ground.
- Non-slip shoes. Roofing boots with a soft rubber sole grip much better than tennis shoes.
- Weather-appropriate clothing. Avoid baggy sleeves that can snag on nails or edges.
Before you get the ladder, use a pair of binoculars. Scan the roof from the ground. Look for missing shingles, dark stained areas, or piles of granule loss. This visual check can tell you if the damage is localized or widespread. Before climbing up, review basic roof repair safety practices.
Here’s a key lesson from tracing leaks for 20 years. Water runs downhill inside your roof before it drips. The wet spot on your ceiling is almost never directly under the hole. To find the source, you need to go uphill on the roof from the interior stain. Think of it like finding a leak in a pipe; you look upstream. On the roof, check for damaged shingles, lifted flashing, or compromised vent boots several feet above where the water appears inside.
Gathering Your Emergency Roof Repair Kit
Using the wrong materials will leave you with a tarp in your neighbor’s yard. I learned this the hard way on an early job with a flimsy cover.
You need a heavy-duty, woven polyethylene tarp, at least 6 mil thick. The woven design resists tearing. Do not use a thin, non-woven blue poly sheet. It will puncture and shred in the wind.
Getting the right tools together before you go up saves time and frustration. Here is your checklist.
- 2×4 lumber for battens. These wood strips hold the tarp down and spread the nail force. Cut them to manageable lengths, about 4 to 6 feet long.
- Roofing nails (1 1/4″ or longer). They must be long enough to bite into the roof decking, not just the shingles. Galvanized nails resist rust.
- A hammer. Any sturdy claw hammer will do.
- A utility knife with sharp blades. For trimming the tarp to size.
- A chalk line. This helps you lay the tarp in a straight line over the damage.
- Durable rope or strapping. Useful for securing loose ends or tying off if needed.
People often ask how to tarp a roof without nails. For a truly flat roof only, you can lay the tarp and weigh its edges down with sandbags or weighted ropes. In such flat-roof scenarios, ponding water is a common concern that can challenge a tarp’s effectiveness. If water tends to pool, drainage becomes crucial to prevent overflow and damage. This is a last-resort, temporary method. It is much less secure than nailing battens. On any sloped roof, wind will get underneath and lift a tarp held only by weight.
If you have leftover roofing underlayment, like ice and water shield, it can be a better temporary patch than a tarp. It adheres and conforms to the roof. Knowing the cost of emergency tarping helps you plan quickly. Emergency tarping costs can vary widely by material and roof size, so a quick, universal DIY option is often a budget-friendly choice. But for a quick, universal emergency cover, a heavy woven tarp secured with wood battens is the most reliable DIY method. It’s like using a strong blanket and seatbelts to protect a wound.
The Right Way to Measure, Cut, and Position Your Tarp
Getting the size right is your first critical step. A tarp that’s too small is useless.
Do not guess. You need to measure from the roof’s ridge, over the entire damaged area, all the way down to the eave (the edge). Then, add four extra feet to that length. This overhang is not optional. It gives you material to secure at the top and allows the tarp to extend past the eave at the bottom, which directs water away from your walls and the gutters. (Proper gutter measurements) are crucial for this to work effectively.
Always cut your tarp to size on the ground, never on the roof. Trying to cut a flapping tarp on a slope is dangerous and you will likely get the dimensions wrong. Lay it flat in your driveway or yard, measure twice, and cut once.
Now, get it up there safely. Do not try to climb a ladder while holding a big, unfolded tarp. It acts like a sail. I fold the tarp into a long, manageable bundle and tie a sturdy rope around it. Then, I climb the ladder first, pull the tarp up with the rope, and unfold it once I’m securely on the roof.
Positioning is everything. Center the tarp over the leak. The top edge must go over the ridge. The bottom must hang past the eave. Think of it like tucking in a blanket; you need coverage above the problem to stop water from getting behind your temporary fix.
Anchoring and Securing: The Pro Method for a Tight Hold
The amateur way is to nail directly through the tarp. This is a mistake I see all the time. Every nail hole through the shingles is a new potential leak. You are trading one problem for a dozen more.
The professional method uses wooden battens, typically 2x4s, to anchor the tarp without puncturing the roofing material. This is how my crew does it on every emergency call, ensuring protection without compromising the underlying roof structure. We follow tried-and-true roof construction methods to keep everything secure.
Start at the top. Lay a 2×4 along the top edge of your tarp, on the side that goes over the ridge. Nail or screw that 2×4 directly into the roof deck. You are nailing through the wood, then through the tarp material, and into the deck. The tarp is pinched securely under the board, and the nails only go through the roofing in one spot under the board, which we will seal later. Next, you’ll move on to installing tar paper on a residential roof as the weatherproof underlayment. This bridge keeps the project cohesive as you transition from tarps to the finished roof.
Next, walk down the roof slope and pull the tarp completely taut. You want a smooth, drum-tight surface so wind can’t get underneath and rain runs straight off. Secure the sides by running more battens vertically along the tarp’s edges, nailing them into the deck. For the bottom, let the tarp hang freely past the eave.
Your approach depends on your roof. On standard asphalt shingles, you can nail battens directly as described. For a metal roof, try to hook battens under a seam or use the screw holes from an existing trim piece if you can safely access them. For clay or concrete tile roofs, you must be extremely careful not to break tiles. Your best anchor point is often at the ridge or eave where there is solid wood, not on the fragile tile field itself.
Sealing the Deal: Making Your Temporary Patch Watertight
You got the tarp up. Now you have to make it stop water. Think of water like a detective looking for a way in. It will find the smallest gap.
The top edge at the roof ridge is your first and most important defense. This is where water starts its journey down your roof.
If you don’t seal the top edge perfectly, every nail and batten below is useless because water will just flow under the whole tarp.
I fold the top 6 to 12 inches of tarp material over a 2×4 wood batten. Then, I nail that batten directly to the roof deck, well above the damaged area. I use roofing cement under and over that top batten. This creates a sealed dam that water cannot get behind.
Managing the Bottom Edge
What about the bottom? You don’t want water running behind your gutters or soaking your fascia board.
Fold the tarp’s bottom edge over the eave and let it hang down past the gutter. Never nail it to the fascia or gutter itself.
Let the tarp drape freely over the edge so water drips clear of your house, just like a properly installed roof would. Make sure to follow the roof installation methods to ensure your roof’s durability.
If it’s windy, you can use a second, shorter batten to weight down the draped portion on the ground. This keeps it from flapping without causing new damage.
Does Tar Stop Roof Leaks?
You might see a bucket of roofing cement, often called “tar,” and think it’s the main fix. It’s a helper, not the star.
Roofing cement is a sealant. I use it in two key spots on a tarp job. First, I apply a thick bead under each wood batten before nailing it down. This seals the nail holes. Second, I smear a generous layer over the top of each batten after nailing, especially that critical top one.
It’s messy and temporary, but it works. Remember, the wood battens and nails provide the strength; the cement just makes the connection watertight.
The Final Check: Eliminate Pools
Stand back and look at your work. Your tarp should be tight, like a drum head.
Any sag or wrinkle is a future puddle. Puddles add weight and stress, and they will eventually find a way through. Walk around the perimeter and gently pull the tarp tighter to remove sags. Add a nail and batten if you need to take up slack.
Your goal is a smooth surface where water runs off quickly.
After the Tarp is Up: What to Expect and What Comes Next
A tarp is a bandage, not a cure. I’ve seen well-secured tarps last through a few storms over several weeks. I’ve also seen them fail in a single bad night.
Plan for your tarp to be a solution for a few weeks, not a full season. Sun, wind, and temperature changes will degrade the plastic and loosen nails.
Your Weekly Tarp Inspection
Make this a habit until the permanent repair is done. From the ground with binoculars or safely from a ladder, look for:
- Flapping corners or edges.
- Visible tears in the tarp material.
- Battens that look loose or raised.
- New water stains inside your home, especially after rain.
If you see a nail pulling up, don’t just hammer it back in. The hole is now too big. Place a new batten over the area or use a larger washer under the nail head to create a new seal.
When to Call a Professional Roofer
The tarp buys you time to make a smart decision. Call a pro for any of these reasons:
- You need the permanent roof repair done. The tarp work is done.
- Your tarp fails or you see new leaks despite your repairs.
- The original damaged area is large, complex, or near roof valleys or chimneys.
- You are not comfortable working on the roof. Safety is always the priority.
A good roofer will assess the damage under your tarp and give you a plan for a proper, lasting fix.
Document Everything for Insurance
Before you even put the tarp up, take clear photos of the damage. Take more photos during and after your tarp installation.
This photo log shows the insurance company the extent of the emergency and the proactive steps you took to prevent further damage to your home’s interior.
Write down the date of the storm and the date you installed the temporary patch. Keep receipts for the tarp, lumber, and any other materials. This documentation makes the claim process smoother.
Common Questions
What type of tarp should I use, and why does it matter?
Only use a heavy-duty, woven polyethylene tarp, at least 6 mil thick. The woven design resists tearing from wind, while thin plastic sheets will shred and leave you unprotected.
How long will a properly secured tarp actually last?
Plan for it to be a reliable fix for a few weeks. UV radiation and weather will degrade the plastic, so consider it a critical bandage while you schedule a permanent repair with a professional.
What should I check after a storm passes?
From the ground, inspect for flapping edges, new tears, or loose battens. Also, check your attic and ceilings for any new moisture-this tells you if water is finding a way behind your patch.
Your Temporary Roof’s Success Checklist
Get the tarp tightly secured over the ridge and anchored solidly with wood battens-that’s the difference between a working stopgap and a wasted effort. Do that, and you’ve bought your home critical time without letting the leak win.
Treat every emergency patch as a reminder that knowing your roof is part of responsible ownership. I recommend using resources on Roof Care, All Types of Roof Guide, and Maintenance to build the knowledge that keeps small problems from becoming major headaches. During a sudden leak or storm, an emergency roof repair guide can offer quick, safe steps to limit damage until help arrives. It helps you triage priorities so you can act confidently when time matters most.
Ray Huffington
Ray is an experienced roofer. He has worked as a general contractor in the roofing industry for over 15 years now. He has installed and repaired all kinds of roofs, from small houses to large mansion, and from basic shingles to cement and metal roofs and even solar roof panels. He has seen homeowners struggle with roofing questions and always has experience based proven advice to help those in need. If you need roof pros, Ray's your guide.