
How Do You Choose Between Synthetic and Traditional Roofing?
Standing at the hardware store or talking to a contractor, the choice can feel overwhelming. Do you go with the classic materials you know, or take a chance on the newer synthetic options?
This isn’t just about looks. It’s a decision that affects your home’s protection, your wallet, and your peace of mind for decades. In this guide, I’ll break down the real-world pros and cons from my years on the job, so you can pick the right roof for your house and your budget. We’ll cover what each material is actually like to install, how long it really lasts, and where it makes the most sense to use.
Key Takeaways: Your Quick Roofing Decision Guide
Choosing a roof is about balancing upfront cost with long-term peace of mind, and the right choice is rarely the cheapest one.
- Synthetic materials often win on weight, impact resistance, and consistent quality, but typically carry a higher initial price tag.
- Traditional materials like asphalt shingles or wood offer lower initial cost and familiar performance, but may require more maintenance and have shorter lifespans.
- The true “best” roof for your home isn’t a universal answer. It’s a formula based on your local weather, your roof’s slope, and your home’s structural frame.
- No material, no matter how advanced, can perform correctly if it’s installed poorly. A perfect shingle on a botched job is a future leak.
The Roofing Material Showdown: Innovative vs. Conventional Choices
Let’s move past the marketing and talk shop. This isn’t about what’s new versus what’s old. It’s about engineered precision versus proven history. On one side, you have synthetics: products designed in a lab for specific performance. On the other, traditionals: materials shaped by nature or refined over decades of use.
Think of it like choosing a deck. A traditional cedar deck is beautiful and natural. It also needs regular sealing and can splinter. A modern composite deck is engineered from plastic and wood fibers. It costs more upfront but resists fading and rot with minimal upkeep. Your roof faces the same fundamental choice between materials and maintenance.
Synthetic roofing products are engineered composites, often made from recycled rubber, plastics, or polymer blends. We install them as large, interlocking panels or synthetic slate/shake tiles. They are designed for consistency; every piece has the same color, thickness, and strength. A full synthetic roof replacement is a major project, but it’s often a “one-and-done” solution for decades.
Traditional materials are what most of us know. This category includes natural slate, clay or concrete tile, cedar shakes, and the ubiquitous asphalt shingle. These are installed using time-tested methods, piece by piece. While an asphalt shingle job is common, a true slate or tile roof requires a specialist crew with specific skills.
What Homeowners Really Mean by “Durability” and “Lifespan”
When you ask me about durability, you’re really asking a few questions. Will it survive the next hailstorm? Can it handle the summer sun without crumbling? Will a branch falling from the oak tree punch a hole through it?
This is where synthetic materials frequently shine due to their engineered nature. They are built to be lightweight, which reduces stress on your home’s structure. Their impact resistance is often superior, a major advantage in hail-prone areas. The UV inhibitors mixed into the material provide consistent fade resistance. I’ve seen synthetic slate survive impacts that would have shattered the natural stone it mimics.
But don’t just look at the warranty number on the brochure. A 50-year “limited” warranty has many conditions. Real-world performance depends on your climate. I’ve replaced 15-year-old asphalt shingles in brutal sun belts, but seen the same product last 25 years in more temperate zones.
Maintenance is the hidden factor in any roof’s lifespan. A traditional wood shake roof needs cleaning and treatment to prevent moss and rot. A concrete tile roof needs periodic checks for cracked tiles. Even a synthetic roof needs an annual visual check, though its maintenance demands are generally lower. The material you choose directly dictates the care schedule you’re signing up for.
Breaking Down Synthetic Roofing: Types, Care, and Considerations

I’ve installed and repaired hundreds of synthetic roofs over the years. These engineered materials are a game changer for many homes. They look like the real thing but are much easier to live with than traditional roofing materials.
Synthetic Slate
This is your best bet for capturing the elegant, layered look of real stone slate. It works well on historic-style homes or any house where you want a premium appearance.
You can expect to pay between $8 and $12 per square foot for a quality installation. The upfront cost is higher than asphalt, but you save massively on maintenance and replacement over decades.
Your care routine is straightforward. Once a year, use a garden hose on a gentle spray to rinse off dirt and pine needles. Never use a pressure washer, as it can force water under the panels. During your inspection, look for any panels that appear warped or have changed color unevenly. The most common repair I see is simply tightening a loose fastener or snapping a displaced panel back into its clip system.
Synthetic Shake
If you love the rustic, textured look of cedar but not the fire risk or upkeep, this is your material. It perfectly mimics the shadow lines and grain of wood.
Plan for a cost range of $7 to $10 per square foot. It’s often more affordable than synthetic slate but offers a very distinct style.
Maintenance is minimal. Use a soft-bristle broom to gently clear away leaves and branches from the textured surface. Your main job is to look for any signs of excessive UV fading, which is rare but can happen with cheaper brands. If a piece gets damaged, you can usually pry it up and slide a new one into the interlocking system without disturbing the whole roof.
Synthetic Tile
This option gives you the classic Mediterranean or Southwestern vibe of clay or concrete tile. It’s ideal for achieving that specific architectural style without the crushing weight.
It’s on the higher end, typically costing $10 to $15 per square foot installed. The price reflects the complex molding needed for the authentic shape.
Cleaning is easy. A low-pressure rinse from the ground is often enough. What you’re inspecting for is different. Check where the tiles overlap. Look for any accumulated grit or moss that could trap moisture. The most frequent fix I perform is reapplying a bead of sealant at the hip and ridge caps if the original bead cracks.
Remember, “low-maintenance” does not mean “no-maintenance.” Every synthetic roof needs a yearly check. Walk around your house with binoculars first. Look for debris piles in valleys and against chimneys. Listen for any rattling sounds in the wind, which can signal a loose fastener.
Here is the basic tool kit I recommend for a safe homeowner inspection:
- A good pair of binoculars.
- A garden hose with a spray nozzle you can set to “shower.”
- A sturdy, well-balanced ladder. Always have someone hold the base when you climb.
- A notepad to sketch any problem areas you spot.
A Look at Traditional Roofing: Asphalt, Metal, and Natural Materials
Traditional materials have been sheltering homes for generations. They are proven, but each one asks for a specific kind of care from the homeowner.
Architectural Asphalt Shingles
This is the workhorse of American roofs. The care is mostly about keeping them clean and sealed. Twice a year, clear your gutters so water drains properly. If you see dark streaks (algae) or moss, you can clean it with a 50/50 mix of water and white vinegar from a garden sprayer.
Weight is rarely an issue. A square of these shingles weighs about 250 to 350 pounds. Any home built in the last 50 years is designed to handle this load. The real concern isn’t weight, but ensuring the decking underneath is solid before a new layer goes on.
Standing Seam Metal Roofing
A well-installed metal roof is incredibly durable. Its core requirement is checking the seams and fasteners. Once a year, visually scan the vertical seams. You’re looking for any that might be pulling apart or have lost their sealant. Also, check around any rooftop penetrations like vents.
Metal is very light, often weighing less than asphalt shingles. You almost never need structural reinforcement. The key is ensuring the panels were fastened with the correct expansion clips, so the metal can “breathe” with temperature changes without buckling.
Natural Slate and Wood
These are the premium, heavyweights. Natural slate roofs require almost no cleaning, but you must keep trees trimmed back. A falling branch can shatter tiles like china. Wood shakes need vigilant moss control. I apply a moss deterrent treatment every other year to prevent rot.
Weight is a major factor. Natural slate can weigh over 1,000 pounds per square. A structural engineer must verify your home’s framing can support it. Wood is lighter but still requires a robust deck. Installing these materials on a frame not built for them is asking for serious structural damage.
Let me compare a common repair. Fixing a damaged asphalt shingle is a quick, one-person job. You slide a flat bar under the shingle above, pop out the old nails, slide the new shingle in, and nail it down. It takes 10 minutes.
Repairing a dented metal panel is different. You often can’t just replace one panel. The adjoining panels are seamed together. The repair usually involves carefully unseaming the damaged section, installing a new panel, and then resealing all the affected seams with a professional-grade sealant. It’s more involved and often needs a pro.
The RoofMason Material Verdict: Side-by-Side Comparison
Numbers on a brochure are one thing. Seeing how materials hold up after a decade of sun and storms is another. This table is based on my time on the job, watching how these products actually age. Remember, specific brand products will vary, so these are practical averages.
| Material | Weight (lbs/sq ft) | Fire Rating | Hail Resistance | “Best Bang for Buck” Climate |
| 3-Tab Asphalt | 1.5 – 2.5 | Class A | Poor to Fair | Mild, low-storm areas. A budget-friendly baseline. |
| Architectural Asphalt | 2.5 – 4.0 | Class A | Good (some are Class 4) | Widely versatile. My default recommendation for most homes in most regions. |
| Synthetic Slate/Rubber | 1.5 – 3.0 | Class A | Excellent (Often Class 4) | Hail-prone, high-wind, or historic-district areas where real slate weight is a concern. |
| Standing Seam Metal | 1.0 – 1.5 | Class A | Excellent | Snow country, wildfire zones, and homes seeking a 50+ year solution. |
| Real Wood Shake | 2.5 – 4.0 | Needs Treatment | Poor | Dry climates only. Avoid in damp, humid, or fire-risk areas. |
My Recommendations Based on Your Scenario
For hail-prone areas, I lean towards Class 4 rated synthetics or metal. I’ve replaced too many asphalt roofs after a single bad storm. The impact resistance of a good polymer shake or a metal panel is a true money-saver over time.
If you’re in a hot, sunny climate, focus on reflective coatings or lighter colors. Premium asphalt with solar reflectance or a light-colored metal roof can noticeably cut cooling costs. Dark synthetic slate, while durable, will absorb more heat.
On a complex roof with lots of valleys, hips, and dormers, material choice impacts labor. Simple asphalt shingles are faster for a crew to cut and fit around obstacles. Installing synthetic slate or intricate metal on a “cut-up” roof doubles the labor time, which doubles that part of your cost.
Installation complexity is the hidden cost. A metal roof is only as good as its seams and fasteners. If a crew normally does asphalt, their first few metal jobs will be slow and prone to error. Always choose an installer with proven experience in the specific material you select. A perfect material installed poorly will fail faster than a mediocre material installed right.
Repairing the Old vs. Installing the New: A Cost-Benefit Analysis
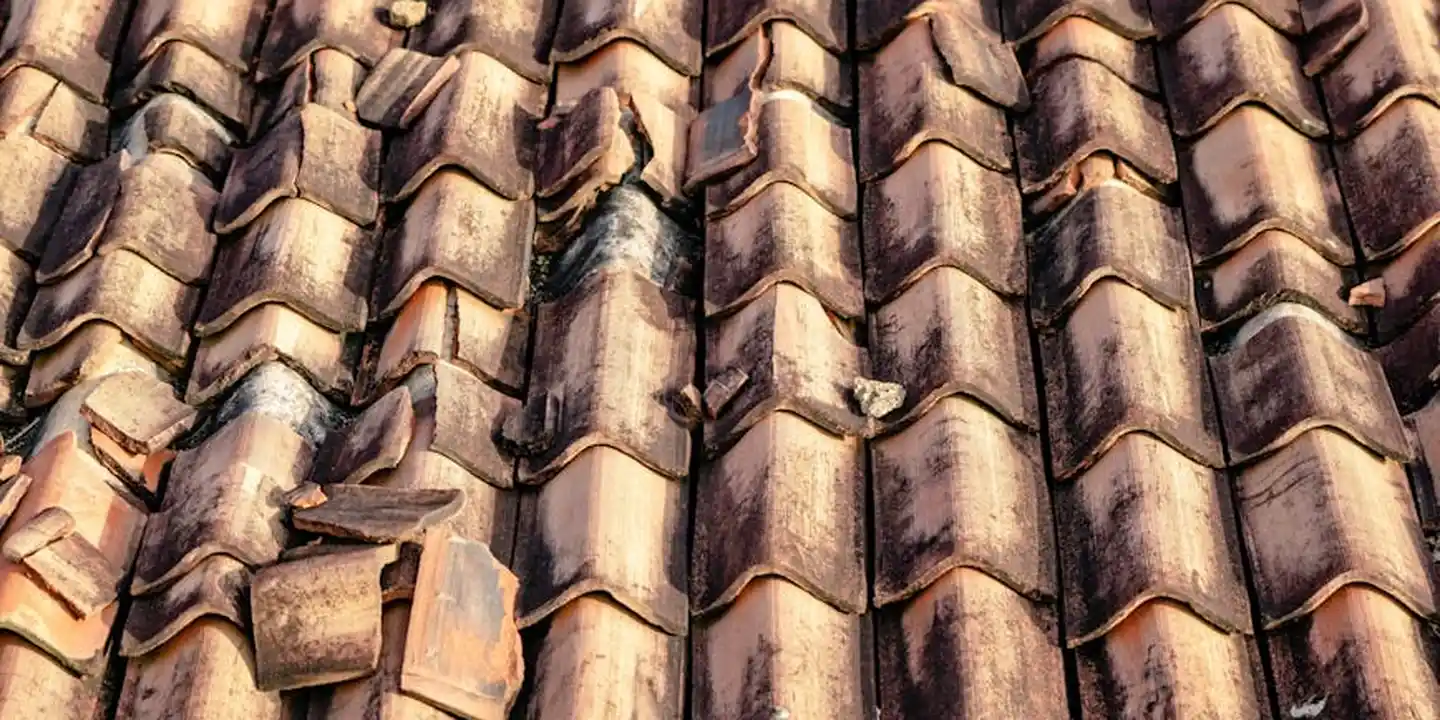
This is the question I get most: “Can I just fix this patch?” My answer always starts with more questions. A repair isn’t a moral failing. A full replacement isn’t always the smartest first move. You need a strategy.
When a Repair is a Smart, Long-Term Fix:
- Damage is truly localized (a 3’x3′ area from a fallen branch).
- The surrounding roof is under 10 years old and in verified good health.
- The failure is a single component, like a pipe flashing boot or a section of ridge cap.
- You have matching materials readily available for a seamless patch.
When a Repair is a “Band-Aid” Waste of Money:
- You’re fixing the third leak in two years, each in a different spot.
- The shingles are brittle, curling, or losing granules heavily (run your hand in a gutter, if it’s sandy, that’s your roof wearing out).
- The underlayment felt is rotten or the decking feels soft-this means water has been getting in for a while.
- The roof is at or beyond its expected lifespan (20+ years for asphalt, etc.).
Cost Tiers: What You Can Expect to Pay
Common Repairs:
- Shingle Replacement (small patch): $300 – $600
- Flashing Repair (valley, chimney, vent): $200 – $500 per location
- Partial Re-roof (one slope): $1,500 – $4,000
Full Replacement (per 10’x10′ square):
- 3-Tab Asphalt: $350 – $550 per square
- Architectural Asphalt: $450 – $750 per square
- Synthetic Slate: $900 – $1,400 per square
- Standing Seam Metal: $1,100 – $1,800 per square
These are installed costs. The high/low range accounts for roof complexity, regional labor rates, and material quality.
The RoofMason Decision Checklist
Answer these questions before you call a contractor:
- Is the damage confined to one small, accessible area?
- Is the rest of the roof firm, with shingles that lie flat and aren’t cracking?
- Is the roof less than halfway through its expected lifespan?
- Can you source matching materials for a clean repair?
If you answered “No” to any of these, a repair is likely short-term thinking. If you answered “Yes” to all, a professional repair could buy you many more years.
The Final Verdict
Repair makes clear financial sense when you have a young, otherwise healthy roof with an isolated problem. It’s like fixing a single loose board on a solid deck. There are roof repair myths debunked you might hear, but small issues don’t always mean you should replace. Knowing the facts helps you choose the right fix.
Replacement is the only prudent move when your roof is aging out, suffering widespread failure, or has hidden structural damage from water. Pouring money into constant patches on a failing system is like using duct tape on a rusty car bumper. You’ll spend more on the tape than the new part, and you’ll still have a rusty bumper.
The hardest call is the roof in the middle-15 years old with a few issues. In that case, get an inspection from a trusted pro who isn’t trying to sell you a roof. Ask them to show you the condition of the underlayment and decking. That’s the truth you need to make the call.
Your Roof Care Playbook: Maintenance Tailored to Your Material
Your roof’s care needs are as unique as its material. A one-size-fits-all approach can cause damage. This guide breaks down what to do, and what to avoid, season by season.
The Seasonal Checklist (Material by Material)
Think of this like changing your car’s oil. Different roofs need different attention at different times. Here’s my crew’s schedule.
Asphalt Shingles & Most Synthetics (TPO, PVC, Some Slate)
Spring/Fall (The Inspection Seasons): Your main job here is visual. From the ground with binoculars, look for cracked, curled, or missing shingles or tiles. Check for loose granules in gutters; a few are normal, a pile is a warning sign. Look for dark streaks from algae (a cosmetic issue mostly). Synthetic materials like some rubber membranes or plastic slates won’t have granule loss, but you still check for punctures or lifting seams.
Summer: Ensure attic ventilation is working. A hot, stagnant attic bakes shingles from underneath. This is less critical for synthetics but vital for wood and asphalt.
Winter: Keep gutters and valleys clear of heavy snow with a roof rake. Never use a metal shovel or pickaxe, as you will damage the surface.
Metal Roofing (Standing Seam & Metal Shingles)
Spring: Inspect for loose fasteners or clips. Check the paint or coating for scratches or rust spots. A small touch-up now prevents a big repair later.
Fall: The most critical task is clearing all leaves and pine needles from the roof surface and valleys. Debris holds moisture against the metal, accelerating corrosion.
Year-Round: After any major storm with hail, check for dents. While metal is tough, large dents can affect the water-shedding path.
Wood Shakes & Shingles
Spring: Look for moss or lichen growth. This is your enemy. It holds moisture and rots the wood.
Summer: Inspect for curling, splitting, or signs of insect damage. Ensure vegetation is trimmed back to allow sun and air flow.
Fall: This is gutter-cleaning season, but it’s extra important for wood. Clogged gutters cause water to back up under the wood courses.
Clay/Concrete Tile & Natural Slate
Spring/Fall: Your primary goal is to stay off the roof. From the ground, scan for cracked, broken, or slipped tiles. Walking on these materials without knowing the specific walk points will cause breakage.
Check the mortar (if used) at the ridge and hip caps for cracking. For synthetic slate, the inspection is similar, but you’re looking for fading or unusual brittleness.
Specific Warnings: What NOT to Do
I’ve seen good intentions cause expensive mistakes. Follow these rules.
- Never power-wash wood shakes, asphalt shingles, or older slate. The high-pressure water drives under the material, forces off protective granules, and lifts seals. It creates leaks. For cleaning, use a low-pressure wash with a moss-killing solution approved for your roof.
- Always use walkway pads or boards on synthetic slate, metal, or PVC membranes. Even a soft shoe can scuff or puncture some synthetics. Distributing your weight is key.
- Never use harsh chemical cleaners or metal brushes on a metal roof. You’ll strip the protective coating.
- Do not attempt to seal a large area of leaking roof with a can of sealant from the hardware store. This is a temporary fix that traps moisture and hides the real problem.
- Never nail, screw, or strap anything directly to your roof (like holiday lights or a satellite dish) without using a proper flashing kit designed for your material.
The Universal Fix: Inspecting and Maintaining Flashings
If your roof is a jacket, flashings are the zippers and seams. Over 90% of leaks I’m called to fix start at a flashing point, not in the middle of the roof field. They are the most critical part of your inspection.
Here’s how to check them twice a year:
- Chimney Flashings: Look where the metal meets the brick. Check for gaps, rust, or cracked sealant. The “step flashing” along the sides should be tight.
- Vent Pipe Flashings: The rubber boot or metal collar around plumbing vents gets brittle with sun exposure. Look for cracks, tears, or dried-out caulk.
- Valley Flashings: If your roof has metal valleys, ensure they are free of debris and the edges are secure. If they are “woven” or “closed-cut” shingle valleys, make sure the shingles aren’t damaged.
- Wall & Drip Edge Flashings: Check where the roof meets a sidewall. The L-shaped metal should be tight. Look at the drip edge along the roof eaves for any lifting.
For minor issues like a small gap in sealant, you can clean the area and apply a high-quality, UV-resistant roofing sealant. For cracked boots, rusted metal, or loose step flashing, call a professional.
Safety First: This Isn’t a Suggestion
I tell every homeowner the same thing. Your safety is more important than any roof repair. The ground is a long way down, so make sure to practice roof walking safety.
If you must go on the roof, use a proper roof harness anchored to a structurally sound point. Never rely on just your balance. Use a sturdy, extended ladder set at the correct angle (a 1:4 ratio – for every 4 feet up, the base should be 1 foot out). Have a spotter hold the ladder.
Wear rubber-soled shoes with good tread. Never work on a wet, icy, or very windy roof.
When to absolutely call a pro: If your roof is steeper than a 6/12 pitch (that’s 6 inches of rise for every 12 inches of run), if you need to work near the ridge, if you see widespread damage, or if you are simply unsure. A professional’s injury insurance and experience are worth the cost. Watching a roofer work from my driveway once taught me more about my own roof’s weak spots than I ever learned from being on it.
Common Questions
What’s the right way to clean moss off a synthetic roof without damaging it?
Never use a pressure washer or metal brush. Use a garden sprayer with a 50/50 water and white vinegar mix, let it sit, then gently rinse with a garden hose on a low-pressure setting.
Can individual synthetic tiles or shakes be replaced if damaged, or is it a bigger fix?
Yes, most are designed for spot repairs. You can usually pry up the damaged piece and snap a new one into the interlocking system, but you must have a matching piece from the original installation batch.
Are synthetic materials like slate a bad choice for very hot, sunny climates?
No, but UV resistance varies by brand. For hot climates, prioritize products with strong UV inhibitors and choose lighter colors to reduce heat absorption and help with energy efficiency.
Making a Durable Roofing Decision
Your roof’s job is simple: keep everything dry underneath for as long as possible. Choose the material-synthetic or traditional-that best defends against your local weather and fits the upkeep you can reliably provide, and then focus on proper installation.
Treat your roof as a critical, living part of your home that needs routine check-ups and safe maintenance. Commit to learning about roof care; it’s the best way to spot small issues early and keep your investment solid.
Expert Resources and Citations
- Metal Roofing vs. Synthetic Roofing: Which is the Best Type of Roof?
- What You Need to Know About Synthetic Roofing
- Synthetic vs. Traditional Roofing Materials: Why Synthetic Slate and Clay Are the Future | Solar Tile Roof
- Synthetic Shingles and Traditional Shingles Compared in Price – Refined Exteriors
- Synthetic vs. Felt Roofing Underlayment
- The Advantages of Synthetic Roofing Materials – HUDCO Roofing
- Composite Shingles vs. Traditional Roofing: What’s Best?
- Synthetic Underlayment vs. Traditional Felt | atlasroofing.com
- Debunking the Myths of Synthetic Roofing Tile – Ecostar LLC
Ray Huffington
Ray is an experienced roofer. He has worked as a general contractor in the roofing industry for over 15 years now. He has installed and repaired all kinds of roofs, from small houses to large mansion, and from basic shingles to cement and metal roofs and even solar roof panels. He has seen homeowners struggle with roofing questions and always has experience based proven advice to help those in need. If you need roof pros, Ray's your guide.