
What Are the Proper Roof Sheathing Installation Requirements and Techniques for Your Home?
Have you ever noticed a roof that sags or leaks soon after installation? In my experience, the problem often starts with the sheathing. If the sheathing isn’t installed correctly, you risk water damage, poor insulation, and even structural failure. I will cover the specific building codes you must follow, the step-by-step techniques for a secure install, and the material choices that impact longevity.
Key Takeaways: The Sheathing Essentials
Roof sheathing is the structural wooden layer under your shingles, and installing it incorrectly is a direct path to a sagging roof, persistent leaks, and a voided shingle warranty.
Doing the job right rests on four core pillars.
- Using the right material for your specific roof and local weather.
- Following the exact nailing or screwing pattern, including fastener type and spacing.
- Managing the gaps between panels so the wood can breathe and move.
- Integrating the sheathing layout with your attic ventilation plan from the very beginning.
Local building codes and the manufacturer’s installation sheet are not friendly suggestions, they are the non-negotiable rulebook for a safe, lasting roof. For cedar shake roofs, understanding legal codes and fire ratings is essential. Installation details directly influence compliance and long-term performance.
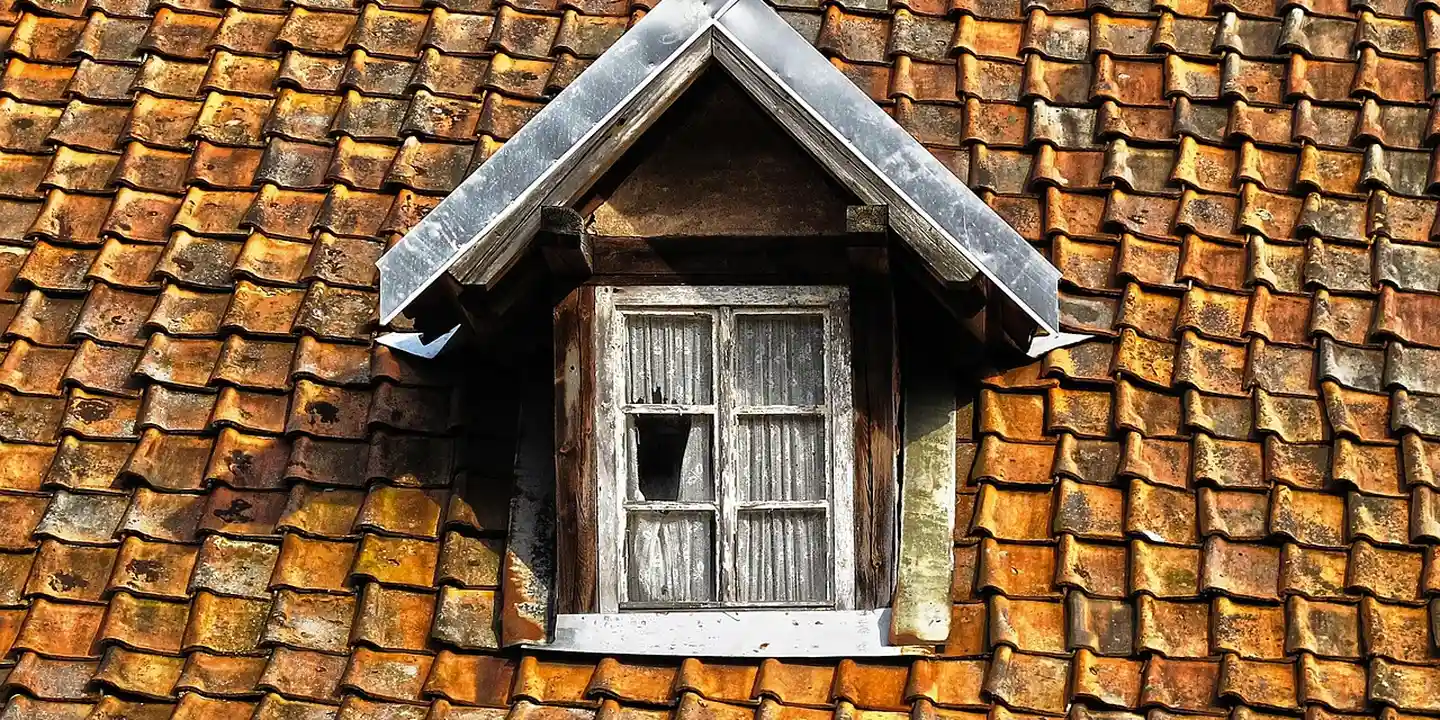
What Is Roof Sheathing? Your Roof’s Hidden Backbone
Roof sheathing, or decking, is the flat surface of panels nailed directly to your roof’s rafters or trusses. Everything else, from the waterproof underlayment to the final shingles, sits on top of it.
Its dual role is to provide the main structural strength for your roof and to create a smooth, stable base for all the finishing layers.
I explain it to homeowners like this: it’s the subfloor under your hardwood. If that subfloor is weak or uneven, your floors will fail no matter how expensive the finish. Your roof works exactly the same way.
Poor sheathing shows up quickly. You’ll see shingles that look wavy or develop dips. You might feel soft, spongy spots when you walk on the roof. Most leaks I trace back start at a poorly supported seam or a rotten section of decking.
The Attic Connection: How Sheathing Affects Your Home’s Health
Sheathing installation has a direct line to your attic’s temperature and moisture levels. Get it wrong, and you’re inviting bigger problems into your house.
If panels are sealed too tightly or block the flow of air from your soffit vents, you trap warm, moist air from your living space below. In winter, that moisture condenses on the cold sheathing, leading to wood rot, mold on the decking, and destructive ice dams. Your heating and cooling bills will climb as your attic overheats.
There’s also a heat loss factor called thermal bridging. Standard wood sheathing acts like a highway for heat to travel from your warm attic to the cold outside. Some advanced materials, like ZIP R sheathing, have integrated insulation. This added layer breaks that thermal bridge, which improves the roof’s overall R-value and helps maintain a more consistent temperature in your attic space.
Choosing Your Sheathing Material: Plywood, OSB, and Beyond
Think of your roof sheathing as the floor of your attic. It’s the solid deck everything else gets nailed to. For decades, the two main options have been plywood and OSB. Each has its place on a jobsite.
Oriented Strand Board (OSB) is made from compressed wood strands. It’s usually the most cost-effective choice, which is why you see it on most new builds. The main trade-off is that OSB swells more at the edges if it gets and stays wet for a long time. I’ve had to replace panels that got soaked before the underlayment went on.
Plywood is made from thin sheets of veneer. It’s a bit more expensive. The advantage is that it tends to handle incidental moisture better, drying out without as much edge swelling. Some crews prefer it because it feels a bit stiffer underfoot when you’re carrying bundles of shingles up. If you’re planning a roof, you might want to explore the best plywood roof decking options. That choice can influence stiffness, moisture resistance, and ease of installation.
Your local lumberyard’s stock often decides for you. In many areas, OSB is the standard. Both are stamped with the same performance ratings when installed correctly.
For special situations, you have other choices. Old historical homes might use real tongue-and-groove planks. For energy efficiency, you can use insulated sheathing panels like ZIP System R. Yes, you can use ZIP R sheathing on a roof. You absolutely must follow the manufacturer’s nailing pattern and fastener specifications to the letter, as the insulated core changes how it holds nails. It’s not a job for guesswork.
Material Thickness and Grade: What the Numbers Mean
The numbers on the panel stamp aren’t suggestions. They’re engineering requirements. The two big ones are thickness and grade.
Thickness ties directly to the distance between your roof rafters or trusses. A wider span needs a thicker, stronger panel to resist sagging.
- 1/2-inch: Used for 16-inch or 24-inch rafter spacing. This is very common for standard home construction.
- 5/8-inch or 3/4-inch: Used for wider 24-inch spacing when you need extra strength, or in areas with heavy snow loads. It provides a much more solid deck.
The grade stamp tells you about moisture resistance. For roofing, you need at least an “Exposure 1” grade. Exposure 1 means the glue can handle some rain during construction without falling apart, but it is not meant for permanent wetness. You still need to get the roof covered with underlayment or shingles as soon as possible.
The Step-by-Step Sheathing Installation Guide
With your materials delivered, it’s time to get to work. This assumes your rafters are up, level, and ready. Before you lift the first panel, think safety.
You are working on a steep, slippery surface. Wear proper shoes with good grip. Use roof jacks and a safety harness tied to a secure anchor. Have a spotter help you get those first heavy panels into position. A dropped 4×8 sheet can do a lot of damage.
Step 1: Layout and First Panel Placement
Start at the lower corner of your roof. Your first panel sets the line for everything above it. Place it so the long side runs across the rafters. The key is to make sure the panel’s edge is perfectly straight with the roof’s edge.
A straight starter edge is critical for installing the drip edge and fascia board correctly later. Use a chalk line snapped along the rafters as a guide. Leave a small 1/8-inch gap between the end of the panel and the adjacent gable or wall. This gap allows for natural expansion of the wood.
Step 2: The Staggered Pattern and Continuing Up
Never let the end joints of your panels line up in consecutive rows. This creates a weak seam that can telegraph through the finished roof.
Work like you’re laying bricks. If your first row starts with a full sheet, start your second row with a half sheet or a 4-foot cut-off. Staggering the joints distributes weight and keeps the roof deck rigid. As you work up the slope, maintain that consistent 1/8-inch gap between all panel ends and edges. These small gaps are your expansion joints.
Step 3: Cutting and Fitting at Obstacles
You will hit vent pipes, chimneys, and dormers. Measure carefully, mark the panel on the roof, and cut it with a circular saw. Set your blade depth to just cut through the sheathing without nicking the rafters below.
For pipes, cut a hole about 1/2-inch larger than the pipe diameter. For walls and chimneys, leave a 1/4-inch to 1/2-inch gap. This clearance is not just for expansion; it is vital for maintaining ventilation airflow from your soffit vents up into the attic. Never pack sheathing tight against an obstacle.
Fastening, Spacing, and Clips: The Non-Negotiable Rules
This is exactly where most DIY roof sheathing jobs fail. I have ripped off too many roofs where the panels were flapping in the wind because someone thought they could eyeball it. Getting this part wrong compromises your entire roof. It is crucial to follow best practices for OSB roof sheathing.
Nail and Screw Requirements: Type, Length, and Pattern
You have two main choices for fasteners: common nails or galvanized nails. I see people ask about deck screws all the time. Do not use deck screws for roof sheathing. They are brittle and can snap under the constant stress and movement of a roof. You absolutely need galvanized nails for corrosion resistance, especially if you live near the coast or in a rainy area. Rusty nails lose their grip, and that’s how sheathing comes loose.
The length of the nail is not a suggestion. A solid rule is that the nail must sink into the roof rafter or truss by at least 1 1/2 inches. For most 1/2-inch or 5/8-inch sheathing, that means using an 8d common or 8d galvanized nail, which is about 2 1/2 inches long. Nail length also depends on the roofing material and its application, from underlayment to shingles, plywood, or metal panels. Matching nail size to material ensures proper hold and minimizes damage.
Nailing follows a strict pattern that looks like a grid. Here is the typical layout:
- Space nails every 6 inches along the panel edges that sit on a rafter.
- Space nails every 12 inches on the interior rafters, what we call the “field.”
People often ask if roofing nails are supposed to go all the way through. The nail must penetrate the sheathing and drive deep into the wooden rafter beneath. If the nail only goes into the sheathing itself, it provides zero holding power. The panel is just sitting there, waiting to blow off.
The Critical Role of Expansion Gaps and H-Clips
You must leave a 1/8-inch gap between the edges of all sheathing panels. Think of wood like a sponge. It swells when it’s damp and shrinks when it’s dry. Without that tiny gap, the panels have nowhere to go. They push against each other and buckle upward, creating humps you’ll see through your shingles.
H-clips, or panel edge clips, are small, H-shaped pieces of galvanized steel. Their job is simple but vital. They support the long, unsupported edge of a plywood or OSB sheet where it meets another sheet between the rafters. This keeps that seam from sagging over time.
So, are clips required for roof sheathing? The answer depends on your rafter spacing and sheathing thickness. The building code has clear rules. If your rafters are spaced 24 inches apart, you will almost always need H-clips for 1/2-inch thick panels. For 5/8-inch roof sheathing on 24-inch rafter spacing, H-clips are still typically required to meet code and prevent sagging. When in doubt, use them. They are cheap insurance for a flat, solid roof deck.
Navigating Hips, Valleys, Ridges, and Building Codes

Hips, valleys, and ridges are the trickiest parts of any roof to sheath. They require precise cutting and fitting. A mistake here leads directly to leaks and callbacks, which I have had to fix more times than I can count. That same precision matters when you install or remove plywood roof sheathing. Getting the sequencing right helps prevent gaps and leaks down the line.
Cutting and Fitting at Roof Angles
Let’s start with hips, where two roof slopes meet at an outside corner. You need to cut the end of each sheathing panel at an angle so they meet cleanly at the peak. I use a circular saw set to the exact roof pitch. A speed square is your best friend for marking these cuts. A sloppy fit here leaves a weak spot.
Valleys are the inside corners where two slopes meet. This is a critical water channel. Your sheathing must provide a perfectly flat and solid surface from one roof plane to the other. Any dip or ridge in the sheathing will cause the valley metal to bend improperly, creating a spot where water and debris can collect and eventually leak. Take your time to fit these pieces tightly.
At the ridge, the very top of the roof, you need to plan for ventilation. You do not sheath all the way to the peak on both sides. Instead, you leave a continuous gap, usually about an inch wide, along the ridge. This allows hot air to flow out of your attic. You then cover this gap with a ridge vent. Make sure the cuts are straight and even on both sides for the vent to seal properly.
The Code Compliance Check: Permits and Wind Uplift
If you are replacing all or a large section of your roof sheathing, you will likely need a building permit. Your local building department needs to check that the work is done safely and to code. Skipping the permit can cause huge problems if you ever sell your house or file an insurance claim.
The rulebook for roof sheathing is the International Residential Code (IRC), specifically section R803. This section tells you the minimum thickness for your sheathing based on rafter spacing (the span rating), exactly how to fasten it, and what materials are acceptable. Familiarizing yourself with IRC R803 is the best way to ensure your roof deck is built to last.
Codes also address wind uplift. This is the force that tries to rip your roof off in a storm. Your nailing pattern and the type of fasteners you use are designed to resist this force. By following the code for fastening, you are automatically building a roof that can handle the wind speeds common in your area. A poorly fastened roof is a blow-off waiting to happen.
Here is a serious warning. If you install sheathing incorrectly, you void the manufacturer’s warranty on the sheathing panels. More importantly, you also void the warranty on your shingles. Most shingle warranties require a solid, code-compliant deck. Improper sheathing installation means you are personally responsible for any future roof failure, even if the shingles themselves are defective.
Common Sheathing Mistakes and How to Avoid Them

Even with the right materials, the installation makes or breaks the roof. I’ve seen too many jobs where a simple error during sheathing led to costly callbacks. Here are the big three mistakes my crew and I have fixed over the years. Understanding proven roof installation methods helps prevent these mistakes. In the next steps, we’ll look at the installation methods that matter most.
Mistake 1: Ignoring Gaps or Over-Driving Fasteners
Wood sheathing needs room to breathe. Nailing panels tight together might look clean, but it’s asking for trouble. When wood absorbs moisture, it swells.
With no gap, swollen panels have nowhere to go but up, pushing against each other to create permanent humps in your roof deck. These humps telegraph through the shingles, creating visible ridges and shortening their life. Always leave a consistent 1/8-inch gap between panels.
The other half of this mistake is driving nails or staples too deep. We call an over-driven nail a “shiner” because you can see its head sunk below the wood surface.
A shiner has almost no holding power and creates a weak spot that can lead to panel movement and squeaks. The fastener head should sit flush with the sheathing, not buried in it. Adjust your nail gun’s air pressure or check your hammer swing.
Mistake 2: Poor Alignment and Inadequate Support
Think of sheathing joints like the seams in a wooden floor. If all the seams line up in a row, you create a long, weak line.
Un-staggered joints create a hinge point across the roof rafters, which is a prime spot for sagging over time. You must offset the end joints by at least one framing bay. Stagger the pattern so no four corners ever meet at one point.
Staggering helps, but long, unsupported edges also need help. This is where H-clips come in. They are small metal braces that fit between panels at the unsupported edges.
H-clips are mandatory when the span between roof rafters is 24 inches or more to prevent that long edge from flexing and sagging. They are cheap insurance. I keep a pocketful on every job and use them per the panel manufacturer’s spec.
Mistake 3: Blocking Ventilation Paths
Your attic needs to breathe. Cool air enters through the soffit vents, travels up under the sheathing, and exits at the ridge.
If you run sheathing all the way to the outside edge of the fascia board, you completely block that intake path. It’s like putting a towel over a air vent. The same goes for sheathing tight against a ridge vent.
Blocking ventilation traps heat and moisture in the attic, which can bake your shingles from below and cause mold and wood rot. Always maintain the clearance specified in your local building code, typically 1.5 to 2 inches back from the soffit edge and ridge. Use a spacer block as a guide when nailing.
Tool List and Safety Protocol for Sheathing Work
Working on a roof deck is dangerous. Speed and efficiency come from being prepared and safe, not from cutting corners. This is the setup we use on every job.
Essential Tools for the Job
You don’t need fancy tools, but you need the right ones. Here is the basic kit:
- Circular saw or panel saw for cuts.
- Hammer or, better yet, a coil-fed roofing nail gun.
- Chalk line for snapping straight layout lines.
- Tape measure (a 25-footer is perfect).
- Speed square for marking angled cuts at hips and valleys.
- A flat pry bar for adjusting panels and pulling old nails.
For sheathing, a pneumatic nail gun is a game-changer for speed and for setting nails at the perfect depth every time. Pair it with a capable air compressor and plenty of roofing coils. Just remember to check your depth setting on a scrap piece first to avoid making shiners.
Safety Gear and Setup
This is non-negotiable. A fall from a roof changes lives.
Proper fall protection is not optional; it means a full harness system tied to a certified roof anchor or a properly installed scaffolding system around the perimeter. If you’re a homeowner considering this work, hire a pro with this equipment. It’s that important. We cover roof anchor installation, safety harness use, and ladder safety in the next sections.
Your personal gear matters just as much:
- Heavy-duty work gloves to protect from splinters and sharp edges.
- Safety glasses, especially when prying or cutting.
- Sturdy boots with defined tread-roofing boots with soft rubber soles are ideal for traction.
Handling 4×8 sheets of OSB on a sloped frame is a two-person job. Always have a spotter when hoisting panels, and never try to wrestle one in windy conditions. If the wind picks up, get the panel flat on the deck and secure it immediately, or stop work. A large panel can act like a sail and knock you off balance in an instant.
Common Questions
Can I use that ZIP System sheathing on a roof?
Yes, you absolutely can. You must follow the manufacturer’s nailing pattern and fastener specs to the letter, as the insulated core holds nails differently than standard OSB.
What should I do if I find rotten sheathing during a repair?
Replace every compromised panel. Do not patch over rot or soft spots, as the decay will continue to spread to surrounding wood and the new roof above it.
Is a nail gun okay for sheathing, or should I hand-nail?
A pneumatic nail gun is the professional standard for speed and consistent depth. Just ensure it’s calibrated to drive the correct code-approved fastener flush-not over-driven-into the rafter.
Building a Roof Deck That Won’t Let You Down
Always insist on code-approved sheathing, installed with the correct spacing and fasteners. A meticulously built deck is the silent workhorse that keeps your roof rigid, safe, and dry for decades.
View your roof as a living system that needs your informed attention and safe, periodic check-ups. To keep you safe during any inspection or repair, familiarize yourself with roof repair safety practices and proper fall protection. Empower yourself by learning about roof care, maintenance, and materials—it’s the key to long-term property protection.
Ray Huffington
Ray is an experienced roofer. He has worked as a general contractor in the roofing industry for over 15 years now. He has installed and repaired all kinds of roofs, from small houses to large mansion, and from basic shingles to cement and metal roofs and even solar roof panels. He has seen homeowners struggle with roofing questions and always has experience based proven advice to help those in need. If you need roof pros, Ray's your guide.