
How Do You Paint TPO Roofs, Asphalt Shingles, and Apply Roof Coatings Correctly?
Is your roof looking tired, and you’re hoping a fresh coat might revive it? Painting or coating a roof isn’t a one-step fix-each material, from TPO to asphalt shingles, has specific needs that, if ignored, can lead to leaks and wasted money.
I’ll break down the safe, code-compliant methods for each surface.
First, how to properly prepare and paint a TPO roof membrane.
Next, the realities and right approach for painting asphalt shingles.
Finally, a step-by-step guide to applying protective roof coatings.
Key Takeaways: What You Need to Know First
- Painting and coating are not the same thing. Painting is often about changing the color for looks, especially on materials like TPO. Coating is a thicker layer meant to seal, protect, and add years to your roof’s life.
- This is not beginner DIY. Working on a roof is dangerous, and applying these materials wrong can void warranties or cause leaks. For most jobs, calling a pro is the smart move.
- We’ll cover three areas: how to paint TPO roofs, the tricky subject of painting asphalt shingles, and the right way to apply protective roof coatings.
- Your first step is always an inspection. Never paint or coat a roof that has damage, leaks, or poor adhesion. Fix the problems first.
Safety First: The Pro-Only Reality of Roof Work
I remember a job early in my career on a steep, two story colonial. The pitch was so sharp that even with gear, my heart was racing. That day taught me that no shortcut is worth the risk.
If you decide to proceed, here is the non negotiable gear:
- A full fall arrest harness system, properly anchored.
- Roof jacks or stable scaffolding, never just a ladder leaned against the eaves.
- Non slip, rubber soled shoes.
- Heavy duty gloves and safety glasses.
The risks are real. A steep pitch can send you sliding off in seconds. Power lines are often too close for comfort. Summer heat can lead to exhaustion. The fumes from some paints or coatings are harsh. Respect these hazards, or stay off the roof.
For anything beyond a single story ranch with a gentle slope, hire a crew. It is not admitting defeat, it is using experience to protect your home and yourself.
When NOT to Try Painting or Coating Your Roof

Can I paint my roof? You can, but only if your roof is structurally sound and in good repair. Applying paint or coating to a failing roof is a waste of money and often accelerates damage.
Do not attempt this project if you see any of these red flags.
- Active leaks or water stains in the attic.
- Any sagging or noticeable structural damage to the deck.
- Moss, algae, or lichen growth that has not been thoroughly cleaned and treated.
- Asphalt shingles that are curling, cupping, or have lost most of their granules. This means they are at the end of their life.
Coating over badly worn asphalt shingles is a trap I’ve seen too many homeowners fall into. It seals in moisture that’s already in the matting, which leads to hidden rot in your roof deck.
Some materials should never be painted. Never paint wood shakes or shingles that are meant to weather naturally; the paint will peel and trap moisture. Be very cautious with polycarbonate sheets or panels, as many paints will not adhere properly and can cause cracking.
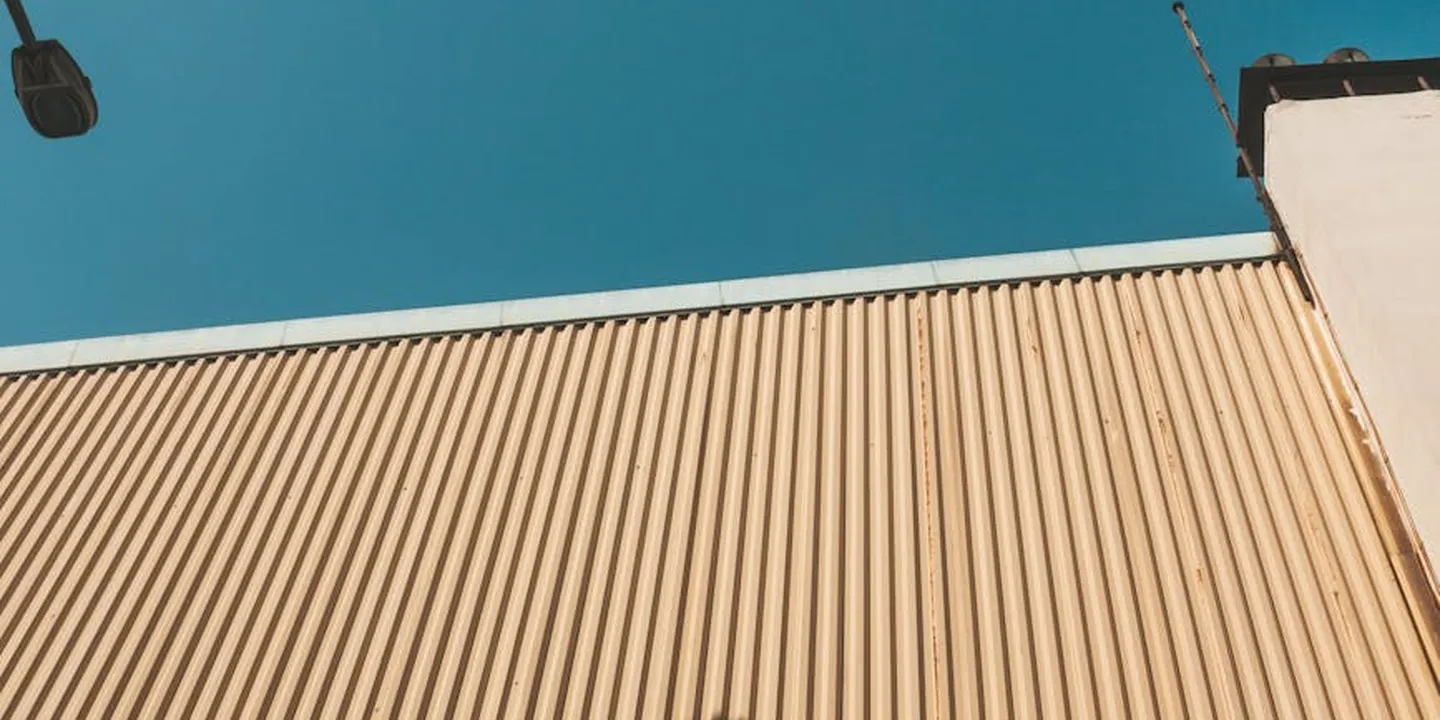
Painting TPO Roofs: A Step-by-Step Guide
How do you paint TPO roofs? It’s a common job for commercial buildings, but homeowners with flat sections can do it too. TPO is a white, single-ply rubber-like membrane. Painting is usually done to restore its high reflectivity or to change its color for aesthetics.
Step 1: Inspection and Material Choice
Before you buy a single gallon, get on the roof and inspect it closely. Run your hands over seams and look for punctures, blisters, or wrinkles. Any of these need a proper TPO repair kit before you paint.
Your paint choice is critical: you must use a coating designed for TPO membranes, like a 100% acrylic or a flexible elastomeric coating. Using the wrong paint will cause it to peel or crack within a season. I always bring the TPO manufacturer’s info to the supply shop to match products.
Step 2: The Critical Clean
A clean, dry surface is non-negotiable. First, sweep off all leaves and debris. Then, wash the entire membrane with a cleaner made for TPO or a mild detergent. Avoid high-pressure washers, as they can force water under seams and weaken them.
Let the roof dry completely. This can take a full 24 to 48 hours of dry weather. Painting on a damp roof guarantees failure.
Step 3: Primer and Application
Check your paint can instructions. Some coatings need a primer, especially on older TPO, while newer formulations are primerless. When in doubt, using a primer is a safe bet for better adhesion.
Apply the coating with a long-nap roller for the big areas. Use a brush to carefully coat the seams, edges, and any penetrations like vent pipes. Aim for an even, consistent layer. One solid coat is better than two thin, patchy ones.
Common Mistakes to Avoid on TPO
- Using oil-based or generic exterior paints. They will not flex with the membrane and will deteriorate quickly.
- Painting in direct, hot sun or when rain is in the forecast. Ideal conditions are cloudy and between 50°F and 80°F.
- Ignoring the manufacturer’s instructions on the paint can and the TPO material. This is the easiest way to void any warranty.
Painting Asphalt Shingles: Is It Even a Good Idea?

You asked, “can asphalt roof shingles be painted?” The short answer is technically yes. The real answer is you probably shouldn’t. I’ve been on roofs for over twenty years, and painting shingles is almost always a bad idea, especially when comparing asphalt shingles to metal roofing.
Painting your asphalt shingle roof will void the manufacturer’s warranty immediately. It also seals in heat and moisture that the shingles are designed to breathe out. Think of it like wearing a plastic bag under your winter coat. You trap sweat, and things get damaged from the inside. Even though roof coatings can be effective, they are primarily designed for other types of roofing materials.
I only consider it a last-resort cosmetic fix for sound, older shingles where replacement isn’t an option right now. If your shingles are curling, cracking, or missing granules, painting is just a waste of money.
If You Decide to Proceed: The Process
So, how do you paint asphalt shingles if you’re set on it? The process is everything. Miss one step, and you’ll cause more harm than good.
Your shingles must be in good structural shape, completely clean, and bone-dry. Any dirt, algae, or moisture under the paint is a recipe for rot.
Here is the step-by-step method I’ve seen work when done carefully:
- Clean with moss remover and a soft wash system, never a pressure washer. Pressure washing will blast off the protective granules. Use a dedicated roof cleaner and a garden hose with a sprayer.
- Let the roof dry completely. This can take 24-48 hours of sunny, dry weather.
- Use a breathable, elastomeric acrylic primer made specifically for roof shingles. This gives the paint something to grip without fully sealing the shingle.
- Apply the paint with an airless sprayer for the most even coat. Immediately after spraying a section, use a roller to “back-roll.” This pushes the paint into the tiny grooves and ensures it sticks.
The Major Downsides and Risks
Let’s talk about what you’re risking. First, the added weight and seal of the paint can cause the shingles to shed granules faster. Those granules are your roof’s sunscreen; losing them speeds up UV damage.
Second, paint makes a roof inspection useless. You can’t see cracked shingles, wind damage, or hail spots. Problems hide until they become major leaks.
If you want to protect an asphalt roof, a reflective roof coating designed for steep slopes is a better option than paint. It’s more breathable and meant for the job—unlike standard residential rubber roof coatings used on flat surfaces.
Applying Roof Coatings: The Right Way to Extend Life
Now, let’s talk about the right way to add a protective layer: roof coatings. This answers “how do you apply roof coatings?” A coating is not paint. Coatings are thick, viscous layers designed to seal, waterproof, and reflect sunlight, mainly on flat or low-slope roofs. They add years of life. Sometimes you can apply the coating from the ground with extendable rollers or spray wands, depending on the roof and coating. We’ll cover ground-level application options in the next steps.
Choosing Your Coating Type
Picking the right coating is like choosing the right outerwear. You need the right tool for the weather.
- Acrylic coatings are like a breathable raincoat. They’re good for water shedding and UV reflection, perfect for metal roofs or modified bitumen. They allow moisture vapor to escape.
- Silicone coatings are like a wetsuit. They’re incredibly waterproof and ponding water resistant, ideal for flat roofs that hold water. They’re the go-to for sealing a standing seam metal roof.
- Urethane coatings are the heavy-duty armor. They’re extremely durable and chemical resistant, often used in commercial settings over spray foam insulation.
Match the coating to your roof material. Using the wrong one leads to peeling and failure.
The Five-Step Application Protocol
A perfect coating job lives or dies by the prep work. Rushing this is the biggest mistake I see.
1. Repair and Clean
Every single repair must be done first. Seal all cracks, fix all flashings, and replace any damaged roof material. A coating seals a good roof; it does not fix a bad one.
Then, clean relentlessly. Sweep off all debris. For most roofs, a thorough power washing is needed to remove dirt, chalk, and old residue. The surface must be pristine. For delicate areas, make sure to clean roof shingles safely without causing damage.
2. Dry Time and Primer
Let the roof dry completely, usually for at least 24-48 hours. Any moisture will be trapped forever. Some coatings, especially on metal or stained surfaces, require a primer. This primer is a chemical bonder. Never skip it if the manufacturer says it’s needed.
3. Application Technique
For small areas, use a thick nap roller (3/4″ or more). For large commercial roofs, a spray system is standard. The key is achieving the right thickness, measured in “mils” (thousandths of an inch).
Work in manageable sections, always maintaining a “wet edge” where you apply new coating over still-tacky coating. This prevents visible seams and laps that can become weak points.
4. Curing and Inspection
Curing takes 24 to 72 hours of good weather. No rain, and temperatures must be within the product’s range. Once cured, walk the entire roof. Look for any missed spots, thin areas, or “holidays.” Mark them with chalk and apply a second coat to those specific areas to ensure a continuous seal.
Tools and Materials Checklist: Gearing Up Right
I always tell my crew to lay out all their tools before climbing up. Having everything within reach prevents unsafe backtracking and makes the job smoother. Use this list to gear up correctly for your specific project.
Painting TPO Roofs
TPO is a smooth, single-ply membrane. Painting it isn’t like painting a wall. You must use products specifically formulated for TPO to avoid adhesion failure and premature peeling.
- TPO cleaner: This isn’t just soap and water. It’s a chemical cleaner that removes manufacturing residues and dirt.
- Soft bristle brush: A stiff brush can scuff the membrane. Use a soft one for scrubbing in the cleaner.
- Acrylic roof paint: Must be labeled for use on TPO. Other paints will not stick.
- Roller frame with a long extension pole: This lets you apply paint from a stable, standing position, covering more area safely.
- Seam roller: A small, hard roller. After painting, you go over all seams to press the paint in and ensure a continuous seal.
- Safety gear: This is non-negotiable. Include a full fall-arrest harness, non-slip shoes, gloves, and safety glasses.
Painting Asphalt Shingles (If You Proceed)
I rarely recommend painting asphalt shingles. It can trap moisture and void warranties. In some cases, painting asphalt shingles can be a viable option with the right breathable coating and proper prep. If you decide to proceed, understand that breathability is your top concern to prevent rot.
- Breathable primer: This is a special primer that seals the surface while still allowing water vapor to escape from the shingles.
- Elastomeric paint: This paint stretches and shrinks with the shingles as they heat and cool, preventing cracks.
- Low-pressure sprayer: High pressure will blast off the granules. A low-pressure unit gives you control.
- Safety harness: Roof slopes can be deceptive. A harness is your most important tool on any roof.
- Additional safety gear: Gloves, eye protection, and shoes with excellent grip are part of every job’s basics.
Applying Roof Coatings
Coatings are like a thick, protective skin for your roof. The success of a coating job is 80% in the preparation and 20% in the application. Your tool list reflects that.
- Repair fabric and cement: For patching any cracks, blisters, or penetrations before the coating goes on. A coating won’t bridge gaps.
- Power washer (if appropriate): Use only on durable surfaces like metal or built-up roofs, and always on a low setting to avoid damage.
- Your chosen coating: Whether it’s acrylic, silicone, or urethane, have all gallons on site before you start.
- Mixer drill and paddle: Coatings settle. You must mix each drum thoroughly for consistent performance and color.
- Wet mil gauge: This little tool measures the thickness of the wet coating. Applying it too thin is the most common mistake.
- Spray rig or heavy-duty roller: For large areas, a sprayer is fast. For smaller jobs or touch-ups, a thick-nap roller works well.
- Safety gear: Full harness system, gloves, eye protection, and a respirator mask are essential, especially when spraying.
Common Questions
How can I inspect my roof for hidden problems before considering paint or coating?
Get in your attic with a bright light. Look for stains, damp wood, or daylight piercing through the decking-these are signs of active leaks that must be repaired first.
My asphalt shingles look bad but replacement isn’t an option. Is a roof coating safer than paint?
Yes, a breathable, reflective coating designed for steep slopes is a better protective option than paint. It must only be applied to structurally sound, thoroughly cleaned shingles to avoid trapping moisture.
With so many roof coating types (acrylic, silicone, urethane), how do I choose the right one?
Your roof’s slope and material dictate the choice. Use acrylic for good drainage and UV reflection, silicone for areas with ponding water, and urethane for maximum durability over foam or concrete.
Your Roof’s Final Defense Layer
From my toolbox to yours, remember that a successful coating job always starts with a perfectly clean and dry surface. Matching the right product to your specific roof type is what locks in lasting protection. When it’s time to paint or repaint a metal roof, choosing a coating designed for metal protection can make a big difference.
Treat your roof as the critical asset it is by scheduling yearly inspections and putting safety above all else. For a practical, step-by-step approach, consult a roof damage inspection guide to identify early signs of wear and damage. It can help you plan repairs before problems escalate. Keep using trusted guides on roof care and maintenance to make informed decisions for your property.
Ray Huffington
Ray is an experienced roofer. He has worked as a general contractor in the roofing industry for over 15 years now. He has installed and repaired all kinds of roofs, from small houses to large mansion, and from basic shingles to cement and metal roofs and even solar roof panels. He has seen homeowners struggle with roofing questions and always has experience based proven advice to help those in need. If you need roof pros, Ray's your guide.