
How Do You Tie a New Roof into an Existing Structure Without Leaks?
What is the biggest mistake people make when connecting a new roof to an old house? I see it all the time: a poor tie-in that looks fine for a season, then starts dripping with the first heavy rain.
I will walk you through my method for preparing the existing roof deck. You will learn the correct way to install and interweave the flashing. We will cover how to seal the joint so it holds up for the long haul.
Start with a Rock-Solid Assessment: Is Your Old Roof Up to the Task?
Connecting a new roof to an old one begins long before you lift a shingle. This assessment is the most important step, because you can’t build a lasting seal on a failing structure. I’ve been on jobs where skipping this led to costly tear-outs within a year.
Walk the existing roof slowly. You’re looking for trouble. Press down on the decking with your hands or a tool handle. A soft, spongy feel means rot. Check for any sagging between the rafters. Any weakness in the deck or framing behind your planned tie-in is a red flag that must be fixed first.
Next, focus on the exact area where the new roof will meet the old. Lift a few shingles carefully with a pry bar. What’s underneath? Brittle, cracked underlayment? Look for worn or missing drip edge and existing flashings. These are your clues.
You need to understand the roof’s “language.” Measure the pitch. Note how the old flashing is layered. Trace the path for ventilation so you don’t block it. Every roof tells you how it wants to shed water, and you have to listen.
Here’s a rule my crew never breaks. Always pull a local building permit and get the existing structure signed off as sound before any work begins. This isn’t bureaucracy. It’s a free second opinion that protects your home and your wallet.
Tools of the Trade and Non-Negotiable Materials
Gather the right stuff. Using subpar materials here guarantees a leak. Here is what you absolutely need:
- Heavy-Duty Ice and Water Shield: This is your primary sealant membrane. Don’t use standard underlayment for the critical tie-in valley.
- Step Flashing Metal: Galvanized steel or aluminum is standard. You’ll bend these “L”-shaped pieces as you go.
- Proper Roofing Nails: 1 ¼-inch or longer, ring-shank nails. Smooth shank nails will back out over time.
For flashing, you have choices. Aluminum is cost-effective and easy to work with. Copper is premium, lasts decades, but costs more and requires special tools. Never mix metals like copper and galvanized steel, as they react and corrode. Your new underlayment must weave under the existing layer at the tie-in point.
Sealant is not a primary waterproofing layer. Use a pro-grade, urethane-based roofing sealant only at termination points. Cheap latex caulk cracks and shrinks fast, making it a sure recipe for a service call.
Your tool belt should have these essentials:
- Roofing nailer (coil-fed saves time)
- Flat pry bar for lifting old shingles
- Sharp utility knives with extra blades
- Chalk line for straight courses
- A strong magnet for nail pickup after the job
Essential materials for a watertight seal are heavy-duty ice and water shield, correctly installed step flashing, and the right nails. The shield stops driven water, the flashing directs runoff, and the nails hold it all securely without backing out.
Phase One: Demolition and Preparation of the Tie-In Zone

You cannot build a good connection on a bad foundation. This phase is about creating a clean, solid platform for everything that follows.
First, you mark your line. Using chalk, snap a straight line along the existing roof where the new roof will meet it. This is your cut line. With a roofing shovel or a flat bar, you carefully remove the existing shingles and underlayment in a clean strip, about two feet wide, along this line.
Work slowly here to avoid damaging the roof deck underneath; a torn-up plywood sheet is a problem you don’t want to create.
Your goal is to expose the solid wood deck and the sheathing of the existing wall. This gives you a bare, stable surface. I always check this exposed deck for soft spots or rot. If you find any, you must replace that plywood or OSB now. There is no skipping this.
Before any new underlayment goes down, you install a “stripping” or “base” flashing. This is a simple L-shaped metal piece. You slip the vertical leg up behind the existing wall siding or sheathing wrap. The horizontal leg lays flat on the exposed roof deck.
This base flashing is your primary diverter, catching any water that gets behind the siding and kicking it out onto the roof deck. It is the first critical layer in a system of backups.
Now, address the edges. Where your new roof’s eave or rake edge meets the old roof, the drip edges must marry up cleanly. Often, this means carefully prying up the old drip edge, sliding the new one under it, and then re-securing both. The metal should form a continuous channel to direct water into the gutters.
What are the key steps for preparing the existing roof edge for a new connection?
- Snap a straight chalk line to guide your work zone.
- Remove old roofing materials carefully to expose a clean, solid deck.
- Inspect the exposed wood for rot and repair it immediately.
- Install a metal base flashing against the wall before anything else.
- Integrate the new and old drip edges to form a continuous drainage path.
The Waterproofing Core: Underlayment, Flashing, and the Critical Ice & Water Shield
Sealing the Deck: The First Line of Defense
With a clean deck and base flashing in place, the layering begins. Roll out your synthetic underlayment over the new roof deck, carrying it over the tie-in zone. Install roofing felt over the deck for added moisture protection.
You weave this new underlayment with the old, or lap it generously, so water always flows over a layer, never under an edge. Think of it like overlapping raincoat layers, one always covering the seam of the one below.
Now for the secret weapon: ice and water shield. This is not optional at a connection. Along the entire junction line, over the underlayment, you apply a wide strip of this self-adhering membrane. I insist on at least 3 feet up the new roof and 3 inches up the existing wall.
This sticky, rubberized membrane bonds to the deck. It seals around the hundreds of nail shanks that will pierce it later. If water or ice melt gets under the shingles here, this membrane stops it cold. It bridges the gap between the two structures.
What is the correct method for integrating the new roof underlayment with the existing roof?
Lap the new synthetic underlayment over the old by a minimum of 6 inches, ensuring the overlap is oriented so water drains over it. Never let an edge face uphill. The entire seam must then be covered by the ice and water shield for a guaranteed seal.
Mastering Step Flashing: The Art of the Interlock
This is where craftsmanship shows. Step flashing is a series of L-shaped metal pieces. They work like overlapping fish scales, each piece directing water down and away from the wall, onto the shingle below.
Here is the method my crew follows:
- Place the first piece of step flashing against the wall, on top of the ice and water shield and base flashing.
- Lay your first course of shingles over its horizontal leg.
- Nail the shingle down, but your nails must go through the shingle only, never through the vertical leg of the flashing against the wall.
- Place the next flashing piece over the nailed-down shingle, overlapping the previous piece by at least 2 inches.
- Repeat for every single course of shingles. One piece per shingle is the rule.
This creates an interlocked system. Water hitting the wall runs down, gets caught by the flashing, and is routed onto the shingle surface.
The final touch is covering the top edge of all this step flashing. You can either tuck metal counter-flashing under the siding and over the steps, or, if the siding allows, carefully re-install the siding over it. This cap protects the exposed top edges from direct rain and wind.
How do you properly install step flashing and counter-flashing at the intersection?
- Install one L-shaped step flashing piece for every course of shingles.
- Always overlap each flashing piece by at least 2 inches, like fish scales.
- Nail only through the shingle and the horizontal leg of the flashing, never through the vertical leg against the wall.
- Protect the installation by covering the top edges with counter-flashing tucked under the siding or by re-installing the siding over it.
Finishing Strong: Shingles, Valleys, and Ventilation
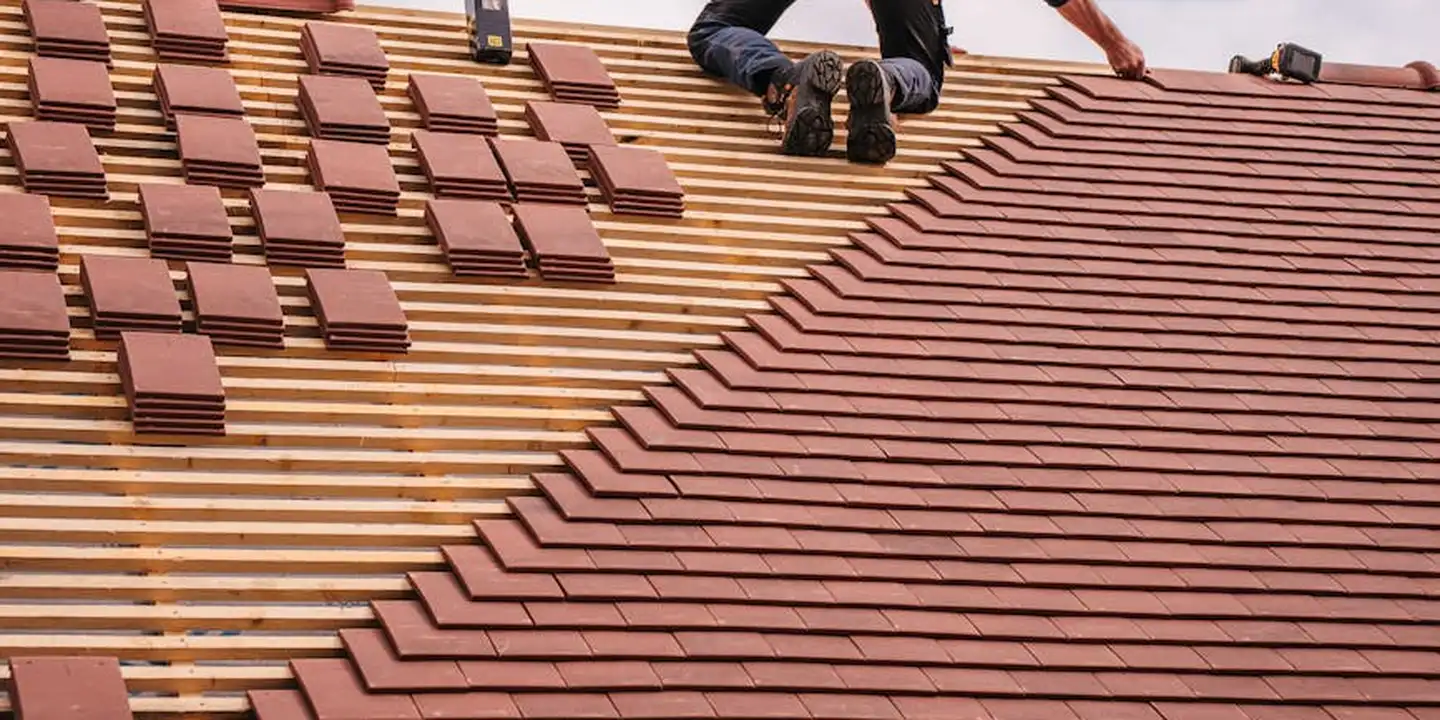
Shingle Weaving for an Invisible Seal
Getting the shingles right is what makes a tie-in disappear. The goal is for the new roof to look like it was always there. You achieve this by weaving.
Weaving means you interlace the new shingle courses directly into the old ones. You carefully lift the edges of the existing shingles and slide the new ones underneath. You then nail them down, following the existing nail line pattern. This binds the two roofs together into a single, continuous layer.
Sometimes a full weave isn’t possible. That’s when you use the cut-in method. You cut the old shingles back in a straight line and then butt the new shingles right up to that cut. You seal the seam with roofing cement. I use cut-in only when the existing shingles are too brittle to lift or when the layout makes weaving impractical.
To ensure a proper seal, you must activate every adhesive strip. Run a roofing roller firmly over every new shingle course. The sun’s heat alone won’t do a complete job. For the shingles at the very edge of the tie-in, I always hand-seal them. Put a small dab of roofing cement under each corner. This prevents wind from getting underneath and starting a peel. It’s especially important when you install roof shingles for a watertight seal.
How do you ensure proper shingle weaving for a seamless seal? Start by matching the exposure. Measure the existing shingles’ reveal exactly. Your new shingles must have the same exposure, or you’ll create a visible hump. Work slowly, lifting only what you need. Secure each new shingle with the correct number of nails, placed just below the adhesive strip.
Building a Bulletproof Valley Junction
Where two roof planes meet, you have a valley. This is the single most critical spot in any roof tie-in. Water from two slopes funnels right into this joint. If it fails, you get a leak.
When you add a gable roof to an existing roof, you’re almost always creating a new valley. This junction cannot be an afterthought. For a tie-in, I strongly prefer the closed-cut valley method over a woven valley. A closed-cut valley is easier to seal perfectly and directs water more predictably. With metal roofs, valley installation methods vary and affect performance. I’ll cover the main metal roof valley techniques in the next steps.
Here’s how it works. You install a layer of specialized valley underlayment first. This is a self-adhering membrane, much heavier than standard felt. It sticks right to the deck. On top of that, many pros add a metal valley liner for extra insurance.
You run the shingles from the main roof through the valley first. Then, you run the shingles from the new addition over them. You snap a chalk line about two inches from the valley center on the new roof side. You cut the new shingles along this line. This creates a clean, closed channel that guides water down without letting it sneak underneath. Next, we’ll cover how to install waterproof shingles in the roof valley to seal this junction. This valley installation is key to keeping the roof watertight and preventing leaks.
What techniques seal valleys where new and old roofs meet? Start with premium underlayment. Never rely on just shingles or tar. Use the closed-cut method for controlled water flow. Keep all nails at least six inches away from the valley centerline. Any nail driven through the middle is a future leak waiting to happen.
Keeping the Attic Breathing Right
A roof isn’t just shingles and wood. It’s a system. The most common system killer in a tie-in job is blocked ventilation. Understanding how roof ventilation types function is key. This helps you choose and place vents to keep air moving.
You cannot let the new structure cover up the existing soffit vents. Those vents under your eaves are the intake. They pull in cool, dry air. If you wall them off, the whole attic ventilation stalls. The same goes for any ridge vent at the peak. The new roof must be framed to leave these airways open.
You need to maintain a clear air channel from the new roof’s soffit, up under the new sheathing, and into the main attic space. This often means installing baffles in the new rafter bays. These plastic channels keep the insulation from clogging the air path. The goal is one continuous flow of air from the new section to the old.
How do you handle insulation continuity? Match the existing R-value. The new knee walls and ceiling must be insulated to the same level as the rest of the house. A weak spot here creates a thermal bridge, leading to ice dams and energy loss. Seal all insulation joints carefully with foam or housewrap tape to prevent air leakage.
The Pro’s Checklist: Mistakes That Cause Callbacks and How to Avoid Them

I’ve been called back to fix other crews’ work. The problems are almost always the same. Avoid these mistakes to save yourself a major headache.
- Skipping ice and water shield. This peel-and-stick membrane is non-negotiable in valleys, at eaves, and against walls. Don’t substitute felt. It seals around nails and forms a gasket.
- Using roof tar as primary flashing. Tar is a temporary patch, not a flashing material. It dries, cracks, and fails. Use bent metal or proper peel-and-stick flashing tape for all joints.
- Nailing through the flashing. You should always nail above the flashing, letting the layers overlap downward. A nail through the flashing creates a direct hole for water.
- Pinching off ventilation. As discussed, this slowly rots your roof from the inside out. Plan the framing to protect air intake and exhaust.
Mismatched shingle exposure is a disaster. If your new shingles sit higher or lower than the old ones, you create a dam. Water and debris will pile up at that seam. It also looks terrible. If you’re considering installing roof shingles over existing ones, alignment matters more than ever. Measure twice, nail once.
Never assume the existing structure can handle the new load. The new roof needs proper headers, beams, and supports tied into the home’s frame. Inadequate framing support can lead to a sagging roof or worse. This is a job for a carpenter, not just a roofer.
A perfect seal requires patience, especially during the flashing steps. Rushing the metal work around chimneys, walls, and valleys is the fastest way to guarantee a leak. Take your time. Fit each piece carefully. Seal every edge.
What are common mistakes to avoid? Cutting corners on underlayment and flashing materials tops the list. Ignoring ventilation and structural support are close behind. Treat every tie-in like a custom puzzle where each piece must fit and function with the old. If it feels like a shortcut, it probably is.
The Final Walk-Through: Your Leak Detection Protocol
Your roof tie-in is done. The crew has packed up. This is the most critical moment. You must be your own quality control inspector. A proper final check catches small issues before they become big, expensive leaks.
Step 1: The Attic Daylight Test
Grab a flashlight and head into the attic on a bright day. Your goal is simple: find any holes. Go to the area directly under the new tie-in seam.
Turn off the flashlight. Let your eyes adjust. Look up along the entire seam where the new roof meets the old. You are looking for pinpricks or lines of daylight.
If you see any light coming through, you have found a guaranteed leak path that must be sealed from the roof side before you proceed. On one job, we found a thin line of light where a step flashing wasn’t fully tucked. It was invisible from the outside but would have funneled water straight into the attic.
Step 2: The Controlled Water Test
This is the definitive test. You need two people: one on the roof with a hose, one in the attic watching the seam.
- The person inside gets into position with a good light and a dry rag to mark any drips.
- The person on the roof uses a garden hose with a gentle shower-nozzle setting. A hard jet of water can force moisture past good seals and give you a false alarm.
Start at the lowest point of the tie-in seam and work upwards slowly. Soak a 3-foot section for at least 5 minutes before moving up. This mimics a persistent, wind-driven rain. The helper inside watches and feels for any moisture.
How do you perform a final inspection and water test to verify the seal’s integrity? You work as a team, applying slow, steady water from the bottom up while monitoring from inside. Patience is key. Rushing this test is worthless.
Step 3: The Exterior Detail Check
After the water test passes, do a close-up visual inspection of the exterior work. Put on your critical eye.
- Nail Tension: Feel the shingles around the seam. No nails should be proud (sticking up) or have popped. Each nail head should be flush and covered by the next shingle’s tab.
- Sealant Bead: Look at any roofing cement or sealant used. The bead should be consistent, like a smooth tube of caulk, with no gaps or skips. It should be tooled smooth against the materials, not just sitting on top.
- Shingle Cuts: Where new shingles meet the old valley or wall, the cuts should be straight and tight. Ragged, frayed cuts invite wind uplift and look unprofessional.
These small details are what separate a hack job from a craftsman’s work-they are the difference between a 5-year seal and a 25-year seal.
Step 4: The Official Sign-Off
If your project required a permit, do not consider it finished until the municipal inspector comes. Schedule your final inspection.
Having that inspector sign off on the work is your official record that it was done to code. This protects you. If a problem arises later, you have proof the work met the legal standard at the time of installation. I’ve seen this save homeowners in disputes with insurance companies.
Your own inspection catches functional problems. The municipal inspection ensures code compliance. You need both for true peace of mind.
Common Questions
How do you assess the existing roof structure before a tie-in?
Walk the roof and press on the decking to check for soft, rotten spots. You must also lift a few shingles at the planned junction to inspect the underlayment and existing flashing for brittleness or damage.
What is the single biggest mistake to avoid?
Using roof tar or cheap caulk as your primary sealant-it dries and cracks. Never nail through the vertical leg of your step flashing, as this creates a direct path for water.
How do you perform a final leak check?
Conduct a two-person water test: slowly run a hose over the seam from the bottom up while a partner watches from inside. Also, get into the attic on a sunny day and look for any pinpricks of light along the tie-in line.
Building a Roof That Lasts
The strongest connection between a new roof and an old one starts with a proper understanding of the existing structure. Take your time with the preparation and flashing details, as this foundational work is what guarantees a durable, watertight seal for decades.
Your roof is your home’s first line of defense, and maintaining that seal is an ongoing responsibility. Regular visual checks and proactive, minor repairs are the safest, most cost-effective way to protect your investment and avoid major structural issues down the line. A roof damage inspection guide offers a simple, step-by-step approach. It helps you spot issues early and plan timely repairs.
Ray Huffington
Ray is an experienced roofer. He has worked as a general contractor in the roofing industry for over 15 years now. He has installed and repaired all kinds of roofs, from small houses to large mansion, and from basic shingles to cement and metal roofs and even solar roof panels. He has seen homeowners struggle with roofing questions and always has experience based proven advice to help those in need. If you need roof pros, Ray's your guide.