
Roof Ventilation Systems: What Are They, How Do They Work, and What Do They Look Like?
Have you ever stared at the various boxes, pipes, and ridges on a roof and asked yourself what their purpose is? In my two decades of roofing, I’ve fixed countless attics ruined by one common issue: bad ventilation. Getting it right stops moisture from rotting your decking, keeps your home cooler in summer, and prevents ice dams in winter.
In this guide, I’ll walk you through the main types of roof vents, how each system pulls air through your attic, the critical job each one does, and how to identify them by their appearance.
Why Your Attic Needs to Breathe: The Roof Care Connection
Roof ventilation is not a separate system. It’s a core part of roof maintenance, as important as good shingles. Think of it as your roof’s respiratory system.
In summer, a hot attic bakes your shingles from below. This cooks the asphalt, making it brittle and aging your roof years faster. In winter, warm air from your house rises and gets trapped. That warm air hits the cold roof deck and condenses into water.
This trapped moisture is a silent killer for your roof structure, warping the wood decking and ruining your insulation’s effectiveness.
I’ve peeled back shingles on twenty-year-old roofs where the plywood was still solid like new, and others on ten-year-old roofs that were spongy and black. The difference was always airflow.
Poor ventilation creates two classic roof problems. First, ice dams. Heat escaping into a snowy attic melts the snow from underneath. That water runs down to the cold eaves, refreezes, and creates a dam that backs water up under your shingles. Second, mold and mildew in the attic, which degrades air quality and wood structure.
A breathing attic protects your investment from the inside out.
The Main Players: Static, Power, and Ridge Vent Systems
Vents work in pairs: intake low (at the eaves) and exhaust high (near the ridge). Here’s how the main exhaust types stack up.
Static Vents (Passive)
These vents rely on natural wind and the simple principle that hot air rises. No moving parts, no electricity.
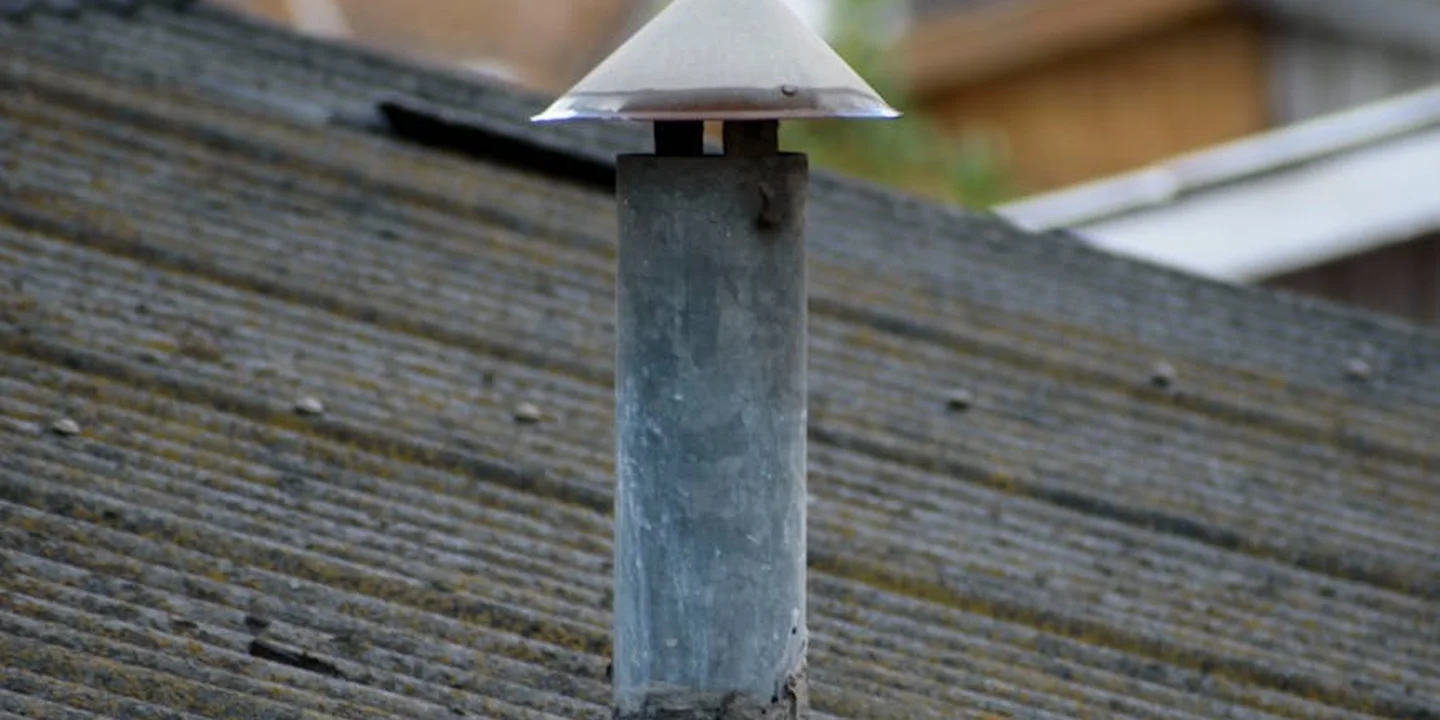
Box Vents (Turtle Vents): They look like low, boxy cubes scattered across your upper roof. They act as simple chimneys, letting hot air rise out. You typically need several to move enough air.
Wind Turbines (Whirlybirds): You’ll see their spinning metal domes. The wind turns the turbine, which creates a vacuum to pull hot air out. Are roof turbine vents effective? They can be, but only when the wind blows. On a still, hot day, they often sit idle. They also have bearings that can wear out and squeak over time.
Gable Vents: These are the louvered panels you see on the triangular ends of a house. They allow cross-ventilation when wind blows through them. Their role as intake or exhaust changes with the wind direction, which makes them inconsistent for a controlled flow.
Power Vents (Active)
These are low-profile electric fans with a hooded cover. A thermostat or humidistat turns the fan on when attic heat or moisture gets too high.
Are power roof vents good? They are a powerful fix for a chronically hot or damp attic, especially in humid climates. I’ve used them to solve persistent mold issues. You must ensure your soffit intakes are clear and adequate, or the fan will suck conditioned air from your living space, raising your energy bill. That connection between roof ventilation and attic airflow matters for mold on shingles. Properly balanced intake and exhaust helps keep shingles dry and mold risk down.
Ridge Vents (The Modern Standard)
This is a continuous vent that runs the entire length of your roof peak. It’s hidden under a special shingle-over cap, so it’s almost invisible from the ground.
Hot air from the entire attic rises evenly to this high point and exits along the whole ridge. Are roof ridge vents effective? In a properly balanced system, they provide the most uniform and low-profile exhaust available. Are ridge vents better than roof vents? Compared to a few box vents, a ridge vent offers more exhaust area and better overall airflow, which is why it’s the standard on most new roofs I install.
The Unsung Hero: Intake Vents
No exhaust vent can work without intake. The intake is almost always at the lowest point, in your eaves or soffits.
Look for continuous perforated strips or individual circular vents along the underside of your roof overhang. Cool, dry air enters here, pushes the old hot air out the top, and completes the cycle. I can’t count how many “bad” ventilation jobs I’ve fixed just by clearing out decades of insulation blocking these soffit vents.
How a Good Ventilation System Works Together
Think of your attic like a chimney. Hot air always rises. This natural movement is called the “stack effect,” and a good roof vent system uses it to its full advantage.
Cool, dry outdoor air needs a clear path to get in. Hot, moist attic air needs a clear path to get out. When both paths are open, the system breathes perfectly.
The Ideal Airflow Path
Proper attic ventilation follows a simple, upward path. Here is how it should work:
- Intake: Cool air enters through vents under your roof’s eaves, called soffit vents.
- Flow: This air moves upward along the underside of the roof deck, washing over the plywood or OSB sheathing.
- Exhaust: The now-warmed air exits at the highest points on your roof through ridge, box, or turbine vents.
This steady flow pulls heat and moisture out before they can damage your roof structure or reduce your home’s energy efficiency.
Balanced System vs. Short-Circuits
A balanced system has equal amounts of intake (soffit) vent area and exhaust (ridge/upper) vent area. This balance allows for that smooth, effective flow.
Problems happen when the airflow gets confused. A common mistake I see is having both gable vents and soffit vents.
- Gable vents are on the side walls of the attic, not at the very top.
- When wind blows, it can pull air in through the gable vent and straight out a nearby ridge vent.
- This “short-circuits” the system. Air takes the easy path and never flows up from the soffits, leaving the lower attic areas stagnant and hot.
For the best performance, your main intake should always be at the lowest point (soffits) and your exhaust at the highest point (ridge).
A Warning About Power Vents
Powered attic fans, or power vents, are strong. They actively suck hot air out of your attic. That sounds great, but it can cause a big problem if your intake vents are blocked or undersized.
The fan creates strong negative pressure inside the attic. If it cannot pull in enough outdoor air through the soffits, it will find air somewhere else. It can start pulling your nice, cool, air-conditioned air from inside your house up through ceiling cracks, light fixtures, and ductwork.
This forces your AC to work much harder, raising your energy bills while potentially pulling moisture into the attic where it does not belong. If you use a power vent, ensuring your soffit vents are completely clear and adequate is non-negotiable.
Spotting Trouble: What Bad Ventilation Looks Like
You don’t need to be a pro to see the warning signs. A failing ventilation system leaves clear clues. Look for them from the ground and up in the attic.
From the street, your roof should tell a quiet story; loud problems often show up as visual damage. Start with the vents themselves. Do you see dark, rusty streaks running down from a turbine or box vent? That’s a sure sign of condensation. The metal is sweating on the inside because hot, moist air is trapped and cooling against it.
Check for physical damage. Are vent caps cracked or missing entirely? This turns a vent into a direct leak and a welcome home for birds or pests. I once found a family of starlings in a soffit vent a crew missed.
Look at your shingles, especially on the south-facing slope that gets the most sun. Do you see shingles that are curling, buckling, or losing granules much faster than the rest of the roof? This is a classic sign of overheating from trapped attic air baking the backside of the shingles.
Exterior Signs You Can See
- Rusty streaks dripping down from metal vents.
- Cracked, broken, or missing vent caps.
- Shingles curling, cupping, or deteriorating unevenly, often worst on the hot south side.
- Soffit vents that are completely painted over or clogged with debris.
Attic & Interior Signs That Tell the Whole Story
The real proof is in the attic. On a hot summer afternoon, open that hatch. If a blast of stifling, heavy air hits you, that’s your first clue the system isn’t moving air.
Use a flashlight. Shine it on the wooden rafters and roof sheathing. Do you see dark streaks, fuzzy mold, or a damp, wet look to the wood? That’s moisture condensing and settling in. In winter, you might even see frost or a thin layer of ice on the nails poking through.
Ice dams are not just an insulation problem; they are a direct symptom of poor attic ventilation. That’s why ice dam prevention hinges on proper ventilation and insulation. When your attic is well ventilated and well insulated, heat loss is minimized and the roof stays colder. Here’s how it works: heat escapes from your living space, warms the attic, and melts the bottom layer of snow on your roof. That water runs down until it hits the cold eaves, where it refreezes into a dam. More melting water backs up behind it, seeping under your shingles.
Your attic should feel close to the outside temperature; if it feels like an oven or a damp cellar, your ventilation has failed its main job.
Matching the Vent to Your Roof’s Style and Climate
Picking a roof vent is not a one size fits all decision. Your roof’s shape and your local weather are the two biggest factors in choosing the right system. I always tell homeowners to think of it like dressing for the weather, you need the right layer for the job.
Ridge vents are the best fit for most standard shingle roofs with a good, clear pitch. They sit right on the peak and let heat escape along the entire length. It works like a natural chimney, which is why I recommend it for straightforward roofs. For a clean, weather-tight finish, you can install metal roof vent caps over these ridge vents. That upgrade helps seal the top and keep moisture out while preserving airflow.
Power vents are the solution for low slope roofs or complex designs with lots of hips and valleys. Their electric fan actively pulls hot air out when natural airflow is weak. I used them on a large, nearly flat roof last year, and they solved a persistent moisture problem.
Turbine vents are highly effective in areas with consistent wind. The breeze spins the turbine, creating suction without any electricity. For homes on open land or near the coast, turbines often outperform other passive options.
How your roof looks is a real concern for many people. Ridge vents are nearly invisible from the ground, offering a clean, uninterrupted roofline. This is usually the top choice when curb appeal is a priority.
Turbines are more visible, but their performance in windy spots makes them a functional choice. You trade a bit of aesthetics for proven, mechanical air movement.
Special roofs need specific plans. Metal roofs often require vents made to attach to standing seams without drilling unnecessary holes. Tile roofs can use vent tiles that mimic the shape and color of the surrounding tiles. For historic homes, the goal is to preserve character, so look for discreet soffit vents or custom painted options that blend in. On a century home project, we matched vent colors to the trim to keep the original look intact.
Your Seasonal Ventilation Maintenance Checklist
Think of roof vents like the air filters in your car. Ignore them, and your whole system suffers. A simple seasonal check keeps everything working smoothly and can add years to your roof’s life.
Spring & Fall: The Visual Inspection
These shoulder seasons are perfect for a walk-around. Your goal is to spot problems before the extreme heat or cold hits.
- Grab your binoculars. From the safety of your yard, look at every vent. You’re checking for cracked housings, missing covers, or damaged flashing.
- Look for animal signs. Birds and squirrels love to make nests in static vents. You might see twigs poking out or other debris.
- The most common mistake I see is buried soffit vents. Go into your attic and find where the soffit vents are. The insulation must be pulled back so air can flow in. If it’s stuffed against the vent, it’s like trying to breathe with a scarf over your mouth.
Summer: The Heat and Sound Check
Summer stress-tests your ventilation. This is when you’ll notice if it’s failing.
- On a very hot afternoon, carefully feel the air in your attic. It should be warm, but not like an oven. If the heat is overwhelming, your exhaust vents may be blocked or undersized.
- Listen for power vents or turbines. A motor that runs constantly, or sounds labored and whiny, is struggling. It might be failing or your attic is simply too hot because intake vents are blocked.
- Check for moisture. Even in summer, poor ventilation can trap humid air from your home, leading to damp wood and mold.
Winter: The Moisture and Ice Watch
Winter reveals a different set of problems. The enemy here is trapped warm air.
- Never, ever block a vent to “save heat.” This is the fastest way to create ice dams and attic rot. The vent’s job in winter is to let moisture escape so your attic stays cold and dry.
- Check for ice dams along your eaves. Consistent, heavy dams often point to warm attic air melting snow from below, a sure sign of poor ventilation or insulation.
- Look for frost on the underside of your roof sheathing or on nails. This is condensation that freezes, and it means too much moist air is stuck in your attic.
Your best tool is a good pair of binoculars and a flashlight for the attic. Leave any repairs on the roof surface to a professional. My job is to keep you safe while you spot the warning signs. A ten-minute check each season can save you a world of trouble and a very expensive repair bill.
Installing or Upgrading Your System: What to Expect
A proper ventilation system is more than just hardware on your roof. It is a calculated, balanced system. The process my crew follows is methodical for one reason: a mistake here can lead to leaks, ice dams, or an attic that’s hotter than it was before. For homeowners, the balanced attic ventilation guide is a handy reference. It shows how to balance intake and exhaust to keep the attic comfortable and dry.
We always start with the math. You cannot guess how much ventilation you need; you must calculate it based on your attic’s square footage. This answers the common question: how many roof vents do I need?
The 1:300 Rule and Net Free Area
Building codes use a standard called the 1:300 rule. For every 300 square feet of attic floor space, you need 1 square foot of total ventilation. This measurement is called Net Free Vent Area (NFVA). It is the actual open area for air to move through the vent.
- Measure your attic floor length and width.
- Multiply them to get total square footage.
- Divide that number by 300. The result is the total NFVA in square feet you need.
For example, a 1,500 sq ft attic needs 5 sq ft (1,500 ÷ 300) of total net free vent area.
Balancing Intake and Exhaust
This is where many DIY attempts fail. You must split that total NFVA evenly between intake vents (at the soffits or eaves) and exhaust vents (at or near the ridge). A 50/50 split is the goal.
Think of it like breathing: you need to inhale as much as you exhale. If you have powerful exhaust vents but clogged or missing intake, the fans will pull conditioned air from your living space, wasting money.
For that 1,500 sq ft attic needing 5 sq ft total, you would aim for 2.5 sq ft of intake NFVA and 2.5 sq ft of exhaust NFVA.
The Professional Installation Process
Once the plan is set, the physical work begins. A professional crew follows a sequence to protect your home.
- Locate and Mark: We identify rafter bays in the attic for intake vents and determine the exact placement for roof exhaust vents, avoiding wires and pipes.
- Cut the Roof Sheathing: This is structural work. We use a saw to cut a precise hole in the roof deck for the vent. This step requires extreme care to avoid damaging the rafters.
- Integrate with Shingles: For exhaust vents, we lift and interweave the surrounding shingles with the vent’s flashing. This makes the vent look like part of the roof, not an afterthought.
- Seal Everything Meticulously: We apply roofing cement under all flashing edges and use the correct, code-approved nails or screws. Every penetration is a potential leak, so we seal it like one.
- Verify from Inside: We go back into the attic to ensure the new vents are clear from insulation and that light can be seen through the intake vents from the soffits.
Safety and Code Compliance Are Not Optional
Working on a roof is dangerous. My crew uses OSHA-fall protection harnesses, proper footwear, and secure ladders every single time. Code compliance is about minimum safety and performance standards that protect your investment. A permit and inspection may be required for this work, and a reputable roofer will handle that.
When You Should Definitely Call a Professional
Some tasks carry too much risk for a homeowner. You should call a licensed, insured roofing contractor for any of the following: Always verify the contractor’s licensing and contract terms before work. In the next steps, we’ll show you how to hire a roofer with proper licensing and clear contracts.
- Any cutting of the roof deck or structural sheathing.
- Working on a roof with a steep pitch (anything over a 6/12 slope is very dangerous without training).
- Installing a system on a complex roof with valleys, hips, or dormers.
- If you suspect mold, rotten wood, or damaged rafters in the attic.
- Integrating new vents with an existing shingle roof without causing leaks.
Getting the installation right the first time prevents costly callbacks and protects the lifespan of your roof and your home’s structure.
Straight Answers on Common Ventilation Questions
After years on the job, you hear the same questions from homeowners. Let’s clear up the most common ones with some plain talk.
Are Roof Vents Better Than Turbines?
This isn’t about better or worse. It’s about consistent performance versus potential. I explain it to homeowners like this.
A continuous ridge vent works all the time. Hot air rises and slips out along the entire peak of your roof, 24/7. It’s a passive, reliable system that doesn’t rely on anything but basic physics.
A turbine (or whirlybird) needs wind to spin and create suction. On a breezy day, it can move a lot of air. On a still, hot day, it just sits there. Its performance is completely at the mercy of the weather, which makes it an inconsistent primary vent.
On my crews, we often used turbines as a boost for problem spots, like over a hot kitchen, but we relied on ridge or soffit vents for the main system.
Should Roof Vents Be Open in Winter?
Yes. Keep them open year round. I can’t stress this enough.
Closing vents in winter is one of the biggest mistakes I see. People think they’re keeping heat in, but they’re actually trapping moisture. Warm, moist air from your living space rises into a cold attic. Without ventilation, that moisture condenses on the wood sheathing and nails. By spring, you’re looking at mold, wood rot, and rusty nail heads that can cause leaks.
A cold, dry attic in winter is a healthy attic. The ventilation keeps it that way.
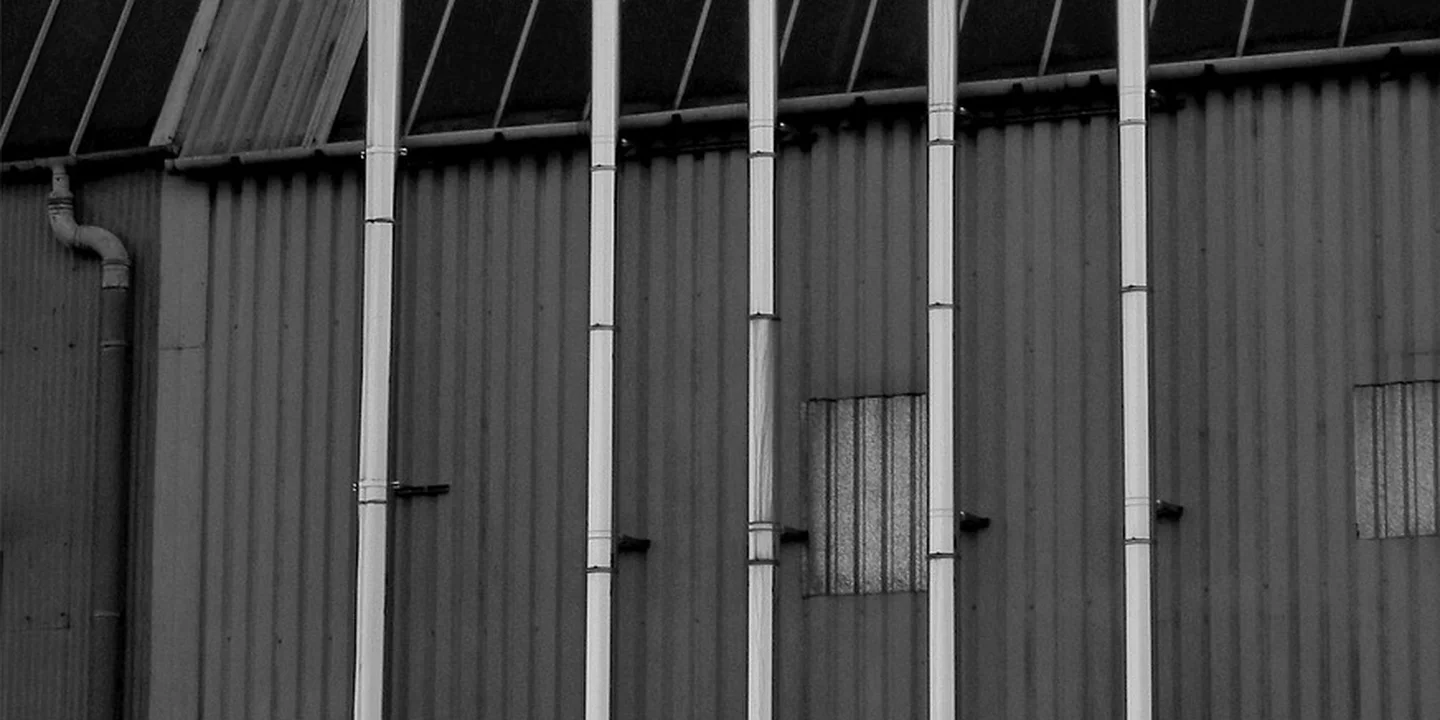
Are There Water Pipes in the Roof?
This confusion comes up a lot. What you see sticking out of your roof are plumbing vent pipes, not part of your ventilation system. They require special roof jacks for proper installation and sealing.
Every sink, toilet, and drain in your house has a pipe that goes up through the roof. Its job is to let sewer gases escape and to allow water to drain smoothly by equalizing air pressure. Think of it like the little hole in a gas can lid, it lets air in so the liquid can flow out.
They’re easy to spot. They are usually white or black PVC pipes, 1.5 to 3 inches wide, with a simple cap on top. A roof vent, like a box vent or ridge vent, is much wider and designed to move attic air.
How Long Do Roof Vents Last?
Lifespans vary wildly by type. Here’s what I’ve seen hold up over 20 years of replacements and repairs.
- Ridge Vents: These last as long as your roof shingles. The vent itself is just a specially designed strip under the cap shingles. When you get a new roof, you get a new ridge vent.
- Turbines (Whirlybirds): The metal housing can last decades, but the moving parts wear out. Bearings seize up. Plan on replacing the turbine unit itself every 15 to 20 years.
- Power Vents: These have a motor and a thermostat. The housing lasts, but the motor will eventually fail. You can expect 10 to 15 years from a power vent before the motor needs service or replacement.
- Static Vents (Box Vents): With no moving parts, these are simple and long lasting. The flashing around them is the weak point. If installed well, they can easily last 20+ years.
My advice is to give all your vents a visual check from the ground each season. Look for cracked housings, rust, or turbines that aren’t spinning freely in the wind.
Common Questions
How do I know if my current roof vents are actually working?
Go into your attic on a hot afternoon. If the air is stifling or you see mold on the rafters, the system is failing. Check from the outside to ensure all exhaust vents are uncracked and your soffit intakes are completely clear of insulation or debris.
Can I add a ridge vent to my existing roof, or do I need a full reroof?
You can add one, but it requires cutting a continuous slot along the roof deck, which is major work. Always hire a professional roofer to integrate it with your existing shingles correctly, or you’ll trade a ventilation problem for a leak.
What’s the typical lifespan of different vent types before they need service?
Ridge Vents: Last as long as your roof shingles. Power Vents: Expect 10-15 years before a motor replacement. Turbines: The bearings wear out; plan for service every 15-20 years.
Inspect all vents seasonally for damage.
Your Roof’s Lifeline: A Final Word on Ventilation
Proper ventilation isn’t an optional extra, it’s a fundamental part of your roof’s structure and longevity. The right system works like a silent partner, regulating temperature and moisture to protect your entire home from the inside out.
Make inspecting your vents a regular part of your roof care routine, just like checking your gutters. When it’s time for a change, always consult a qualified professional who can assess your specific attic and recommend a balanced, effective solution for lasting protection.
Ray Huffington
Ray is an experienced roofer. He has worked as a general contractor in the roofing industry for over 15 years now. He has installed and repaired all kinds of roofs, from small houses to large mansion, and from basic shingles to cement and metal roofs and even solar roof panels. He has seen homeowners struggle with roofing questions and always has experience based proven advice to help those in need. If you need roof pros, Ray's your guide.