
How Are Roof Tiles Made and Installed? A Veteran Roofer’s Guide
Have you ever looked up at a roof and wondered how each tile was formed and fastened into place? As a roofer with years on the job, I can tell you that knowing this process helps you choose quality materials and recognize proper installation.
I will walk you through the common materials like clay and concrete, show you how tiles are molded and fired in the factory, and explain the critical steps we use to install them securely on your roof.
The Foundation: Understanding Roof Tile Materials
The material you choose for your roof tile is not just about color or style. It dictates everything. The manufacturing process, the final cost, and most importantly, how the tile will perform on your house for decades. I have installed them all, and each has its own personality and purpose.
Let us break down the four main contenders you will see.
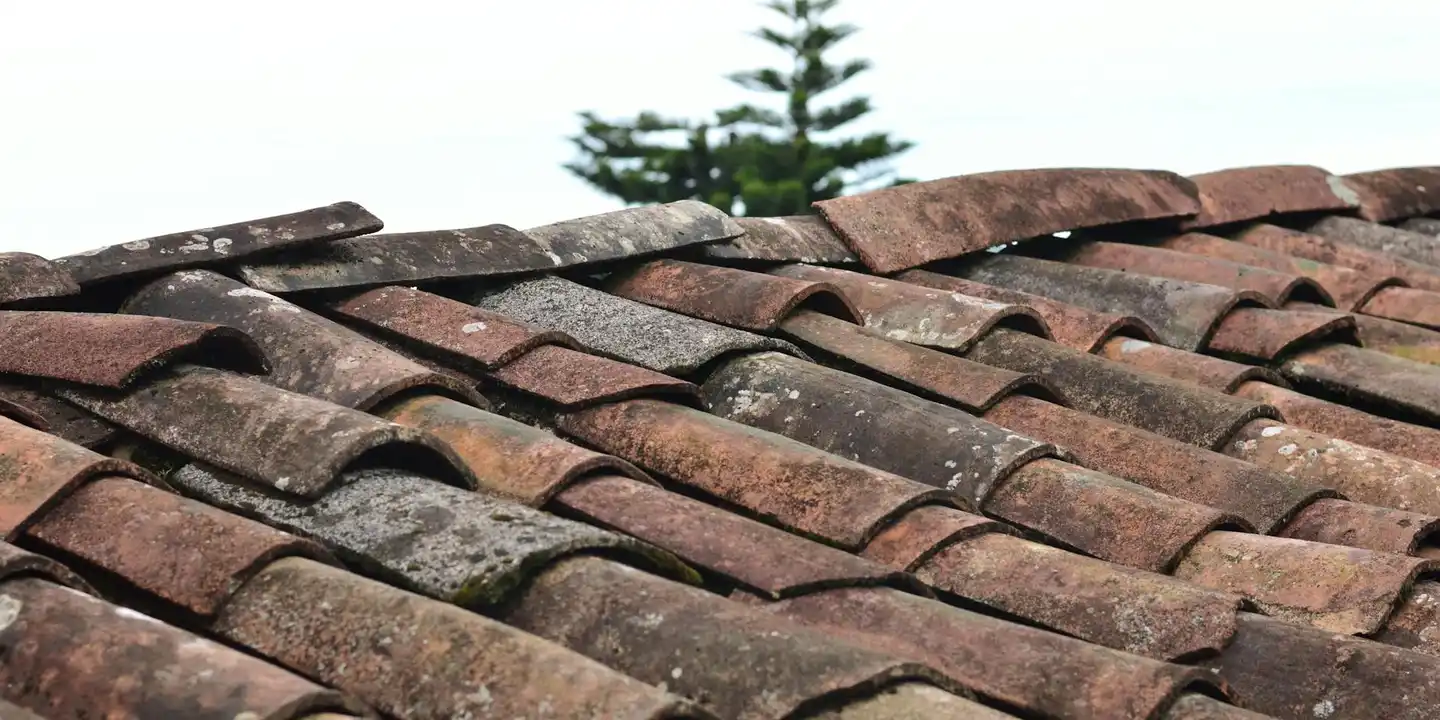
Clay tiles, often called terracotta, start as specific types of shale and clay pulled from the earth. This material is what gives those classic Spanish or Mediterranean roofs their warm, orange-red hue. The best clay is dense and fine. It is mined, then processed into a workable form. These tiles are incredibly durable but heavy. Your roof framing must be ready for that weight. Within the broader topic of roof construction types and materials systems, clay tiles illustrate how cladding choice shapes framing needs. They are part of a family of roofing systems that includes slate, metal, and concrete tiles, each with its own structural requirements.
Concrete tiles are essentially sophisticated pavers for your roof. Their raw materials are common: Portland cement, sand, and water. Iron oxide pigments are mixed in to create the color. This mix makes them versatile and often more affordable than clay. They are still heavy, but the manufacturing process allows for many shapes and color blends.
Slate is a natural stone, quarried in large blocks and then split into thin sheets. There is no “manufacturing” in the traditional sense. The quality depends entirely on the quarry. Good slate is dense, non-porous, and has incredible grain. I have worked on 100-year-old slate roofs that look new. It is the premium, long-life choice, but the cost reflects that.
Metal tiles are a different category, designed to mimic the look of traditional materials. They are typically formed from steel or aluminum coils, coated with a weather-resistant alloy, and then pressed into shapes that look like clay or slate. They are lightweight, which is a huge advantage for many homes, and their performance is all about that protective coating.
Your local climate and architectural style often point to the right material. Clay and concrete dominate hot, dry regions. Slate suits colder climates and historic homes. Metal works everywhere, especially where weight is a concern.
From Dirt to Durability: How Roof Tiles Are Made
So, how are roof tiles made? Think of it like a specialized bakery or a precision concrete shop. The goal is to take raw, loose materials and transform them into a hard, weatherproof shield through controlled processes. The journey is different for clay and concrete, the two most common types. Once they’re made, installing them is the next step to ensure your roof is both functional and durable.
Clay and Terracotta Tile Creation
Watching how are clay roof tiles made is like watching pottery on an industrial scale. It is a patient process.
First, the mined shale or clay is ground into a fine powder. Water is added to create a thick, plastic mud. This mix is then forced through a shaped opening in a process called extrusion. It comes out like a long, continuous ribbon of clay in the tile’s profile. A wire cuts it into individual tile blanks. Some manufacturers use powerful presses to stamp the clay into molds instead.
The next step is critical and slow: drying. The wet clay tiles are moved to drying rooms where temperature and humidity are carefully controlled. This can take days. Rushing this causes cracks as the water leaves. I have seen tiles fail on the roof because they were fired with moisture still trapped inside.
After drying, the tiles enter the kiln. This is where the magic happens. They are fired at extremely high temperatures, often over 2000°F. This firing vitrifies the clay, turning it permanently hard and giving terracotta its famous color. The heat triggers a chemical change, like turning sand into glass.
For a finished color or extra waterproofing, a glaze can be applied before that final firing. This liquid glass coating melts in the kiln, creating a shiny, impervious surface. This is how you get those vibrant blues, greens, and blacks on clay tile roofs.
Concrete and Composite Tile Creation
The process for concrete tiles is more about chemistry and pressure than heat.
It starts with a precise, dry mix. Portland cement and sand form the base. Iron oxide pigments are blended in to integrate color throughout the entire tile, not just on the surface. This mix is then fed into a mold.
Here is where strength is built: a massive hydraulic press comes down with tons of pressure. This compresses the mix, squeezing out air pockets and creating an incredibly dense tile blank. Higher pressure generally means a stronger, less porous tile. Think of it like compacting gravel in a driveway, but with extreme precision.
There is no kiln. Instead, the pressed tiles move to a curing chamber. These are often steam rooms where controlled heat and humidity help the cement complete its chemical hardening process. This curing can take over a day. It allows the cement crystals to fully interlock, creating a tile that gets stronger over time, just like a concrete foundation. After curing, a sealant or acrylic coating is often applied to enhance weather resistance and color.
The Pro-Only Process: How a Tiled Roof is Installed
Let me be clear right from the start: this is not a do-it-yourself project. I’ve been called to fix too many “DIY specials” that ended in leaks, injuries, or worse. Installing a tile roof demands professional skill for two big reasons: safety and the system itself. You’re not just laying heavy pieces of clay or concrete. You’re building a waterproof, wind-resistant shell that must last for decades. Think of a proper tile roof like a layered winter coat for your home, where every component from the deck up has a specific, critical job.
The Critical Safety and Hazard Assessment
Before my crew even sets up a ladder, we run through a mental checklist of hazards. You should know what they’re looking for so you can appreciate why this work is left to pros.
- Extreme Weight: A pallet of clay tiles can weigh over a ton. Moving them onto a roof requires equipment and planning.
- Fragile Tiles: They crack under foot pressure if you step in the wrong spot. One misstep can cost hundreds in broken tiles.
- Steep Pitch: Most tile roofs are on steeper slopes. The angle alone makes any work up there a major fall risk.
- Power Lines: We always survey for overhead lines before raising ladders or materials.
Every roofer on my jobs is tied off with a safety harness connected to a secure anchor. We use roof jacks and planks to create a safe working platform, and wear shoes with soft, grippy soles. This section is so you understand what a competent roofer does to stay safe; it is not a guide for you to try it yourself, especially when walking on roofs.
Tools of the Trade for Tile Installation
The right tool makes the job precise and protects the tiles. Here’s what you’d see in a pro’s tool belt.
- Tile Cutters (Nippers or Saws): These are for trimming tiles to fit at edges, valleys, and around pipes. Tile nippers work like heavy-duty snips, biting off small pieces. For complex cuts, we use a diamond-blade saw.
- Roofing Hammer: It has a sharp pick end for making nail holes in hard tile and a flat head for driving nails.
- Chalk Lines: These are our guides. We snap lines on the underlayment to keep every row of tiles perfectly straight.
- Ladder Hooks: These attach to the roof ridge, securing the ladder so it can’t kick out from the wall.
Step-by-Step: Building a Roof That Lasts
This is the method my crew follows. We never rush the prep work, because that’s what guarantees a roof won’t leak.
Step 1: Deck Prep and the First Line of Defense
Everything starts with a solid foundation. We inspect every sheet of plywood or OSB on the roof deck. Any soft, warped, or poorly nailed board gets replaced immediately. A wobbly deck means a wobbly roof. Once the deck is sound, we install drip edge metal along all the eaves and rakes (the edges). This metal piece catches water running off the roof and directs it away from your fascia board, which is the first critical step in preventing wood rot.
Step 2: Underlayment and the “Leak Point” Analysis
Next, we roll out the underlayment, usually a synthetic fabric or felt paper. This is your primary moisture barrier if any water gets past the tiles. But here’s the pro secret: the field of the roof is easy. The junctions are where leaks happen. We always install a self-adhering ice and water shield membrane in all valleys, along the eaves, and around every penetration like chimneys, skylights, and walls. Why? These are low spots or seams where water and ice can pile up and seep in. Sealing them first stops 90% of future leaks before the first tile is even laid. This is the core of roofing underlayment leak prevention.
Step 3: Laying the Tiles: A Pattern of Protection
Now for the part most people picture: how are roof tiles installed? It starts with a starter course at the very bottom eave. This row is laid upside down or with special tiles to create a level base and protect the edge. Then, we work upward row by row. Each tile overlaps the one below it, and the one beside it, like fish scales or shingles on a house. This overlapping pattern is what makes the roof waterproof. How are clay tile roofs installed securely? We fasten them according to the local building code for wind uplift. Some tiles get nailed, some use hidden clips, and in high-wind zones, we use both. We never just rely on their weight.
Step 4: Sealing the System: Hips, Ridges, and Flashing
The final touches seal the deal. Specially shaped hip and ridge tiles cap off the angled peaks of your roof. We mortar or mechanically fasten these in place. Properly installed, they lock in the field tiles and allow for vital attic ventilation at the peak. Then, we integrate metal flashing. This is custom-bent sheet metal that bridges the gap between the tiles and things like chimney sides or wall intersections. I cannot stress this enough: if a roof leaks, we check the flashing first. This is where water most often finds a way in.
Caring for Your Tile Roof: Inspection and Maintenance
Once the pros are done, the job shifts to you. Good maintenance is how you get the full lifespan from your investment. This is how you maintain roof tiles.
Safe Visual Inspection from the Ground
You should never climb onto your tile roof casually. Grab a pair of binoculars and do a walk-around your house every spring and fall. Look for these key things: individual tiles that are cracked, slipped out of place, or missing entirely. Check for dark streaks of algae or patches of moss, which can hold moisture. Scan the metal flashing around chimneys for signs of rust or separation. Catching these issues early from the ground is safe and smart.
Cleaning and Minor Repair Guidance
If you see moss or algae, cleaning is usually straightforward. Use a garden hose with a low-pressure spray or a dedicated roof cleaner applied from the ground. Never use a high-pressure washer, as it can force water under the tiles and damage the underlayment. For a single broken tile, replacement is a common repair. However, lifting the surrounding tiles to swap in a new one requires a delicate touch; pressing down in the wrong spot can crack the adjacent tiles. If you’re not comfortable, call a professional. It’s a small job for them but can prevent a big, costly mistake for you.
Lifespan and Long-Term Value of a Tile Roof
What is the lifespan of roof tiles? This is one of the first questions I get from homeowners. The answer is simple: a very, very long time. I’ve torn off 80-year-old clay tiles that were still solid. I’ve seen slate roofs outlive the original house. This isn’t marketing. It’s the reality of a material fired in a kiln or formed under pressure. In a real home, life expectancy isn’t just about the tile. Climate, installation quality, maintenance, and ventilation all influence residential roof life expectancy factors.
Here are the realistic ranges you can expect. Clay tiles often last 50 years or more, with many hitting the century mark in the right climate. Concrete tiles have a solid 30 to 50-year lifespan. Natural slate is the champion, routinely lasting 75 to 100 years and beyond. Compare that to the typical 15 to 25-year service life of standard asphalt shingles. The difference isn’t just years. It’s generations.
That long-term performance frames the real value. Think of it as buying a roof once. You might pay more upfront for tile than for a shingle roof. But over 50 years, you could replace asphalt shingles two or even three times. You’ll pay for multiple tear-offs, disposal fees, and labor costs again and again. With tile, you pay for that major installation once. Your maintenance becomes about care, not full replacement.
A tile roof’s legendary lifespan is a promise that depends entirely on two things: flawless installation and consistent maintenance. I’ve seen brand new tile roofs fail in a decade. Why? The crew treated them like heavy shingles. They didn’t use the right underlayment. They nailed them too tight or in the wrong spot. They didn’t account for proper ventilation. The tile itself is durable. The system holding it in place must be just as strong.
Your job as the homeowner is protecting that investment. It means walking the perimeter after big storms to look for debris. It means keeping valleys and gutters clear so water flows away. It means having a qualified pro inspect the flashings and underlayment every few years. Do that, and the tiles overhead will do their job for a lifetime.
Common Questions
How often should I have my tile roof professionally inspected?
Every 3-5 years. We look under the tiles at the underlayment and flashings-things you can’t see from the ground. Schedule it after a major hailstorm or severe winds.
Can I walk on my tile roof to clean gutters or make repairs?
Never. Your weight will crack tiles and compromise the waterproofing. Always use a securely anchored ladder for gutter work and call a pro for any roof repair.
What’s the most common cause of premature tile roof failure?
Poor attic ventilation. Trapped heat and moisture rot the deck and underlayment from underneath. Your first sign is often cracked tiles from the excessive heat.
Your Roof’s Foundation: Tiles and Technique
The best roof tile in the world won’t last if it’s installed poorly. I tell every homeowner to prioritize both premium materials and a crew with proven skill.
You are the first line of defense for your home’s protection with consistent, safe inspections. Keep building your knowledge with guides on roof care for all types to make informed decisions for years to come.
Ray Huffington
Ray is an experienced roofer. He has worked as a general contractor in the roofing industry for over 15 years now. He has installed and repaired all kinds of roofs, from small houses to large mansion, and from basic shingles to cement and metal roofs and even solar roof panels. He has seen homeowners struggle with roofing questions and always has experience based proven advice to help those in need. If you need roof pros, Ray's your guide.