
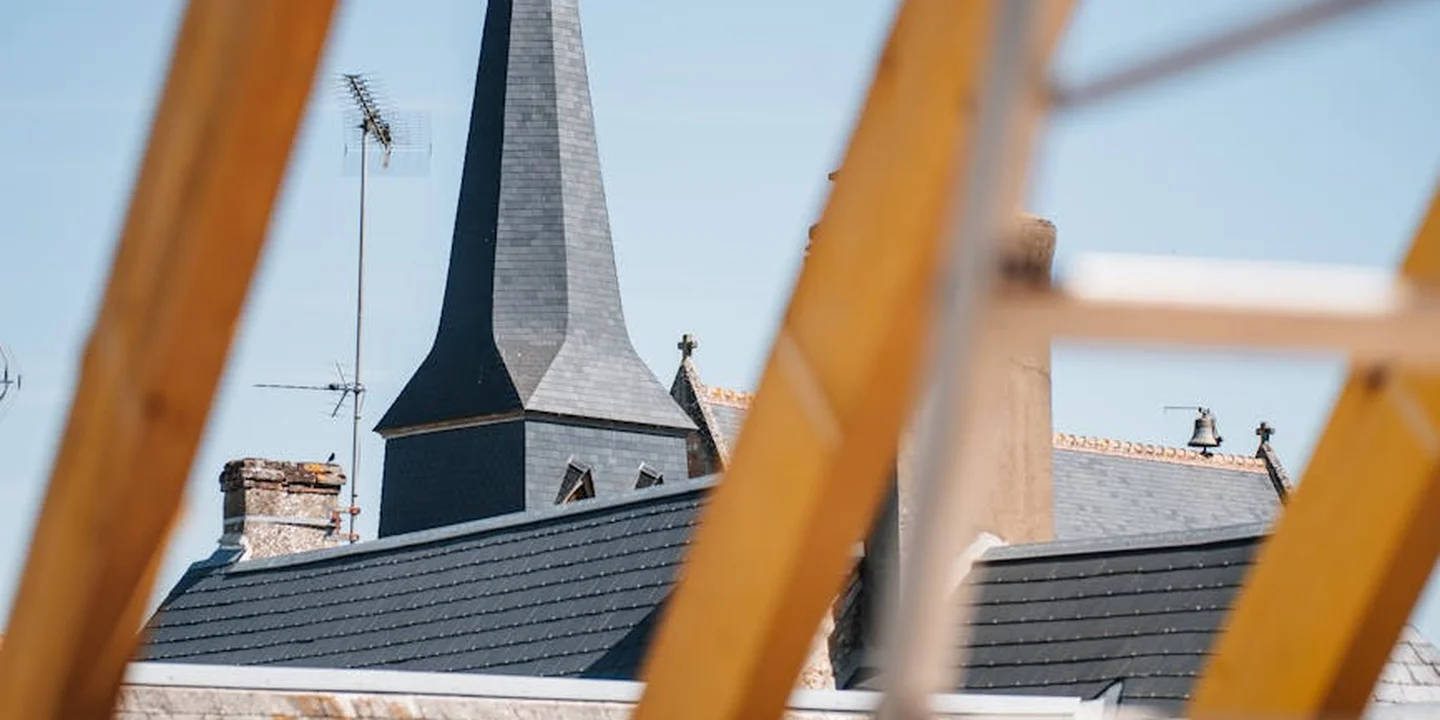
How Do You Stay Safe on a Roof? A Roofer’s Guide to Anchors, Harnesses, and Ladders
How many times have you looked at your roof and thought, “I can probably just be careful”? I’ve been there on a hundred different job sites early in my career, and that feeling is the most dangerous tool you can bring up with you. Working on a roof without the right gear and knowledge isn’t just risky, it’s a gamble with a very high price. This isn’t about fear, it’s about having a clear, practical plan so you can focus on the work.
Let’s get right to what you need: a safe system from the ground up. I’ll walk you through the non-negotiable basics I’ve used for decades: setting a proper roof anchor, wearing your safety harness correctly, and getting up there with a ladder that won’t let you down.
Key Takeaways
Working safely on a roof ties three skills together. Installing an anchor, wearing a harness, and using a ladder are all parts of one system.
If your roof is pitched, using a fall protection system is mandatory, not a suggestion you can skip.
You cannot start without four specific pieces of gear. You need a full-body harness, a tested roof anchor, a dynamic rope system, and a ladder rated for the job.
Checking every piece of this gear before you climb is a non-negotiable ritual, just like sharpening a blade before you cut.
Safety First: This Isn’t a Typical DIY Job
Changing a light fixture is DIY. Cleaning your gutters is DIY. Getting on a roof is a different world. The setup is complex and the penalty for a mistake is severe.
The gear list is specific and non-negotiable: a full-body harness, engineered roof anchors, a dynamic rope with a shock-absorbing lanyard, a ladder with stand-off stabilizers, a hard hat, and boots with aggressive tread.
Specific conditions turn a simple job into a high-risk event. A roof pitch steeper than 6/12 is a major hazard. Wet leaves, moss, or morning dew make surfaces slippery as ice for walking. Simply being near overhead power lines with a metal ladder is a deadly risk. Any work above 10 feet demands a harness.
Early in my career, I was on a low-pitch shed roof cleaning moss. I thought I was safe. My foot slipped on a wet patch and I slid right off the edge. I caught the gutter, which bent but held. That two-second slide scared me more than any high-wind repair. It taught me that “low slope” doesn’t mean “no risk.”
The “Pro-Only” Reality: When Your Roof Becomes a Hazard
A steep pitch changes the physics of the job. On a 9/12 pitch or steeper, you are not walking. You are clinging. Think of it like trying to stand on a slippery playground slide. Your center of gravity is fighting you with every move.
Wind and weather don’t just make the job unpleasant, they make it impossible. A 15 mph gust can push you off balance when you’re holding a tool. If rain is forecast, or if the roof is even damp from dew, your workday is cancelled. No debate.
Your Personal Fall Arrest System: Gear You Must Trust
Your safety depends on a chain of equipment. Every link must hold.
- Harness: This is a full-body vest that distributes force across your chest, shoulders, and thighs during a fall. A waist belt alone is dangerous and useless.
- Shock-Absorbing Lanyard: This short rope connects your harness to the anchor. It has a special section that tears apart in a controlled way during a fall. This slows you down, reducing the brutal shock to your body.
- Anchor Point: This is a permanent or temporary device secured directly to the roof’s structure. It is the unmovable point your entire system relies on.
- Connector (Carabiner): This metal clip joins your lanyard to the anchor. It must lock automatically.
Every single piece must be labeled as compliant with OSHA standards, or an equivalent like ANSI. If the tag is missing or faded, do not use the gear.
Risks You Can’t Ignore: Pitch, Power, and Instability
You must know your roof’s pitch. Measure the rise (vertical height) over a 12-inch run (horizontal span). A 6/12 pitch means the roof rises 6 inches for every 12 inches inward. If it’s 6/12 or steeper, I recommend calling a professional. If you proceed, a harness is absolutely required.
Look up before you move a ladder. Treat all overhead power lines as live and deadly. A metal ladder doesn’t need to touch the line for electricity to arc across the gap. Use a fiberglass ladder for any electrical proximity.
An old roof is a fragile work platform. Brittle, curled shingles can crack under your boots. The wooden decking underneath may be rotten. A roof anchor is only as strong as the truss or rafter it’s screwed into. If the structure is weak, the anchor will pull out when you need it most. Inspect from the attic before you trust the surface.
How Do You Install Roof Ancholdsers?
The way you install a roof anchor changes based on your roof material. Shingle, metal, and tile roofs all need different handling. I learned this the hard way early in my career when a temporary anchor slid on a metal roof panel.
First, collect your tools. You need a drill, the correct drill bits for wood or metal, a measuring tape, a wrench, and a tube of high-quality sealing caulk. Without the right tools, you risk a weak anchor or a roof leak from day one. Check out our essential tools guide for beginners before you start.
So, how do you install a roof anchor properly? The core idea is to secure it to the roof’s structural skeleton, not just the outer layer. Imagine buttoning a coat, the button needs to go through all the layers to hold.
Choosing Your Anchor: Permanent vs. Temporary
You’ll pick between two main types. Screw-down permanent anchors are metal bases that bolt directly into the roof deck. I use these on my own home because I’m up there cleaning gutters every fall. They’re for frequent, reliable use. Temporary strap-style anchors hook under shingles or tiles. They’re faster but only for one quick job. If you plan to use the anchor more than once, install a permanent one.
Your roof decking makes a difference too. Most decks are plywood or OSB. Plywood is solid and grips screws well. OSB is like pressed wood chips, it can crumble if you’re not careful. On an OSB deck, I often use a larger washer to spread the load.
Step-by-Step Installation on a Shingle Roof
Let’s walk through how do you install a permanent anchor on an asphalt shingle roof. This is the method I’ve used on hundreds of homes. Make sure to follow proper roof installation methods to ensure safety and durability.
- Locate the Roof Framing. Go into your attic and use a stud finder on the ceiling to find the rafters. If you can’t access the attic, you can carefully probe with a thin nail through the shingles. The anchor must screw into this solid wood.
- Mark and Prepare the Site. Outside, gently lift the shingles where the anchor will go. Use a pencil to mark the drill holes on the wooden deck beneath. Take your time to avoid cracking the shingles.
- Drill Pilot Holes. Select a drill bit slightly smaller than the anchor’s bolt. Drill straight down through your marks. This pilot hole guides the bolt and keeps the wood from splitting.
- Secure the Anchor Base. Apply a thick bead of roofing sealant under the anchor’s metal base. This seals the holes. Set the anchor in place and screw it down firmly with your wrench until it’s snug. Stop when you feel solid resistance.
- Test the Anchor. Before clipping in, lean on it with steady pressure. It should not move, wiggle, or lift the shingles around it. A good anchor feels like part of the roof.
Common Installation Mistakes to Avoid
I’ve been called to fix these errors more times than I can count. Watch out for them.
- Drilling into only the shingles. If your bolts don’t reach the structural decking, the anchor will pull out in a fall. Always confirm you’ve hit solid wood.
- Over-tightening and crushing the shingles. Cranking too hard distorts the anchor base and damages the roof. Under-tightening is just as bad, leaving everything loose. Hand-tight plus a quarter-turn with the wrench is usually enough.
- Forgetting to seal the penetration. Every drill hole is a direct path for water. That bead of caulk under the base is your insurance policy. I never skip it.
How Do You Use a Safety Harness and Rope?
Think of your fall protection system like a climber’s setup. The roof anchor is your solid rock, the one unmovable point. The rope is your planned path up and down the wall. Your harness is simply the seat that connects you to it all. A harness by itself is just an uncomfortable piece of webbing; it only becomes a lifeline when properly connected to a verified anchor with a managed rope.
I’ve seen guys clip into anything handy, from vent pipes to chimney flues. That’s a gamble with your life. Your sequence must be: inspect your gear, put it on right, then connect to a proper anchor. Let’s walk through it.
Pre-Use Inspection: Your Lifeline Checklist
You check your car’s tires. You check your ladder’s feet. You must check your fall gear every single time, no exceptions. Sun, dirt, and simple wear tear at this equipment silently.
Start with your harness. Lay it out flat on a clean surface, like your driveway. Run your hands along every inch of webbing.
- Look for frayed edges, cuts, or any abrasion that looks like a worn-out seatbelt.
- Bend each plastic or metal buckle, checking for cracks or deformity.
- Inspect every stitch line, especially where straps meet the D-ring. Torn stitching is an immediate fail.
Now, check your rope or lanyard. A static kernmantle rope is common for roofing work.
- Look for cuts or flat, abraded spots that feel rough.
- Check for severe discoloration or a stiff, brittle feel from UV damage.
- Find the label. Verify it meets ANSI or OSHA standards. Note the manufacture date. This gear has a service life, typically five years from manufacture, even if it looks fine. If the label is gone or faded, retire the gear.
Donning and Adjusting Your Harness Correctly
A loose harness can be as dangerous as none at all. In a fall, your body can slip right through if it’s not snug. I adjust mine the same way every time.
- Unbuckle all the straps. Hold it by the shoulder straps and put it on like a backpack. Step into the leg loops one at a time, then pull the harness up.
- Tighten every strap. Start with the leg loops, then the waist, then the chest strap if you have one. A good rule: you should only be able to slide a flat hand, palm down, between the strap and your body. It should be snug, not cutting off circulation.
- Ensure the D-ring on your back is centered between your shoulder blades. Nothing should be twisted over it. This is where your lifeline connects, and it must lay flat against your back.
Take a moment to move around. Squat down. The harness should move with you, not pinch or bind. If it does, readjust.
Connecting to the Anchor: The Critical Link
This is the moment that matters. You have your inspected harness on. Your anchor is installed correctly. Now you connect them.
Use a rated lanyard with a shock-absorbing pack or a rope grab on your static line. Attach the carabiner or snap hook directly to the anchor’s rated point. Listen for the click. Give it a tug to confirm it’s locked.
Your number one job now is to manage slack. The goal is to prevent you from reaching the edge, not just to catch you after a six-foot drop. Keep your connection as short as practical.
As you work sideways along the roof, you must maintain tension. This is where a rope grab shines. You slide it up the rope as you move toward the anchor, and it automatically locks if you fall. When moving away, you must manually reposition it to take up the new slack. Never have so much rope out that you could hit the ground or a lower ledge. I keep my rope just tight enough that I can do my work, but never loose enough to take a full step toward the edge unchecked.
How Do You Safely Use Ladders for Roof Access and Transport?
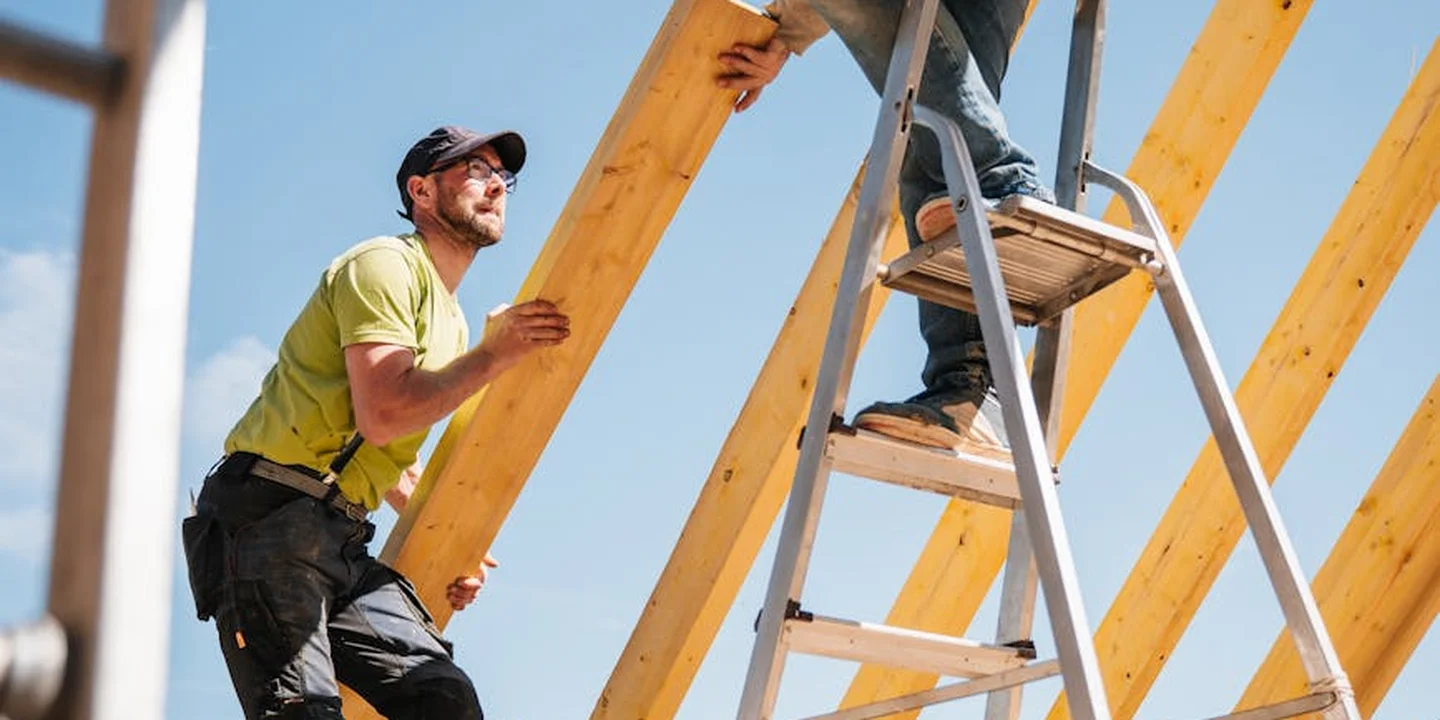
Let’s answer the big question right up front. A roofer props a ladder dozens of times a week, and the process is only safe with strict rules. Are roof ladders safe? Yes, but only the specific kind built for the job and used correctly. Can you use a ladder on a roof? The answer is more complicated and depends entirely on your equipment. Getting this wrong is how most weekend warrior falls start. The goal isn’t just to get up there, but to work confidently and come down safely.
Selecting and Setting Up Your Ladder
This is where safety is decided before you take a single step. Using a flimsy ladder is asking for trouble.
Choose a Type I (250 lbs) or IA (300 lbs) rated extension ladder for heavy-duty use, never a light-duty household step ladder. The rating includes you, your tools, and anything you carry. I’ve watched a guy snap an old ladder on a simple gutter clean-out. It was a cheap ladder, but the hospital bill wasn’t.
Setting the angle is non-negotiable. Use the 4-to-1 rule. For every 4 feet of height to where the ladder touches the house, the base should be 1 foot out from the wall. If your gutter line is 16 feet up, the ladder’s feet need to be 4 feet away from the siding. A trick I use is to stand with my toes at the ladder’s feet and extend my arms. My fingertips should just touch a rung at shoulder height.
Secure the base on solid, level ground. Use plywood on soft dirt. The top must rest against a stable part of the eaves, not on gutters or fragile trim. If the ladder rocks or sinks when you test it, the setup has already failed.
Climbing and Working on the Ladder
Now you’re on the clock. Every move matters. Your hands are for holding on, not for holding tools.
Always maintain three points of contact. That means two hands and one foot, or two feet and one hand, are always in solid contact with the ladder. This isn’t a suggestion. It’s the law of gravity. Break it, and gravity wins.
Use a tool belt or a rope-and-bucket system. Never carry materials in your hands while climbing. I keep my hammer, cat’s paw, and chalk line on my belt. Everything else gets hauled up after I’m secure.
Never overreach. Your belt buckle should stay between the ladder rails at all times. If you can’t reach the work, get down and move the ladder. Leaning out shifts your center of gravity and can flip the ladder sideways. I’ve seen it happen. It’s fast and it’s ugly.
Using a Ladder on the Roof Itself: Roof Ladders and Jacks
This is advanced access. A roof ladder, also called a hook ladder, is a different tool. It’s designed to lay flat on the roof slope.
How does a roof ladder work? It has large, padded hooks at the top that reach over the roof ridge. The weight of the ladder and you is distributed along the roof, not focused on one spot. You walk on the rungs, not the shingles. This protects your roof and gives you a stable platform.
You can only put a straight extension ladder on a roof if you’re using it with a proper roofing system. This means setting roof jacks (brackets nailed into the roof deck) and laying planks (walkboards) between them. The ladder then rests on this stable platform, not the shingles. It’s how pros set up for multi-day jobs.
Transport is part of the job. You can carry a ladder on a roof rack, but you must use proper tie-downs at the front, middle, and back. Ratchet straps are better than rope. A 28-foot ladder becomes a dangerous sail if it comes loose at 55 miles per hour. Check your knots and straps every time you stop.
Answering “Can You Put a Ladder on a Roof?”
This question needs a clear “no” with an explanation. Placing the top of a straight extension ladder directly onto the shingles is a double mistake, especially considering the layers and regulations for roof shingles.
First, it’s damaging. The ladder’s feet will crush the granules, crack the shingles, and potentially puncture the underlayment. You’re creating a leak point.
Second, it’s dangerously unstable. Shingles are a slick, angled surface. The ladder can kick out sideways or slide down the roof, which could potentially lead to a roof collapse.
The safe alternative is a ladder stabilizer or stand-off. This is a large, padded arm that attaches to your ladder. It spans over the gutters and rests against the solid siding or eaves, holding the ladder away from the roof surface. It protects your roof and creates a far more secure top rest, making it the right answer for most homeowner access. It’s the first accessory I bought for my own ladder twenty years ago.
When NOT to Try This: Calling a Professional
Knowing your limits is the most important safety rule. This isn’t about skill, it’s about survival.
A steep pitch is the great equalizer; it turns a simple walk into a deadly slide in a heartbeat. If your roof is steeper than a 6-in-12 pitch (that’s 6 inches of rise for every 12 inches of run), you should not be on it without professional training and equipment. That’s the pitch where you start to feel gravity pulling you toward the edge.
You should hire a licensed and insured roofer for any work on steep, high, or complex roofs. Their insurance and bond protect you if something goes wrong. My crew wouldn’t think twice about calling in a specialist with a crane for a four-story Victorian with a slate roof. It’s the smart move. Also, verify the roofer has a current license and offers a written contract outlining scope, timeline, and warranty. A clear contract protects you and helps ensure licensing requirements are met.
- Multi-story homes where a fall means certain, severe injury.
- Slate, clay tile, or metal roofs, which are slippery and fragile.
- Roofs with solar panels, skylights, or complex valleys that create trip hazards.
- Any forecast of rain, wind, or even heavy dew. A damp roof is an ice rink.
Red Flags That Mean Stop and Call a Pro
Listen to your gut. If any of these thoughts cross your mind, put the ladder down and pick up the phone.
Your physical reaction is a built-in warning system you cannot ignore. If you feel a flutter in your chest or get lightheaded just looking up from the ground, your body is telling you this is a bad idea. Respect that signal.
- You feel dizzy, anxious, or unsure when you simply think about the height.
- The roof pitch looks or feels steeper than you could walk on without using your hands for balance.
- During your visual inspection, you see sagging, or you probe the eaves and discover soft, rotten wood. Your anchor points are only as strong as the deck they screw into.
The True Cost of a DIY Fall
People often only count the ambulance ride. The real bill is much higher.
A fall can change your life in an instant, leading to permanent disability that affects your job and family. Beyond the hospital stay, think about months of rehab, lost income, and the simple things you may never do again the same way. I’ve seen it.
Then there’s the collateral damage. A dropped hammer becomes a projectile. It can punch through a patio table, a car windshield, or worse. If your insurance company finds you were performing unpermitted work on the roof, they may deny your claim entirely.
Now, contrast that with the cost of a pro. A few hundred dollars for a safety inspection or minor repair pays for their expertise, their million-dollar liability policy, and their thousands of dollars in fall protection gear they use every day. It’s not an expense, it’s an investment in walking away in one piece.
Maintaining Your Roof Safety Equipment
Your safety gear is only as good as the care you give it. Simple, regular maintenance keeps your equipment trustworthy and ready for the next job. I treat my harness and ladder with the same respect as my tools. On my crew, we had a rule: inspect everything Monday morning. It saved us from close calls more than once. Neglected equipment doesn’t warn you before it fails. It happens when you’re 30 feet up, relying on that one strap or rung.
Harness and Rope Care
These are your lifelines. A damaged harness is worthless. I keep mine in a gear bag in my dry basement, never in the garage where temperature swings and chemicals live.
- Store away from sunlight, chemicals, and moisture in a cool, dry place. Ultraviolet rays and oil fumes weaken nylon and polyester fibers over time.
- Clean with mild soap and water only. I use a damp cloth and a tiny bit of dish soap. Never machine wash or use harsh detergents. They can strip protective coatings.
- Inspect before every use and log any issues. Run your fingers along every inch of rope. Look for cuts, fraying, or discoloration. Check all metal D-rings and buckles for cracks. Retire gear immediately after a fall or at the manufacturer’s date. The internal damage from a fall is often invisible.
Ladder Maintenance and Storage
A wobbly ladder is a ticket to the emergency room. I check mine every time I pull it off the truck. It takes two minutes.
- Check for cracks, loose rungs, and damaged non-slip feet regularly. Give each rung a good shake. If the rubber feet are smooth or missing, replace them before your next climb.
- Lubricate moving parts on extension ladders sparingly. A light silicone spray on the pulley and lock mechanisms once a season keeps them working smoothly. Too much oil attracts dirt.
- Store horizontally on racks or hang vertically to prevent warping. I hang my extension ladders from the garage ceiling joists. If you lean them against a wall long-term, they will bow.
- Secure properly for transport. For the question “can you carry a ladder on a roof rack?”-yes, but do it right. Use heavy-duty ratchet straps, not bungee cords. Secure the ladder at the front, middle, and back of the rack. I always tie a red flag on the end if it overhangs my vehicle.
Common Questions
When should I use a temporary roof anchor versus installing a permanent one?
Use a temporary strap-style anchor only for a single, quick inspection. If you plan to clean your gutters annually or do any recurring work, install a permanent, screw-down anchor. A permanent anchor is a one-time investment in reliable safety.
How can I tell if my safety harness is adjusted properly?
After tightening all straps, you should only be able to slide your flat hand, palm down, between the strap and your body. Do a squat test; if the harness pinches or binds, it’s not right. A proper fit means the gear moves with you, not against you.
What’s the safest way to get a ladder up to a second-story roof by myself?
Never try to muscle a heavy ladder up alone. Lay it flat on the ground, lift the end to your shoulders, and “walk” it upright hand-over-hand. Always use a ladder stabilizer at the top to protect your roof and gutters, and secure the base to prevent kick-out.
Your Blueprint for Safe Roof Work
From my crew’s experience, the single most important habit is this: always perform a thorough inspection of your anchors, harness, and ladder before your feet leave the ground. This five-minute ritual is the simplest, most effective way to ensure you come back down safely.
Owning a roof means owning the responsibility to maintain it safely, using code-compliant methods and quality gear. Make a commitment to keep learning about roof care and maintenance for all roof types. It’s how you build a legacy of safety and durability for your property.
Ray Huffington
Ray is an experienced roofer. He has worked as a general contractor in the roofing industry for over 15 years now. He has installed and repaired all kinds of roofs, from small houses to large mansion, and from basic shingles to cement and metal roofs and even solar roof panels. He has seen homeowners struggle with roofing questions and always has experience based proven advice to help those in need. If you need roof pros, Ray's your guide.