
How Do You Mount Solar Panels on Your Roof? A Roofer’s Breakdown
You’re ready to harness the sun, but how do you attach those panels without turning your roof into a leaky sieve? Choosing the right mounting method protects your investment and your home. From my years on crews installing solar, I’ve seen the good, the bad, and the water-damaged. This guide cuts through the confusion.
We’ll walk through the three main approaches:
- Roof-penetrating racking systems
- Ballasted, non-penetrating setups
- Integrated solar roof options
Key Takeaways for a Roof-Smart Solar Install
Before you get excited about solar savings, get serious about your roof. I tell every homeowner this: your roof’s primary job is to keep water out, and any solar install must protect that job above all else. Your roof’s age and current condition are non-negotiable factors that dictate the entire project. Here are the roof-centric truths you must walk into any installer meeting knowing.
- Every hole drilled for a racking foot is a potential leak point, so the installer’s sealing method is as important as the panels themselves.
- Ground-mounted systems are often the kindest long-term option for your shingles and structure, avoiding roof penetrations completely.
- The racking system must be specifically designed for your roofing material; what works on metal can crush clay tile.
- A solar installation can void portions of your existing roof warranty; always check with your roofer or manufacturer first.
- Your roof needs a significant remaining lifespan to justify the cost and disturbance of a penetrative mount.
Stop! Assess Your Roof First (The Roof Mason’s Golden Rule)
Solar should never be the first major project on an old or failing roof. I’ve been called to too many homes where new panels were bolted to a roof that was already on borrowed time. Adding solar to a failing roof is like putting a new engine in a car with no brakes-it misses the critical safety issue. Before you call a solar company, do this simple self-inspection. Grab binoculars and look for these signs from the ground, especially those related to structural requirements for solar panels.
- Shingle Granule Loss: Check your gutters and downspouts. A pile of black, sand-like granules means your shingles are wearing thin.
- Soft Spots or Sagging: Look at your roofline. Any dips or valleys could signal rotten decking underneath.
- Flashing Condition: Inspect around chimneys, vents, and walls. Cracked, rusted, or missing flashing is a guaranteed leak waiting to happen.
- Curling or Cupping Shingles: Edges that are lifted or tiles that look wavy indicate advanced age and moisture damage.
If your asphalt shingle roof is over 10 years old, consider this rule non-negotiable. Get a professional roof inspection and report before you even get a solar quote. This report is your bargaining power and your peace of mind.
Roof Integrity & Lifespan Report: The Foundation for Solar
Think of a solar array as adding a permanent, dynamic load to your roof. It’s not just the static weight of the panels (like a constant layer of heavy snow). The real engineering challenge is wind uplift, where gusts can get under the panels and try to rip the entire system off your house. Your roof structure and decking must be sound enough to handle this decades-long stress.
For a penetrative mount to make financial sense, your roof needs a long runway. On a typical asphalt shingle roof with a 25-year lifespan, I advise clients it should have at least 15-20 years of solid life left. Tile and metal roofs can last longer, but the same principle applies: the roof should outlive the payback period of your solar investment. Mounting solar on a roof with less than a decade of life left often means a costly panel removal and re-installation for the future reroof. This is why it’s essential to consider the lifespan of both your roof and solar panels before installation.
Know the red flags. If you see these during your inspection, plan to fix or replace your roof first.
- Widespread curling, cupping, or missing shingles across multiple slopes.
- Multiple layers of old shingles underneath the current ones (adds excessive weight and complicates proper flashing).
- Any visible sagging or deformation in the roof deck when viewed from the attic.
- Active leaks or extensive water stains on your attic sheathing.
The Big Three: Core Solar Mounting Methods Explained
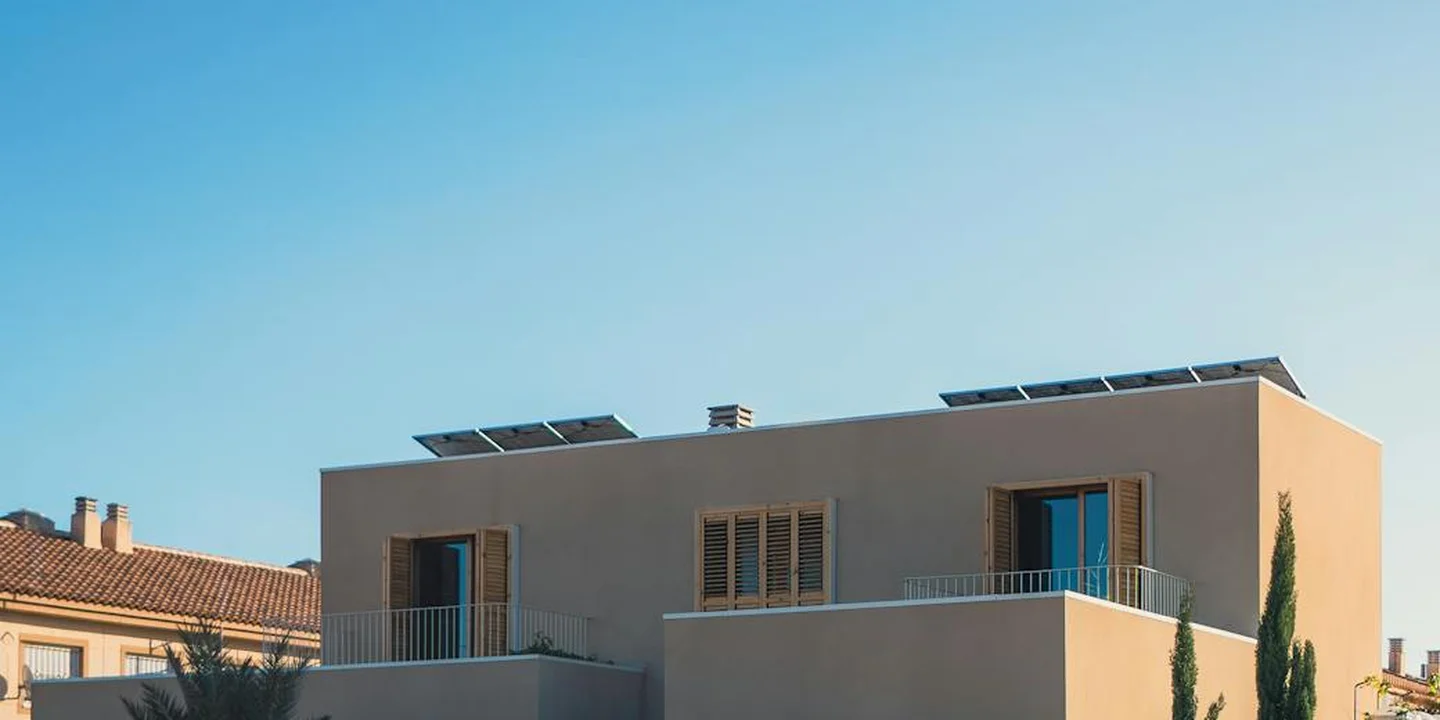
From a roofer’s practical viewpoint, you have three main choices for mounting solar panels. Penetrating mounts attach directly to your roof structure. Ballasted systems use weight to hold everything down. Integrated systems make the roof itself the solar collector. Think of them like this: penetrating is using nails, ballasted is using paperweights, and integrated is buying a whole new suit. Your roof’s shape, material, and strength will point you to the right one. But if you want to go all in with integrated systems, be prepared for a different level of investment.
How Are Solar Panels Attached to a Roof? The Penetrating Mount
This is the most common method for sloped shingle or tile roofs. It directly answers the question of how panels are secured. The process involves making strategic holes, so precision is everything.
Here is the step-by-step process my crew uses on a standard asphalt shingle roof:
- Locate the rafters. We use a stud finder or gently tap to find the solid wooden framing underneath the deck. Missing the rafter means a weak attachment point.
- Install flashing-boot assemblies. For each mount, we cut a small opening in the shingles and slide in a metal flashing with a rubber seal. This is exactly like putting a gasket under a bolt; it creates a watertight seal around the penetration. We apply sealant meticulously.
- Secure the rails. We bolt long aluminum rails directly to those flashing assemblies. These rails form the skeleton that runs across your roof.
- Attach the panels. Finally, we clamp the solar panels onto the rails. The entire array is now anchored to your home’s frame.
For a tile roof, we carefully remove specific tiles, install the mounts on the deck, and then replace the tiles around them. The principle is the same. The quality of the flashing and sealant job is what prevents leaks for decades. I’ve repaired too many jobs where this step was rushed.
What is a Ballasted Mounting System? The Non-Penetrating Option
A ballasted system holds solar panels in place with heavy weight, not roof penetrations. Think of weighted plastic trays or concrete blocks that the panels sit in. This method adds no holes to your roof membrane, which is a big plus for waterproofing.
This is the ideal use case for flat or very low-slope roofs, often seen on commercial buildings or some modern homes. The roof must be designed to handle a significant dead load. We’re talking about adding 4 to 6 pounds per square foot across the whole array.
You absolutely need a professional structural analysis before considering a ballasted system. I was called to a home where the homeowner wanted this, but the roof trusses couldn’t support the extra weight. We had to redesign the entire plan. Never assume your roof can handle it.
Solar Shingles and Integrated Systems: When the Roof is the Panel
With products like the Tesla Solar Roof or certain standing-seam metal solar panels, your roof covering and solar system are one and the same. They are designed to look like traditional roofing materials.
You must frame this as a full roof replacement project, not a simple add-on. You are stripping off your old shingles and installing a new, power-generating roof. The cost and scope are comparable to a high-end re-roof.
The pros include a sleek, nearly invisible look and a uniform lifespan where the roof and panels wear out together. The cons are significant. The upfront cost is immense, often two to three times more than a traditional roof with add-on panels. There are far fewer certified installers, which can limit your choices. Repair complexity is high; if one solar shingle fails, you often need a specialist from the manufacturer, which I’ve seen take weeks to coordinate. Considering the average cost of solar panel installation for a residential roof in 2024 helps frame the financial trade-offs. It clarifies the long-term value against the upfront expense.
Choosing the Right Mount for Your Roof Type
Putting solar on your roof isn’t one-size-fits-all. The right method depends entirely on what your roof is made of. Think of it like choosing the right tool for the job. You wouldn’t use a nail gun on slate tiles, and you shouldn’t use a tile mount on a metal roof. Matching the mount to the material protects your investment in both the roof and the solar panels.
Mounting on Composite Asphalt Shingle Roofs
This is the scene I see most often. The standard method is a penetrating mount. Installers use lag bolts, long and thick, that screw directly into the roof’s wooden rafters.
Here’s how they attach panels to a shingle roof without causing leaks. The crew lifts a single course of shingles and slides a metal bracket, called a flashing, underneath. That bracket has a tall pipe that the bolt goes through. They drive the lag bolt down through the shingle, the decking, and deep into the rafter. Then, they lower the shingle back over the bracket’s flashing and seal everything with roofing cement.
The most critical detail is hitting the rafter. If those bolts only go into the plywood decking, they don’t have the holding power for a windstorm. On a past job, we had to fix an array where the original installer missed the rafters. Every bracket was loose. A good installer uses a stud finder or taps along the roof to find the rafters before they drill a single hole.
Mounting on Metal Roofs (Standing Seam vs. Corrugated)
Metal roofs can be fantastic for solar, but you have to know which type you have.
For standing seam roofs, the panels have raised seams that run vertically. The best systems use special clamps that grab onto these raised seams without drilling any holes through the metal roof panel itself. It’s an elegant solution. The solar rails attach directly to these clamps. This keeps the weathertight integrity of the roof completely intact. Proper installation and mounting are crucial for the longevity of solar panels.
For corrugated or screw-down metal panels, you usually have to penetrate. This isn’t a deal-breaker, but it requires care. The installer must use a specialized metal roof flashing with a thick rubber gasket made for metal. They’ll use a sealant compatible with your roof metal (like Galvalume) to prevent any corrosive reaction. The bolt goes through this flashing seal, into the roof deck, and again, into a rafter.
Mounting on Tile Roofs (Clay, Concrete, Slate)
Tile roofs demand respect and a very careful crew. There are two main ways to tackle this.
The first, and often best, method uses special mounting hooks. The installer carefully removes a single tile, slides the L-shaped hook under the tile above, and secures it to the deck. The removed tile is then either replaced or cut to fit around the hook’s vertical leg. No tile drilling is needed.
The second method involves drilling through the tile itself. This requires a diamond-tipped drill bit, a steady hand, and a lot of experience to avoid cracking. A high-quality sealant and a compression fitting are then used to waterproof the hole.
This is not a job for a general solar crew. You need installers who have worked with fragile, expensive roofing materials. A cracked tile might not leak today, but it’s a weak spot that will fail. I’ve seen beautiful old clay tiles ruined by a crew that treated them like asphalt shingles.
Can I Install Solar Panels on a Flat Roof?
Yes, absolutely. But it looks completely different. Since flat roofs have no natural slope, panels are mounted on tilt-up rack systems to angle them toward the sun, especially designed for solar panel installation on flat roofs.
You have two main choices for securing these racks. A ballasted system uses heavy concrete blocks to hold everything down without penetrating the roof membrane. A penetrating system uses bolts, similar to a sloped roof. Many setups use a hybrid: some ballast and a few strategic bolts for high-wind areas.
Your roofer’s biggest concern will always be water. The rack layout must never block the natural drainage paths or create areas where water can pond. We always lay out the feet so water can flow freely around them to the drains. Adding hundreds of pounds of ballast or penetrations in a puddle zone is asking for a leak.
Hazard & Safety Assessment: Why This is Pro-Only Work

Let me be completely clear. Mounting solar panels on your roof is not a do-it-yourself project. I’ve seen too many homeowners underestimate the dangers, and the results can be tragic. The risks are real, severe, and immediate.
First is the fall hazard. Your roof is a worksite at height. One slip on a steep pitch, one misstep on a dewy morning, and the outcome is catastrophic.
Next is electrical shock. A solar array is a live electrical system the moment it’s in the sun. The DC wiring can carry a lethal current, and connecting it incorrectly is a silent, deadly risk. This isn’t like wiring a ceiling fan.
Then there’s the structural risk. A roof is engineered to hold a specific weight. A crew of workers plus several hundred pounds of racking and panels changes that math instantly. Placing that load in the wrong spot can stress rafters to the breaking point.
Finally, there’s the damage you can’t see. Every mounting point is a hole in your roof’s waterproof layer. If the flashing and sealing aren’t done with absolute precision, you’re buying a slow-motion leak. That leak might take years to show up as a stained ceiling, long after any warranty you provided yourself would have expired.
This combination of height, electricity, heavy loads, and critical waterproofing is why you must hire licensed, insured professionals.
The Pro-Only Safety Gear Checklist
A professional crew doesn’t just show up with tools. They show up with a system designed to keep everyone safe. Here’s what that system includes.
Proper fall protection is non-negotiable. This means OSHA-compliant full-body harnesses, secured to properly rated roof anchors. These aren’t suggestions. They are the difference between a slip and a fall.
For steep roofs, they use roof jacks and planks to create a stable work platform, or they set up scaffolding. They don’t just rely on rubber-soled boots.
Their ladder setup is meticulous. The ladder extends 3 feet above the roof line, is angled correctly, and is secured at the top and bottom. A wobbly ladder is the first step to disaster.
Beyond the gear, they follow strict procedures for electrical safety, including lockout/tagout to ensure the home’s power is isolated before any connection is made. This training is as vital as the harness. A real pro respects the roof and the lethal power running through the wires they install.
The Cost Conversation: Mounting Methods and Your Wallet

Let’s talk about what this all means for your budget. I tell my crew that the mounting method isn’t just a technical choice, it’s a financial one. The price tag isn’t just for the panels.
Ballasted systems can look cheaper on paper because there’s less labor drilling into the roof. But that weight means your roof deck and structure must be strong enough to hold it. You might save on installation labor only to spend more upfront reinforcing the roof itself.
Penetrated mounts are the standard for a reason. They’re secure and versatile, but the cost comes from the quality of the hardware and the skill of the installer making those penetrations watertight.
Where Your Money Really Goes
When you get a bid, it’s helpful to know what you’re paying for. The main cost factors break down into three areas.
First is hardware. The rails, clamps, and especially the flashing kits. High-quality, corrosion-resistant flashing is non-negotiable. It’s the seal between your new investment and a leak-free attic.
Second is labor intensity. This changes drastically with your roof material. Installing on a composite shingle roof is relatively fast. Installing on clay or concrete tile is a slow, meticulous process of lifting and replacing individual tiles. That extra time is reflected in the price.
The third, and most often overlooked, factor is roof prep. We won’t install on a failing roof. If your decking is soft, shingles are curled, or the underlayment is shot, that needs to be fixed first. A reputable installer will build re-decking or major repairs into the quote. A low bidder might ignore it.
A Word on Bids and Quality
I’ve been called to fix too many “budget” solar jobs. Here’s the hard truth.
The cheapest bid usually saves money by using inferior flashing, skipping proper sealants, or rushing the attachment points. They see the roof as a platform for panels. I see it as the shelter over your family that we must protect.
The mounting hardware is the only thing connecting the solar array to your home. It’s the piece that must last 25+ years against wind, rain, and sun. Do not let a contractor cut corners there to lower the price. A proper, code-compliant installation might cost more today, but it prevents a costly roof leak-and a total system reinstall-tomorrow.
How Mounting Methods Affect Your Roof Warranty

Let’s talk about your roof’s warranty. This is where a poor solar install can cost you big money down the road.
Most roofing material manufacturers have strict rules. They require their products to be installed exactly as their instructions say. Puncturing the roof deck for solar racking often breaks those rules. A bad penetration is an open invitation for a leak.
If a leak starts at a solar mounting point, your shingle or tile warranty is likely void for that area, leaving you to pay for repairs. I’ve seen this happen. A homeowner had a leak two years after a solar install. The roofer traced it to a poorly sealed lag bolt. The shingle manufacturer wouldn’t cover a cent of the repair because the roof was modified incorrectly.
The Solar Installer’s Warranty is Your First Defense
A professional solar company knows this risk. They build their business on not causing leaks.
A quality installer will provide a separate, long-term warranty specifically for the weather-tightness of their roof penetrations and attachments. Think of it like a surgeon guaranteeing their stitch won’t get infected. This warranty should be for 10 to 25 years, matching the life of the panels. It’s their promise that their work won’t damage your roof.
You must ask for this warranty in writing before signing any contract. If a company hesitates or says their work is covered under a general “workmanship” clause, consider it a red flag. You need explicit, written coverage for leaks.
The Critical Step: Getting Warranty Overlap in Writing
Here is my best advice from decades on roofs. Your goal is to eliminate the “he said, she said” if a problem occurs.
Before installation starts, create a paper trail. Contact your original roofing contractor, if you know who they are. Tell them you are getting solar. Ask for a written statement on how the install should proceed to keep your material warranty intact.
Then, give that statement to your solar installer. Have them confirm in writing that their methods and their weather-tightness warranty will comply.
Get a single document, signed by both your roofer and solar installer, that clearly states who is responsible for what if a leak develops at a mount. This clarity is priceless. It protects you from being stuck in the middle of two companies blaming each other while water drips into your living room.
Do not skip this step. It is the most practical thing you can do to protect your investment in both your roof and your solar panels.
What Factors Should I Consider When Choosing a Mounting Method?
Choosing the right mount is not just about holding panels in place. It’s about partnering two systems on your roof. I think of it like picking work boots for a specific job. You wouldn’t wear slick dress shoes on an icy roof.
You need gear suited for the task and the conditions. Let’s break down the priorities in order.
1. Roof Condition & Type: The Foundation of Everything
This is your non-negotiable first step. You must have a sound foundation.
If your roof is over 10-12 years old or has any known issues, a full replacement before solar is the wisest long-term investment. Adding panels now just locks in those underlying problems. Solar panels do not alleviate roof damage.
Your roofing material dictates your options. Composite shingles work with almost any system. Tile roofs need special hooks or a replacement system. Standing seam metal is ideal for clamp-on mounts that avoid penetrations.
2. Local Wind & Snow Load Codes: The Rulebook
Your local building department has rules for a reason. They’ve seen what wind and heavy snow can do.
A reputable installer will always pull a permit, and the mounting plan must be engineered to meet your area’s specific requirements. This isn’t just paperwork. It verifies the attachment points and rail strength can handle a 50-year storm.
Rail-less systems often need more attachment points per panel to meet these codes. Make sure your installer explains how their design meets the local load calculations.
3. Budget: Balancing Cost with Value
Costs vary. Penetrating mounts (rails or direct-attach) are often the most cost-effective upfront. Integrated systems (BIPV) carry a premium price.
Think beyond the sticker price. Consider the lifetime cost, including potential roof maintenance and panel removal for repairs. A slightly more expensive system that’s easier to service might save you money in 15 years.
Rail-less can save on materials but may cost more in labor. Get detailed quotes that break down equipment and labor.
4. Aesthetics: How It Looks From the Street
This matters to most homeowners, and it’s okay to care about it. The visual impact is real.
Rail-less and integrated systems offer the sleekest, low-profile look. They hug the roof contour. Traditional railed systems have a more industrial, “bolted-on” appearance.
Ask for photos of completed jobs using the proposed method on a roof like yours. See what you’ll be living with for the next 25 years.
5. Long-term Roof Health Goal: The Veteran’s Priority
This is where my crew’s experience really counts. Every penetration is a potential leak point, no matter how well it’s flashed.
We prefer methods that minimize holes. For a new standing seam roof, clamp-on is a dream. For a shingle roof, a direct-attach system with integrated flashing often seals better than a lag bolt through a standard L-foot.
Your primary roof’s job is to keep water out. The solar system’s job is to generate power. The mounting method should never compromise the first to achieve the second, especially considering the potential impact on roof integrity and lifespan.
Your roof sheltered you first. Choose a solar mount that returns the favor.
Common Questions
Which mounting method is best for my roof type?
Your roof material decides: penetrating racks for asphalt shingles, clamp-ons for standing seam metal, and ballasted trays for flat roofs. Always confirm your roof’s structure can handle the chosen system’s weight or penetrations first.
How do mounting methods affect roof warranties?
Penetrating mounts can void manufacturer warranties if installed incorrectly. Get a written, long-term weather-tightness warranty from your solar installer specifically covering leaks at the attachment points.
What factors should I consider when choosing a mounting method?
Start with a professional roof inspection to gauge condition and remaining lifespan. Then, prioritize local wind/snow codes, budget, and methods that protect your roof’s waterproofing above all else.
Making Your Roof Ready for Solar Power
From my time on the crew, the core lesson is simple. Your roof’s job is to shed water, so any solar mount must keep that primary function intact and secure. Invest in a method that creates a reliable, lasting seal.
You own the long-term health of your roof system. Commit to regular check-ups, prioritize safety in all maintenance, and keep learning about proper Roof Care for your specific material from trusted guides.
Ray Huffington
Ray is an experienced roofer. He has worked as a general contractor in the roofing industry for over 15 years now. He has installed and repaired all kinds of roofs, from small houses to large mansion, and from basic shingles to cement and metal roofs and even solar roof panels. He has seen homeowners struggle with roofing questions and always has experience based proven advice to help those in need. If you need roof pros, Ray's your guide.