
How Do You Build a Gable Roof Over a Doorway? A Veteran Roofer Explains
Looking to add character and weather protection to your front door? A well-built gable roof does exactly that, and I’ve installed more than I can count.
You might be thinking about tricky cuts or whether it will hold up in a storm. I’ll show you how to do it right, from the ground up.
This guide will cover planning your roof’s size and pitch, constructing a solid, safe frame, and installing roofing and flashings for a leak-proof finish.
The Truth About This Project: A Roofer’s Safety First Warning
Let’s be clear. Building a roof structure over a doorway is not a beginner’s weekend project.
You are working with heavy materials at a dangerous height. I’ve walked hundreds of roofs, and the margin for error on a small canopy is zero. If you choose to do this yourself, you must commit to the right gear.
- A full roofing harness system, not just a belt.
- Properly installed anchor points on your main roof structure.
- Roof jacks and planks to create a stable work platform.
- Sturdy, secured ladders with a 3-foot extension above the landing point.
The risks are real. A slip from even 10 feet can change your life. The pitch, or steepness, makes simple tasks like holding a board difficult. If the new structure isn’t tied correctly into your home’s framing, it can sag, leak, or even detach in a storm. Always look up for overhead power lines before moving long pieces of lumber.
Before you buy a single 2×4, you need to talk to your local building department. Most areas require a permit for this work. An inspector needs to verify your plans and the structural connection. Building without a permit can lead to fines, force you to tear it down, and will almost certainly void your home insurance if something goes wrong.
My honest advice? For most homeowners, hiring a licensed contractor is the smartest path. They handle permits, liability, and have the experience to build it right the first time.
Planning Your Door Canopy: Size, Pitch, and Looks
Good planning prevents a wobbly, leaky mess. Start with size. How far out from the door should the roof project? A good rule is at least 18 inches to keep rain off someone standing there. For width, extend at least 12 inches beyond each side of the door frame.
Next is pitch. Pitch is just how steep the roof is. A quick roof pitch calculation converts rise over run into the familiar ratio. In the next steps, we’ll show how to measure rise and run to determine your roof pitch. We say it as a ratio, like 6/12. That means for every 12 inches it goes out (horizontal run), it goes up 6 inches (vertical rise). For a small roof like this, I recommend a steeper pitch, like 6/12 or even 8/12, because it sheds water and snow much faster. Think of a steep hill versus a gentle slope. Water runs off the steep one immediately.
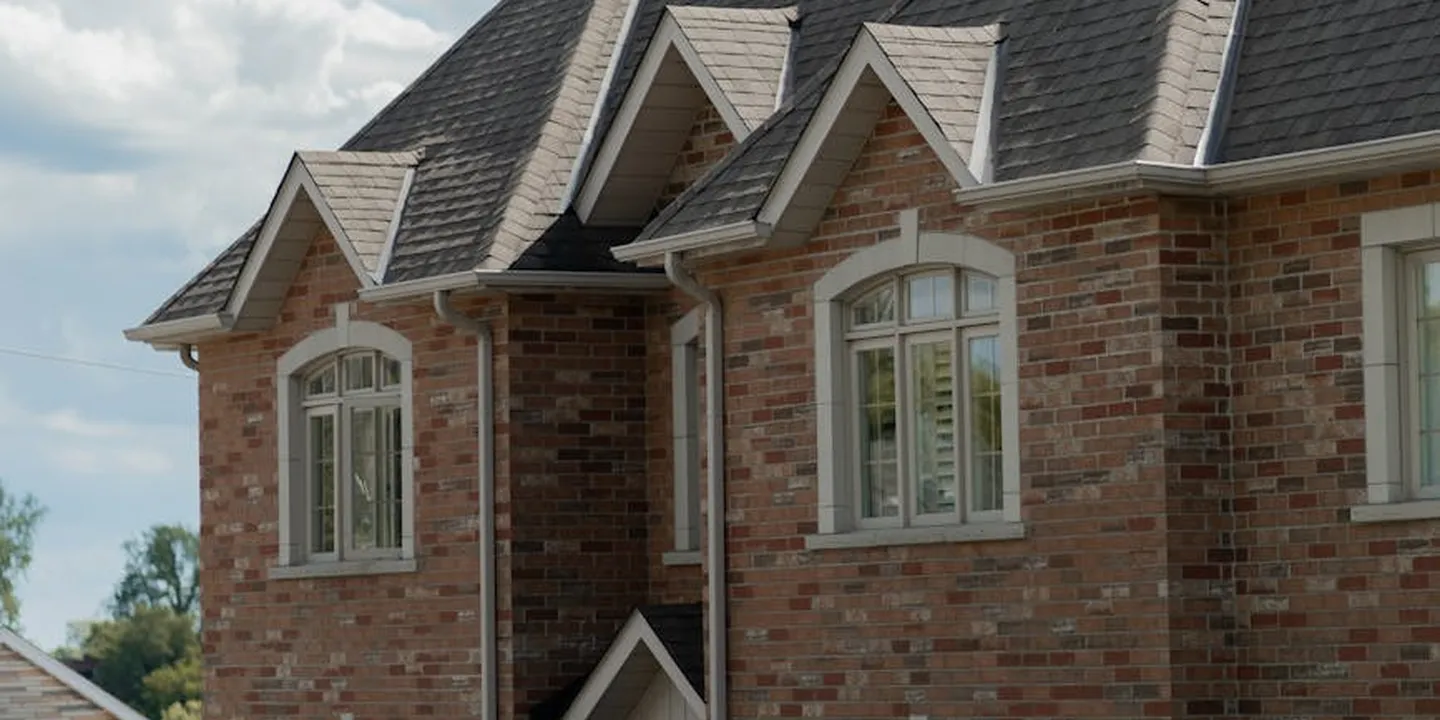
You’re building a gable end roof, the classic triangle shape. Keep it simple. A dutch gable (a gable on top of a hip roof) or a cross gable (where two gables meet) are for larger structures like a full front porch gable roof. They involve complex valley flashing where the roofs meet. That’s a leak waiting to happen for a DIYer.
Your material choice changes the game. Using cedar for rafters and trim gives a beautiful, custom look, but it needs regular sealing. For a low-maintenance option, I often use pressure-treated lumber for the structure wrapped with PVC trim boards. PVC won’t rot or need paint, letting you focus on the roof covering itself, like shingles or metal.
Gathering Your Gear: Tools and Materials List
You can’t build a sturdy roof with the wrong gear. I learned that the hard way on my first patio roof job. Having everything ready before you climb the ladder saves hours of frustration.
Here is your toolkit.
- Circular Saw (for clean lumber cuts)
- Speed Square (for marking rafters and checking angles)
- 4-Foot Level (a true friend for keeping everything plumb)
- Hammer Drill (for drilling into your home’s framing)
- Pneumatic Nail Gun (or a reliable hammer)
- Tape Measure
- Chalk Line
- Safety Glasses and Gloves
Your materials list is just as important. The right materials here stop problems with water, rot, and wind before they ever start.
- Framing Lumber: Use pressure-treated wood for any posts touching the ground. Use standard, straight kiln-dried lumber (like 2×6 or 2×8) for the rafters and ridge board.
- Roof Sheathing: 1/2″ or 5/8″ OSB or plywood. This is your roof’s solid floor.
- Underlayment: A synthetic underlayment is my go-to. It’s tougher and less prone to tearing than old-fashioned felt paper.
- Drip Edge & Ice & Water Shield: Metal drip edge seals the roof edges. Ice and water shield is a sticky membrane. You install it along the edge where the new roof meets your house wall. This is your main defense against leaks.
- Roofing Material: Match your main house roof if you can. Asphalt shingles are common. Metal panels or cedar shakes work too. Your choice changes the installation steps a bit.
- Flashing: This is not optional. You need step flashing for the side walls and counter flashing to seal it against the house siding. High-quality roofing caulk is your backup sealant.
- Fasteners: Galvanized or, even better, stainless-steel nails and screws. They won’t rust and stain your roof.
Choosing durable, code-compliant materials is the first step in learning how to build a gable patio roof that lasts. Understanding roof construction types and their materials systems helps you pick the right setup. Skimp here, and you’ll be fixing leaks in a year.
Building the Bones: Framing the Gable Structure
This is where your roof takes shape. Think of it like building a skeleton. If the bones are crooked, the whole body is weak. I like to build the two main gable ends, or trusses, on the ground first. It’s safer and more accurate, especially when you understand the design principles of the gable end.
Start with your ridge board. This is the horizontal beam that runs along the very peak of your roof. Your rafters will attach to it on both sides.
Next, cut your rafters. This is where your speed square earns its keep. You need to cut a birdsmouth at the bottom of each rafter. A birdsmouth is a two-cut notch that lets the rafter sit flat on your wall’s top plate while keeping the roof at the proper slope. It looks like a bird’s open mouth, hence the name. Without this cut, your rafter has only a tiny point of contact. With it, you have a wide, stable seat.
Once your rafters are cut, assemble one gable end on the ground. Attach two rafters to the ridge board, then add any vertical “king post” and bottom crosspiece. Repeat for the second gable end.
Now, attach the ledger board to your house. This is the most critical structural connection you will make. The ledger is a sturdy board that supports the end of your rafters against the house.
Do not just screw it to your siding. You must find the solid wood framing studs behind the siding. Use a stud finder. Secure the ledger board with long, thick lag screws or bolts that sink deep into those house studs. I always add a metal flashing strip behind the top of the ledger before I bolt it up. This kicks any water that gets behind it back out onto the roof.
With the ledger secure, you can lift your pre-built gable ends into place. Brace them perfectly plumb. Then, run your ridge board between them and install all the intermediate rafters. Framing the gable roof structure correctly is about precision in these connections: the birdsmouth to the wall, the rafter to the ridge, and the ledger to your home. Understanding gable roof connection methods helps ensure these joints transfer loads properly and stay secure. In the next steps, we’ll outline the common methods for tying the gable ends to the walls, ridge, and ledger. Get these right, and the rest is straightforward sheathing and roofing.
The Critical Lift: Attaching and Sheathing the Roof

Lifting the pre assembled gable frame into place requires a crew and a plan. I never do this with less than two people, and three is safer. You and your helpers lift from below, guiding the structure up until the rafter tails sit flat against the ledger board on your house. Rushing this lift is how frames get dropped or people get hurt, so take it slow and communicate.
Once it is up, do not bolt it down yet. First, make it plumb and level. Hold a 4 foot level against the gable end. While one person steadies it, another screws temporary 2×4 braces from the frame to the ground or a stable part of the house. These temporary braces hold everything perfectly square while you work on the permanent connections.
Permanent attachment is about strength and code. Drill through each rafter and into the house ledger board. Use galvanized through bolts with washers for a clamp like hold. Then, add metal hurricane ties at every rafter to ledger joint. Through bolting and hurricane ties work together to resist gravity and wind uplift, which is non negotiable for a safe roof. I learned this on a coastal job where missing ties led to a warranty call after a storm.
With the frame locked down, you can sheath it. Sheathing turns a skeleton into a solid deck.
- Nail a continuous edge board along each sloped rake. This gives you a clean edge for the drip edge later.
- Measure from the peak down to the eave and cut your plywood or OSB panels to fit. A circular saw works fine here.
- Always stagger the vertical seams between panels. Think of it like brickwork, never stacking seams directly on top of each other.
- Nail the panels with 8d ring shank nails. Space them every 6 inches along panel edges and every 12 inches in the middle of the panel.
A tight, staggered sheathing job prevents future sagging and gives your roofing materials a firm base to grip.
Skin and Seal: Waterproofing is Everything
This is the answer to the common question of how you ensure a roof is sealed. Waterproofing is a layered system, and skipping a layer invites a leak.
Start from the bottom up. Install metal drip edge along the eaves and rakes first, nailing it into the sheathing. The drip edge acts like a gutter’s lip, guiding water clear of your wood trim and into the gutter system.
Next, address the most vulnerable spot, the valley where your new roof meets the house wall. Roll out a 3 foot wide strip of ice and water shield adhesive membrane here. Stick it firmly to the sheathing and extend it up the wall at least 6 inches. This self sealing membrane is your primary defense against water driven uphill by wind or ice dams.
Now, cover the entire deck with synthetic underlayment. Overlap each horizontal row by 6 inches. Secure it with plastic cap nails. This underlayment is your backup roof, just in case.
The critical junction is where the roof meets the wall. This is where step flashing and counter flashing come in.
- As you install your roof covering, integrate one L shaped piece of step flashing under each course. Each piece overlaps the one below it.
- Then, tuck a piece of counter flashing up under the existing siding and bend it down over the step flashing.
Proper step and counter flashing create a shingled, interlocked barrier that sheds water down the roof and away from the wall, not into it. I have repaired dozens of roofs where a single piece of bent metal was used here instead, and every one leaked.
For the final roof covering, match your house for a seamless look on a gable porch. If using asphalt shingles, start at the eave and work up, following the nail line printed on the shingles. If tying into an existing roof, weave the new shingles under the old ones at the top. For metal roofing, ensure the panels and closures are compatible.
Finish the job with water management. Add a small aluminum gutter along the eave. Pitch it slightly toward a downspout that carries water at least 5 feet from your foundation. A small gutter completes the system by controlling runoff, which protects your landscaping and basement from water damage.
After the Build: Care, Maintenance, and Real Costs
Your new roof is up. It looks great and keeps you dry. Now, you need to keep it that way for years. Maintenance is simple but non-negotiable.
Think of it like checking the oil in your car. A few minutes twice a year saves you a major headache later.
Your Simple Maintenance Checklist
I tell my clients to do a quick visual check in the spring and fall. That’s it. Follow this simple list.
- Check for debris. After a storm, look for piled-up leaves or twigs on the small roof. They hold moisture against the shingles.
- Inspect seals and flashing annually. This is your most important job. Get on a ladder and look at where the new roof meets the house wall. Run your eyes along all the metal flashing. You’re looking for any gaps, cracks, or sections that have lifted.
- Clean the gutters. If your gable roof has gutters, keep them clear. Clogged gutters cause water to back up and seep under the roofing materials.
Catching a tiny crack in the flashing early means a $10 tube of sealant. Missing it means a $1,000 water repair inside your wall.
What This Project Really Costs
Let’s talk numbers. I’ve seen too many homeowners get shocked by quotes because they didn’t know what drives the price. Your cost boils down to one choice: DIY or hire a pro.
The DIY Route (Materials Only)
If you have solid carpentry skills and the right tools, you can save on labor. You’re still buying everything.
- Basic Asphalt Shingle Roof: $300 – $800. This covers rafters, plywood, shingles, drip edge, and flashing for a small 4×4 to 6×6 structure.
- Standing Seam Metal Roof: $800 – $2,500+. The metal panels cost more, and the trim details are trickier. The finish is durable and sleek.
Remember, this is just for the stuff. Your time, your risk on the ladder, and your potential for mistakes are the hidden costs.
Professional Installation (Full Cost)
Hiring a licensed contractor gets you a warranty, proper permits, and peace of mind. Here’s what you’re paying for.
- Basic Asphalt Shingle Roof: $1,500 – $3,500.
- Standing Seam Metal Roof: $3,000 – $6,000+.
These ranges are wide because three big factors change the price: the size of the roof, your material choice, and how complex your house wall is to tie into.
What Drives The Final Price?
When a pro gives you a quote, they’re weighing these factors.
- Size: A roof over a single door is cheaper than a grand portico covering a double-door entryway. More materials, more labor.
- Material Choice: Basic 3-tab asphalt shingles are the budget-friendly workhorse. Architectural shingles cost 30-50% more and look better. Metal roofing is a premium, long-term investment.
- Site Complexity: Is the wall under the roof simple siding, or is it brick or stone? Brick requires special flashing and drilling, which adds time and cost. Is the area easily accessible, or is there a garden or deck in the way?
This breakdown directly addresses how to add roof over front door budget questions. Now you know why one quote might be $2,000 and another is $4,500.
The Flashing is Everything
I want to end this section by hammering one point home. You can have the prettiest shingles or metal panels made, but if the flashing is wrong for the roof, it will leak.
Flashing is the thin metal (usually aluminum or galvanized steel) that seals the joints. It directs water away from the vulnerable spots where the roof meets the wall, especially when used in tin metal roof installations.
Skimping on flashing to save $150 is the most expensive mistake you can make. A proper installation with integrated step flashing and counter-flashing is an investment that protects the entire structure of your home.
On my jobs, I spend as much time detailing the flashing as I do putting up the roof deck. That’s the difference between a cover that lasts a season and one that lasts for decades.
Common Questions
How do I inspect the finished roof for problems?
Do a visual check twice a year. Look for lifted, cracked, or corroded flashing where the new roof meets the house, and ensure the gutter is clear of debris.
What’s the most common mistake with the roof-to-wall connection?
Using only caulk or a single piece of bent metal instead of proper step and counter flashing. This will fail. The only correct fix is to install interlocking metal flashing.
Can I use this method for a larger structure, like a full porch?
The principles are the same, but the engineering is not. For any roof wider than a simple doorway, you must consult a structural engineer or licensed contractor to size beams and footings correctly.
Ensuring Your Doorway Roof is Built to Last
From my experience, the best advice I can give is to always build with a steep enough pitch and install robust, code-compliant flashing. Get these two things right, and your gable roof will protect that doorway from the worst weather for years.
Take charge by scheduling seasonal inspections and tackling any repairs safely with the right gear. Always follow roof repair safety practices—secure ladders, use fall protection, and inspect tools before use. Prioritizing safety in every repair step helps protect you and your home. Keep building your skills with our resources on roof care, maintenance, and all types of roof guides to ensure your whole home stays protected.
Ray Huffington
Ray is an experienced roofer. He has worked as a general contractor in the roofing industry for over 15 years now. He has installed and repaired all kinds of roofs, from small houses to large mansion, and from basic shingles to cement and metal roofs and even solar roof panels. He has seen homeowners struggle with roofing questions and always has experience based proven advice to help those in need. If you need roof pros, Ray's your guide.