
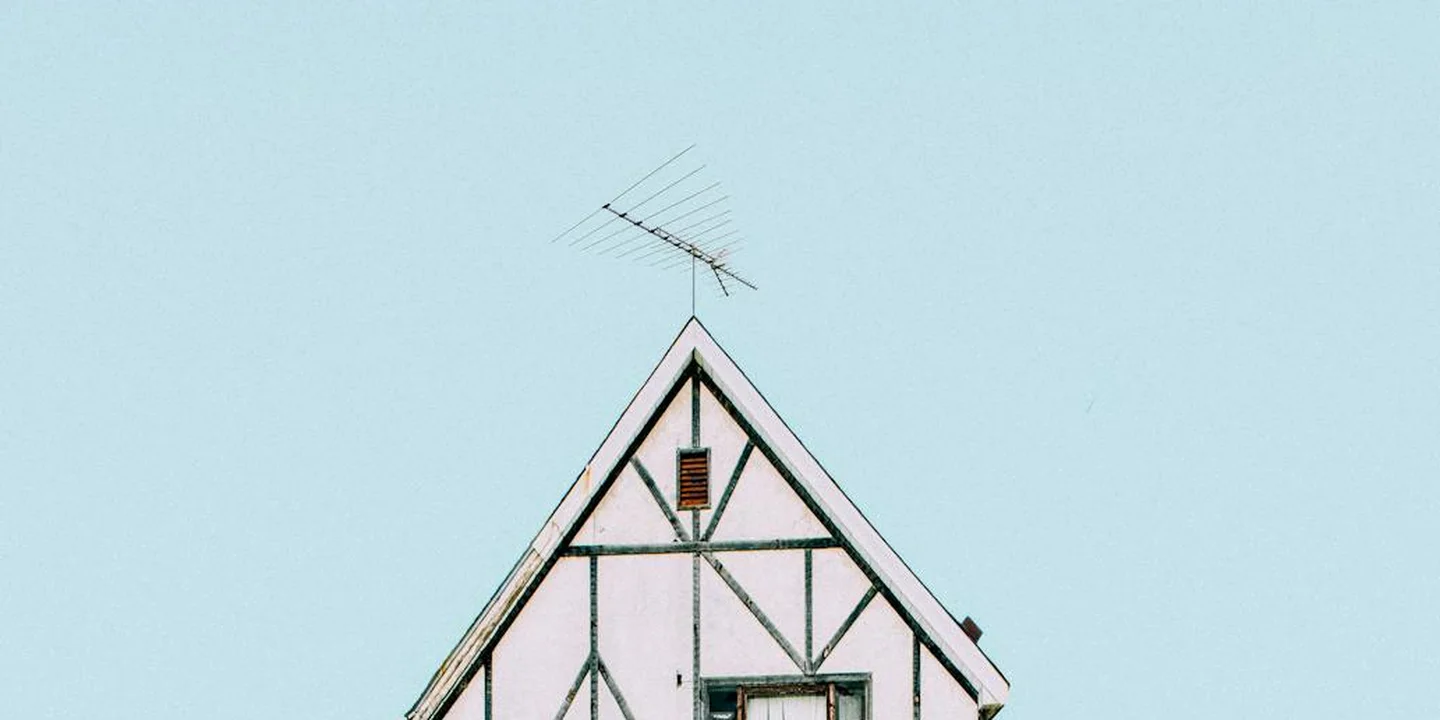
How Do You Calculate Roofing Squares and Estimate Shingles for a Gable Roof?
Ever stood in your yard, looking up at your roof, and felt lost on how to start measuring? I’ve been on countless jobs where a wrong measurement meant wasted shingles and budget overruns, so getting this right from the start is key.
I’ll walk you through the three core skills: calculating roofing squares, measuring gable roof area, and estimating your shingle needs.
Key Takeaways: Your Roof Math Cheat Sheet
Before you grab your ladder, let’s get the basics straight. This quick list sets you up for success.
A “roofing square” is just roofer talk for 100 square feet of roof area. Shingles, underlayment, and other materials are all sold based on this unit.
You only need three simple tools: a long tape measure (100-foot is best), a sturdy ladder, and a notepad to write everything down.
Getting your measurements right the first time saves you a major headache. Ordering too few materials stops the job cold, while too many wastes your money.
Remember, a roof’s pitch (its steepness) is not just for looks. A steeper slope means a much larger surface area than your house’s footprint. Understanding how slope affects drainage is essential for choosing the right installation techniques. In the next steps, we’ll dive into roof slope drainage techniques.
Roofing Squares Decoded: The Language of the Pros
When I first started, I thought my boss was talking about actual squares. I quickly learned it’s all about the math.
In roofing, a “square” isn’t a shape. It’s a unit of measurement equal to 100 square feet. It’s the standard language for ordering materials and estimating jobs.
Roofers use squares because it simplifies everything. Think of it like buying eggs by the dozen instead of counting each one. Bundles of shingles are designed to cover a fraction of a square, so working in this unit makes the math clean and reduces errors.
So, how do you calculate roofing squares? It’s simple division. First, find your total roof area in square feet. Then, divide that number by 100.
For example, if your roof area measures 2,300 square feet, you divide by 100. That gives you 23 squares. You’d order your materials based on 23 squares, not 2,300 square feet. It’s that straightforward.
Does the Roof Overhang Count as Square Footage?
Yes, absolutely. This is a critical detail that many DIYers miss.
The overhang, which includes the eaves (the part that extends past your exterior walls) and the rakes (the sloped edges at the gable ends), is a vital part of your roof’s waterproofing shell. It must be covered with shingles and underlayment.
To measure it safely, you often don’t need to climb onto the roof. From your ladder at the eave, measure straight out from the wall to the farthest edge of the drip edge or shingle. For the rake, you can usually estimate this from the ground by seeing how far the shingles extend past the siding.
Leaving out the overhang is a classic mistake that leads to ordering one or two fewer bundles of shingles. On a job, that means an unplanned trip to the supplier or a bare spot on your roof. Always include it in your total.
Gearing Up: Tools and Safety for Roof Measuring
Before you climb, get your gear right. I’ve seen too many folks try to eyeball it from the ground or use a flimsy kid’s tape measure. That just leads to buying too much or, worse, not enough material.
The Essential Tool Kit
Gather these items first. A 25-foot tape measure is the minimum. A 100-foot tape is better for long runs without repositioning your ladder.
- 25-foot (or longer) Tape Measure: Get a metal one with a sturdy locking mechanism. The cheap plastic ones can flex, giving you a wrong number.
- Sturdy Ladder: An extension ladder that extends at least 3 feet above your roof’s edge. Make sure the feet are solid and the rungs are clean.
- Notebook and Pencil: Paper doesn’t lose signal. Write down every measurement as you take it. Label them clearly (e.g., “North side, eave to ridge”).
- Laser Measurer (Optional but Helpful): For high gables or long spans, a laser can be a lifesaver. It lets you measure from the safety of the ladder without walking the roof.
I learned the hard way that a $10 tape measure will fail you when you’re 20 feet up a ladder. Investing in good tools is the first step to an accurate estimate.
Non-Negotiable Safety Steps
Your safety is more important than any measurement. Roofer’s rule number one: no job is worth a trip to the ER.
- Use a Spotter: Never work on a ladder alone. Have someone hold the base steady for you. Their only job is to watch you and keep the ladder stable.
- Secure the Ladder: Set it on firm, level ground. The base should be one foot away from the wall for every four feet of height. Tie off the top to a secure point if you can.
- Wear Proper Shoes: Athletic shoes with flat, rubber soles are a must. No boots with deep lugs or worn-out sneakers. You need grip.
- Check the Weather: Do this on a clear, dry, calm day. Wind, rain, or morning dew make shingles and ladders dangerously slick.
A spotter isn’t just helpful, it’s critical. They can catch a wobble before you feel it. I’ve had my crew hold a ladder for a simple measurement more times than I can count. It’s standard practice.
When to Hand the Tape to a Pro
Be honest with yourself about your comfort level and your roof’s challenges.
Call a professional roofer for a measurement if your roof is steep (think a pitch you wouldn’t walk on without anchors), more than two stories high, or has a complex shape with lots of valleys, dormers, and hips.
There’s no shame in calling for backup. Pros have the training and insurance to handle risky measurements safely. The cost of their estimate is far less than a hospital bill.
The Accuracy Payoff
Precise tools lead to precise numbers. A flexible tape can sag over a long span, adding phantom inches to your measurement. A wobbly ladder makes it hard to hold the tape level.
When you start with accurate ground measurements, your final shingle count will be on target. This saves you money on wasted materials and multiple delivery fees.
Time spent checking your tools is never wasted. It’s the foundation of a good roofing plan. A reliable tape measure is the most important tool in your box for this job.
Step-by-Step: How to Measure a Gable Roof Area from the Ground
You want to know your roof’s size for shingles or to get an estimate. You do not need to climb up there. I always measure from the ground first. It’s safer and you can get a good number for planning.
This method gives you the total surface area of both roof slopes on a simple gable.
Step 1: Find Your Roof’s Footprint
Think of your roof’s shadow at noon. The area it covers on the ground is its “footprint.” For a simple gable roof, this is just a rectangle.
Grab your tape measure. You will measure the length and width of your house.
- Measure from one outer corner to the other along the side with the triangular gable ends. This is the length.
- Measure from the same side to the opposite side, under the peak of the roof. This is the width.
Your tape must go from the outside of the siding on one side to the outside of the siding on the other. This includes the roof overhangs (the eaves). If you cannot reach, use a ladder to get the measurement but keep your feet on the ladder, not the roof.
This length times width gives you the “plan area,” which is smaller than the actual sloped roof surface.
Step 2: Find Your Roof’s Pitch (Slope)
Pitch tells you how steep your roof is. Roofers say it as “rise over run.” A 6/12 pitch means the roof rises 6 inches for every 12 inches it goes horizontally.
You have two safe ways to find it.
Method 1: The Attic Check (My Favorite)
- Take a 2-foot level and a tape measure into your attic.
- Place one end of the level on the underside of the roof deck. Make it perfectly horizontal using the bubble.
- At the 12-inch mark on the level, measure straight down (vertically) to the roof deck.
- That measurement in inches is the “rise.” You now have your pitch (e.g., 6/12).
Method 2: The Smartphone Shortcut
Many free apps use your phone’s sensors to measure angles. Stand back from your house, point your phone at the roof slope, and it will give you the pitch. It’s not perfect, but it’s close enough for an estimate.
Once you know your pitch, use this chart to find your “pitch multiplier.” This number converts your ground footprint into the real roof area.
- 4/12 Pitch: Multiply by 1.054
- 6/12 Pitch: Multiply by 1.118
- 8/12 Pitch: Multiply by 1.202
- 10/12 Pitch: Multiply by 1.302
- 12/12 Pitch: Multiply by 1.414
Step 3: Calculate the Actual Roof Surface Area
Now we put it all together. Here is the formula I use on every estimate pad.
(House Length) x (House Width) x (Pitch Multiplier) = Total Roof Area (in square feet).
Let’s do a real example. Say your house measures 40 feet long by 30 feet wide, and you found it has a 6/12 pitch.
- Footprint Area: 40 ft x 30 ft = 1,200 square feet.
- Pitch Multiplier for 6/12: 1.118 (from the chart above).
- Actual Roof Area: 1,200 sq ft x 1.118 = 1,341.6 square feet.
That’s how you calculate roof area from the ground. Your 1,200 sq ft house has about 1,342 sq ft of roof surface. That extra 142 square feet is why you can’t just use your house’s footprint; the steeper the roof, the more shingles you need.
From Square Feet to Roofing Squares: The Final Calculation
This is where everything comes together. You now have your roof’s total area in square feet. You’re asking the right question: “How do I calculate roofing squares from this number?”
A roofing square is the standard unit of measurement for materials. It’s simple.
One roofing square equals 100 square feet of roof area. You calculate the number of squares by dividing your total square footage by 100.
The Simple Division You Need
Let’s say your gable roof calculation gave you a total of 2,150 square feet.
The formula is: Total Roof Area (sq ft) ÷ 100 = Number of Roofing Squares.
For our example: 2,150 ÷ 100 = 21.5 squares.
The Golden Rule: Always Round Up
You never order partial squares of shingles. In our example, 21.5 squares means you need to order 22 full squares.
This accounts for cutting waste, starter course shingles, and the ridge cap. I always add 10% extra for a standard gable roof. For a complex roof with lots of hips, valleys, and dormers, I add 15%.
Using our 2,150 sq ft roof, here is the safe calculation:
- Base squares: 2,150 ÷ 100 = 21.5 squares
- Add 10% waste: 21.5 x 0.10 = 2.15 squares
- Total needed: 21.5 + 2.15 = 23.65 squares
- Order: 24 roofing squares.
Calculating for Other Materials
The process changes slightly for materials like metal roofing. The math still starts with your total square footage. But instead of dividing by 100, you divide by the coverage area of one metal panel.
For example, if a metal panel is 3 feet wide and 12 feet long, it covers 36 square feet. For our 2,150 sq ft roof: 2,150 ÷ 36 = about 60 panels. You then add your waste factor. You order full panels, just like you order full squares of shingles.
Estimating Shingle Requirements: Bundles, Waste, and Starter
How do you estimate shingle requirements? You start with the roofing squares you already calculated. The golden rule for standard 3-tab asphalt shingles is simple.
Three bundles of asphalt shingles will typically cover one roofing square. It’s the baseline we’ve used on crews for decades. For a quick check, you can measure roof square footage and compare it to shingle coverage, using Google Maps to help estimate area.
The math is straightforward. Take your total roof area in squares and multiply by three.
Roofing Squares x 3 = Total Bundles (approximate)
For example, a 25-square roof would need about 75 bundles (25 x 3). I like to lay this out in a simple table when I’m planning a job.
| Roof Area (Squares) | Approx. Bundles Needed (3 per sq.) |
| 15 | 45 |
| 20 | 60 |
| 25 | 75 |
| 30 | 90 |
This number is your starting point, not your final order. You must account for cuts, mistakes, and the special shingles you can’t forget.
How Much Should I Order for Waste and Mistakes?
How do you calculate how much roofing material you need for a real project? You add a waste factor. You will have off-cuts. You will mis-cut a shingle. Valleys and hips use more material.
For a simple gable roof, I always add 10% to 15% extra material for waste. For a roof with many dormers, valleys, or a complex shape, plan for 15% to 20%.
Let’s go back to our 25-square roof. The base was 75 bundles. Adding 10% waste (7.5 bundles) brings the total to about 83 bundles. You round up, never down.
Two items homeowners often miss are the starter course and the ridge caps. The starter course goes along the eaves. Ridge caps cover the peak. They are specific products.
You must include special starter shingles and ridge cap shingles in your total material order. Do not plan to use your field shingles for these jobs. It leads to a weak roof edge and a poor seal at the ridge.
One more critical tip. Shingle color can vary slightly between production runs, called dye lots. Buy all your shingles from the same dye lot to ensure a perfect color match across your roof. If you need to order more later, the color might be off. When planning color, consider your home’s exterior and surroundings. In the next step, we’ll explore roof shingle color choices to help you pick a complementary shade.
Shingle Types and How They Affect Your Order
The 3-bundles-per-square rule applies to classic 3-tab shingles. Modern dimensional or architectural shingles are different. They are thicker and heavier. They often cover the same area with fewer bundles. This difference also matters when you compare roof shingle materials to choose the best option for your home. A quick comparison of materials can reveal which shingles balance durability, weight, and cost.
Many architectural shingles only need 2 to 2.5 bundles to cover one square. This changes your entire calculation. Knowing the shingle bundles per roofing square streamlines your estimate. Multiply that by the number of squares to size your order precisely.
Always, always check the ‘Coverage’ label printed right on the shundle wrapper. Do not guess. The manufacturer will state exactly how many square feet that bundle covers. Use that number for your math.
The weight matters too. Three bundles of standard shingles weigh about 60 pounds per square. Architectural shingles can weigh 70 pounds or more per square. It adds up.
A heavier roof means more weight on your framing. If your roof structure is older, this is a factor to consider. Most homes handle it fine, but it’s a question for a pro if you have any concerns about the strength of your rafters.
The RoofMason Material Verdict: Asphalt, Metal, or Slate?

Picking roof material feels overwhelming. I get it. After thirty years with the crew, I’ve laid miles of all three on gable roofs. We’ll break down the pros and cons of different roofing materials and styles, so your choice aligns with cost, climate, and what your house can literally carry.
Let’s compare asphalt, metal, and slate like you’re choosing tools for a job. Each has its place.
Weight, Resistance, and Cost: The Core Comparison
Think of a “square” as a 10-foot by 10-foot patch of roof. That’s your unit for everything here.
| Material | Weight per Square | Impact/Hail Resistance | Fire Rating | Cost per Square (Materials Only) |
|---|---|---|---|---|
| Asphalt Shingles | 250 to 350 pounds | Fair to Good. Modern impact-resistant grades help. | Typically Class A | $100 to $150 |
| Metal Roofing | 50 to 150 pounds | Excellent. Hail dents it but rarely punctures. | Class A | $300 to $600 |
| Slate Tiles | 800 to 1,500 pounds | Superior. It’s stone. It doesn’t care about hail. | Class A (Non-combustible) | $800 to $1,500 |
The cost range is wide, but the weight tells the real story for your home’s structure. I once had to walk away from a slate job because the old rafters would have sagged within a year.
My Best Bang-for-Buck Recommendations
Your local weather decides the winner. Here’s my field-tested advice.
For most temperate climates, asphalt shingles are the reliable choice. They are cost-effective and perform well. In regions with occasional severe storms, spend a bit more on impact-resistant asphalt shingles rated Class 4. They saved a client’s roof in Ohio last spring.
Choose metal roofing if you’re in hail alley or deal with heavy snow. The upfront cost is higher, but it lasts. Metal is my go-to for hail-prone areas because it minimizes insurance claims and repair headaches. A standing seam metal roof I installed a decade ago in Colorado still looks new.
Slate is for historic homes or budgets where money is no object for longevity. Its weight and cost rule it out for most.
Why Weight Load and Codes Matter
Material choice is a structural decision. Slate weighs a ton, literally. Your roof framing must be engineered to handle the dead load, or you violate building codes and risk collapse. Local codes specify load limits.
Always check your roof’s capacity before selecting heavy materials like slate or even concrete tile. Metal is often a smart upgrade for older homes because it’s so light. Asphalt is the standard weight most residential frames are built for.
Code & Compliance Check: What Your Estimate Must Include

Your square footage is just a start. The real number that matters is one that gets your roof past the inspector and keeps your wallet safe for decades. Your material list and labor quote must account for local building codes, or you’re buying a roof that isn’t legal to install.
Local Building Permits: The Non-Negotiable First Step
Before you price a single shingle, call your local building department. Most areas require a permit for a full re-roof. The permit fee is not a tax. It’s your guarantee that a third-party inspector will check the critical work, especially when it involves multiple layers of shingles.
I’ve been on jobs where the homeowner tried to skip the permit to save a few hundred dollars. When they later sold the house, the lack of permit paperwork lowered the home’s value and caused a major headache. Always factor the permit cost and timeline into your project plan from day one.
Wind Uplift Ratings: Your Shingle’s Secret Code
Look at any shingle bundle. You’ll see a code like “ASTM D7158 Class F” or “UL 997 Class H.” This is the wind uplift rating. It tells you how much wind force the shingles are tested to withstand when installed correctly.
Your local building code sets a minimum required class based on your area’s wind speed maps. In coastal Florida, you’ll need a Class H (up to 150 mph). In a calmer Midwest suburb, Class D (up to 90 mph) might be fine. Using a shingle with a lower rating than your code requires is like wearing a raincoat made of paper in a storm it simply won’t hold. Your roofer must specify the correct class on your estimate.
Manufacturer Warranties and the Nail That Voids Them
That 30 or 50-year shingle warranty is full of fine print. The manufacturer only guarantees their product if it’s installed exactly to their specs. The biggest trip-up is the nailing pattern.
Most architectural shingles require 6 nails per shingle in a specific zone. Use 4 nails, or nail outside the marked area, and you’ve voided the warranty before the last bundle is off the roof. Your written estimate should state that installation will follow the manufacturer’s instructions to preserve the full warranty. If a roofer scoffs at this, find another crew.
The High Cost of Skipping the Research
Ignoring code isn’t just about a failed inspection on installation day. It creates long-term risk. If a windstorm damages a roof installed with under-rated materials, your insurance company has grounds to deny the claim.
I saw this happen after a hail storm. The homeowner had a cheap roof installed with no permit. The insurance adjuster noted the improper underlayment and denied coverage for the interior water damage. Protect your investment by making code compliance a line item in your planning, not an afterthought. A legitimate roofer will welcome these questions because they do this work every day.
Common Pitfalls and Pro Tips for a Flawless Estimate
Getting your math right is the most important step. I have seen too many jobs get messy because someone skipped a detail on the ground.
The Mistakes I See Every Season
These are the big ones that throw your square count off.
- Forgetting Dormers and Valleys: People measure the main rectangle of their roof and call it a day. A dormer is a mini-roof with its own planes. Valleys use extra shingles for weaving and sealing. If you ignore them, you will be short on materials.
- Ignoring Ridge Length: Ridge cap shingles are separate from your field shingles. You need the linear length of all your roof ridges and hips. Forgetting to add this is a sure way to end up with an unfinished roof peak.
- Mis-Measuring Pitch: Guessing the slope is a bad plan. A 6/12 roof needs more material per square foot than a 4/12 roof. Use the 12-inch level and tape measure method. Do not just eyeball it from the ladder.
A Rule from My Tool Belt: Measure Twice, Order Once
Here is my process. First, I sketch the roof. I label every plane, dormer, and valley. I write down each measurement right on the sketch.
Then, I add 10% for waste. This covers starter course cuts, trim, and mistakes. For complex roofs with lots of hips and valleys, I might add 15%.
Always order a couple of extra bundles beyond your calculated waste factor. On a job last spring, we found a soft decking spot that needed repair. Those extra bundles meant we did not have to stop work and wait for a delivery. They are your safety net.
What to Do With Leftover Shingles
Do not just leave them leaning against the garage. Store them right for future repairs.
- Keep them in a cool, dry place like a basement or a shed. Heat and moisture can make shingles stick together.
- Lay them flat. Do not stand them on end. This keeps them from warping.
- If you have partial bundles, wrap them tightly in a plastic tarp. This keeps the color from fading and protects them from dust.
Matching shingles for a small repair in five years is much easier when you have the originals.
The Bottom Line
A precise estimate is the foundation of a good roof job, whether you are doing it yourself or hiring a pro. It controls your budget, prevents delays, and ensures the crew has exactly what they need to work efficiently. Good math leads to a good roof.
Quick Answers
Should I measure the roof overhang, and how do I do it safely?
Yes, you must include the overhang-it’s part of the waterproof shell. To measure it safely, use a ladder to measure the eave from the wall out, and estimate the rake extension from the ground; you don’t need to walk the roof.
How much extra should I order for waste on a simple gable roof?
Always add a 10% waste factor to your total square footage for cuts and starter courses. For your final order, round up the total number of bundles to the nearest whole number-it’s cheaper than a second delivery.
Do different shingle types change how many bundles I need?
Absolutely. Modern architectural shingles often require only 2-2.5 bundles per square, not 3. Never guess; always check the ‘coverage’ label printed on the bundle wrapper for the exact square footage it covers, especially if you’re figuring out the shingles needed to cover your roof.
Your Roof Estimate: From Plan to Protection
From my years on the crew, I’ve seen that a careful measurement is your best defense against wasted time and money. Get this right, and you build a foundation for a durable, reliable roof.
Owning a roof means embracing the duty of safe, proactive care. Keep learning about materials and maintenance-it’s how you safeguard your home for years to come.
Ray Huffington
Ray is an experienced roofer. He has worked as a general contractor in the roofing industry for over 15 years now. He has installed and repaired all kinds of roofs, from small houses to large mansion, and from basic shingles to cement and metal roofs and even solar roof panels. He has seen homeowners struggle with roofing questions and always has experience based proven advice to help those in need. If you need roof pros, Ray's your guide.