
Spray vs. Brush-On Roof Coatings: Which Should You Use?
Have you ever wondered if a roof coating could fix your minor leaks or sun damage, but felt overwhelmed by the options? I’ve been on hundreds of roofs where this decision made all the difference. Choosing between a spray treatment and a brush-on sealant isn’t just about price it’s about lasting protection for your home.
I’ll walk you through how each method works on a real roof, where each one excels or fails, and my straightforward advice for picking the winner for your situation.
Key Takeaways: Quick Facts Before You Start
Spray treatments apply a coating fast over large, simple areas, while brush-on sealants give you careful control for detailed work and repairs.
Spray coatings win in these three scenarios:
- Covering a large, flat commercial roof or a simple residential garage.
- When time is critical and you need to beat incoming weather.
- Applying a highly reflective, uniform coat to reduce cooling costs.
Brush-on sealants are better here:
- Sealing specific leaks around vents, pipes, or chimneys.
- Working on a steep, pitched roof where overspray is a major concern.
- Handling a small, DIY project where buying spray equipment isn’t worth it.
For a DIY project, budget $0.50 to $1.50 per square foot for materials. A professional application typically costs $1.50 to $4.00 per square foot, including labor and materials for either method.
The single most important safety tip is to use proper fall protection, like a harness tied to a secure anchor point, every single time you’re on a roof. A bucket of sealant won’t help if you take a fall.
If you see widespread sagging, soft spots you can feel when walking, or rotted decking, skip the coating. That’s structural damage, and you need to call a professional roofer for a full assessment.
What is a Roof Coating, Really? And Is It a Repair or a Band-Aid?
Think of a roof coating as a heavy-duty, liquid rain jacket for your roof. You apply it as a liquid, and it cures into a seamless, waterproof membrane that sits on top of your existing roof material. For residential roofs, rubber roof coatings are a popular option because they stay flexible with temperature shifts. They seal seams and protect against leaks, making them a natural next step to explore.
Its main jobs are to seal out water, block UV rays that break down asphalt, and reflect sunlight to keep your building cooler. A good coating can add 5 to 10 years of life to an aging but sound roof, which is a smart financial move.
You must understand what a coating cannot do. It cannot fix a roof deck that’s rotting from the inside out. It won’t magically re-support sagging rafters. If your roof has major structural issues, a coating is just an expensive band-aid that delays the inevitable repair.
In a long-term roof care plan, a coating is a proactive maintenance step, not a last-ditch rescue. It’s for roofs that are tired and worn but still fundamentally solid. I’ve used coatings successfully to postpone a full replacement by a decade on several of my past projects. Coatings are one example of roof value treatments that help protect your investment. We’ll build a detailed comparison chart in the next section to make your choice clear.
Common Coating Types Beyond Basic Sealants
The “battle” isn’t just spray vs. brush. The base material matters. The three main types are acrylic, silicone, and asphalt-based (or aluminum).
Acrylic coatings are like a durable, breathable raincoat. They’re water-resistant but allow moisture vapor to escape, which is good for roofs that might have a little trapped moisture. They are often the most cost-effective and offer great reflectivity.
Silicone coatings are your ultimate waterproof rubber suit. For roofs in consistently wet climates or with poor drainage, silicone’s water resistance is unmatched. The trade-off is that dirt can stick to them more easily, and they typically cost more.
Asphalt-based or aluminum coatings are the old-school workhorses. They’re thick, often used on lower-slope roofs, and are great for restoring weathered asphalt surfaces. They are less reflective but very durable against the elements.
Choose silicone if you fight ponding water or heavy rain often. In hot, dry, sunny climates, an acrylic coating’s reflectivity and breathability often make it the better choice.
The Great Showdown: Spray Treatment vs. Brush-On Sealant
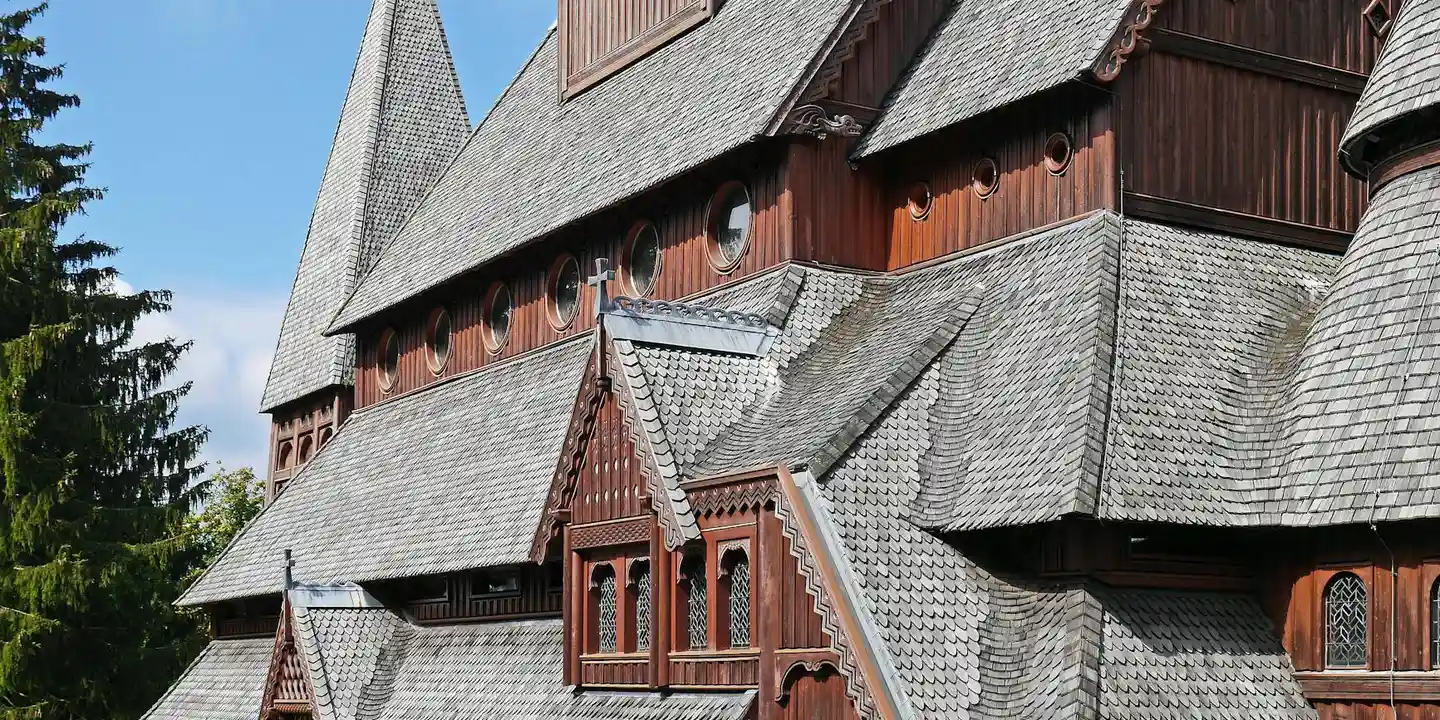
Choosing a roof coating often feels like picking a tool for a job. Do you grab the power sprayer for speed, or the trusty brush for control? This isn’t about which product is universally better, but which one is the right tool for your specific roof. Here’s a quick, scannable breakdown to start the comparison.
| Factor | Spray-On Treatment | Brush-On Sealant |
|---|---|---|
| Core Idea | Like using a garden sprayer to mist a fine layer over a large area. | Like painting a wall by hand with a roller and brush. |
| Best For | Large, flat surfaces, intricate details like pipes, and speed. | Small repairs, thick protective layers, and areas needing precision. |
| Biggest Challenge | Controlling overspray and needing calm weather. | The physical labor and time required for even coverage. |
Spray-On Coatings: The Power Tool Approach
You apply a spray coating with a pump sprayer, from a simple garden model to a professional airless rig. It lays down a fine, mist like layer that can cover vast areas quickly. The main advantage is speed you can coat a large flat roof in a fraction of the time it takes to brush it on. It also gives very even coverage and gets into nooks and crannies around vents and pipes that a brush might miss.
But there are trade offs. Wind is your enemy, as it can blow the coating onto your siding or plants. You also typically get a thinner film per coat, which might mean applying more layers for the same protection. I remember a job on a sprawling warehouse flat roof. The crew used a spray system to apply a reflective coating in one long day. Using spray was the only practical way to seal that massive surface before afternoon thunderstorms rolled in. It saved the schedule and the roof.
Brush-On Sealants: The Paintbrush Precision Method
This is hands on work. You use rollers for open areas, brushes for edges, and squeegees to spread the product evenly. Brush on application gives you maximum control over where the coating goes and how thick it is. You can build up a substantial, durable film in one go, which is ideal for sealing seams or covering a small repair spot.
The downside is it’s slow and physically demanding. On a big roof, it feels like painting a house by hand. If you’re not careful, you can leave lap marks or uneven spots. Think of it like this, spraying a wall is fast, but brushing it lets you fill every tiny crack. For a focused repair or a small, complicated roof section, the brush and roller are your best friends.
Head-to-Head on Key Factors
Let’s break down the practical details.
- Cost: Material cost per square foot is often similar. The real difference is labor. Spraying is faster, so if you’re hiring a pro, it might be cheaper for large areas. For DIY, you invest time instead of money with brush on.
- Ease of Use: On a low slope or flat roof, a DIYer might manage spray with careful masking. On a steep roof, spray is risky and brush on is safer, as you have more control from a secure position.
- Durability & Lifespan: A thicker film generally lasts longer. Since brush on allows for a heavier application, it can offer better long term protection against sun and rain if applied correctly.
- Water & Stain Resistance: Thickness matters here too. The denser layer from a brush on sealant often provides a more immediate barrier against water ponding and stains from debris.
How to Pick the Winner for Your Roof Type
Forget a one size fits all answer. The right choice starts with your roof’s material, condition, and slope. Follow this simple logic. First, what is your roof made of? Second, what is its overall condition? Third, how steep is it? Your answers will point you to the best method.
Best for Metal Roofs
Spray treatments excel on corrugated metal panels. The fine mist can wrap into every groove and lap seam for complete coverage. Use a spray for the main field of a corrugated metal roof to ensure no spot is missed. For treating specific rust spots or seams before the overall coating, use a brush on sealant. It lets you work the product into the damaged area. Preparation is non negotiable. Metal must be thoroughly cleaned and often etched so the coating will stick.
Best for Asphalt Shingle Roofs
I need to be clear here. Coating an entire asphalt shingle roof is rarely a good idea and can void warranties. For standard shingle roofs, view coatings as a repair tool, not a full cover solution. Use a brush on sealant only for targeted jobs, like sealing the base of a plumbing vent or a small section of flashing. Spray coatings are generally not advised because they can clog the shingle granules and trap moisture.
Best for Flat or Low-Slope Roofs (Rubber, Modified Bitumen)
This is where spray treatments shine. For large, uninterrupted surfaces of rubber (EPDM) or modified bitumen, a spray application creates a seamless, monolithic seal that water can’t find a way through. It’s efficient and effective. Always use a brush on method for the detailed work around the roof’s edge, drains, and any penetrations. This two method approach gives you both speed and precision.
Best for Tile and Slate Roofs
Proceed with extreme caution. Coating historic or delicate tile and slate is often a job for a specialist. If a coating is necessary for protection, a brush on method is the only safe choice for a DIYer. It allows you to carefully apply product only where needed, such as to a concrete tile’s porous surface, without risking overspray that could damage adjacent tiles or the underlying structure.
Doing It Yourself: A Roofer’s Step-by-Step Guide
Taking on a roof coating yourself is a big job. You can do it safely and well if you pick the right method and follow the steps. I’ll give you two clear paths here: one for spray and one for brush-on. Or, you can choose to apply roof coating from the ground using long-handled tools and safe setups. This keeps you off the roof while still delivering a solid coat.
Safety is not the first step, it’s the foundation of every step. This work is high, slippery, and serious. Always use a proper fall-arrest harness tied to a secure anchor point. Only work in dry weather with no rain in the forecast for at least 48 hours. Wear rubber-soled, non-slip shoes. If your roof is steep or high, honestly, call a pro. For roof-walking safety, plan your route and watch edge hazards as you move. Keep your footing steady and maintain three points of contact whenever possible.
Universal Prep Work You Cannot Skip
Whether you spray or brush, 90% of a good coating job happens before you open the bucket. A coating sticks only as well as the surface it’s applied to. Skipping prep guarantees failure.
You will need:
- A stiff push broom
- A pressure washer with a wide, 40-degree tip (or a garden hose sprayer)
- A specialized roofing cleaner (check coating manufacturer recommendations)
- A primer, if your coating product requires it
- Safety glasses and gloves
Here is the cleaning process:
- Sweep the entire roof to remove loose debris, dirt, and grit.
- Apply the roofing cleaner as directed, usually with a pump sprayer. Let it dwell to kill moss and algae.
- Rinse thoroughly with the pressure washer on a gentle setting. Hold the wand at least two feet from the surface. You are cleaning, not blasting shingles off.
- Let the roof dry completely. This usually takes 24-48 hours of sunny, breezy weather.
Adhesion is everything; a clean, dry, bare roof is non-negotiable for a lasting seal. Any dirt, moss, or old flaking coating will lift your new coat right off.
Applying a Spray Coating (The Fast Lane)
Spray application is fast and gives a very even finish. It’s great for large, simple roofs. Think of it like using a spray gun to paint a car.
- Mix your coating material thoroughly according to the label. Some products are ready-to-spray.
- Test your spray pattern on a large piece of cardboard. Adjust the nozzle until you get a consistent, even fan.
- Start at the peak of the roof and work downward. This prevents you from stepping on wet coating.
- Use slow, side-to-side overlapping passes. Overlap each pass by 50% to avoid thin stripes.
- Keep the spray wand the same distance from the roof throughout for uniform thickness.
Apply the coating in two thin coats rather than trying to lay it on too thick in one pass. A thick coat can crack as it cures.
Watch the wind forecast. Even a light breeze can carry spray drift onto windows, siding, or your neighbor’s car. Tape off and cover anything you don’t want coated.
Applying a Brush-On Sealant (The Sure Hand)
Brushing (and rolling) is slower but offers more control. I use this method on complex roofs with lots of vents, valleys, and edges. You can feel the coverage.
- “Cut in” all the edges, penetrations, and valleys first using a 4-inch brush. Get a good seal around flashings and pipes.
- Use a long-nap roller (3/4-inch) on an extension pole to cover the large field areas. Pour material into a roller tray.
- Work in small, manageable sections. Always maintain a “wet edge” where you apply new material next to still-tacky material to avoid lap marks.
- Back-brush or back-roll immediately after applying to even out the material and push it into the granule surface.
Applying two thin coats is far better than one thick, gloopy coat that will sag and peel. The first coat should be a primer, seeping into the substrate.
Mind the dry time between coats. The product label will specify a recoat window. Applying the second coat too soon or too late can ruin the bond. In hot sun, this window can be surprisingly short.
The Real Cost: Repair with Coating vs. Full Roof Replacement

A roof coating is a strategic repair, not a magic fix. It can be a brilliant long-term investment or a complete waste of money, depending on your roof’s condition.
The financial logic is simple: compare the upfront cost of coating to the extended lifespan it provides, then weigh that against a replacement’s enormous price tag. A $3,000 coating that adds 10 years to your roof is a win. That same $3,000 on a failing roof is money thrown away.
Estimated Cost Tiers for DIY vs. Pro
Costs vary by region, roof type, and product quality. These are rough 2024 estimates to give you scale.
DIY Material Costs (only):
- Brush-On Acrylic Sealants: $0.15 to $0.30 per square foot.
- Spray-Applied Elastomeric Coatings: $0.25 to $0.50 per square foot.
Professional Application (Materials & Labor):
- Full professional application typically ranges from $1.50 to $4.00 per square foot. The labor is intensive (prep, safety, cleanup), which is where the cost comes from.
For context, a full asphalt shingle roof replacement starts around $5.00 per square foot and goes up fast with material choices. A metal or tile roof can be double or triple that. Understanding the roof replacement cost per square foot helps you compare options more clearly. This metric can vary with roof size, pitch, and local labor costs.
The Verdict: Is a Coating Worth It for You?
Based on my jobs over the years, here is my straightforward advice.
A roof coating is a smart, worthwhile investment if your roof is structurally sound but shows its age. Look for these signs: minor granule loss, slight sun bleaching, a few popped nails, or one isolated leak at a flashing seam. The roof deck must be firm and dry.
A coating is a “waste of money” band-aid if your roof has underlying failure. Do not coat a roof with widespread leaks, soft or rotted decking, severely curled or bare shingles, or multiple layers of old roofing. You are just sealing in problems that will explode later.
If you are unsure about your roof’s condition, pay for a professional inspection. A good roofer will tell you honestly if a coating will work or if you’re delaying the inevitable. That fee is cheap compared to coating a roof that’s already failed.
When NOT to Try a Roof Coating
A coating is a maintenance tool, not a miracle cure. Knowing when to walk away is just as important as knowing how to apply one. This stops you from wasting money and gives you a clear path to a real fix.
If you see any of the following stop signs, put the bucket or sprayer down and call a pro. Trying to coat over these problems is like putting a bandage on a broken arm. It looks like you did something, but the real issue just gets worse underneath.
Roof Conditions That Say “No”
Your roof must be sound before you seal it. Here are the conditions that rule out a DIY coating job.
An active leak means water is already winning. Coatings are designed to shed water, not contain it. Applying one over a leak traps moisture against your roof deck. This accelerates rot and creates a much bigger, hidden problem.
Thick moss or algae mats signal a chronically wet roof. You have a moisture retention issue that a surface coating won’t solve. The organic growth needs to be professionally removed and the root cause, like poor sunlight or clogged gutters, needs addressing first.
If more than a quarter of your roof is badly worn or damaged, it’s replacement time. No coating can resurrect shingles that are cupping, curling, or missing granules. I’ve been on jobs where a homeowner coated a failing roof. It bought them one storm season, maybe two, before they paid for both the failed coating and a full replacement.
Structural problems are an immediate disqualifier. If you see sagging lines from the ground, or if you walk in the attic and see soft, rotted sheathing, your roof is failing from the inside out. A coating adds zero structural support. This is a critical safety issue that requires a contractor’s assessment.
Weather and Timing Limitations
Even on a perfect roof, the wrong conditions will ruin the coating. Timing is everything.
Rain within 48 hours is an absolute deal-breaker. Most coatings need a full day to form a skin and longer to fully cure. Water will wash it away, creating streaks and thin spots. Check a reliable forecast and have a solid two-day window of dry weather.
Extreme temperatures make proper application impossible. In high heat over 90°F, the coating can skin over too fast, trapping solvents and preventing a good bond. In cold under 50°F, it becomes thick and gummy, won’t level out, and may never cure properly. Aim for a mild, dry day.
A steep roof is not a DIY project. If your roof pitch makes you nervous to look at, don’t go up there with a bucket. My crew uses harnesses, proper anchors, and planks for anything steep. A fall from a roof changes your life. No coating is worth that risk. Hire a licensed contractor with the right safety equipment.
Quick Answers
Can I combine spray and brush-on methods on one roof?
Absolutely, and it’s often the professional approach. Use spray for the large, open field to save time, then switch to a brush to meticulously seal edges, flashings, and penetrations. This hybrid method gives you both efficiency and precision where it matters most.
How do I maintain my roof after applying a coating?
Keep it clean and clear. Gently remove debris twice a year and ensure gutters and drains are never clogged to prevent standing water. Inspect the coating annually for any small tears or bubbles and address them immediately with a brush-on sealant.
What’s the one thing I must check before even buying coating?
Your roof deck’s integrity. Go into your attic on a bright day; if you see numerous pinpricks of light or feel any soft, spongy areas, your sheathing is compromised. A coating will fail over these spots, so repair the deck first.
Moving Forward with Roof Protection
Choose the coating method that best suits your roof’s material and your ability to apply it consistently. A well-matched application, whether spray or brush, is your simplest path to extended roof life and avoided repairs.
Make safety and code compliance your top priorities for any roof maintenance task. Build on this knowledge by exploring detailed guides on Roof Care, All Types of Roof Guide, Care, and Maintenance to become a more informed and responsible property steward.
Further Reading & Sources
- Brushing vs. Spraying Paint: Which is Best? – The Craftsman Blog
- Spray Painting vs. Brus Painting a House | Five Star Painting
- Spray vs. Brush Painting: Which Is Best?
- r/paint on Reddit: Sprayer or brush?
- Spray vs. Brush: Pros and Cons of Different Painting Techniques – My Three Sons Painting
- House Painting: Spray Rig vs. Brush and Roller – Fine Homebuilding
Ray Huffington
Ray is an experienced roofer. He has worked as a general contractor in the roofing industry for over 15 years now. He has installed and repaired all kinds of roofs, from small houses to large mansion, and from basic shingles to cement and metal roofs and even solar roof panels. He has seen homeowners struggle with roofing questions and always has experience based proven advice to help those in need. If you need roof pros, Ray's your guide.