
How Long Does a Chimney Really Last?
Do you believe your chimney, made of brick and mortar, will stand forever without a second thought? That’s a common hope, but experience on rooftops tells a different story.
No chimney part lasts forever, and ignoring this fact leads to costly repairs and safety hazards. In this article, I’ll share realistic timelines for each major component based on what I’ve seen fail and what I’ve seen endure for decades.
What you’ll learn:
The true lifespan of masonry brick and mortar.
When a clay tile or metal flue liner needs replacing.
Why the chimney cap is your first line of defense.
Where Did the “Forever Chimney” Idea Come From, and Why Is It Wrong?
I hear this all the time from homeowners. You look up at your brick chimney. It’s massive and solid. It looks like part of the house’s bones, so it must last as long as the house itself, right? That’s the myth.
This idea comes from only seeing the outside shell. You see the bricks or stone and think “permanent.” You forget about everything inside and on top that you can’t see. It’s like judging a car’s health by its paint job alone.
Let’s use that car analogy. Think of your chimney’s masonry as the car’s frame and body. It’s built to last. But inside, you have an engine-that’s the flue liner. On top, you have an exhaust system-that’s the cap and crown. A solid frame doesn’t mean the engine won’t wear out or the exhaust won’t rust through. Your chimney works the same way.
You might point to century-old chimneys in historic districts. I’ve worked on a few. The reason they’re still standing isn’t magic. They received constant, skilled maintenance. Mortar was repointed. Liners were repaired. Caps were replaced. That level of care is rare for a modern homeowner. Without it, no chimney is forever.
Realistic Lifespan Expectations: Masonry, Liners, and Caps
Let’s get practical. Here’s a straightforward look at what actually wears out and when.
Masonry (Brick & Stone)
The bricks themselves are tough. They can easily last a century. The weak link is the mortar holding them together.
Mortar is softer than brick. It’s designed to be. Every winter, water gets in the tiny pores. It freezes, expands, and makes the cracks bigger. This freeze-thaw cycle slowly but surely crumbles the mortar joints. You can expect to need repointing (replacing the mortar) every 25 to 50 years, long before the bricks fail.
Liners (The Inside Passage)
This is the most critical safety component. It contains the heat, sparks, and corrosive gases.
- Clay Tile Liners: These are traditional and can last a very long time. But they are brittle. A house settling or a sudden thermal shock (like a cold chimney getting a blast of super-hot air) can crack a single tile. That crack is a fire hazard.
- Stainless Steel Liners: Modern liners are often stainless steel. They handle heat and settlement well. Their enemy is chemistry. Burning gas or wood creates acidic moisture that condenses inside the flue. Over decades, this acid can corrode even stainless steel, leading to pin holes and weakness.
- Cast-in-Place Liners: This is a cement-like product poured in place to form a new, seamless flue inside the old one. When done right, this isn’t just a liner fix; it’s a structural repair that can extend the chimney’s life for decades.
Caps & Chase Tops
I tell my clients to think of these parts as sacrificial. Their job is to take the beating so the rest of the chimney doesn’t have to.
A good chimney cap keeps out rain, snow, and animals. It’s made of metal (steel, copper) or sometimes concrete. It sits right in the line of fire for sun, ice, and acidic exhaust. Metal caps slowly rust and pit. Concrete can crack. You should plan on inspecting them closely every few years and replacing them every 15 to 25.
For factory-built fireplaces with a metal “chase” surrounding the flue, the metal top is even more vulnerable. It’s often lighter gauge metal that rusts faster. I’ve seen them fail in as little as 10 years in wet climates. Checking for rust spots here is a key part of annual roof maintenance.
The Critical Leak Points: Flashing, Crown, and Mortar Joints
A chimney doesn’t fail all at once. I’ve never seen one just collapse into dust. They leak at specific, predictable junctions where materials meet, and water finds a way in. Knowing these three spots lets you target your inspections and understand what a pro is talking about.
Focus on Flashing
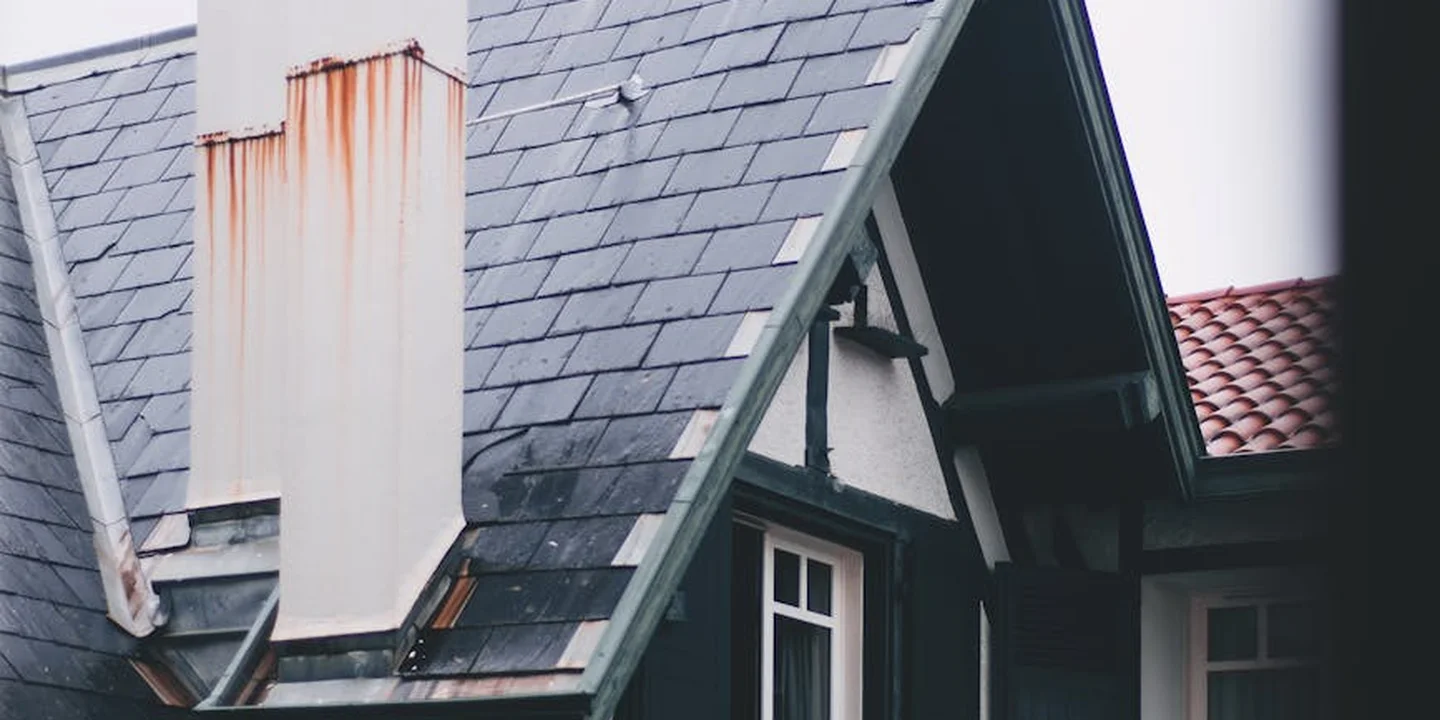
If I had to guess where a chimney leak starts without looking, I’d say the flashing. This is the metal work that seals the joint where the chimney brick meets the roof shingles. It’s the number one leak source I repair.
Proper flashing isn’t one piece. It’s a two-part system. First, step flashing is layered under the shingles up the side of the chimney. Then, counter-flashing is embedded into the chimney mortar joints and bent down over the step flashing. This creates an overlapping shingle effect that sheds water down and onto the roof. Problems happen when this metal rusts, pulls loose, or when someone tries to seal the gap with a glob of caulk instead of fixing the metal.
Focus on the Crown
Look at the very top of your chimney. That concrete slab is the crown, think of it as the chimney’s sidewalk. Its job is to slope water away from the flue liner and off the sides of the chimney.
Concrete cracks. When it does on the crown, water doesn’t run off. It sits, seeps, and pours directly into the chimney structure. A cracked crown is like leaving a bucket upside down on your chimney, it funnels water right inside. This water then soaks the bricks and mortar from the top down, causing damage you can’t see from the ground.
Focus on Mortar Joints
The mortar between bricks is the glue of your chimney. Over decades, it erodes from weather cycles of freezing and thawing. We call this process spalling.
Think of it like the grout between your bathroom tiles. When grout crumbles, water gets behind the tiles. When mortar erodes, water gets behind the bricks. Once inside, it freezes, expands, and can pop bricks apart or cause interior damage. You’re looking for gaps, holes, or bricks that look like they’re crumbling or flaking apart.
How to Inspect Your Chimney Like a Pro (Safely From the Ground)
You do not need to be on your roof. Climbing without proper training and fall protection is how people get seriously hurt. Your most important tool for this job is a good pair of binoculars and your feet planted firmly on the ground.
Here is a simple, step-by-step way to check your chimney from your yard.
-
Look at the cap. Point your binoculars at the metal cage on top. Is it there? Is it heavily rusted with visible holes? A missing or rusted-out cap lets rain pour straight down your flue and allows animals in.
-
Scan the crown. Look at that concrete “sidewalk” on top. Can you see any dark crack lines? Does it look like a piece has chipped off? Any crack is a potential entry point.
-
Check the mortar joints. Slowly scan down the length of the chimney. Look for lines between the bricks that are darker, recessed, or missing entirely. Look for bricks that appear cracked or uneven.
-
Examine the roof flashing. Look where the chimney meets the shingles. You should see neat metalwork. Be concerned if you see lifted or bent metal, large, shiny blobs of sealant (caulk), or rust streaks running down the bricks or roof from that joint. If issues are found, follow our chimney flashing install guide for step-by-step repair. It outlines the right flashing types and proper sealing techniques.
Don’t Forget the Internal Signs
Your fireplace tells you secrets about your chimney’s health. White, powdery stains (efflorescence) on the inside of your firebox mean water is moving through the masonry and leaving mineral deposits. That’s a clear warning sign.
Listen and smell, too. A musty odor coming from the fireplace, especially after rain, is a red flag. In rare cases, you might even hear dripping sounds inside the chimney chase after a storm. Any of these internal clues mean it’s time for a professional level inspection. Some people blame summer myths or rainy-day odors for chimney smells, but there are practical fixes. We’ll walk through those fixes in the next steps.
Maintenance That Actually Extends Chimney Life
Homeowners often tell me they keep their chimney clean, so it must be fine. Real chimney maintenance is not just cleaning, it is a complete system of protection against water, weather, and wear. I have seen too many “forever” chimneys fail from ignored, small issues that snowballed.
You need an annual professional inspection from a CSIA-certified sweep. Think of this like a yearly physical for your house, it is non-negotiable for a healthy chimney. They use tools and training to spot hidden problems in the flue and masonry that you cannot see, especially when negotiating repairs or assessing priorities.
A quality water repellent sealer can help masonry last longer. These sealers let internal moisture vapor escape while beading away liquid rain, but they cannot waterproof or repair existing damage. It is like putting a durable wax on a leather boot, it sheds water but will not fix a torn sole.
The single best investment you can make is a proper, well fitted chimney cap. A good cap keeps out rain, squirrels, birds, and leaves, stopping the main causes of interior decay and blockages. On my crew’s jobs, we always check the cap first, a missing or cheap cap causes most of the leaks we repair.
When to Repair, Rebuild, or Reline: Making the Call
Facing chimney work can be confusing. Use this simple logic. Ask yourself, is the damage small and on the surface? Repair it. Is the structure itself failing or unsafe? Rebuild it. Is the inside liner cracked or rusty? Reline it immediately. Blockages can hide liner damage and reduce draft. If a blockage is found, liner replacement may be needed. Always compare the one time cost of a proper fix to the ongoing risk and much higher cost of ignoring it.
Repair is for localized, cosmetic issues. This includes repointing old mortar joints, replacing a few spalled bricks, or sealing a small crack. It is like fixing a scrape on your car’s paint, it addresses the surface to prevent deeper trouble.
Rebuild is necessary for major structural failure. Look for severe leaning, extensive spalling (where bricks crumble), or large sections of collapsed masonry. When the chimney’s core integrity is gone, patching it is a temporary and dangerous band aid.
Reline is a critical safety procedure, not an upgrade. Cracked clay tile liners or corroded metal liners can leak carbon monoxide into your home or allow heat to ignite framing. This fix is not optional, it protects your family from fire and poisoning.
When in doubt, get a certified chimney sweep’s opinion. They can diagnose the source of a leaky chimney and outline the necessary fix. It is cheaper than a house fire or a major structural leak.
Quick Answers
How often should I have my chimney professionally inspected?
Get a CSIA-certified inspection annually if you use your fireplace regularly. For unused chimneys, a professional check every 2-3 years is wise to catch hidden water damage early.
What’s the first thing I should fix if my inspection finds problems?
Address cap and flashing issues immediately. These are your primary water defenses; letting them fail guarantees more expensive internal damage follows.
Is a stainless steel liner always the best choice when relining?
Not always. For a structurally sound but cracked clay flue, stainless is a great fix. For a chimney with widespread mortar deterioration, a cast-in-place liner adds structural stability while creating a new flue.
Ensuring Your Chimney Stands Strong for Years
From my years on the crew, I can tell you that annual professional inspections and timely repairs are the only real way to manage a chimney’s lifespan. Commit to this routine, and your masonry, liner, and cap will reliably protect your home for decades. Understanding the typical duration of a chimney inspection helps you plan ahead. In the next steps, we’ll outline the professional testing involved and how repairs are determined.
Owning your home means taking direct responsibility for its safety through proactive, hands-on maintenance. Make that duty easier by building your knowledge of Roof Care and All Types of Roof Guide, Care, and Maintenance for a complete, weather-ready roof system.
Sources and Additional Information
- What is the Life Expectancy of Your Chimney? | Jacksonville, FL
- Lifespan of Prefab Chimney? | Hearth.com Forums Home
- How Long Does a Chimney Last? | A Step In Time
- How Long Do Chimney Liners Last? | Vertical Chimney Care
- How Many Years Does a Chimney Last? Lifespan Explained
- How Long Does a Chimney Last? – Fiddler On The Roof Chimney Service
- How Long Does a Chimney Last?
- How Long Do Chimneys Last? – Chimney Heroes
Ray Huffington
Ray is an experienced roofer. He has worked as a general contractor in the roofing industry for over 15 years now. He has installed and repaired all kinds of roofs, from small houses to large mansion, and from basic shingles to cement and metal roofs and even solar roof panels. He has seen homeowners struggle with roofing questions and always has experience based proven advice to help those in need. If you need roof pros, Ray's your guide.