
How Do You Properly Shingle a Barn, Gambrel, or Shed Roof?
Ever started a roofing project on your barn or shed, only to second-guess every shingle you lay down? I’ve been on hundreds of these jobs, and the worry is always the same: will it leak when the rain comes? Proper shingling on these structures isn’t about guesswork; it’s about technique tailored to each roof’s shape.
In this guide, I’ll walk you through what really matters. You’ll learn the specific steps for each roof style, the common mistakes I’ve fixed on old jobs, and how to ensure your work lasts for years.
Before You Climb Up: The Universal First Steps
Your shingle job is only as good as what’s under it. A bad deck will ruin the best materials.
First, you check the roof deck. This is the plywood or wooden board surface you nail into. You walk the entire area, looking for soft spots or rot. Press down with your hands. Listen for spongy sounds. Every soft spot means a board needs replacement.
You need a deck that’s flat, dry, and solid enough to hold a nail without crumbling.
Under that deck are the rafters. Think of them as the skeleton of the roof, the big wooden beams holding everything up. If a rafter is cracked, sagging, or rotten, it must be fixed before you do anything else. A shingle can’t fix a failing structure.
Now for safety. I never go up without this gear.
- A proper roof harness, tied to a certified anchor point on a solid part of the structure.
- Roof jacks and planks for any steep work. They give you a flat platform to stand on.
- Sturdy boots with solid grip.
- Eye protection, especially when prying up old nails.
Here is the non-negotiable part. Barns, gambrels, and sheds often have very steep pitches. If the roof slope is 6/12 or steeper (that means it rises 6 inches for every 12 inches horizontally), this is Pro-Only territory. A fall from that angle is often fatal. Do not risk it.
The RoofMason Material Verdict: Choosing Your Shingle
Picking shingles is about matching the material to your building and your weather. Each has its place.
| Material | Weight | Fire Rating | Hail Impact | Lifespan |
|---|---|---|---|---|
| 3-Tab Asphalt | Light | Class A | Poor | 15-20 years |
| Architectural Asphalt | Medium | Class A | Good | 25-30 years |
| Standing Seam Metal | Medium | Class A | Excellent | 40-60 years |
| Slate/Heavy Alternatives | Very Heavy | Non-Combustible | Excellent | 75-100+ years |
You can use architectural shingles on a gambrel roof’s steep lower section, but you must take extra steps. Use the adhesive strip and add six dabs of roofing sealant under each shingle’s leading edge. This keeps them from sliding before the sun heats and bonds them.
For most climates, architectural asphalt shingles offer the best balance of cost, looks, and durability. However, choosing the right shingles material is equally important.
If you live where hail is common or get heavy, wet snow, standing seam metal is a smarter long-term investment. The snow slides right off, and it handles impacts much better than asphalt.
The “Leak Point” Analysis: Flashing is Everything
Forget the big, open slopes for a minute. The shingles there are just the raincoat. The real waterproofing happens at the seams and joints. If you remember one thing, it’s this: 90% of leaks don’t start in the middle of a roof, they start where two surfaces meet. That’s where flashing comes in. Think of it as the critical tape and seals on that raincoat.
Valleys: The Roof’s Riverbeds
Where two roof slopes meet, you get a valley. Water from both sides funnels down this channel. If it’s wrong, it’s a guaranteed leak. You mainly have two methods.
Woven Valley: Shingles from both slopes are woven over the valley, alternating as you go up. It creates a very integrated, water-shedding path. I use this on most barn and shed roofs for its durability.
Closed-Cut Valley: Shingles from one slope are run continuous across the valley. Shingles from the adjoining slope are then laid over them and trimmed back about 2 inches from the valley center. It gives a cleaner look but relies more on the underlayment.
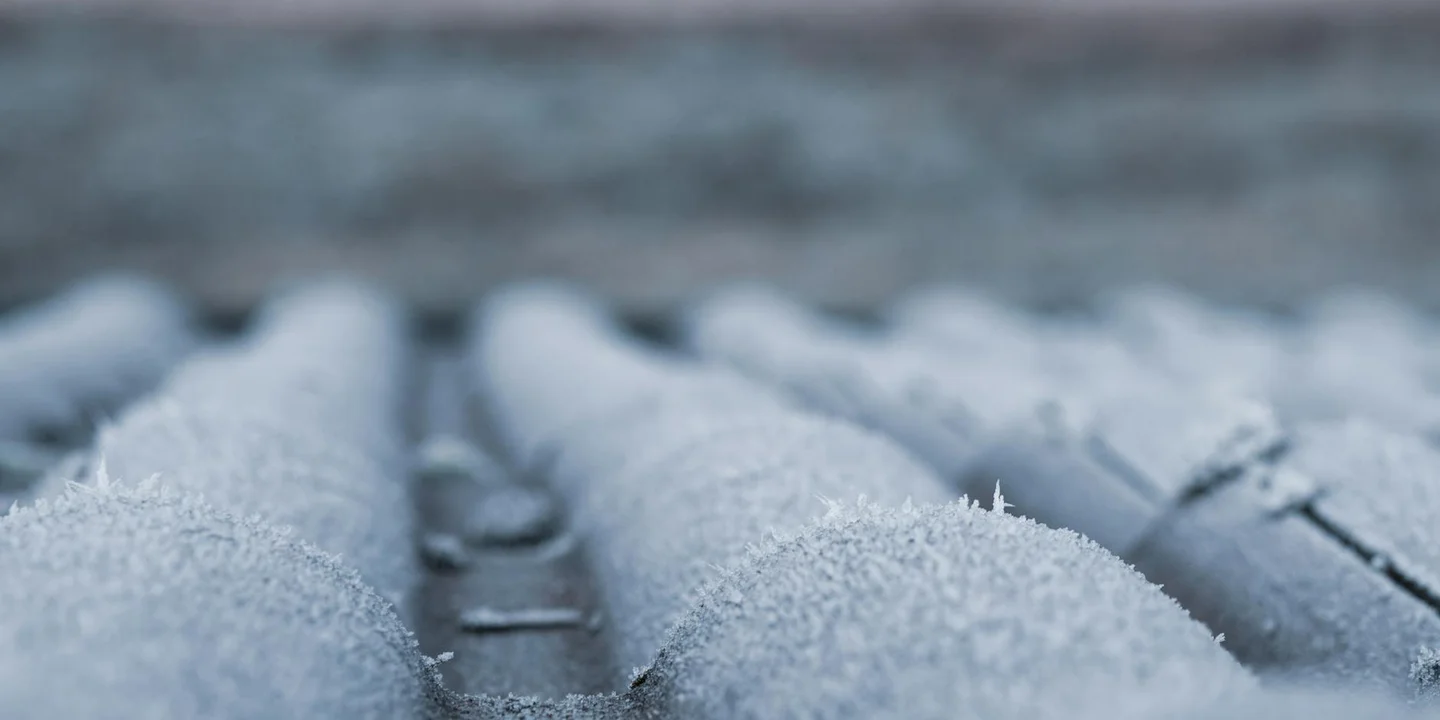
No matter the method, the secret weapon goes underneath: ice and water shield. You must line the entire valley with a self-sealing membrane, extending it at least 12 inches up each slope. This isn’t a suggestion. On any roof in a cold climate, or on a steep gambrel, it’s your insurance policy against ice dams and driven rain.
Sealing Walls and Chimneys with Step Flashing
Where your roof meets a sidewall or a chimney, you cannot just slap shingles against it and caulk it. That will fail. You need step flashing.
Step flashing is a series of L-shaped metal pieces. Each one gets tucked under the siding or wall material and then layered over by a shingle. The next piece goes over the next shingle, like steps climbing the roof. This interlocking system lets water flow down over each piece and onto the shingles below, never behind them.
I’ve fixed too many leaks where a roofer used one big piece of flashing and sealed the top with tar. When that sealant dries and cracks, water pours right in. Step flashing done right doesn’t rely on sealant.
Drip Edge: The Finishing Guard
Drip edge is that angled metal strip you see on the very edge of the roof. It’s not just for looks. It has two critical jobs.
First, it supports the shingles at the eave, preventing them from sagging over time. Second, and most important, it controls dripping water. The drip edge’s design forces water to drip off cleanly away from your underlying fascia board and into the gutter. Without it, water can curl back under the shingles, wick up the fascia, and rot your wood.
It gets installed in two stages. The eaves drip edge goes on over the underlayment at the bottom. The rake (side) drip edge goes on under the underlayment along the sides. This directs all water away from the deck edges.
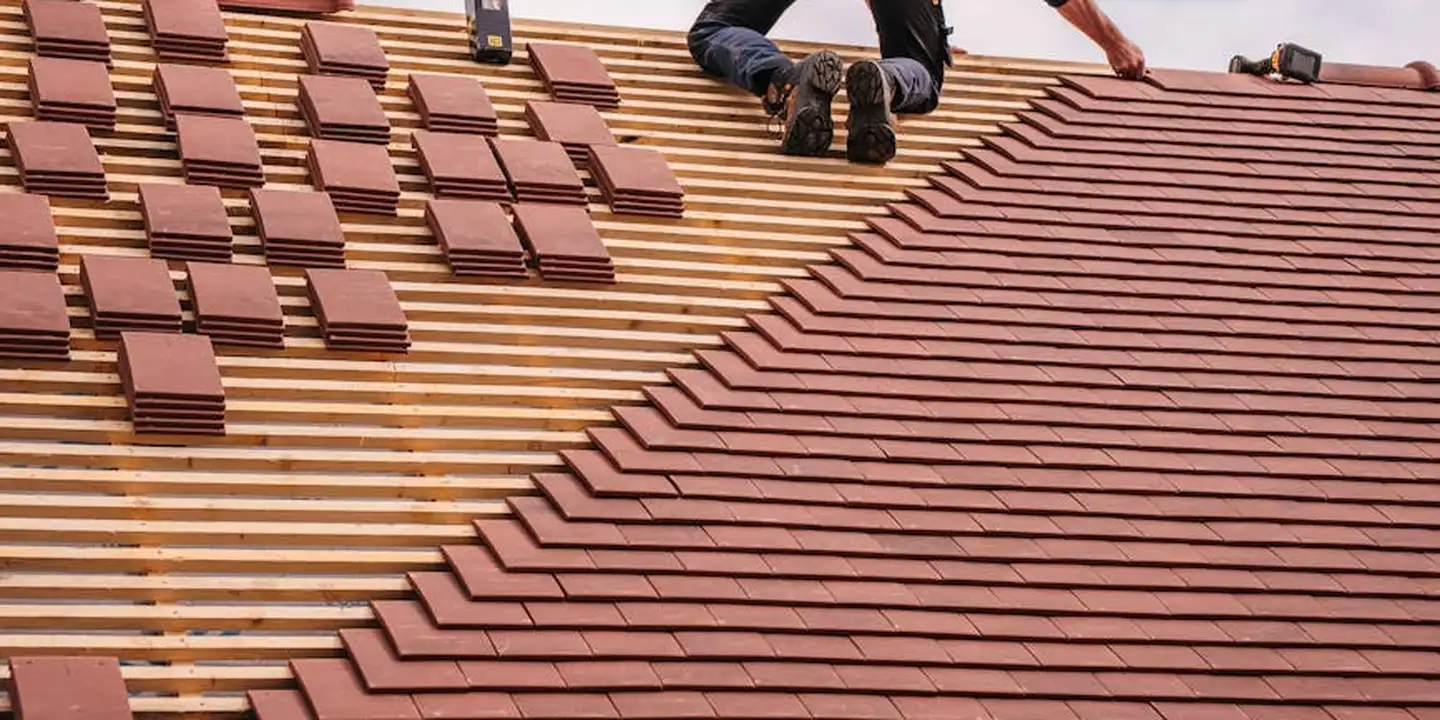
How Do You Properly Shingle a Barn Roof?
A barn roof is a beast of a different color. The main challenge is the sheer scale. You’re dealing with a massive, uninterrupted slope that’s often very steep. You can’t just shuffle up and down a ladder. You need a system.
The only safe way to work on a wide, steep barn roof is by building a secure platform across the entire span. Trying to work off ladders or just your feet is asking for a fall. This is non-negotiable.
Setting Up Your Safe Working Platform
We use roof jacks and staging planks. Roof jacks are metal brackets that hook under the courses as you go up. Here is the right way to set them up:
- Attach roof jacks directly to the roof deck with long nails or screws, hitting the rafters underneath for solid holding power.
- Space them no more than 8 feet apart. On a 40-foot roof, that’s at least 4-5 jacks per row.
- Use true staging planks, not just any old lumber. They are rated for the weight and have a non-slip surface.
- Secure the planks to the jacks. I’ve seen a gust of wind lift an unsecured plank right off the jacks. Tie them down.
This platform becomes your workbench. You keep all your shingles, nails, and tools on it. You can move across the roof safely without stepping directly on the new shingles.
Starting Straight and Staying Straight
On a surface this big, a tiny mistake at the eave magnifies into a huge problem at the ridge. Your starter course is the foundation for everything above it.
Snap a chalk line for both the starter course and every subsequent course up the roof. Do not rely on your eye. The roof deck might not be perfectly straight, and shadows will fool you. A chalk line is your truth-teller.
For the starter row, use starter strip shingles or cut the tabs off three-tabs. This gives you a solid, sealed base. Align it perfectly with your chalk line. On a barn, I run two chalk lines the full length: one for the starter, and one 11.5 inches above it for the first full course. This keeps the first few rows perfectly straight and locked in.
Handling the Peak: Vent or Cap?
At the top, you have two main choices: install a ridge vent or use traditional hip and ridge cap shingles.
A ridge vent is almost always the better choice for a barn. That big attic space needs airflow to prevent moisture buildup and extreme heat. Installing one is straightforward:
- Leave a 1.5 to 2-inch gap open along the ridge on both sides of the roof deck.
- Staple a ridge vent filter (a mesh material) over the gap to keep bugs out.
- Nail the ridge vent shroud directly over the gap.
- Cover the vent with hip and ridge cap shingles, but be careful not to nail into the vent shroud itself.
If you choose a traditional, non-vented cap, the process is about clean lines and good seals. Bend your cap shingles at the perforation to fit the peak’s angle. Nail them properly, with each one overlapping the last to shed water. Seal the final cap at the end.
Whether you vent or just cap it, the goal is a clean, watertight line that looks straight from the ground. On a barn, that final ridge line is the most visible part of your work.
The Gambrel Roof Gambit: Taming the Two-Slope Beast
A gambrel roof looks classic, but that sharp angle change is a trap for water and wind. The steep lower slope wants to shed shingles, and the flat upper section collects debris if you don’t shingle it right. I think of it like a two-story building for water, each floor with its own rules.
You always start at the bottom. On that steep lower slope, gravity is your enemy. Begin your first course of shingles at the eave and work your way up toward the break line, just like on a standard roof. But on a pitch this sharp, the factory adhesive strips might not seal fast enough in cooler weather.
Here is the method I use with my crew to lock the lower slope down.
- Snap your chalk lines and lay the starter course as usual, but go slow. Check each shingle is straight before you nail it.
- As you work up, put a dab of roofing cement under the top corner of every shingle tab. Hand-sealing each tab prevents wind from getting underneath before the sun activates the factory adhesive. I learned this on a barn in October, where the morning frost kept the strips from sticking.
- Keep your courses straight and tight all the way to the break line. This is where the roof angle flattens out.
Transitioning over that break is the make-or-break moment. You must treat the last course on the lower slope as a solid base for the upper slope to sit on. Do not let shingles from the upper section just hang over the edge. Cut the last full shingle on the steep slope so its top edge is flush with the break. Then, start your first course of the upper slope directly on top of that cut edge, overlapping it by at least six inches. This creates a double layer that water can’t push through.
From there, the upper slope is straightforward. Shingle the shallower upper section from the break line up to the ridge, maintaining your standard overlap. The flatter pitch means less worry about sliding, so you can rely on the factory adhesive. Finally, cap the ridge with hip and ridge shingles, cutting them to fit the gentler angle. A proper transition at the break line directs all water down the steep slope and away from the building, which is the whole point of a gambrel roof.
Shed Roof Shingling: Low Slopes and Big Considerations
Let’s get right to those burning questions. Can you put shingles on a flat roof? I’ll be blunt, you should not. A truly flat roof has zero pitch, and shingles are not designed for that. Can you use shingles on a low slope roof? Sometimes, but it’s a calculated risk that requires extra steps. Using standard shingles on a roof that’s too flat is a common shortcut that leads to guaranteed leaks.
Roof pitch is the slope, written as a ratio like 4:12. That means for every 12 inches the roof goes out, it rises 4 inches. Most asphalt shingle manufacturers require a minimum pitch of 2:12 or 4:12 for warranty coverage. Your local building code will specify the exact number. If you install shingles on a slope lower than the minimum, water simply won’t run off fast enough. It will seep under the shingles, cause rot, and create ice dams in cold weather. I’ve torn off sheds where the plywood was mush because someone ignored this rule.
So what do you use instead? For low-slope sheds, the right choice is a system made for the job. One option is specialized roll roofing, which comes in wide sheets with sealed seams. The better, more durable alternative is a fully adhered membrane, like TPO or EPDM rubber. Think of it like this, shingles are like overlapping scales that shed water, while a membrane is a single, watertight sheet glued directly to the deck. It’s the safer, code-compliant choice for slopes below 2:12.
If your shed roof is at that absolute minimum pitch, say a 3:12, and you’re set on shingles, there is one non-negotiable rule. You must cover the entire roof deck with ice and water shield underlayment before the shingles go on. Do not use standard felt. This self-adhering membrane seals around nail holes and prevents water intrusion. On a low slope, this full underlayment isn’t just extra insurance, it’s your primary water barrier, the shingles are almost decorative on top. Skipping this step is an invitation for a major repair bill.
Hazard & Safety Assessment: This Isn’t a Ground-Level Job

I cannot stress this enough. Roofing these structures is a pro-only task.
The risk is not worth the few thousand dollars you might save. I’ve seen too many close calls. The steep pitch on a barn or gambrel roof is deceptive. It looks manageable from the ground, but once you’re up there, it’s a whole different ballgame. You are one slip away from a life-changing fall.
The specific dangers here are very real and often underestimated by a homeowner.
- Pitch Steepness: Barn and gambrel roofs have extreme slopes. A standard shingle roof might be a 4/12 or 6/12 pitch. These agricultural roofs can easily be 8/12, 10/12, or steeper. That means for every 12 inches of horizontal run, the roof rises 8, 10, or more inches. There is no safe footing.
- Ladder Setup: Getting onto the roof safely is the first major hurdle. Your ladder needs to extend 3 feet above the eaves, be on solid, level ground, and be properly secured. A helper must foot the ladder at all times. One gust of wind or a misstep while climbing with a bundle of shingles can be catastrophic.
- Power Line Awareness: Many older barns and sheds have service lines running to them. Metal ladders and aluminum drip edge are perfect conductors. You must maintain a 10-foot clearance from any overhead line. Always look up and plan your work path.
- Sheer Physical Risk: This work is exhausting. You are hauling heavy materials, bending, kneeling, and swinging a hammer overhead for hours. Fatigue leads to mistakes. A mistake at height leads to a fall.
The Non-Negotiable Safety System
If a professional crew is doing this work, they will use a fall arrest system. This isn’t just a suggestion, it’s the law for pros on steep roofs. You should understand how it works so you know what to expect from a quality crew.
A proper harness system is a connected chain of equipment designed to catch a fall, not prevent one. It starts with a full-body harness worn by the worker. A shock-absorbing lanyard connects the harness to a secure anchor point, like a roof anchor screwed directly into the roof framing. If a worker falls, the system deploys to safely arrest the fall and minimize injury.
Beyond a harness, pros also use:
- Sturdy, rubber-soled roofing boots for grip.
- Roof brackets and planks to create a stable working platform on steep slopes.
- Knee pads to save your joints from the relentless hard surface.
Weather is Not Your Friend
Schedule is the enemy of safety. Never let a deadline force you onto a roof in bad conditions.
Never work on a wet, icy, or even dewy roof. Shingles and roof decking become slick as ice. A slight morning dew is enough to turn a steep pitch into a slide. Wind is another silent danger. It can catch a sheet of underlayment or a bundle of shingles like a sail, throwing you off balance or off the roof entirely. If the forecast calls for rain or wind, the job waits.
The Physical Toll and a Second Set of Hands
This is brutal work. A single bundle of architectural shingles weighs 70 to 80 pounds. You need dozens of them on the roof. Hoisting them up a ladder alone is asking for trouble.
A reliable helper on the ground is not a luxury, it’s a critical part of safe material handling. They can foot the ladder, run materials up via a rope or lift, and, most importantly, keep an eye on you. If something goes wrong, they are your first call for help. Trying to be a hero and do it all solo is the fastest way to get hurt.
Common Mistakes That Lead to Leaks and Callbacks
I’ve been called back to fix more than a few roofs that were just installed. The problems are almost always the same simple errors. Knowing what to avoid is just as important as knowing the right steps.
Nailing Errors: Too High, Too Low, or Wrong
Nail placement is everything. An under-driven nail, where the head sits above the shingle, is a snag point for wind. It can rip right off. An over-driven nail, driven so hard it cuts or dimples the shingle, breaks the sealant strip and creates a tiny hole for water. Every nail must be flush, driven straight into the decking within the manufacturer’s marked nailing zone. On a steep gambrel roof, a single row of bad nails can start a major leak.
Poor Shingle Alignment and Layout
Crooked shingles are more than ugly. They expose nail heads from the course below and create uneven gaps. This lets wind-driven rain and snowmelt sneak underneath. I use chalk lines for every single course, especially on long shed roof runs. Taking five minutes to snap a line prevents a lifetime of chasing water stains on your barn’s interior walls.
Skipping or Botching the Flashing
Flashing is your roof’s tailored raincoat for joints. The most common mistake is just slapping shingles over a wall or pipe. Water will find its way in. For a barn roof against a vertical wall, you need step flashing woven with each shingle course. For pipe vents, a proper boot sealed to the shingle above and below is non-negotiable. If you don’t detail the flashing correctly, you haven’t finished the roof.
Ignoring the Drip Edge
This thin metal strip is your first line of defense. It goes on before the underlayment along the eaves, directing water into the gutters and off the fascia board. I’ve seen roofs installed without it, and within a season, the wood at the edge is rotten. On a shed roof with a narrow overhang, it’s even more critical. Drip edge isn’t optional, it’s code for a reason.
Forgetting to Stagger Shingle Joints
Lining up the cut ends of three-tab or architectural shingles creates a weak seam. Water can channel right down that vertical line. You must offset the joints from the course below by at least six inches. Think of it like laying bricks, the pattern provides strength. A consistent, random stagger is what makes a shingle roof shed water like a skin, not a collection of parts.
Skimping on Sealant in Critical Spots
On steep slopes or in valleys, adhesive alone isn’t enough. In valleys, I always add a bead of roof cement under the shingle edges for extra insurance. On the steeper upper section of a gambrel roof, I’ll hand-seal the leading edges of the first few starter shingles. A five-dollar tube of sealant can prevent a five-hundred-dollar leak repair. Don’t be afraid to use it where water pressure is highest. That’s how you achieve a watertight seal when you install roof shingles. Careful detailing now saves you from costly repairs later.
Using Old or Compromised Underlayment
That roll of synthetic underlayment or felt you left in the shed from last year? Don’t use it. If it’s been wet, frozen, or left in the sun, it becomes brittle and loses its waterproofing. Your underlayment is your backup system. Always use fresh, pliable underlayment and lay it smooth without wrinkles that can trap water. I open rolls as I need them, never weeks in advance.
No Plan for Waste and Cleanup
This isn’t just about being neat. Shingle scraps and old nails on the ground are a safety hazard. They can damage lawn equipment or hurt animals. More practically, tripping over bundles or tangled waste slows you down and causes accidents. Have a tarp down to catch cuttings and a dedicated can for nails. Keep your workspace clean and you’ll work faster and safer. I make it a crew rule to sweep the area at the end of every day.
Long-Term Care for Your New Shingle Roof
Your work isn’t done once the last shingle is nailed. I’ve seen too many great roofs fail early because the owner thought they were “maintenance-free.” They aren’t. Think of it like a truck. You change the oil. You check the tires. A roof needs the same kind of simple, regular check-ups to avoid issues and debunk any roof repair myths.
Your Biannual Roof Check-Up (Spring & Fall)
Make this a habit every spring and fall. You don’t need to climb up. A pair of binoculars from the ground will show you 90% of what you need to know.
- Look for damaged shingles. Search for any that are cracked, curled at the edges, or look wavy. On a gambrel roof, pay extra attention to the steep lower slope where snow and ice often sit.
- Check all flashings. This is the metal work sealing joints. Look at the base of pipes, walls, and in roof valleys. You’re looking for rust, bending, or gaps where the metal has pulled away.
- Clear all valleys and gutters. Valleys are the roof’s drainage highways. Leaves and pine needles clog them fast, forcing water under your shingles. Keep them clean.
A ten-minute visual inspection twice a year can spot a small problem before it becomes a major leak.
Gutters: Your Roof’s Best Friend or Worst Enemy
Clogged gutters cause most of the ice dam and water backup problems I get called to fix. Water has to go somewhere. If it can’t flow freely through the gutter, it will back up under your shingles.
Clean them at least twice a year. More if you have overhanging trees. Make sure downspouts are clear and direct water at least five feet away from your foundation. On a long shed roof, this is critical for preventing soil erosion and basement flooding at the downhill side.
Proper gutter maintenance is the single cheapest way to protect your roof’s lifespan and your building’s foundation. For residential roofing gutter services, keeping gutters clear helps rainwater flow where it should. Well-maintained gutters shield siding, landscaping, and foundations from costly damage.
Dealing with Moss and Algae Safely
Moss isn’t just ugly. It holds moisture against the shingles, rotting the wood deck beneath. Algae stains (those black streaks) are mostly cosmetic but can degrade granules over time.
Never power wash shingles. You’ll blast off the protective granules. For light algae, a 50/50 mix of water and household bleach sprayed from a garden sprayer (from the ground, on a cool, cloudy day) can help. Rinse gently. For thick moss, you need to be gentler.
I once spent a whole day carefully brushing moss off an old barn roof with a soft-bristle broom. It’s slow, but it works. For prevention, consider installing zinc or copper strips near the ridge. When it rains, a tiny amount of metal washes down, creating an environment where moss can’t grow. For removing moss from a roof safely, use a soft-bristle brush and avoid pressure washing. Always wear safety gear and work from a stable ladder.
DIY Fix or Pro Call? How to Decide
Knowing when to handle it yourself and when to call a crew like mine can save you money and prevent disaster.
Consider a DIY repair if:
- You have a few isolated shingles that are cracked or lost.
- The damaged area is easily accessible from a safe, stable ladder.
- You are comfortable with basic hand tools and can match the shingle.
It’s time to call a professional roofer if:
- You see leaks in the attic or water stains on interior ceilings.
- There is widespread damage (more than a 3ft x 3ft area).
- The leak is near a complex area like a chimney, valley, or wall.
- You see sagging in the roof deck. This indicates structural issues.
- You simply don’t feel safe on a ladder or your roof’s pitch is steep.
My rule is simple: if you’re questioning your safety or the scope of the repair, make the call. A small pro repair now is always cheaper than fixing the water damage a failed DIY attempt can cause.
Common Questions
What should I use instead of shingles on a low-slope shed roof?
For slopes below the minimum pitch for shingles (typically 2:12 or 4:12), switch to a system made for the job. Use specialized roll roofing or a fully adhered membrane like TPO or EPDM rubber, which acts as a single, watertight sheet.
What’s the best way to prevent shingles from sliding on a steep gambrel roof?
Beyond relying on the factory adhesive, hand-seal each shingle tab with a dab of roofing cement as you work up the lower slope. This locks them down immediately, preventing wind lift before the sun activates the primary seal.
How do I choose between asphalt and metal for a barn roof?
Consider the building’s importance and your local weather. Architectural asphalt offers a great cost-to-durability balance for most outbuildings. Choose standing seam metal if the barn is critical, stores valuable equipment, or faces frequent hail and heavy snow.
Locking in a Lifetime of Protection
From my crew’s experience, the best roofing job always starts with meticulous underlayment and starter course installation. Nail these first steps correctly, and the rest of your shingles will lay flat, shed water perfectly, and defend your building for years.
Your role as the owner is to maintain that protection with safe, regular inspections. Stay engaged with your roof’s condition and keep learning about proper care; it’s the surest way to preserve your investment and everything it shelters. For a practical, step-by-step reference, consider the roof damage inspection guide. It can be a handy companion as you monitor and maintain your roof.
Ray Huffington
Ray is an experienced roofer. He has worked as a general contractor in the roofing industry for over 15 years now. He has installed and repaired all kinds of roofs, from small houses to large mansion, and from basic shingles to cement and metal roofs and even solar roof panels. He has seen homeowners struggle with roofing questions and always has experience based proven advice to help those in need. If you need roof pros, Ray's your guide.