
How Do You Insulate Metal, Gambrel, Flat, and Rafter Roofs?
Why does one house stay comfortable year-round while another battles drafts and high bills? More often than not, the answer is in the roof insulation. Getting insulation right for metal, gambrel, flat, and rafter roofs means understanding their unique shapes and needs. A mistake here can trap moisture or leave you wasting energy.
I’ll break down the right methods for each roof type, explain which materials work best, and share practical steps from my own jobs to help you get it done.
Why Your Roof’s Insulation is Its Secret Weapon
Good roof care starts from the inside. Your insulation is not just fluffy stuff in the attic. It is a critical layer that protects your entire home.
Proper insulation shields your roof’s wooden structure from temperature extremes that cause wood to warp and shingles to crack. In winter, it keeps heat from escaping into the attic. This prevents snow on your roof from melting and refreezing at the edges, which is how destructive ice dams form on roofs. I’ve repaired too many leaky roofs where poor insulation was the root cause.
In summer, a well-insulated attic blocks solar heat from baking the roof deck. This reduces thermal stress on your shingles or metal panels, adding years to their life.
Think of insulation like a winter hat for your house. A good hat traps your body heat. Insulation traps your conditioned air inside and blocks the weather outside. Your furnace and air conditioner won’t have to run constantly.
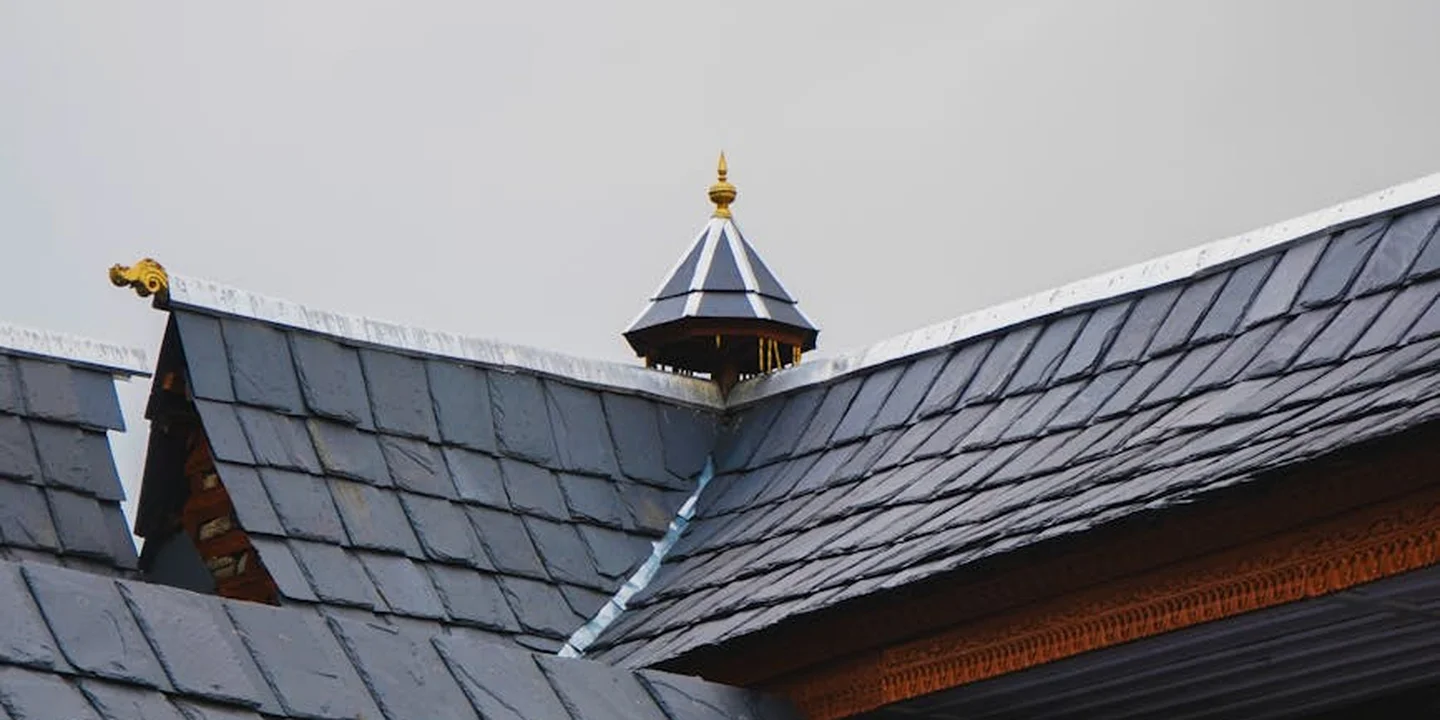
But every roof design presents a unique puzzle. A flat roof has no attic space at all. A gambrel roof has steep lower slopes and a flatter top section, creating odd angles. Insulating a metal roof requires attention to condensation. You must tailor your approach to the shape overhead.
The Golden Rule: Insulation Works With Ventilation, Not Against It
Sealing up your attic without planning for airflow is a recipe for disaster. I call this the “Attic Connection” to major problems.
Warm, moist air from your kitchen, bathroom, and laundry rises into the attic. Without a way out, that moisture condenses on the cold roof sheathing. This leads to black mold on the wood and soggy insulation that loses all its R-value. I’ve pulled out dripping wet batts that were growing mushrooms.
You must always maintain a clear air channel from the soffit vents under your eaves to the ridge vent at the roof’s peak. This gap lets outside air flow in, sweep away damp air, and keep the roof deck dry. Never bury these vents with insulation.
To protect this pathway, use simple tools called baffles. These are plastic or foam channels you staple into place along the roof deck. They hold the insulation back and guarantee the air keeps moving.
You can check your attic’s health in two minutes. On a cool day, go up there and place your hand near the eaves. You should feel a slight breeze from the soffit vents. Look for daylight through those vents. If you see insulation blocking them, your roof can’t breathe.
R-Values and Your Energy Bill: What Those Numbers Really Mean
R-value measures how well a material resists heat flow. A simple way to picture it is the thickness of a winter coat. A puffy down jacket has a high R-value. A thin windbreaker has a low one.
Your climate zone dictates the R-value your roof insulation needs. Colder northern states often require attic insulation of R-49 or higher. Milder southern zones might be adequate at R-30. Your local building department has the exact code for your area.
Not all insulation is the same. Here’s how the common types stack up.
| Material | R-Value Per Inch | Cost & Notes |
| Fiberglass Batts | R-3.1 – R-3.8 | Lowest cost. Easy for DIY but must be installed perfectly without gaps to work well. |
| Blown-In Cellulose | R-3.2 – R-3.8 | Moderate cost. Great for filling odd spaces. Made from recycled paper, which is a sustainable choice. |
| Spray Foam (Closed-cell) | R-6.0 – R-7.0 | Highest cost. Creates an air seal and vapor barrier. Requires a pro for safe installation. |
| Rigid Foam Boards | R-5.0 per inch | Higher cost. Used for flat roofs or cathedral ceilings. Resists moisture well. |
Your choice depends on your roof type, your budget, and whether you’re hiring a crew. For any job, worker safety and following code are non-negotiable.
How Do You Insulate a Metal Roof?
Metal is an excellent roof, but it’s a terrible insulator. Think of it like a cast iron skillet. It heats up fast and cools down fast. That conductivity makes insulation underneath absolutely critical for your comfort and energy bills, especially in hot, cold, and humid climates.
Your approach changes completely depending on timing. During a new installation, you have a clean slate. You can install rigid foam boards right on the decking or use a structural insulated panel (SIP) system before the metal goes on. This is especially important in residential metal roof installation, where the roof acts as a major part of the home’s insulation envelope. Retrofitting an existing metal roof is more surgical. You’re almost always working from the inside, fitting insulation between the structural supports. Proper insulation planning enhances comfort and energy efficiency under a metal roof.
No matter the method, one item is non-negotiable. You must install a radiant barrier directly under the metal panels. This reflective foil layer bounces the sun’s radiant heat away from your attic space. Skipping this is like wearing a black shirt in summer and wondering why you’re hot.
Best Methods: From the Outside vs. From the Inside
Many homeowners ask, “can you insulate a roof from the outside?” With a metal roof, the answer is a definitive yes, but only during a full replacement. The best exterior method involves laying thick, rigid foam insulation boards directly over the roof decking. This creates a continuous thermal blanket with no gaps. The metal panels then get fastened on top.
From the inside, the most effective retrofit is closed-cell spray foam. A pro sprays it between the purlins or rafters. It expands to seal every crack and, crucially, acts as its own vapor barrier. Batt insulation is another interior option, but it’s tricky to install perfectly around all the framing.
- DIY Potential: Installing fiberglass batts from the attic is the only real DIY path. It demands extreme care to avoid compression and perfect sealing. One missed gap creates a cold spot and condensation risk.
- Hiring a Pro: For spray foam or any exterior rigid board installation, hire a specialist. They have the equipment and know the exact foam density and thickness needed to prevent condensation inside the roof assembly. This isn’t a guesswork job.
Metal Roof Insulation Red Flags
I’ve fixed too many jobs where the insulation was crushed. Compressing insulation, like stuffing a thick batt into a thin cavity, destroys its trapped air pockets and R-value. It becomes nearly useless. Always use the correct thickness for your space.
The biggest danger with metal is condensation. Warm, moist indoor air will turn to water when it hits the cold underside of an unshielded metal panel. You need a continuous vapor control layer, like a properly installed spray foam application or a dedicated membrane, on the warm side of the insulation. Without it, you’re inviting rust, mold, and wood rot into your roof structure.
Tackling the Tricky Spaces: How Do You Insulate a Gambrel Roof?
A gambrel roof gives you that classic barn look. It has two slopes on each side. The top slope is gentle. The bottom slope is much steeper.
This shape creates tricky spaces inside your attic. The steep lower slope meets the floor to form short, vertical walls called knee walls. The space behind these walls is often cramped and hard to reach. The real challenge is the shallow upper slope. There is very little room for standard insulation batts and proper airflow.
Insulating a gambrel roof means treating it as two separate roofing assemblies that you must connect seamlessly.
Mapping the Air and Insulation Path
Think of insulating a gambrel attic like dressing for cold weather in layers. You need to cover every area without leaving gaps. Here is how you map the path from the inside out.
First, you address the knee wall. Insulate this vertical wall just like an exterior house wall. Use fiberglass batts or dense insulation boards fitted tightly between the wall studs. Seal every seam and edge with caulk or foam. This wall is your first major thermal barrier.
Next, you move to the floor behind the knee wall. This attic floor area needs a thick layer of insulation, like blown in cellulose. Cover it completely. This step seals off the lower attic space from your living area below.
Now for the upper sloped ceiling, the tricky part. You have two main choices. You can create a “hot roof” by installing rigid foam boards or spray foam directly against the underside of the roof deck. This method seals and insulates in one step but requires expert air sealing.
Your other choice is to frame out a new, deeper ceiling. Build a raised frame inside the shallow slope to fit proper thickness batts. You must leave a continuous air channel from the soffit to the ridge vent above this new insulation. This is difficult in such a tight space.
Creating separate, sealed insulation compartments is often necessary to manage the different air spaces in a gambrel attic. The space behind the knee wall is one zone. The living space under the sloped ceiling is another. They should not freely exchange air.
Can you insulate a gambrel roof from the inside? Yes, this is almost always how it is done. The work happens entirely from within the attic. It is a detailed carpentry and insulation job. You are building a snug, insulated envelope inside the existing roof structure. Getting the ventilation right is the skilled part of the job. A mistake here can trap moisture and rot your roof deck from the inside.
The Low-Slope Puzzle: How Do You Insulate a Flat Roof?

Can you insulate a flat roof? You absolutely can, but it’s a different beast than a sloped one. First, let’s be clear. A “flat” roof isn’t truly flat. We call it a low-slope roof, pitched just enough to shed water. On these roofs, managing water is job one.
I learned this the hard way on a commercial job years ago. We focused on R-value but skimped on the slope detail. Within a season, ponding water started compromising the membrane. Drainage isn’t an afterthought here; it’s the foundation of your whole plan.
You have two main paths to take. Think of them as putting on a coat in different ways. In a “warm roof,” the insulation sits on top of the roof deck, like a winter parka over your shoulders. In a “cold roof,” the insulation is installed below the deck, more like a heated vest you wear indoors.
Warm Roof vs. Cold Roof: Choosing Your Strategy
Choosing between these systems defines your project. A warm roof protects the entire structure from temperature swings. We typically use rigid foam boards, like EPS or XPS, layered right on the deck.
The warm roof method shields the roof deck, which prevents condensation and major thermal stress on the waterproof membrane. This is the gold standard for new builds or full replacements. The insulation boards are then covered with a final waterproofing layer, like TPO or EPDM rubber.
Now, can you insulate a flat roof from the inside? That’s the cold roof approach. Here, you add insulation between the rafters or attach it to the underside of the deck from inside the building.
Insulating from the inside is often a retrofit solution, but it leaves your roof deck exposed to the cold, which can lead to condensation and rot if not vented perfectly. My crew has been called to fix several of these where the ventilation was an afterthought.
Let’s compare the details side-by-side.
- Materials: Both use rigid foam (EPS/XPS), but in a warm roof, it’s your primary layer. In a cold roof, batts or spray foam might also be used between rafters.
- Waterproofing: In a warm roof, the membrane goes on top of the insulation. In a cold roof, the membrane is directly on the deck, so it experiences full temperature extremes.
- Ceiling Height: A warm roof adds thickness on top, so it doesn’t touch your interior space. A cold roof eats into your ceiling height from below.
Your choice directly impacts cost and longevity. Putting the insulation above the deck (warm roof) greatly extends the life of your roof membrane by keeping it at a stable temperature. The cold roof method can save on upfront cost during a retrofit, but that membrane will work harder and may fail sooner.
The Classic Approach: How Do You Insulate a Rafter Roof?
When homeowners ask about insulating a “rafter roof,” they’re almost always talking about a standard pitched roof with an attic you can actually walk or crawl into. This is the most common roof setup and your best chance for a do-it-yourself insulation project. The goal is to keep your living space warm by creating a thermal barrier at the attic floor, not by heating the attic itself.
Can You Insulate Between the Roof Rafters?
You absolutely can insulate between roof rafters, but I usually advise against it for a simple attic. I’ve fixed too many jobs where someone stuffed fiberglass batts between the rafters, thinking they were helping. This method blocks the critical air flow from your soffit vents up to the ridge vent. That trapped, moist air rots the roof deck from the inside out.
The better approach is to insulate the attic floor and keep the rafters clear for ventilation. Think of your attic as needing to breathe. The floor gets the sweater (insulation), and the rafters stay open for air to move.
Step-by-Step: Insulating the Attic Floor Safely
If your attic floor is your target, here’s how to do it right. Gear up first. You need sturdy knee boards to walk on the joists, a tight-fitting N95 respirator (not a dust mask), safety glasses, and full-coverage clothing with gloves.
Your first and most critical job is air sealing. Use spray foam or caulk to plug every tiny hole where warm air from your house sneaks up into the attic. Seal around wires, pipes, and the top plates of your walls.
- Roll out unfaced fiberglass batts or lay down blown-in cellulose.
- Lay the batts perpendicular to the joists to cover them completely.
- Never, ever cover recessed “can” light fixtures that aren’t rated for insulation.
- Keep all insulation at least three inches back from soffit vents to preserve that air flow.
Spotting the Weak Points: Insulation at Critical Junctions

Insulation doesn’t fail in the middle of an open attic. It fails at the edges and holes. You need to conduct a “leak point” analysis. Focus your air sealing and insulation efforts on these key junctions:
- Where the roof meets a wall (at dormers).
- Around chimneys and plumbing vents.
- In roof valleys and at skylight openings.
The trick is to make your insulation and air barrier wrap around these objects. Don’t just stop at them. I think of ice and water shield beneath the shingles as the roof’s last line of defense, working as a backup if moisture ever gets past the insulation and ventilation.
Flashing and Insulation: A Necessary Partnership
Flashing is your roof’s raincoat. Insulation is its sweater. If the sweater is bunched up or shoved in the wrong place, it can push the raincoat out of position. I’ve seen batt insulation crammed against chimney flashing, holding moisture right against the metal. Flashing must lay flat and tight to the roof, and insulation needs to be trimmed neatly to sit beside it, not under it. A proper thermal barrier should never compromise a water barrier.
Knowing When to Call a Pro: Integrity Checks and Red Flags
Here’s a quick integrity report from the field. Blown-in cellulose or fiberglass batts in a dry attic can last the life of the house. Spray foam on the underside of the roof deck has a long lifespan if installed perfectly, but it’s permanent and hides the roof deck from view.
Watch for these red flags that mean your insulation has failed:
- A musty smell or visible mold growth on the underside of the roof sheathing.
- Widespread dampness or dark stains on the insulation itself.
- Any sagging or bouncy feeling in the roof deck when you’re in the attic.
Adding batts to an open attic floor is firmly in the DIY-friendly category. Installing spray foam in a cathedral ceiling (where you *must* insulate between rafters) is a professional’s job. Most importantly, if you see structural issues or major water stains, fixing that is your step one. Insulation is always the final step in a dry, sound structure.
The Safety Brief: What Your Roofer Wants You to Know
I can’t say this enough. Attic work is hazardous. Always have solid footing on the joists or boards. Near the eaves, the ceiling drywall won’t hold you. It’s a straight fall to the floor below.
Before you cut or move anything, identify every electrical wire and plumbing line. Assume nothing is off. Wear that respirator the entire time you’re up there. Fiberglass particles and cellulose dust are terrible for your lungs, and spray foam chemicals are in a different league entirely. Your safety gear isn’t optional; it’s your most important tool for the job.
Spotting the Weak Points: Insulation at Critical Junctions
Think of your roof’s insulation like a winter coat. If it has a big, unzipped hole over your chest, the rest of the coat doesn’t matter much. You’ll still get cold. Roofs have these same weak points, and I call them the “Leak Points” for heat and air.
These are the complex junctions where different planes meet or something pierces through. Valleys, chimneys, skylights, and dormers are prime spots. Insulation often fails here because it’s tricky to fit material into odd angles and tight spaces. The goal is not just to fill the cavity but to create a continuous thermal and air barrier that wraps the entire house envelope.
How to Wrap Insulation Around Penetrations
The biggest mistake I see is insulation that stops at the edge of a chimney chase or skylight shaft. This leaves a direct path for warm, moist indoor air to hit the cold roof sheathing and condense.
- For chimneys or plumbing vents, the insulation should be carefully fitted around the penetration. I often use cut-to-fit rigid foam board or spray foam to seal the irregular gap completely before the interior finish is applied.
- At skylights and dormers, you must insulate the “sidewalls” and “ceiling” of the light well or dormer cavity itself, connecting it seamlessly to the main attic insulation. Imagine building a tightly sealed, insulated box around the inside of the feature.
- In valleys, the focus is on the attic floor or rafter bays below. Ensure insulation extends fully into the tight angle where the two roof decks meet, leaving no voids. Sometimes, adding a baffle for ventilation here is also critical.
The Backup Defender: Ice and Water Shield
Insulation manages temperature and air. Ice and water shield manages liquid water. Think of it as your roof’s last-ditch waterproofing layer, installed directly onto the decking. This self-adhering membrane is your safety net in critical areas, sealing around nails and protecting the wood if water gets past the shingles or metal panels. Understanding its installation coverage helps you see how it guards the roof from eaves to ridges. When properly installed, it seals around penetrations and valleys to prevent leaks and protects the roof deck.
It’s not insulation, but it directly supports insulation’s job. By keeping the roof sheathing dry, it prevents rot that can compromise the structure holding your insulation. In valleys, at eaves, and around all penetrations, I always specify a quality ice and water shield. It’s cheap insurance for the expensive materials it protects.
Flashing and Insulation: A Necessary Partnership
Here’s the simple way I explain it to homeowners: flashing is your roof’s raincoat. It’s designed to shed water away from vulnerable joints. Insulation is your roof’s sweater. It keeps the heat in.
They have to work as a team. If the sweater (insulation) is bulging out or poorly installed, it can push against the raincoat (flashing), bending it out of its proper position. Now your raincoat doesn’t shed water correctly.
More dangerously, if insulation is crammed tightly against the backside of flashing in a roof-to-wall joint, it can trap any minor moisture that gets behind the flashing. That moisture has no way to dry out. This creates a perfect pocket for slow, hidden rot inside your wall or roof structure, which we often don’t find until major damage is done.
On a job last fall, we found exactly this. Previous insulation had been shoved into a dormer corner, pinching the step flashing. For years, a tiny leak wicked into that packed insulation, rotting the sheathing from the inside out. The fix required new sheathing, properly integrated flashing, and correctly fitted insulation that allowed for a slight air gap behind the metal. It was a clear lesson in how these systems depend on each other.
Knowing When to Call a Pro: Integrity Checks and Red Flags
Think of your roof insulation like a winter coat. Even the best coat won’t help if it’s soaking wet or full of holes. Before you add more, you need to check the condition of what’s already there.
The Insulation Integrity & Lifespan Report
No insulation lasts forever. Its lifespan depends heavily on the roof above it and if it stays dry. Here’s what I’ve seen over the years.
- Fiberglass or Mineral Wool Batts: Under a sound, leak-free roof, they can last for decades. But if your roof has a small, persistent leak you haven’t found, the batts will soak it up like a sponge and lose all R-value in a single season.
- Blown-In Cellulose or Fiberglass (in an attic floor): This is a durable choice for attics. It can last 20-30 years or more if the attic space stays dry and well-ventilated. I’ve pulled out dry, fluffy cellulose from houses built in the 80s.
- Spray Foam (on the roof deck): High-quality closed-cell foam is incredibly durable and can last as long as the roof deck itself. The real risk isn’t the foam failing, but a roof leak hiding behind it where you can’t see.
- Rigid Foam Boards: Used under metal roofs or on flat roofs, these boards are tough. Their lifespan is tied completely to the waterproofing layer above them. A failed membrane means wet, useless foam underneath.
Moisture is the enemy of every insulation type, and a compromised roof will cut any material’s life short. Location and climate influence roofing materials lifespan, so where a roof sits can accelerate wear or extend longevity. Understanding these location factors helps you choose durable options and plan maintenance.
Red Flags: Signs Your Insulation Has Failed
Some problems are subtle. These are not. If you see these signs, your insulation job is now a repair job.
- Widespread dampness or dark stains on the roof deck or rafters. This isn’t a little spot. I’m talking about large areas that feel damp or look darker than the surrounding wood.
- A sagging roof deck between the rafters. Look up in your attic. The plywood or boards should be flat. If they are bowing downward, that’s often the weight of waterlogged insulation and rot.
- Interior mold growth on ceilings or walls, especially at the top. This is a major health hazard and a sure sign moisture is moving through your roof assembly.
- A persistent, musty odor in the attic or top floor. Your nose is a good tool. That smell is often trapped moisture and the beginning of mold.
- Visible gaps, compression, or complete absence of insulation in key areas. Common in gambrel roofs or around kneewalls where installation was tricky and rushed.
DIY or Pro? How to Choose
Be honest about your skills and the job’s complexity. This keeps you safe and saves money.
A DIY job is usually safe if: You are simply adding new, unfaced batts or blown-in insulation over existing material on a flat, easily accessible attic floor. You are not touching wiring, plumbing, or the roof structure itself.
You need to call a professional for:
- Installing spray foam insulation, especially in cathedral ceilings or rafter bays. Getting the mix and application wrong leads to off-gassing and poor performance.
- Any insulation work where you must also address air sealing or complex ventilation.
- Working in a tight, steep attic (like a gambrel roof’s upper section) where movement is difficult and fall risk is high.
- Removing old, wet, or mold-contaminated insulation. This requires containment and proper disposal.
If you have structural issues like soft rafters or widespread water damage, insulation is the last step, not the first. Insulating over rot is like putting a bandage on an infected wound. It traps the problem and makes it worse. Fix the roof leak and repair the structure first. Always.
The Safety Brief: What Your Roofer Wants You to Know
We see too many preventable accidents. Follow these rules like your life depends on it. It does.
Fall protection isn’t optional. If your attic access is near the eaves or you are working in a finished attic space with steep slopes, you must secure yourself. Use a proper harness tied off to a structural member, not just plumbing or wiring. A fall onto the attic floor joists can cause serious injury.
Always assume every wire is live. Before cutting or placing insulation, map out all the electrical runs, junction boxes, and light fixtures in the attic. Never pile insulation over a recessed light fixture (IC-rated or not) or directly against a chimney flue. Keep insulation at least 3 inches away from knob-and-tube wiring.
Your lungs are not filters. Fiberglass and cellulose dust are irritants. Chemicals from spray foam kits are hazardous. Wear a properly fitted NIOSH-approved N95 respirator or better whenever you are disturbing old insulation or installing new loose-fill material. Safety glasses and gloves are also mandatory.
Common Questions
For a flat roof, how do I prevent moisture from ruining the insulation?
Always ensure your insulation strategy includes a proper slope for water drainage and a continuous vapor barrier. For long-term health, the “warm roof” method with insulation above the deck is the best defense.
Can I add insulation to my gambrel roof’s upper section myself?
It’s possible but difficult due to the tight, shallow space and critical need for maintained ventilation. This work often requires framing new cavities or applying spray foam, so hiring a pro is usually the wiser choice.
I have a metal roof. What’s the single biggest insulation mistake to avoid?
Failing to install a continuous vapor barrier on the warm side of the insulation. Without it, condensation will form on the cold metal, leading to guaranteed rust, mold, and rot in your roof structure.
Your Insulated Roof: Built to Last
After decades on the job, I can tell you this: the best insulation starts by working with your roof’s design, not against it. The materials you choose for the roof—especially their insulation value—directly influence indoor comfort and your energy bills. Get that match right, and you’ve done most of the hard work for a durable, efficient home. When roofing and insulation work together, you see cooler summers, warmer winters, and lower utility costs.
See your roof as a living system that needs your regular, safe attention to perform its best. Keep learning with resources like our All Types of Roof Guide to make confident care and maintenance choices for years to come.
Ray Huffington
Ray is an experienced roofer. He has worked as a general contractor in the roofing industry for over 15 years now. He has installed and repaired all kinds of roofs, from small houses to large mansion, and from basic shingles to cement and metal roofs and even solar roof panels. He has seen homeowners struggle with roofing questions and always has experience based proven advice to help those in need. If you need roof pros, Ray's your guide.