
How Do You Install Corrugated Plastic and PVC Roofing Panels on Your Home?
Thinking about using corrugated plastic or PVC panels for your roof? I’ve put these up on sheds, patios, and home additions for years, and they’re a smart pick for letting in light and standing up to weather.
The biggest worry I hear from DIYers is causing leaks with a poor install. My guide will show you how to do it properly, just like my crew does on the job.
First, I’ll help you pick the right panels and gather the necessary tools.
Next, we’ll walk through measuring your roof and cutting the panels accurately.
Finally, you’ll get my proven method for fastening everything down securely.
Should You Install These Panels Yourself or Hire a Pro?
Your first decision is the most important. Installing a roof is not like hanging a shelf.
Start by honestly assessing the job’s scale. Replacing a few panels on a low garden shed is a common DIY task. Covering your entire house is a professional project. The size changes everything about the tools, labor, and risk.
The specific dangers are real. I’ve seen seasoned crew members slip on a dewy roof. A steep pitch multiplies that risk instantly. You are working at height, where a simple misstep has serious consequences. Handling large, lightweight panels in even a light breeze is like wrestling a sail. You can easily lose control. Proper fastening is its own skill. Under-drive a screw and you compromise the seal. Over-drive it and you crack the panel or strip the hole.
Mistakes in measuring, sealing, or fastening don’t just look bad; they create direct paths for water to enter your home. A small leak can cause rot in your roof deck and framing long before you see a stain on your ceiling.
Some projects are a hard “no” for DIY. If your roof has a steep slope, multiple penetrations like vent pipes or skylights, or is a large surface area, hire a pro. A complex roof valley or a high peak is not the place to learn.
Never overlook local building permits and codes. This isn’t bureaucracy. It’s safety. Codes dictate how your roof must be attached to resist wind uplift in your area. A permit ensures someone checks that the structure can handle the load. Skipping this can void your insurance and put your home at risk.
Understanding Your Materials: Plastic vs. PVC Panels
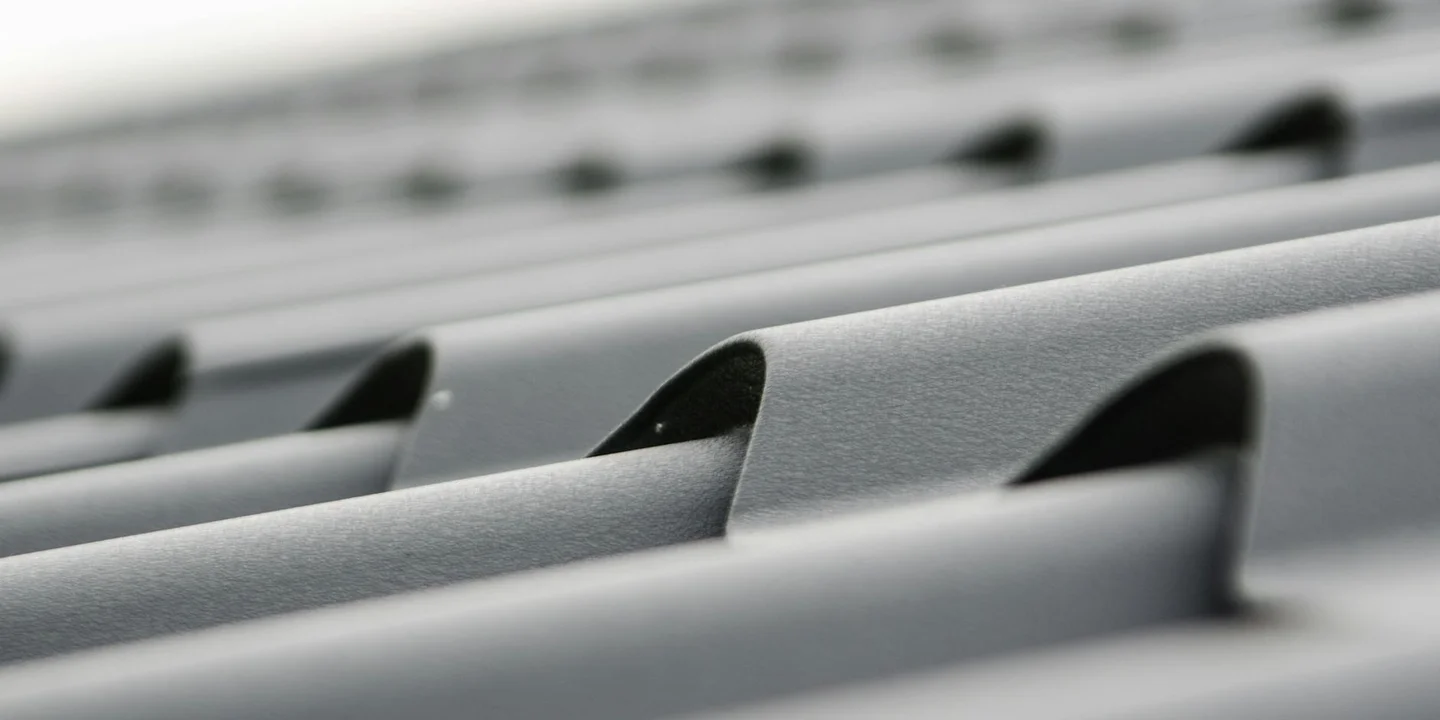
People say “plastic roofing,” but that’s like saying “metal.” You need to know which kind. “Plastic” usually means polycarbonate (very tough, like safety glasses) or acrylic (often used for greenhouses). PVC is a different, softer material, commonly used for industrial siding and some patio covers.
Choosing the right one matters. Here’s a simple comparison from my experience on jobs:
- Durability: Polycarbonate wins. It’s incredibly impact-resistant. PVC can become brittle and crack over time, especially in cold weather.
- UV Resistance: Both come with UV coatings, but quality varies. A cheap PVC panel will yellow and weaken faster than a quality polycarbonate one.
- Flexibility & Expansion: PVC is more flexible when cutting. But all plastics expand and contract with temperature much more than metal. Polycarbonate expands more than PVC. You must account for this with proper fasteners and spacing, or the panels will buckle and pop.
- Cost: PVC is generally the cheaper option upfront, but may not last as long.
Your material choice directly changes the installation. For example, you cut polycarbonate with a fine-tooth saw to avoid cracking, while PVC can be scored and snapped. Their different expansion rates mean you follow the manufacturer’s specific guidelines for fastener hole size and spacing, not a general rule.
For comparison, a corrugated metal roof is a different beast. It’s far more durable against impact and fire, but it’s heavier, noisier in rain, and requires different tools (like snips) to cut. The principle of overlapping panels is similar, but the execution is different.
This brings us to a common question: can you use corrugated sheets on a flat roof? You can, but it’s tricky. You need an absolute minimum slope, typically at least 1/4 inch per foot. Any less and water will pond. On a low slope, sealing the end laps and side laps becomes the most critical part of the job. A single tube of caulk won’t cut it. You need proper sealing tapes or mastics designed for the panel material. For a truly flat roof, a fully adhered membrane system is almost always a better choice.
Gathering Your Tools and Materials for the Job
Getting your materials right is the single biggest factor for a successful install. I’ve seen too many DIY jobs fail because someone used the wrong screw or skipped a crucial layer. Let’s get your shopping list straight.
The Complete Materials Checklist
Don’t head to the store without this list. Think of it as your recipe for a roof that lasts decades.
- Panels: Calculate your square footage, then add 10% for waste from cutting and overlaps.
- Fastening System: This is critical. You need corrosion-resistant screws (stainless or coated) with integral neoprene washers. Never use standard screws.
- Battens/Purlins: These are the wooden or metal strips that run perpendicular to your rafters. They create the flat, supportive surface for the panels.
- Sealant: Use a high-quality polyurethane or silicone sealant designed for plastics. Cheap caulk will crack and fail.
- Flashing & Trim: You’ll need ridge cap, eave trim, gable trim, and pipe boots. Match these to your panel profile.
- Underlayment: A synthetic roof underlayment is your backup shield. It goes on top of your roof deck, under the battens.
Essential Tools You’ll Need
You don’t need a pro’s full truck, but you do need the right tools for clean, safe work.
- Drill/Driver: A cordless drill with a magnetic bit holder makes driving hundreds of screws much easier.
- Circular Saw: Fit it with a fine-tooth carbide blade (80-tooth or more) for cutting plastic. A dull blade will melt and chip the panels.
- Tape Measure & Chalk Line: For marking straight, accurate cut lines and fastener rows. Eyeballing it leads to a wavy roof.
- Safety Gear: Gloves, safety glasses, and a good pair of shoes with solid tread. A harness system is non-negotiable if your pitch is steep.
- Utility Knife & Aviation Snips: For trimming sealant, cutting underlayment, and making small adjustments to trim pieces.
Using the exact fasteners and sealants specified by your panel manufacturer is the only way to keep your warranty valid. I’ve been the guy on the phone with a manufacturer denying a claim because a homeowner used off-brand screws. It’s not worth the risk.
Why Underlayment and Battens Are Non-Negotiable
This isn’t just extra stuff. Think of your roof like a winter coat. The underlayment is your waterproof shell, and the battens are the insulating puffy layer that keeps everything off your skin.
Battens create a crucial air gap between the panel and the deck. This ventilation prevents condensation from rotting your roof deck from the inside out. They also give you a solid, straight nailing base so your screws bite into real wood, not just thin plywood. Skipping them means trapping moisture and having a weak, noisy roof.
A proper batten system is what turns a simple cover into a durable, high-performing roof that protects your home for years.
Preparing Your Roof Deck: The Foundation Matters
Think of your roof deck as the floor of your house. A shaky floor means trouble. A weak deck guarantees a failed roof, no matter how good your panels are. You need a solid starting point.
This preparation work is the single most important part of the job. I’ve torn off too many panels where a roofer skipped these steps. Don’t be that person.
Step 1: The Thorough Inspection
Get up there with a notepad. Your job is to be a detective. You’re looking for anything that compromises strength.
- Check for Rotten Wood: Poke every suspect area with a sharp tool like a awl or screwdriver. If it sinks in easily or wood flakes away, it’s rotten. Pay extra attention near old nail holes and gutters where water collects. Replace every single rotten board or plywood sheet. Do not patch over it.
- Ensure a Clean, Dry Surface: Sweep off all debris, leaves, and old nails. The deck must be bone dry before you put anything on it. Trapped moisture will rot the wood from the inside out and ruin your underlayment.
- Verify Structural Soundness: Walk the entire deck. Listen for creaks and feel for sponginess. Every joist and rafter should feel firm underfoot. If the whole structure feels bouncy, you may need a structural consult before proceeding.
Your panels can only be as strong and long-lasting as the surface they are attached to. This step is non-negotiable.
Step 2: Installing the Roof Underlayment
Underlayment is your roof’s secret raincoat. If water gets past a panel seam or fastener, this barrier directs it back out. Proper underlayment installation matters for leak prevention. Correct overlap and sealing help keep water from sneaking in.
Use a synthetic roof underlayment. It’s tougher and less prone to tearing than old-fashioned felt paper. Start at the bottom edge of your roof (the eave) and roll it out horizontally.
- Overlap each successive row by at least 6 inches.
- Overlap side seams by at least 4 inches.
- Staple it down securely, but don’t pull it drum-tight. It needs to lay flat without wrinkles.
This layer is your critical secondary water barrier and it protects the underside of your panels from condensation. Do not skip it, even on a porch or shed.
Step 3: Installing Wooden Battens (Purlins)
Battens are the wooden strips that run perpendicular to your roof rafters. Your panels will screw directly into these. They create the air gap that allows your roof to breathe.
Use pressure-treated 1×4 or 2×4 lumber for longevity. The exact spacing is dictated by your panel manufacturer and your local snow load code. Common spacing is 24 inches on center, but always check your panel’s instructions first.
- Getting Them Level: This is where patience pays. Snap a chalk line for your first batten at the eave. Use a long, straight carpenter’s level or a laser level as you work your way up the roof. Shim underneath any batten that sits low. A level frame means your panels will lay flat and look professional.
- Fastening Correctly: Attach each batten to every roof rafter it crosses underneath. Use corrosion-resistant screws or nails long enough to penetrate deep into the rafters. A wobbly batten means a wobbly panel.
- Spacing Trick: Cut a scrap piece of wood to your exact batten spacing (e.g., 24 inches). Use it as a consistent spacer as you install each row. This keeps your layout perfect from bottom to top.
Properly spaced and level battens are the skeleton of your roof. They ensure proper drainage, prevent panel sag, and make the actual panel installation simple.
The Step-by-Step Installation Process
This is where the job gets real. Rushing through these steps is how leaks happen. Take your time, think two steps ahead, and your roof will last for decades.
Step 1: The Critical First Measurement and Panel Layout
Do not just buy panels to cover your roof area. You must account for overhang and overlap. Measure the exact length from your eave to your planned ridge line, then add at least 1.5 to 2 inches for the eave overhang. Measure the width of your roof from rake edge to rake edge.
Your layout plan decides where water goes and where weak points will be. Always start your first full panel at the downwind, bottom corner of the roof. This means if your area gets west winds, start at the bottom of the west side. This prevents wind from driving rain up under the side laps.
Plan your panel runs so horizontal seams (end laps) don’t line up in adjacent rows, and they land on a solid roof deck purlin or rafter for proper support underneath.
Think of panel layout like laying bricks. You want a staggered pattern for strength. Measure and mark your starting point at the eave and rake, then snap a chalk line as your guide for the first panel edge. This line is your truth for the entire job.
Step 2: Cutting Panels Safely and Accurately
For clean, straight cuts on polycarbonate or PVC, a circular saw with a fine-toothed blade (like one for laminate) works best. Clamp the panel firmly to your work surface along the cut line. Use a straight edge as a guide.
Never cut a panel that is just loosely held down it will chatter, bind, and can kick back violently. Always wear safety glasses and a dust mask. The plastic shavings are sharp.
For thinner polycarbonate, you can score and snap. Use a sharp utility knife and a straight edge. Score the protective film and the panel surface deeply along your line. Place the scored line over the edge of a table and apply firm, even pressure to snap it. This method creates less mess.
If you are cutting PVC, do it outside or in a very well ventilated garage. The fumes are not something you want to breathe in.
Step 3: Placing, Overlapping, and Securing the First Panels
With a helper, lift your first panel into place. Align its bottom edge with your eave overhang mark and its side edge perfectly with your chalk line. This first panel sets the stage for every panel that follows, so get it right.
Side laps are critical. Most corrugated panels need to overlap by one full corrugation (the ridge and valley). Some thicker panels require two. Check your manufacturer’s specs. For end laps (where the bottom of one panel meets the top of another), a 6-inch minimum overlap is standard.
Always drill a pilot hole before driving any screw. The drill bit should be slightly larger than the screw’s shank. This allows for thermal expansion and contraction without stressing the plastic.
Drive screws only into the high point, the crown, of the corrugation. Never screw into the valley where water runs. Start at the eave end, work up the panel, and don’t overtighten. You should see a small, neat rubber washer seal. If you squeeze the panel flat or distort the washer, you’ve gone too far and created a stress point.
Step 4: Sealing the System and Finishing the Field
As you install each panel, apply a continuous bead of compatible polyurethane sealant under the end laps. Do not use cheap silicone. I’ve seen too many silicone seals fail and turn brittle within a few years.
Install the next panel in the course, overlapping the side lap. Keep checking your alignment with the chalk line or the previous panel’s edge. A slight drift will become a big problem by the time you reach the ridge.
When you get to the top, you will likely need to cut the final panel to fit the ridge slope. Measure carefully from the top of the last full panel to the ridge apex. Remember to account for your ridge cap overhang. Cut this final piece, seal its end lap, and secure it.
Step 5: Waterproofing the Critical Junctions: Flashing and Trim
The panels keep water off 95% of the roof. The flashing seals the other 5% where leaks actually happen.
For a standard vent pipe, use a manufacturer-specific pipe boot or a universal rubber seal. Slide the base of the flashing under the panel above the pipe. The upper part of the flashing will then sit over the panel below the pipe. This shingle-style layering ensures water flows over, never under. Seal the flashing base liberally with sealant and screw it down securely.
At the ridge, install closure strips into the ends of the corrugations. These foam pieces block wind, rain, and pests. Then, install your ridge cap over them, screwing it into the ridge purlin, not just the plastic panels.
At the eave and rake edges, use trim flashing. The drip edge at the eave goes on after the underlayment but before the first panel. Sidewall or rake trim gets installed as you go, sealing the gap between the last panel and a wall or the roof edge.
Flashing is not an afterthought. It is the most important part of the waterproofing system. Take your time here, use plenty of sealant, and follow the golden rule: water always flows from the layer on top to the layer underneath.
Non-Negotiable Safety Protocol for Roof Work
I’ve seen too many close calls over the years. Installing roof panels is a two-person job that demands respect for height and materials. Your safety plan is more important than your tool list, and it’s not something you can skip. In residential roof projects, the right solar panel mounting methods can significantly affect safety and performance. We’ll explore these mounting options in the next steps.
Mandatory Safety Gear
You are not working on the ground. Every person on the roof needs this basic kit.
- Harness and Anchor: A proper roof harness is non-negotiable. You must attach it to a certified roof anchor, not a chimney or vent pipe. This is your last line of defense.
- Sturdy Shoes: Wear boots with a defined heel and aggressive rubber soles. Tennis shoes or sneakers will slip on a smooth panel.
- Work Gloves: Corrugated panel edges are sharp. Gloves protect your hands from cuts while handling.
- Eye Protection: You’ll be drilling and cutting overhead. Safety glasses stop plastic shavings and debris from falling into your eyes.
If you don’t have a harness system and a solid anchor point, you are not ready to start this job.
Weather Conditions Matter
The weather changes how your panels behave and how safely you can work.
- No Wind: A gust can turn a large panel into a sail. It can pull you off balance or rip the sheet from your hands. Wait for a calm day.
- No Rain or Moisture: Wet panels are extremely slippery. Wet roof decking is also a slipping hazard. Everything must be dry.
- Avoid Extreme Heat: On a hot, sunny day, plastic and PVC panels can become soft and more easily damaged. They can also expand, making fitting tricky.
The best days are cool, dry, and completely calm. I’ve rescheduled jobs for a better forecast, and you should too.
Plan Your Tool and Material Handling
Getting an 8-foot or 12-foot panel onto a roof is the first big challenge. Doing it wrong can damage the panel or a person.
Never try to carry a full panel up a ladder by yourself. Here is the method we use on my crew:
- Clear a path on the ground and near the ladder.
- One person stays on the roof, secured with a harness.
- The person on the ground lifts one end of the panel to the person on the roof.
- The roof person pulls the panel up, walking backward, while the ground person guides and lifts.
Store panels flat on the roof on supports like 2x4s. Never lean them against a vent or stack. Always handle more panels than you think you need at once to minimize trips up and down the ladder. Each trip is a risk.
Post-Installation Check and Common Mistakes to Avoid
Your panels are up. Now, don’t put the ladder away just yet. A careful final walkthrough catches small errors before they become big problems.
The Final Inspection Walkthrough
Grab a notepad and walk the perimeter of your roof. You’re looking for two main things: fastener security and watertight seals.
First, check every single screw. Run your gloved hand over them. A properly seated screw will be flush with the washer, creating a solid, even seal without biting into the panel. Any screw that spins freely or sticks up needs attention.
Next, inspect all seals and flashings. Look at ridge caps, sidewall flashings, and where the panels meet pipes or walls. The sealant tape should be completely hidden, compressed under the overlap. From the ground, use binoculars to look for gaps or places where the flashing isn’t lying flat against the panel surface.
Common Installation Errors and Their Consequences
I’ve fixed enough DIY and pro jobs to see the same few mistakes again and again. Avoiding them saves you a world of trouble.
1. Screw Driving Errors
This is the number one issue. An under-driven screw (left too loose) won’t compress the washer seal. Water will wick right under it. An over-driven screw (cranked down too tight) distorts the washer and can crack the plastic panel around the hole, creating a direct leak path.
Both under-driving and over-driving fasteners guarantee leaks; it’s not a matter of if, but when.
2. Incorrect Panel Overlap
Panels must overlap by the full corrugation profile, as the manufacturer states. Shortchanging this overlap is tempting to save material, but it directs water right into the seam. Think of it like shingling a wall-each layer must shepherd water over the one below.
3. Forgetting Sealant Tape
That butyl or foam tape that comes with the panels isn’t optional. It goes under the side and end laps. I once saw a barn roof leak like a sieve because the crew thought the overlap was enough. The tape fills the tiny gaps between corrugations that water and driven snow will exploit.
4. Ignoring Expansion Gaps
Plastic and PVC expand and contract with temperature changes more than you’d think. If you install panels tight against each other or snug against a wall on a cool morning, they will expand and buckle in the afternoon sun. That buckling pulls screws, breaks seals, and warps the roof. Leaving the specified gap at panel ends isn’t a suggestion-it’s what keeps your roof flat and secure through summer heat and winter cold.
| Mistake | Direct Result | Long-Term Problem |
|---|---|---|
| Over-driven Screws | Cracked panel at fastener | Persistent leak at multiple screw points |
| Insufficient Overlap | Water ingress at seams | Water staining, decking rot, interior damage |
| No Sealant Tape | Capillary water draw | Mystery leaks during wind-driven rain |
| No Expansion Gap | Panel buckling or “oil-canning” | Failed fasteners, torn panels in high wind |
Caring for Your New Roof: Long-Term Maintenance
Installing the roof is only half the job. The other half is keeping it in top shape for the decades it’s designed to last. Think of it like a car. You wouldn’t drive for years without an oil change. Your roof needs the same basic attention, regardless of the installation methods used.
Simple Cleaning is the Best Cleaning
You want to keep your panels clear of dirt, pollen, and organic growth like algae or moss. This prevents staining and lets maximum light through.
- Use a soft-bristle brush or a microfiber mop on an extension pole.
- Mix a mild detergent (like dish soap) with water in a bucket.
- Wet the panel, gently scrub, and rinse thoroughly with a garden hose.
I’ve seen homeowners make one big mistake. Never use a pressure washer or abrasive cleaners on plastic or PVC panels. The high pressure can crack the material and abrasive powders will scratch the surface, making it look cloudy and reducing light transmission permanently.
Your Bi-Annual Check-Up
Mark your calendar for spring and fall. These are the best times to give your roof a visual once-over. Always do another check after any major storm with high winds or hail.
Your inspection from the ground (with binoculars) or a safe ladder position should look for:
- Cracks, punctures, or holes in the panels.
- Excessive sagging between supports.
- Leaves, branches, or debris accumulating in the valleys.
- Discoloration or heavy staining.
Keeping Everything Snug: Fastener Care
Over years of heating and cooling, panels expand and contract. This can slowly work fasteners loose. A loose fastener is a leak waiting to happen.
Checking them is straightforward.
- Wait for a cool, dry day. Panels are contracted and least stressed.
- Carefully walk the roof (or use planks) to avoid cracking panels underfoot.
- Use a cordless drill with the correct bit (usually a #2 or #3 square drive for roofing screws).
- Gently try to tighten each screw. If it turns more than a quarter-turn, snug it up. Don’t over-tighten.
If a fastener spins freely or the seal is cracked, replace it immediately with an exact match from your original installation. Using the wrong screw type can cause leaks.
How Do You Maintain and Clean Corrugated Plastic and PVC Roofing Panels?
The answer is with a gentle hand and a regular schedule. Maintenance means inspecting twice a year and after storms. Cleaning means using soft tools, mild soap, and lots of water. Your goal is to preserve the panel’s surface. Any harsh treatment will damage it faster than weather ever will.
Lifespan and Knowing When to Replace
A quality corrugated plastic or PVC roof, installed correctly, should last 15 to 30 years. UV-resistant coatings have gotten much better, but the life span can also depend on residential roof life expectancy factors.
You’ll know replacement is on the horizon when you see multiple panels that are:
- Extremely brittle and cracking easily.
- Extensively yellowed or clouded, blocking most light.
- Failing with leaks at multiple fastener points, not just one.
You rarely replace a single panel years later. Sun exposure affects the whole roof uniformly. When one goes, the others are usually close behind. Plan for a full section replacement when the time comes.
Common Questions
How do I stop my new roof from leaking at the panel overlaps?
Ensure you used the manufacturer’s sealant tape under every side and end lap during installation. After installation, check that all screws are snug-not over-driven or under-driven-to compress the neoprene washer into a proper seal.
Why are my panels buckling or making popping noises?
This is almost always caused by thermal expansion without proper gaps. On your next cool morning, check that fasteners are in oversized holes and that panel ends aren’t jammed tight against trim; they need room to move.
Can I replace just one damaged panel, or do I need a whole section?
You can replace a single panel if the rest are in good shape. Carefully remove the trim and fasteners from the damaged sheet and the two adjacent panels, slide the new one in, and reseal. If the surrounding panels are also brittle or discolored, plan to replace the entire affected section for a uniform, watertight result.
Securing Your Investment with Corrugated Panels
From my years on the crew, I know that meticulous panel alignment and proper fastener spacing are what keep a roof tight. These principles are especially important in residential metal roof installation, where proper alignment and fastening prevent leaks and wind uplift. Apply them to your home metal roof project for lasting protection. Focus on these during installation, and you will build a durable, leak free barrier for your home.
Treat this roof as a long term asset by committing to seasonal checks and always using safe practices for any upkeep. Keep educating yourself on roof care-it empowers you to make smart, lasting decisions for your property.
Ray Huffington
Ray is an experienced roofer. He has worked as a general contractor in the roofing industry for over 15 years now. He has installed and repaired all kinds of roofs, from small houses to large mansion, and from basic shingles to cement and metal roofs and even solar roof panels. He has seen homeowners struggle with roofing questions and always has experience based proven advice to help those in need. If you need roof pros, Ray's your guide.