
How to Connect Your Gutters to a Rainwater Harvesting System
What if the next rainstorm could fill a barrel for your garden or even supply water for your home? As a roofer who has installed hundreds of systems, I know that thought is often followed by a big question: is linking my gutters to a tank too complicated or expensive for my house? Let me reassure you-it’s a very achievable project that starts with your existing roof.
I’ll explain the crucial first step: modifying your gutters and downspouts. You’ll learn how to choose and install a proper filtration setup. Finally, I’ll share my routine for keeping the whole system flowing smoothly.
Key Takeaways: What You Need to Know First
Before you connect a single pipe, step back and look at your roof. I’ve seen too many folks jump into rainwater harvesting without fixing the basics first. Your roof is where the water starts, so its condition sets the stage for everything else.
Think of your roof and gutters as the first and most important filters in your entire system. If they’re not right, you’ll be fighting a losing battle with dirty water and clogs.
- Start with a clean, well-maintained roof. Your shingles or tiles are the first filter for your water. Moss, granules, and old sealants can wash right into your tank.
- Gutter sizing is critical. Undersized gutters will overflow during a heavy rain. That water never makes it to your tank, and it can damage your home’s siding and foundation.
- Always install a first-flush diverter and proper filtration. This isn’t optional. It keeps leaves, bird droppings, and roof grit out of your storage tank, saving you from big clean-out headaches later.
- Check local codes and permit requirements before you start. Using rainwater for your garden is usually straightforward. If you want to use it indoors, say for toilets or laundry, the rules get much stricter for health and safety.
- A consistent maintenance routine can extend the life of your roof and harvesting system by 5-10 years. A little cleaning twice a year prevents major repairs.
How Your Roof and Gutters Become a Water Collection Team
The process is simple physics, but making it work reliably takes some know how. Rain hits your roof, sheets down the slope, and gets caught by your gutters. From there, it’s channeled through downspouts toward your storage.
Different roof materials change the game. Metal roofs are the gold standard for harvesters because they’re smooth and inert, so water flows fast and stays relatively clean. Asphalt shingles work, but they can shed tiny granules and may have chemical treatments. Clay or concrete tiles are great for flow, but the mortar can affect water pH.
This is where gutters shift from simple drainage to a vital delivery system. Your gutters are the essential link that makes roof-based harvesting efficient and safe for your home’s foundation. In residential settings, roofing gutter services help ensure those channels are properly sized, pitched, and attached. Regular upkeep keeps systems clean and leak-free, preserving your harvesting potential. I often get asked, “Are gutters necessary?” For casual drainage, maybe not on every home. But for harvesting? Absolutely. Without them, you’d lose most of your water to splash-off and have no controlled path to your tank.
Your Roof: The Catchment Area That Dictates Quality
Your roof type decides your starting water quality. On my jobs, I always inspect the roof first.
Roofs best for harvesting include metal, concrete tile, and slate. They’re durable, non-absorbent, and don’t leach many materials into the water.
Roofs that need extra caution are wood shakes and old asphalt shingles. Wood shakes can hold moisture and mold, and treated asphalt shingles might release chemicals you don’t want in your garden soil. Always inspect your roof’s condition before adding a system. An old, leaking roof with broken seals will contaminate your water from day one.
Gutters Explained: Styles and Materials for the Job
Not all gutters are created equal for water harvesting. The two main styles are K-style and half-round.
K-style gutters are common. They have a flat back and bottom with decorative front. They hold a lot of water, which is good for volume. Half-round gutters are, as the name says, a half circle. I prefer half-round for harvesting because debris like leaves doesn’t catch in the corners as easily, so they tend to stay cleaner. They shed debris better, which means less for your filters to handle. Considering K-style vs half-round gutters can help you decide which fits your home. A quick comparison of their maintenance and performance can guide your choice.
Material choice matters for durability and water use. Aluminum is lightweight, affordable, and rust proof. It’s perfect for non potable water like irrigation. Copper is beautiful and long lasting, but expensive. Vinyl is cheap and easy to install, but it can become brittle and crack in cold weather. For any system where water might eventually be used indoors, stick with inert metals like aluminum or copper to avoid any plastic leaching.
The Rainwater Harvesting System: Beyond the Downspout
The downspout is just the beginning. A good system is a chain of parts that clean and store the water.
The basic chain is: roof → gutter → downspout → filter → first flush diverter → storage tank → pump or outlet for use.
Here’s how it works in practice. The first flush diverter is key. It captures the initial dirty flow from a rainstorm-the water that washes the roof clean-and sends it away. Think of your filtration system like a coffee filter: it removes the grounds (roof debris) so you get a clean cup of water in your tank. Without these steps, your tank would fill with sludge. I’ve helped clean out tanks that skipped this, and it’s a messy, expensive job.
Planning Your Integration: Sizing, Materials, and Rules
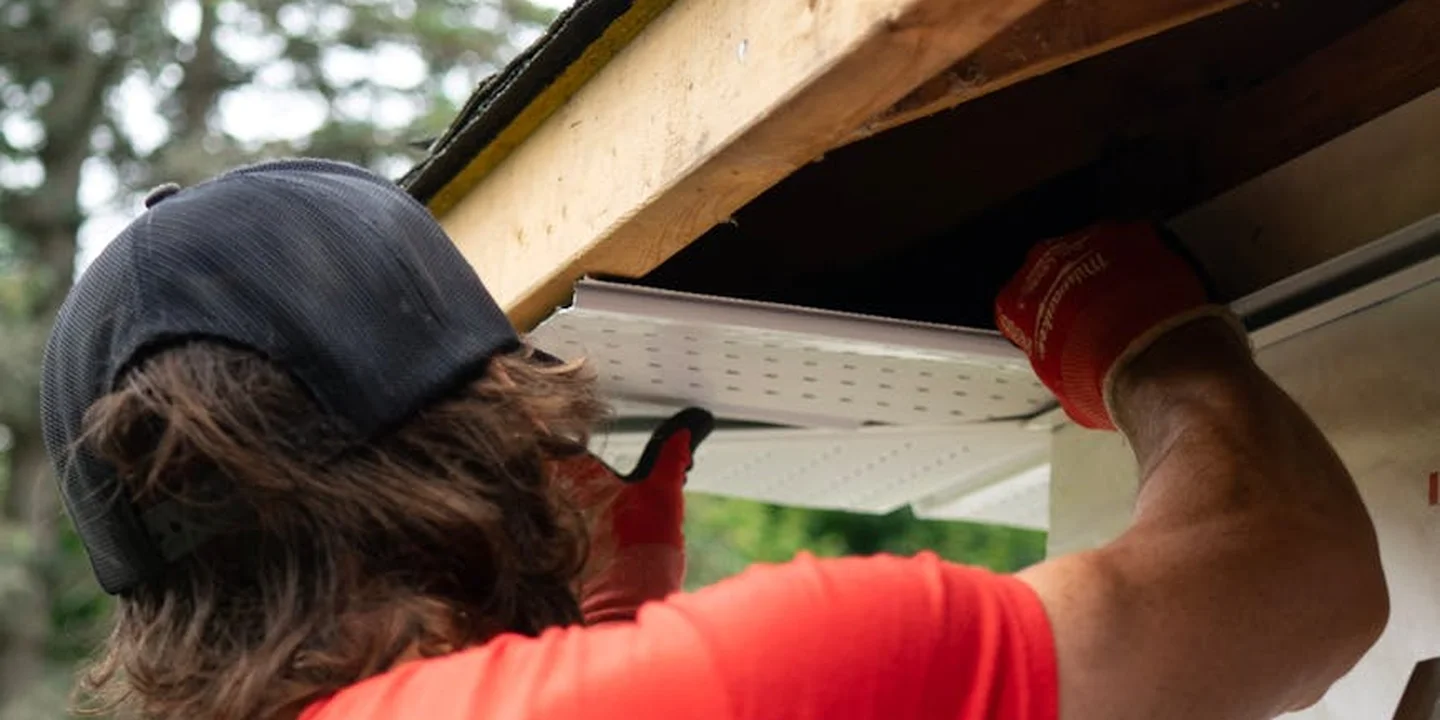
Getting your system sized right is the first job. An undersized gutter will overflow in a heavy storm, wasting water and possibly damaging your foundation. Your materials need to be safe for collecting water you might use on plants. And you have to play by the local rules. We’ll walk through each piece.
Doing the Math: How to Size Your Gutters and Downspouts
You start with your roof’s catchment area. This isn’t the square footage of your house. It’s the footprint of your roof that drains to a single gutter run.
Here’s the simple math I use on jobs:
- Measure the length and width of your roof section.
- Multiply them to get the square footage (e.g., 40 ft long x 25 ft wide = 1,000 sq ft).
- Find your area’s rainfall intensity. This is the inches of rain per hour during a heavy storm. You can get this from a local roofer, builder, or an online rainfall map.
- Use the formula: (Catchment Area in sq ft) x (Rainfall Intensity in inches per hour) = Gutter Flow in gallons per minute.
For a 1,000 sq ft roof in an area with 4 inches per hour rain, your gutters need to handle at least 4,000 gallons per hour, or about 67 gallons per minute. Snow and rain contribute to roof loads, which are considered in roof-load calculations. These calculations guide drainage decisions and gutter sizing. A standard 5-inch K-style gutter can handle that. For bigger roofs or heavier rain, you jump to 6-inch gutters and 3×4-inch downspouts.
| Roof Catchment Area | For Moderate Rain (3″/hr) | For Heavy Rain (5″+ /hr) |
|---|---|---|
| Up to 750 sq ft | 5-inch gutter, 2×3 downspout | 5-inch gutter, 3×4 downspout |
| 750 – 1,200 sq ft | 5-inch gutter, 3×4 downspout | 6-inch gutter, 3×4 downspout |
| Over 1,200 sq ft | 6-inch gutter, 3×4 downspout | 6-inch gutter, 4×5 downspout or multiple downspouts |
Selecting Safe and Durable Materials
Not every gutter material is fit for harvesting. You’re collecting water for use, so safety and longevity are key. Eco-friendly gutters can provide sustainable, durable options using recycled or low-impact materials. They help protect your system and the environment while maintaining performance.
Aluminum is the most common choice for a reason. It’s lightweight, rust-proof, and affordable. For harvesting, use a mill-finish or plain aluminum. Avoid pre-painted gutters where the paint’s chemical composition is unknown, as it can leach into your water.
Copper is the premium, long-term play. It naturally inhibits algae and moss growth, which keeps your collected water cleaner. It lasts for decades. The initial cost is high, but for a permanent harvesting setup, it’s an excellent investment.
You must avoid lead-coated materials, old galvanized steel that may contain lead, or any material with a questionable paint coating that contacts your water. When in doubt, ask the supplier if the material is rated for potable water contact or rainwater harvesting.
Navigating Local Codes and Finding Help
Your local building codes exist for safety and public health. Ignoring them can lead to fines or having to redo your work. Most areas have rules about three things:
- Backflow Prevention: A device that stops your harvested water from siphoning back into the municipal drinking water supply if you have a cross-connection.
- Tank Placement: Rules on how close a tank can be to property lines, foundations, or septic systems.
- Overflow Management: Your tank overflow must be directed away from your foundation, usually to a storm drain or a designated drainage area.
The single best thing you can do is call your local building department. Ask, “What are the permit requirements for a residential rainwater harvesting system?” They will tell you.
For complex plumbing or electrical work (for pumps), hire a certified professional. This is how you find reliable “gutter rain water harvesting near me” help. Look for licensed plumbers or contractors who specialize in sustainable water systems. Their expertise is worth the cost for a safe, code-compliant install.
One last crucial note: modifying your gutters or roof drainage in a way the manufacturer didn’t approve can void your roof or gutter warranty. Check your warranty documents first.
The Installation Process: A Safe, Step-by-Step Approach
Safety is your first tool. Always work with a sturdy, well-positioned ladder and have a spotter. We’ll cover two paths: installing a new gutter system built for harvesting, and the simpler route of retrofitting your existing gutters with gutter guards.
Gutter Installation and Modification: Securing the Collection Network
For a new system, seamless gutters are the gold standard. They have no joints along their length, which are the most common leak points. A pro with a truck-mounted machine forms them on-site. Homeowners often weigh the seamless vs sectional gutters pros cons to decide which system suits their home. Understanding both options can help you choose the best fit.
If you’re installing sectioned gutters or checking a pro’s work, follow this sequence:
- Plan your downspout locations, aiming for one every 35-40 feet of gutter.
- Snap a chalk line with a slight slope toward the downspout (about 1/4 inch for every 10 feet).
- Install gutter hangers every 24 inches, or closer in areas with heavy snow or rain. In storm-prone regions, use hangers rated for high “wind uplift” to prevent the whole gutter from being torn off.
- Join sections with a high-quality gutter sealant designed for long-term waterproofing.
For retrofitting existing gutters, a downspout diverter kit is the easiest method. You cut into your existing downspout and install a diverter valve. When you want to harvest, you flip the valve to send water to your tank. When the tank is full, you flip it back to send water out the normal downspout path. It’s a non-destructive modification that works well.
Connecting Downspouts to Your System: The Critical Link
This is where your harvested water leaves the gutter and enters your filtration system. Whether from a new gutter or a diverter kit, you’ll route the water via a pipe.
Use a flexible, corrugated polyethylene pipe or a rigid PVC pipe rated for outdoor use. Ensure any pipe exposed to sunlight is UV-resistant, or it will become brittle and crack within a few seasons. Connect this pipe directly to your first line of defense: a filter box or your first-flush diverter.
Adding Filtration: Protecting Your Tank and Water
Filtration happens in stages. Your goal is to keep leaves, grit, and roof sludge out of your storage tank.
- First Stage (Gutter Level): Install simple mesh gutter guards or screens over your gutters. These stop leaves and large debris from ever entering the system.
- Second Stage (Downspout): A downspout filter basket can catch anything that got past the guards.
The third and most critical stage is the first-flush diverter, and I consider it mandatory. The first rain after a dry period washes bird droppings, dust, and pollen off your roof. This water is dirty. A first-flush diverter is a simple chamber that automatically discards this initial volume-usually the first 5 to 10 gallons-before allowing cleaner water to flow to your main tank. It’s the single best thing you can do for water quality.
From here, the water goes into your storage tank. The method-whether a single direct line or a branched system feeding multiple barrels-depends on your space and needs. The core principles of safe collection remain the same.
The Homeowner’s Maintenance Routine: Extending Your System’s Life
Think of your roof, gutters, and tank as one connected machine. When one part fails, the whole system suffers. Your gutters are the vital delivery system for your harvested water. A clog here doesn’t just cause a spillover. It forces water back under your shingles, rotting the roof deck and sheathing. I’ve seen roofs fail a decade early because the gutters were ignored, letting water constantly back up into the eaves.
Proper, consistent care is the single biggest factor in how long your gutters will last. A quality aluminum gutter system, when kept clean and secure, can easily serve you for 20 years or more. Neglect it, and you’ll be dealing with rust, seams pulling apart, and hangers failing in half that time. The maintenance schedule below isn’t just busywork. It directly protects your roof’s warranty, your home’s structure, and the quality of the water in your tank.
Seasonal Maintenance Log: Your Year-Round Action Plan
This log is based on the rhythm I follow for my own home’s system. Stick to it, and you’ll catch small problems before they become expensive repairs.
| Season | Primary Tasks | Why It Matters for Harvesting |
|---|---|---|
| Spring | Clear winter debris (pine needles, twigs) from gutters. Inspect roof for loose shingles or storm damage. Check and empty the first-flush diverter. | Ensures clean water collection after winter storms. A full first-flush diverter can’t do its job of diverting the dirtiest water. |
| Fall | Clean gutters thoroughly after leaves drop. Ensure all downspouts and leaf guards are clear. Inspect the tank’s overflow pipe and screen. | Prevents autumn leaf sludge from entering your tank. A clear overflow is critical before seasonal heavy rains to prevent tank overpressure or flooding. |
| Bi-Annual (Spring & Fall) | Check and clean inlet filters at the tank. Inspect every gutter seam, end cap, and hanger for looseness or leaks. | Clean filters mean better water flow and less sediment. Tight seams prevent water loss and keep the system’s delivery volume high. |
Gutter and Roof Specific Care
Cleaning gutters safely is non-negotiable. I use a plastic gutter scoop and a heavy-duty bucket with a hook. Work from a sturdy, properly angled ladder. Never lean out to the side. Flush the gutters with a garden hose after scooping to check for proper flow and hidden leaks at the seams. If you find any issues, it’s crucial to repair those leaks to prevent further damage.
Your roof’s surface is the first filter for your rainwater, so its condition directly impacts water quality. Moss and algae aren’t just cosmetic. They hold moisture against shingles and add organic matter to your runoff. For light moss, a zinc or copper strip at the roof ridge can be a long-term solution. For existing growth, a gentle wash with a moss-killing solution (never pressure wash asphalt shingles) is key. While you’re up there, visually inspect flashings around chimneys and vents. A breach here lets water into your attic, but it can also wash dirt and contaminants from your attic into your water supply line. These steps also support moss prevention for residential roofs by reducing moisture and debris that moss thrives on. In the next steps, you’ll find a concise moss-prevention guide tailored for homes.
Rainwater System Component Upkeep
The care continues where the downspout ends. Annually, inspect your storage tank. For above-ground tanks, look for sediment buildup on the bottom. Many tanks have a cleanout port for flushing this out. Check the pump, if you have one, for any unusual noises and ensure its intake screen is clean.
Filter cartridges are your best friend for clean water. Replace them according to the manufacturer’s schedule, which is often every 3-6 months for pre-tank filters. Letting a tank sit stagnant is an invitation for mosquitoes and algae blooms. If you’re not using the water regularly, consider a tank screen or a safe, pond-approved mosquito dunk to prevent breeding. A dark, enclosed tank will naturally inhibit algae growth better than a clear one.
Common Questions
1. What’s the real gutter rainwater harvesting cost?
For a basic DIY barrel system with a diverter kit, expect $100-$500. A professional, whole-house system with a large tank and filtration starts around $2,500. Your biggest cost saver is starting with gutters and a roof that are already in good shape.
2. Should I retrofit my old gutters or replace them?
Retrofit with a downspout diverter if your gutters are sound, clean, and correctly sized, or consider installing gutter guards to keep debris out. Replace them if they are leaking, undersized, or made from unsafe materials like old lead-coated steel. Half-round gutters are superior for harvesting if you’re starting fresh.
3. I live in a place with heavy monsoons/light rain-does that change the approach?
Absolutely. Heavy rain areas need oversized gutters, larger first-flush diverters, and robust overflow management. In drier climates, maximizing catchment from every shower is key, so ensure absolutely zero leaks. Always check local methods-for example, in India, systems often prioritize large underground storage for seasonal use.
Securing Your Roof’s Partnership with Rainwater Harvesting
From my years on the crew, I’ve learned that a successful system hinges on one simple rule: keep your gutters clean and correctly sloped before connecting any harvest setup. Doing this stops water from pooling on your roof and directs every gallon smoothly into storage.
You hold the key to its long-term health through safe, routine inspections and a willingness to learn. I recommend using detailed guides on roof damage inspection and maintenance for your specific roof type to make smart, lasting decisions.
Expert Resources and Citations
- r/Permaculture on Reddit: How do you collect rainwater from your gutters? Did you you buy a diverter or make something? If you bought a diverter where did you get it and do you like it? If you made something yourself please leave a picture and what you did, and what would you do differently?
- The Perfect Tool For Rainwater Harvesting – Gutterglove
- Conveyance – Rainwater Harvesting
- Ways to Collect Rainwater from Gutters – L.I. Metal Systems
- From Gutters to Gardens: Rainwater Harvesting 101 – The Edge from the National Association of Landscape Professionals
- Rainwater Harvesting 101 | Your How-To Collect Rainwater Guide
- Rainwater Harvesting: Get Clean Water from Your Gutters
- Rainy Day Savings: Rainwater Harvesting with Gutters
Ray Huffington
Ray is an experienced roofer. He has worked as a general contractor in the roofing industry for over 15 years now. He has installed and repaired all kinds of roofs, from small houses to large mansion, and from basic shingles to cement and metal roofs and even solar roof panels. He has seen homeowners struggle with roofing questions and always has experience based proven advice to help those in need. If you need roof pros, Ray's your guide.