
How Do You Walk Safely on Different Roof Types?
Have you ever needed to get on your roof but hesitated, worried about slipping or cracking a tile? I’ve coached countless homeowners through this, and the right know-how makes all the difference.
Walking on a roof safely isn’t one-size-fits-all; asphalt, metal, and tile each demand their own technique to avoid injury and expensive damage. Let’s break down how to approach each one with confidence.
First, I’ll outline the critical safety equipment you should never skip, based on what my crew uses every day. Then, I’ll give you the hands-on walking methods for asphalt shingles, metal panels, and clay or concrete tiles. Finally, I’ll point out the common pitfalls I’ve fixed on past jobs to keep you from making the same mistakes.
Key Takeaways: The Non-Negotiable Rules of Roof Walking
Keep these points in mind before you touch a ladder. They are based on real jobs, not theory.
- Proper footwear and a safety harness are not just recommendations. Use them on any sloped roof to prevent a fall.
- The roof’s pitch, its condition, and the weather are your three biggest safety factors. If one is wrong, do not go up.
- Always distribute your weight carefully. Walk on the balls of your feet and step directly over the roof’s framing.
- For steep roofs or if you have any doubt, hiring a professional is the safest choice. It is cheaper than a hospital bill.
The First Question: Should You Even Go Up There?
Homeowners often ask me, “Can I climb on my roof?” or “Am I too heavy?” Let’s answer that first. Not every roof is safe to walk on, and knowing the difference is your first job.
Start with a full visual inspection from the ground. Walk around your house and look up. You are checking for sagging between the rafters, cracked or missing shingles, and dark streaks from water damage. A sagging roof line often means the decking underneath is rotten and cannot hold weight. This is the exact same check my crew does before we set foot on any roof.
I once drove to a customer’s house for a simple gutter cleaning. From the ground, I could see a visible dip near the chimney. I told the homeowner we couldn’t proceed. The roof deck was soft from a long leak, and walking on it would have caused a cave-in. That ground inspection saved a dangerous accident.
Here are clear limits that mean “stay off”:
- A steep pitch, especially anything steeper than a 6/12 slope.
- Any sign of rotten or spongy decking.
- Wet, icy, or even just damp conditions.
- If overhead power lines are near the roof edge.
When Your Weight is a Concern
Your roof framing is designed to distribute weight, like a network of floor joists. It spreads the load from snow or workers across many boards. The problem is a concentrated load on one weak spot. Stepping between the rafters on an old roof is like jumping on a single, dry-rotted floorboard. It might not hold.
Your body weight alone is often less of a concern than how you carry it. A 200-pound person standing still is less stress than that same person carrying a 80-pound bundle of shingles and stumbling. The risk isn’t just your weight, it’s the impact of your foot in a damaged area. If you are genuinely worried about the roof’s strength, consult a structural engineer. They can assess the load capacity for you.
Knowing Your Limits: The “Pro-Only” Scenarios
Be honest with yourself. Some situations require a professional roofer with the right tools and insurance. Do not attempt these yourself, especially when it’s a matter of DIY roof repair vs hiring professional.
- High-pitched roofs (over an 8/12 slope). Your balance is not enough.
- Metal roofs, particularly in cold or damp weather. They become incredibly slick.
- Any repair on clay or concrete tile roofs. Tiles are brittle and stepping in the wrong place causes expensive cracks.
There are also liability issues. If you fall and are injured, your homeowner’s insurance may not cover a self-inflicted DIY accident. More importantly, walking on a roof without proper technique can void the manufacturer’s warranty on your shingles or tiles. Protecting your investment means knowing when your job is to make the phone call, not climb the ladder.
Gearing Up: Your Personal Safety Kit for the Roof
Walking on a roof is not like walking on the ground. The right gear is not a suggestion. It is your primary defense against a life-changing fall. I treat my safety kit with the same respect as my hammer.
What Safety Equipment is Essential for Roof Walking?
Essential means you cannot safely do the job without it. For any roof with a noticeable slope, this list is non-negotiable.
- Fall Arrest Harness and Anchor System: This is your number one, cannot-skip item. It stops a fall before you hit the ground.
- Roof Shoes or Boots: Proper footwear gives you the grip you need on slippery or uneven surfaces.
- Gloves: They protect your hands from sharp metal edges, abrasive shingles, and hot surfaces.
- Safety Glasses: Roof work creates debris. Grit, old roofing nails, and granules can easily get in your eyes.
If you only remember one thing, it is this: never get on a sloped roof without a plan to arrest a fall. Everything else supports that goal.
The Harness and Anchor: Your Lifeline
I see homeowners think a rope tied around their waist or a chimney is enough. It is a deadly mistake. A simple rope is not a fall arrest system.
A proper system has three parts that work together: a full-body harness you wear, a secure anchor point on the roof, and a lanyard that connects them with an energy-absorbing section. A rope alone can snap under the sudden force of a fall, or worse, cause severe internal injury when it jerks tight. A real system is designed to distribute that force and slow the stop.
Your anchor point must be solid. For most homes, this means a temporary roof anchor screwed securely into the roof framing. We also use jack stands for certain jobs. These are metal tripods set up on the roof that provide a strong, portable anchor point without penetrating the roof. You must know which is right for your roof type and pitch.
Footwear, Gloves, and Glasses: The Supporting Cast
Your shoes are your connection to the roof. Smooth-soled sneakers are a recipe for a slip. You need soft-rubber soled shoes or boots designed for roofing. They mold to the surface for better grip. On a metal roof, some pros even wear shoes with magnetic soles.
Gloves save your hands from a hundred small injuries. A cut from a metal drip edge can end your workday. Good gloves also give you a better grip on tools and materials.
Safety glasses seem obvious, but they are the most forgotten item. One gust of wind blowing old, crumbly asphalt granules into your eyes is all it takes to cause a panic and a misstep.
Cheap Gear vs. Professional-Grade: Why It Matters
You can find a harness and lanyard online for under a hundred dollars. The professional kit my crew uses costs several times that. The difference is not just in price.
Cheap gear is often made with weaker webbing, thinner stitching, and lower-grade hardware. It might pass a visual inspection, but you cannot see the material’s integrity. Professional gear is built for daily, rugged use and is certified to meet strict safety standards (look for OSHA compliance and SEI certification).
Think of it like this: a dollar-store rain poncho might keep you dry in a drizzle. You would not trust it in a thunderstorm. Your roof safety equipment is the same. You are trusting your life to its construction. Buy the best you can afford from a reputable safety supplier, inspect it before every use, and replace it if you have any doubt.
Walking on Asphalt Shingles: A Step-by-Step Guide
You walk on an asphalt shingle roof by focusing on foot placement and movement to prevent damage and stay safe. Step only on the nail line, the strip where the shingles are fastened to the solid wood decking beneath. This is the strongest part of the roof. Avoid putting your weight on the lower, overhanging tabs of the shingles, as they can easily crack or lift. This precaution is especially important when traversing complex areas like hip roofs, where shingles are angled and more susceptible to damage.
Move laterally across the roof by taking small, controlled steps. Keep your weight centered. To go up or down on a low slope, face the slope directly and use your legs to climb, not your hands, unless you need a quick balance check. I tell my crew to move like they’re on a ladder, not a sidewalk.
Be extra mindful in hot weather. The sun can soften the asphalt, making it easy to scrape off the protective granite granules with your shoe. On older roofs, shingles become brittle. I’ve punctured a few on inspections by not being gentle enough, and that’s a quick way to start a leak.
Where to Step and Where to Avoid
Use this simple rule: walk on the “bones,” not the “skin.” The “bones” are the solid decking under the nail line. The “skin” is the overhanging shingle tab that isn’t fully supported. Stepping on the bones spreads your weight safely.
Some areas are always off limits. Never step directly in roof valleys, on the very peak of the ridge, or within a foot of any vent, pipe, or skylight. These spots are critical for water drainage or are mechanically fastened. Disturbing them is the most common cause of DIY leaks I get called to fix.
Treading on Metal: Techniques for a Slippery Slope
Walking on a metal roof is a different ball game from shingles or tile. I’ve seen experienced guys get humbled by a painted metal panel on a dewy morning. The two big questions are what makes it risky and how you handle it. The answers are connected.
Metal presents three unique dangers. First is the obvious slickness, especially with certain painted or coated finishes. Second is the potential for denting thinner-gauge panels; your weight in the wrong spot can cause costly damage. Third are hidden fasteners. Walking between the raised seams is safe, but stepping directly on a screw head can damage its seal or your footing.
The right gear isn’t a suggestion for metal, it’s your lifeline. You must have shoes with soft, rubber soles designed for grip. Think of the tread on a hiking boot, not a hard work boot. A proper fall-arrest harness system anchored to a secure roof point is non-negotiable. I won’t go up on a metal roof without one, period.
Your technique matters just as much as your gear. Always maintain three points of contact-two feet and one hand, or two hands and one foot. This keeps you stable. Plan each step. You must walk on the flat, low areas of the panel (the “flat” of the rib), not on the high seams or ridges. The seams are often slicker and more rounded, offering less traction. Walking on the flats distributes your weight better and keeps you away from the fastener lines.
Weather is Everything on Metal
If asphalt shingles are slippery when wet, a metal roof becomes an ice rink. Morning dew, a light mist, frost, or recent rain multiplies the risk instantly. The surface tension of water on that smooth metal creates a near-frictionless plane.
Plan any metal roof work for a dry, cool part of the day, ideally when the roof is in the shade. Direct sun can make both the metal and your shoes hot, sometimes softening the rubber soles and reducing grip. A dry, shaded roof gives you the best possible traction. If you see moisture, wait. It’s never worth the slide. Metal roofs heat up quickly in hot sun and can stay cooler in shade, especially in humid climates. Knowing how a metal roof affects temperature in hot, cold, and humid climates can help plan safer work.
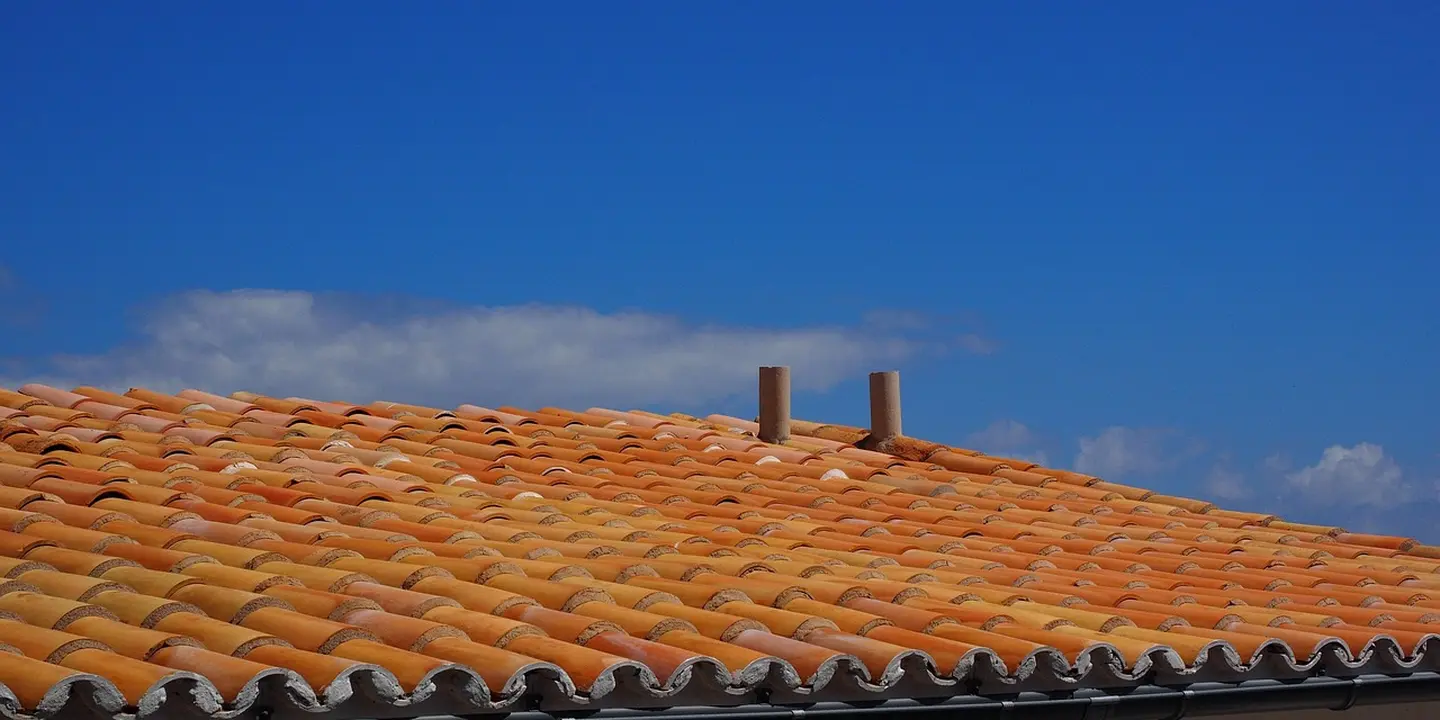
Navigating Tile Roofs Without Causing a Cascade
What are the dangers of walking on tile roofs? You are walking on brittle, baked earth or cured concrete. A single misstep can turn a beautiful roof into a very expensive puzzle. How do you walk on tile roofs without breaking them? You don’t. Not in the traditional sense. Your goal is to avoid walking whenever possible.
Concrete and clay tiles are not flexible like shingles. They crack under pressure, especially in the center. Replacing one broken tile often means carefully lifting the ones above it. The labor cost adds up fast. This is why many roofers consider tile work a specialty, especially when repairing cracked concrete or clay roof tiles.
If you must move across a tile roof, every step is deliberate. You never step on the middle or high point of a tile. Your foot must land on the lower third of the tile, directly over the solid wooden batten beneath it. This is the strongest part of the assembly. Finding these battens requires you to know the roof’s layout or to probe gently.
Smart pros use equipment to spread their weight. A roof ladder hooked over the ridge distributes your weight across many tiles. Crawl boards (wide planks) laid across the roof surface create a temporary walkway. For most homeowners, the safest choice is to recognize this as a pro job and call a qualified tile roofer. I’ve seen too many DIY attempts end with a call for us to fix both the original issue and the new damage.
The “Sit and Slide” Method for Tiles
When my crew works on tile roofs, we minimize footsteps. We use the “sit and slide” method. We lay long, wide planks horizontally across the roof rows. Then we sit on the plank and slide it along as we work. We do our repairs or inspections from this seated position. Our weight is spread across the plank, and the plank is spread across dozens of tiles.
This technique lets us work an entire section without ever standing on the tiles themselves. It is slow and methodical, but it prevents damage. Contrast this with the disastrous approach of walking on a tile roof like it’s a sidewalk. That person is listening for cracks with every step and will likely cause leaks. The right tools and techniques protect your investment.
Other Roof Types: Flat, Rubber, and Wood

Flat roofs are generally designed to be walked on for maintenance. You can often sit on them too, provided the underlying structure is sound. The real question isn’t permission, it’s awareness of what’s hiding beneath your feet.
That seemingly solid surface can hide two major hazards. First are soft spots. These occur where the roof deck has gotten wet and lost its strength, or where insulation has compressed. Walking on a soft spot feels like stepping on a thick sponge, and you can easily punch right through. The second hazard is the seams of the membrane itself. The glued or heat-welded seams are the weakest points in the system.
- Walk with a flat-footed, shuffling step to spread your weight.
- Never step directly on a seam if you can avoid it.
- Listen and feel for any give or a crunchy sound beneath you.
Rolled roofing, often used on low-slope sheds, has a gritty surface. It can be slippery when wet or dusty. Your main concern is not tearing the material. It’s thinner than it looks. Use the same careful steps as on a flat roof membrane.
A rubber (EPDM) roof feels different. It has a bit more give, almost like a very firm gym mat. This slight bounce is normal, but a dramatic dip is a warning sign of a soft spot. Its greatest vulnerability is puncture. Check your tool belt and remove any sharp items. Clean your boots of gravel before stepping onto it.
Wood shakes or shingles require the lightest touch of any roof. Old, dry wood becomes incredibly brittle. Step only on the thickest part of the shake, directly over the gap where two shakes meet below. This is where the roof deck provides solid support. Avoid stepping on the thin, exposed tips of the shakes, as they will snap under pressure.
Here’s a quick feel comparison from my jobs:
- Flat (Built-Up or Membrane): Firm, with potential spongy spots. You might hear gravel crunch.
- Rolled Roofing: Gritty and slightly flexible. Feels thin.
- Rubber (EPDM): Smooth with a gentle, uniform bounce.
- Wood Shakes: Uneven and creaky. You’ll feel every individual piece give a little.
Dealing with Weather, Slope, and The Clock

Your boots and gear are only part of the safety equation. Before you even lift a ladder, you need to read the roof itself. I treat every inspection like a three-part check: the sky, the slope, and the time.
Assessing Roof and Weather Hazards
Weather changes everything underfoot. A bright, sunny roof is not always a safe roof.
- Wind: A steady breeze over 15-20 mph is a hard stop for me. It affects your balance and can catch tools or materials like a sail.
- Rain and Dew: Water turns any roof into a skating rink. Wet clay tile is nearly impossible to stand on. Asphalt shingles become slick, and moss or algae growth turns treacherous.
- Heat: On a hot summer day, asphalt shingles can get soft. You can literally leave boot-print dents or tear the granule surface. This damages the roof.
- Cold: In freezing temps, materials become brittle. A tile can snap, and asphalt shingles can crack like a cookie if you step wrong.
The rule is simple: if the weather isn’t perfect, postpone the job. No repair is worth a trip to the emergency room.
Understanding Slope: It Changes Everything
Slope, or pitch, is how steep your roof is. It’s the biggest factor in how dangerous a walk will be. We measure it as a ratio like 4/12 or 8/12. Understanding how to calculate this pitch is essential for planning safe roof work, and in the next steps we’ll provide a quick roof pitch calculation guide.
Imagine a 12-inch long level. If you place one end on the roof, the 4/12 slope means the other end is 4 inches off the roof. An 8/12 slope means it’s 8 inches off.
- Low-Slope (2/12 to 4/12): This feels almost flat, but water can pool. You can usually walk on it with care, but wet surfaces are still a major slip hazard.
- Conventional Slope (4/12 to 9/12): This is most homes. A 4/12 is walkable for a cautious homeowner with proper shoes. A 6/12 requires more attention. Once you hit 8/12 or 9/12, you are on a steep wall. This is where I always use a harness.
- Steep Slope (10/12 and above): This is professional-only territory. Walking requires specialized equipment and training.
If your roof looks steep from the ground, it is steeper up there. Do not guess. When in doubt, call a pro.
The Best (and Worst) Time of Day for Roof Work
Timing your roof walk can make a big difference in safety.
Early morning often means dew, which makes everything slippery. I wait for the sun to dry the surface completely. Late afternoon brings the risk of losing light. Shadows can hide hazards, and rushing as the sun sets is a recipe for a misstep.
The sweet spot is usually late morning on a dry, calm day. The overnight dampness is gone, and the intense afternoon heat hasn’t softened the shingles yet.
Plan your work so you are never rushing to beat the clock or the weather. A patient approach is a safe approach.
What Never to Do on Any Roof
Let’s cut straight to the chase. I’ve spent more time on roofs than I have in my own living room, and I’ve seen how quickly a simple mistake becomes a trip to the ER. Here are the rules that keep you safe, no matter what your roof is made of.
Never, ever work on a roof alone. If you slip, who calls 911? I’ve had a crew member catch me from a slide more than once. A second person on the ground is your lifeline.
Never ignore your safety harness. Thinking “I’m just popping up for a second” is how falls happen. If you’re attached, a slip is just a scary moment. If you’re not, it’s a disaster.
Never drag your tools, a hose, or a cord behind you. They snag on everything. A snagged hose can pull you off balance, and a snagged power cord can send tools flying off the edge.
Your gutters and flashing are not steps. Step on a gutter, and you’ll likely fold it in half or rip it off the fascia. Flashing is thin, bent metal designed to shed water, not hold your weight. Step next to it, not on it.
You might wonder, “Are roofs safe to sit on?” The answer isn’t simple. It’s about point load versus distributed weight. Think of a ladder truck’s outrigger pads-they spread the immense weight over a large area. Your rear end is not a pad.
When you sit, all your weight presses down on a few small shingles or tiles. You can crack tiles, crush the granules and mat of shingles, and compromise the roof’s seal. Kneeling is better, but standing with your weight spread between both feet is best.
My final piece of advice is the one I give every homeowner: if your gut says no, listen to it. That feeling of unease is your brain recognizing risk you haven’t consciously processed yet. Roofing isn’t a hobby; it’s a skilled trade for a reason. When in doubt, call a pro. As you vet a roofing contractor, the questions you ask should reveal any red flags or warning signs. Keep an eye out for vague answers, pressure tactics, or missing licenses.
Common Questions
How do I prepare for walking on a roof?
Start with a thorough visual inspection from the ground for sagging, damage, or moisture. If the roof passes that check, ensure you have the right safety gear and a clear, dry day before you even touch the ladder.
What are the specific risks of walking on a metal roof?
The main risks are extreme slickness, especially when wet or cold, and denting the panels. You must always walk on the flat areas of the panels and never on the high seams where it’s more slippery and you risk damaging hidden fasteners.
How does weather affect roof walking safety?
Weather is a decisive factor. Postpone any work if there’s wind, rain, dew, or extreme temperatures, as these conditions make all roof surfaces dangerously slick or brittle. The ideal time is a dry, calm, and cool part of the day. Never attempt roof repairs or installations in wet conditions to ensure safety.
Your Blueprint for Lifelong Roof Safety
The most critical lesson is to let the roof type dictate every move you make up there. I tell my crew that proper shoes and a planned path are your best insurance against a fall.
Own your role in roof care by making safety the first step of any maintenance task. Keep a trusted all types of roof guide handy to inform your decisions and protect your home for years to come. Periodically review your roof damage inspection guide to catch potential issues early.
Ray Huffington
Ray is an experienced roofer. He has worked as a general contractor in the roofing industry for over 15 years now. He has installed and repaired all kinds of roofs, from small houses to large mansion, and from basic shingles to cement and metal roofs and even solar roof panels. He has seen homeowners struggle with roofing questions and always has experience based proven advice to help those in need. If you need roof pros, Ray's your guide.